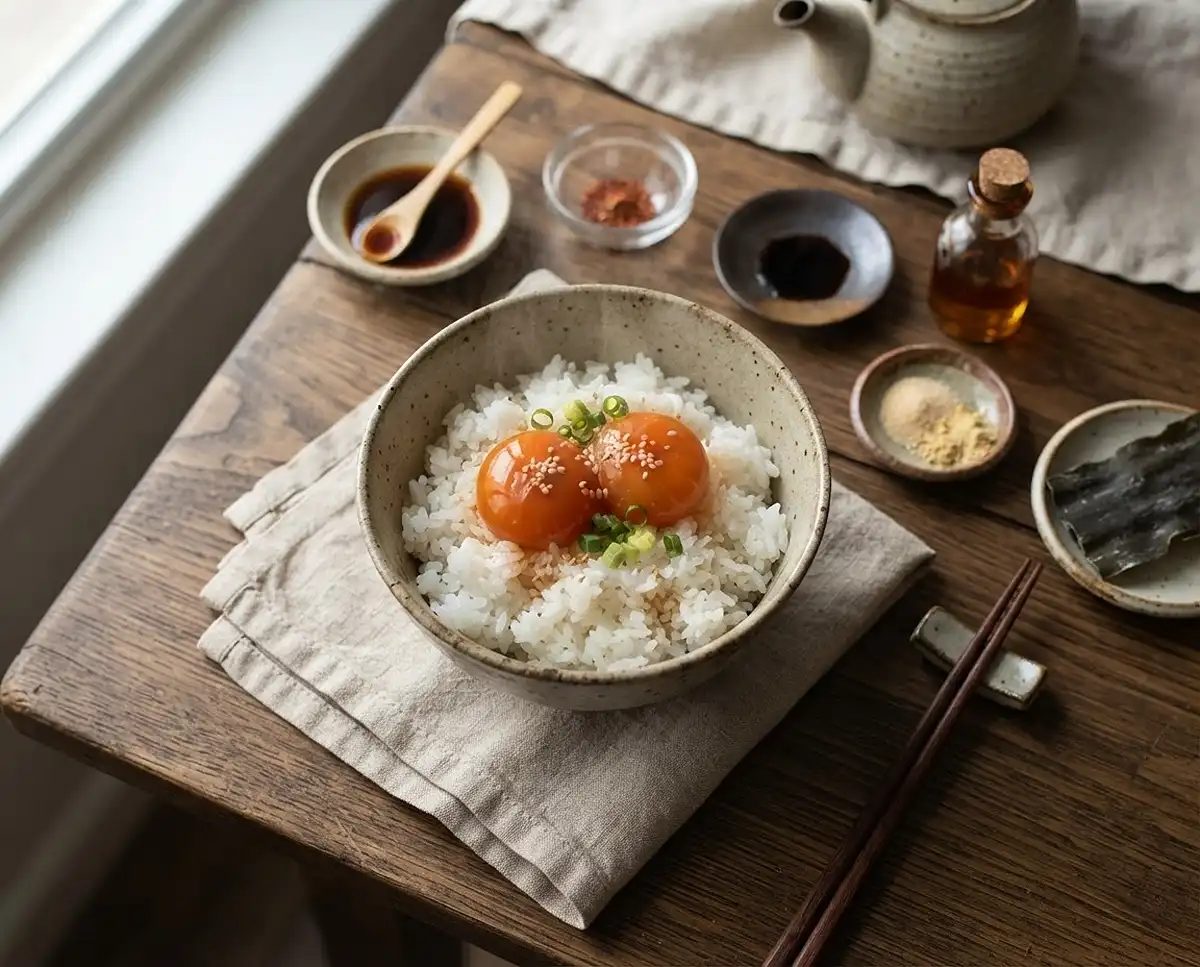
Learn how to make a cured egg yolk recipe soy sauce with just four ingredients and a fridge. Silky, salty, jammy yolks that make plain rice taste fancy.
I stumbled onto this soy sauce cured egg yolk recipe on a lazy Sunday when my rice bowl needed some help, and now I make a batch almost every week. Four ingredients, zero fancy gear, and a payoff that tastes like an izakaya splurged on your dinner.
Table of Contents
Why You’re Going to Love This Soy Sauce Cured Egg Yolk Recipe
This isn’t some finicky, multi-day fermentation project. It’s a marinade, a fridge, and a little patience. The yolks come out rich, glossy, and jammy, somewhere between a fancy cheese and a savory custard.
- Just four core ingredients, all pantry-friendly
- Ready in as little as 4 hours, or go longer for firmer yolks
- Endlessly customizable with garlic, ginger, chili, or kombu
- Works on rice, noodles, toast, or straight off a spoon (no judgment)
This technique borrows from the same idea behind shoyu tamago, the soy-marinated eggs you see bobbing in a good bowl of ramen. We’re just skipping the boiling step and going straight for the yolk, which is where all the rich, custardy magic lives anyway.
Where This Trick Comes From
This soy sauce cured egg yolk recipe borrows its whole personality from Japanese cooking traditions, where soy-based marinades have long been used to preserve and flavor everything from fish to vegetables. It’s a close cousin of shoyu tamago, the soy-marinated eggs that show up in bowls of ramen all over Japan.
The magic here is basically osmosis. Salt from the soy sauce slowly pulls moisture out of the yolk, and as that moisture leaves, the marinade seeps in and takes its place. That’s why the yolk goes from soft and runny to firm, glossy, and packed with deep, savory flavor.
You don’t need a Japanese pantry or years of practice to pull this off at home, though. Just soy sauce, mirin, a little fridge space, and the patience to leave a container alone for a day.
Soy Sauce Cured Egg Yolks
Equipment
- Shallow container with lid
- Spoon
- Paper towel
- Refrigerator
Ingredients
The Star
- 4-10 large egg yolks fresh pasteurized eggs strongly recommended; keep yolks intact
Marinade
- 1/2-1 cup soy sauce amount depends on container size and salt preference
- 1/4-1/2 cup mirin use roughly 2 parts soy sauce to 1 part mirin
Optional Aromatics
- 1 pinch red pepper flakes optional, for heat
- 1 small piece kombu optional, adds deeper umami
- 1-2 shakes garlic powder optional
- 1 pinch ground ginger optional
Instructions
- Pour the soy sauce and mirin into a shallow container and stir to combine. Add any optional aromatics, such as red pepper flakes, kombu, garlic powder, or ground ginger.
- Carefully separate the egg yolks from the whites, keeping each yolk intact.
- Gently lower each yolk into the marinade so it is submerged or well coated on all sides.
- Cover the container and refrigerate for 4 to 12 hours for softer yolks, or 24 to 48 hours for firmer, saltier yolks.
- For even curing, flip the yolks once halfway through, or lay a paper towel over the top so it wicks marinade onto the exposed sides.
- Gently lift the cured yolks out of the marinade and let the excess liquid drip off before serving.
- Serve over hot rice, noodles, ramen, toast, or savory bowls.
Notes
What You’ll Need
Here’s the whole ingredient list, grouped so you can see exactly what’s doing what in this soy sauce cured egg yolk recipe.

| Ingredient | Amount | Notes |
|---|---|---|
| The Star | ||
| Egg yolks | 4 to 10 large | Fresh yolks work best. Pasteurized eggs are strongly recommended, since these yolks stay raw. |
| The Marinade | ||
| Soy sauce | 1/2 to 1 cup | Amount depends on your container size and how salty you like things |
| Mirin | 1/4 to 1/2 cup | Aim for roughly 2 parts soy sauce to 1 part mirin |
| Optional Aromatics | ||
| Red pepper flakes | A pinch | For a little heat |
| Kombu | 1 small piece | Adds a deeper, briny umami note |
| Garlic powder | A shake or two | Savory background flavor |
| Ground ginger | A pinch | Brightens up the whole marinade |
Quick note on mirin, since it trips people up: it’s a sweet Japanese rice wine, not the same thing as rice vinegar. If you want the full rundown before you shop, this overview of mirin explains the different types and why it matters here.
How to Make This Soy Sauce Cured Egg Yolk Recipe, Step by Step

Mix Up Your Marinade
Grab a shallow container, something wide and short works way better than a deep jar. Pour in your soy sauce and mirin, then stir in any aromatics you’re using. This is your flavor base, so give it a taste and adjust before the yolks go in.
Separate the Yolks (Gently!)
This is the part where patience pays off. Crack each egg and carefully separate the yolk from the white, keeping every yolk intact. A cracked yolk in soy sauce turns into a sad, salty puddle, so take your time here.
Lower each yolk into the marinade so it’s fully submerged, or at least well coated on all sides. “Gentle” is the operative word. Think of it like tucking the yolks into bed, not dropping them in from a height.
Let Them Cure in the Fridge
Cover the container and refrigerate. This is where the soy sauce cured egg yolk recipe really does its thing, slowly pulling moisture out and pushing flavor in.
For softer, more delicate yolks, 4 to 12 hours does the trick. If you want something firmer and more intensely salty, go 24 to 48 hours. I usually land around the 24 hour mark, since that’s my sweet spot for texture and flavor.
Serve It Up
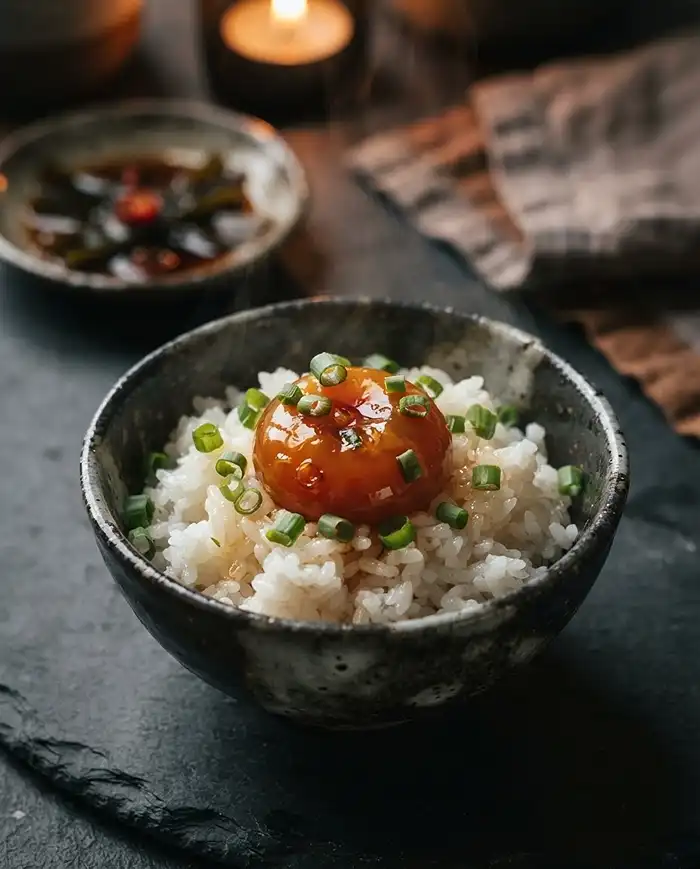
Gently lift each yolk out of the marinade and let the extra liquid drip off before serving. Set it on top of a steaming bowl of rice, tuck it into noodles, or slide it onto buttered toast for an umami hit that’ll ruin plain eggs for you forever.
If you want the full visual walkthrough with step-by-step photos, check out our original soy cured egg yolk recipe for reference.
And if noodles are your thing, this soy sauce cured egg yolk recipe is honestly incredible spooned over a bowl of our alfredo cottage cheese sauce. Salty and creamy, it shouldn’t work, but it absolutely does.
Tips for Getting It Just Right
How Long Should You Actually Cure the Yolks?
Longer curing means firmer, saltier yolks, since more moisture leaves and more soy sauce moves in. Generally, up to 24 hours gives you the best balance of texture and flavor without tipping into “too salty to enjoy” territory.
Getting Even Curing
Egg yolks float, which means the top can end up under-cured while the bottom gets all the marinade action. Flip the yolks once, halfway through, or lay a paper towel over the top so it wicks marinade down onto the exposed side.
A Quick Word on Food Safety
Since these yolks stay raw the whole time, food safety matters here. Use pasteurized eggs whenever you can find them, and always keep the curing container refrigerated rather than leaving it out on the counter.
If you want the full picture on raw egg safety, the FDA’s guide to egg safety is a solid, no-nonsense resource, especially if you’re serving this to kids, older adults, or anyone pregnant or immunocompromised.
Can You Reuse the Marinade?
Yes, with one caveat. Boil the leftover marinade briefly before reusing it on a new batch of yolks, since this kills off anything that may have transferred from the raw eggs. Or skip reusing it entirely and just drizzle it over rice or veggies as a savory sauce.
Fun Ways to Switch Up Your Soy Sauce Cured Egg Yolks
Once you’ve got the base soy sauce cured egg yolk recipe down, it’s really easy to riff on it. Add extra garlic powder and a splash more mirin for a sweeter, rounder flavor, or lean into the kombu and red pepper flakes for something spicier and more savory.
Craving a spicy version? Double up on red pepper flakes or add a small spoonful of chili crisp right into the marinade. Want it milder and kid-friendly? Skip the aromatics entirely and let the soy sauce and mirin do all the talking.
Looking for a fun way to build out a whole snack plate around these yolks? They’re great alongside something warm and savory like our high-protein cottage cheese pizza crust, cut into strips for dipping.
It sounds like an odd pairing, but the salty richness of the yolk plays surprisingly well against a warm, cheesy crust.
How to Store Soy Sauce Cured Egg Yolks
| Method | How Long | Notes |
|---|---|---|
| In the marinade, fridge | 2 to 3 days | Keep yolks fully submerged to prevent drying out |
| Removed from marinade, airtight container | 1 to 2 days | Texture firms up more the longer they sit |
| Freezer | Not recommended | Freezing wrecks the silky, jammy texture |
These yolks are best enjoyed fresh, so there’s no real reheating involved, just pull them straight from the fridge. For a no-waste move, don’t pour that extra marinade down the drain. Boil it briefly and use it as a savory drizzle over roasted vegetables or a simple stir-fry.
Cured Egg Yolk Recipe Soy Sauce FAQs
How long do soy sauce cured egg yolks last in the fridge?
They stay best for 2 to 3 days while sitting in the marinade, fully submerged. Once removed from the marinade, try to eat them within a day or two for the best texture and flavor.
Do I need to use pasteurized eggs for this recipe?
Pasteurized eggs are strongly recommended since the yolks stay raw throughout the curing process. This lowers the risk of foodborne illness, especially for kids, older adults, and anyone with a weaker immune system.
Can I reuse the leftover soy sauce marinade?
Yes, but boil it briefly first to kill off anything that transferred from the raw yolks before using it on a new batch. You can also skip reusing it and just drizzle the cooked marinade over rice, noodles, or vegetables.
Why is my yolk only cured on one side?
Egg yolks float, so the top often gets less contact with the marinade than the bottom. Flip the yolks once halfway through curing, or lay a paper towel over the top to wick marinade down evenly.
Conclusion
This soy sauce cured egg yolk recipe is proof that a few pantry staples and a little patience can make something that tastes way fancier than the effort it takes. It’s become one of my go-to tricks for turning a plain bowl of rice into something worth getting excited about.
Give it a try this week, and if you’re a visual planner like me, go ahead and pin this recipe for later so it doesn’t get lost in the scroll. I’d love to hear how yours turns out, so drop a comment and let me know what mix-ins you tried.