
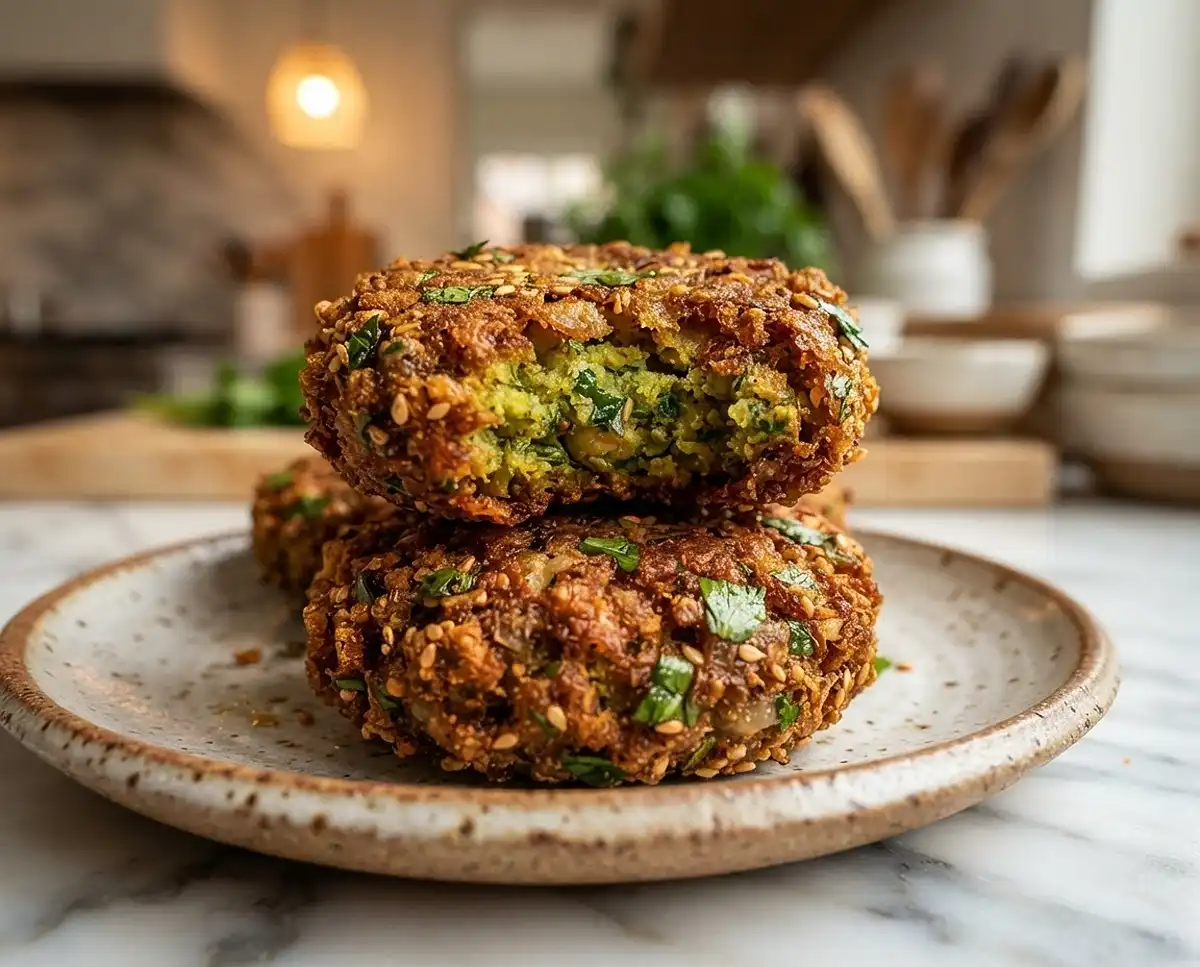
Learn how to make falafel with canned chickpeas for a crispy, herby, garlicky bite you can pull off any weeknight, no soaking, no fuss required.
Okay, real talk: I used to think falafel was one of those “someday” recipes, the kind you admire at a restaurant but never actually attempt at home. Then I found out you can skip the whole overnight-soaking-dried-chickpeas thing and just use a can from your pantry, and my whole falafel-fearing world changed.
This is the recipe I make when I want something crispy and herby without turning my kitchen into a science lab.
Table of Contents
Why You’ll Love This Recipe
This falafel with canned chickpeas comes together fast, no planning ahead, no soaking dried beans for twelve hours, no guilt if you forgot to prep last night. You just open a can, grab your food processor, and go.
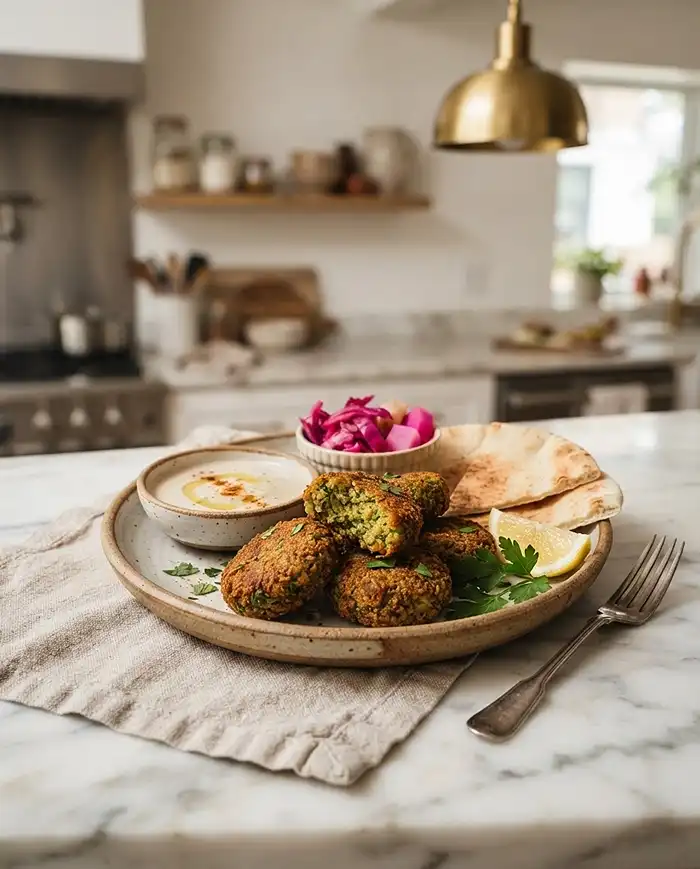
The texture is what really sells it. You get that craggy, golden-brown crust on the outside and a soft, herb-flecked center that’s packed with parsley, cilantro, and just enough garlic to make your kitchen smell like a Mediterranean restaurant. It’s the kind of thing that tastes like it took way more effort than it did.
And because it starts from canned chickpeas, it’s genuinely one of the more approachable ways to learn how to make falafel with canned chickpeas at home, even if you’ve never fried anything trickier than an egg. If you’re already a chickpea person, this is basically the natural next step after crispy roasted chickpeas.
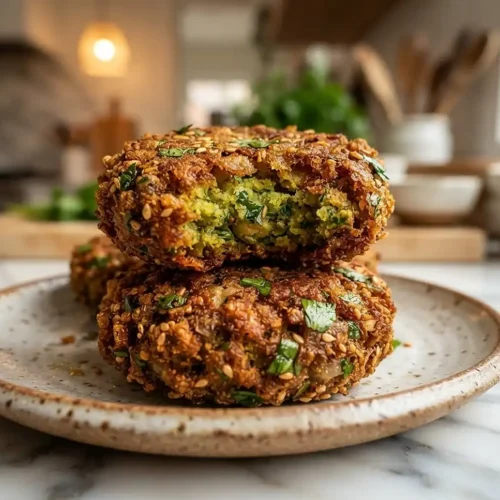
How to Make Falafel With Canned Chickpeas
Equipment
- Food processor
- Measuring cups and spoons
- Knife
- Cutting board
- Large skillet
- Spatula or tongs
- Paper towel-lined plate
Ingredients
For the Falafel
- 1 15-ounce can chickpeas drained, rinsed, and patted very dry
- ½ cup fresh parsley finely chopped
- ½ cup fresh cilantro finely chopped
- ⅓ cup onion finely chopped
- 3 cloves garlic minced
- 1 teaspoon ground cumin
- 1 teaspoon ground coriander
- ½ teaspoon fine sea salt
- 1 pinch ground black pepper
- 1 pinch cayenne pepper optional
- ⅓ cup all-purpose flour for binding
- as needed oil for frying
Instructions
- Drain and rinse the chickpeas thoroughly, then pat them very dry with paper towels to remove as much excess moisture as possible.
- Add the chickpeas, parsley, cilantro, onion, garlic, cumin, coriander, salt, black pepper, and cayenne, if using, to a food processor. Pulse until combined but still slightly coarse and crumbly; do not process into a smooth paste.
- Sprinkle the flour over the chickpea mixture. Pulse a few more times, just until the mixture starts to hold together when pressed between your fingers.
- Scoop about 2 tablespoons of mixture at a time and gently shape into small, slightly flattened patties. Place them on a plate and let rest for 5 minutes so the flour can absorb any remaining moisture.
- Heat enough oil to coat the bottom of a large skillet over medium-high heat. Once the oil is shimmering, add the falafel in batches without crowding the pan.
- Fry for about 3 minutes per side, until deeply golden brown and crisp. Transfer the cooked falafel to a paper towel-lined plate and repeat with the remaining patties.
- Serve warm in pita with hummus and vegetables, over a salad, or with tahini sauce, cucumber, and tomato.
Notes
Quick Overview: What Makes This Falafel Work
Before we get into the nitty-gritty, here’s the gist. This recipe leans on a few smart moves that make canned-chickpea falafel actually hold together and fry up crisp instead of falling apart in the oil (we’ve all seen that happen, it’s not pretty).
- Canned chickpeas, well-drained and rinsed, so you skip the soaking step entirely
- A generous amount of fresh parsley and cilantro for that classic green, herby falafel flavor
- Warm spices like cumin and coriander, plus a little heat from optional cayenne
- Just enough flour to help everything bind without turning the mixture gummy
- A hot pan of oil for that irresistible golden crust
The result is a batch of falafel with canned chickpeas that’s crispy outside, tender inside, and honestly better than most of the falafel I’ve had from strip-mall spots. No offense to strip-mall falafel. It has its place.
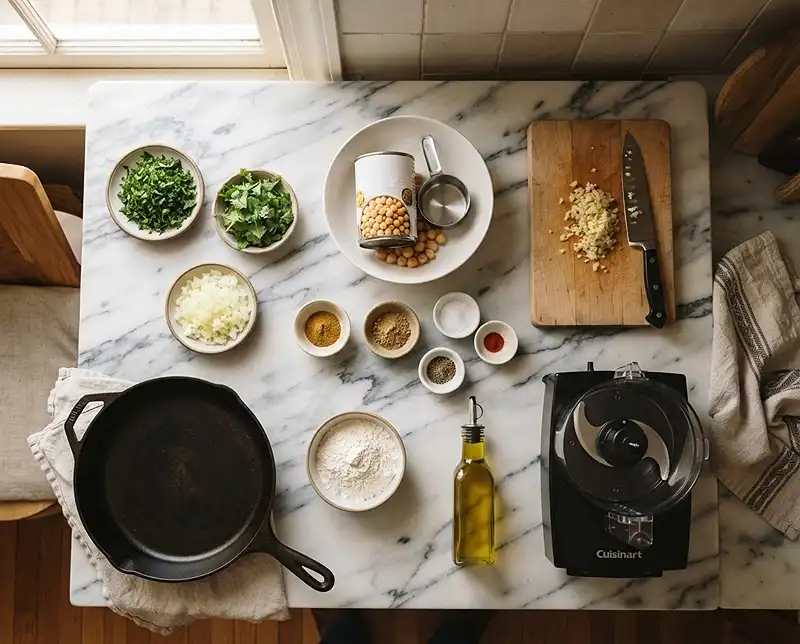
Ingredients You’ll Need
Here’s everything that goes into this recipe. Most of it is probably already sitting in your kitchen, minus maybe the fresh herbs.
| Ingredient | Amount |
|---|---|
| Canned chickpeas, drained and rinsed | 1 can (15 ounces) |
| Fresh parsley, finely chopped | 1/2 cup |
| Fresh cilantro, finely chopped | 1/2 cup |
| Onion, finely chopped | 1/3 cup |
| Garlic, minced | 3 cloves |
| Ground cumin | 1 teaspoon |
| Ground coriander | 1 teaspoon |
| Fine sea salt | 1/2 teaspoon |
| Ground black pepper | 1 pinch |
| Cayenne pepper (optional) | 1 pinch |
| All-purpose flour | 1/3 cup |
| Oil, for frying | as needed |
A quick note on the chickpeas: make sure they’re really well-drained. Canned chickpeas hold onto a surprising amount of liquid, and extra moisture is the number one reason falafel with canned chickpeas falls apart in the oil instead of holding its shape.
How to Make Falafel With Canned Chickpeas
Alright, let’s get into the actual cooking. I promise this is way less intimidating than it sounds, and most of the “work” is just pulsing a food processor a few times.
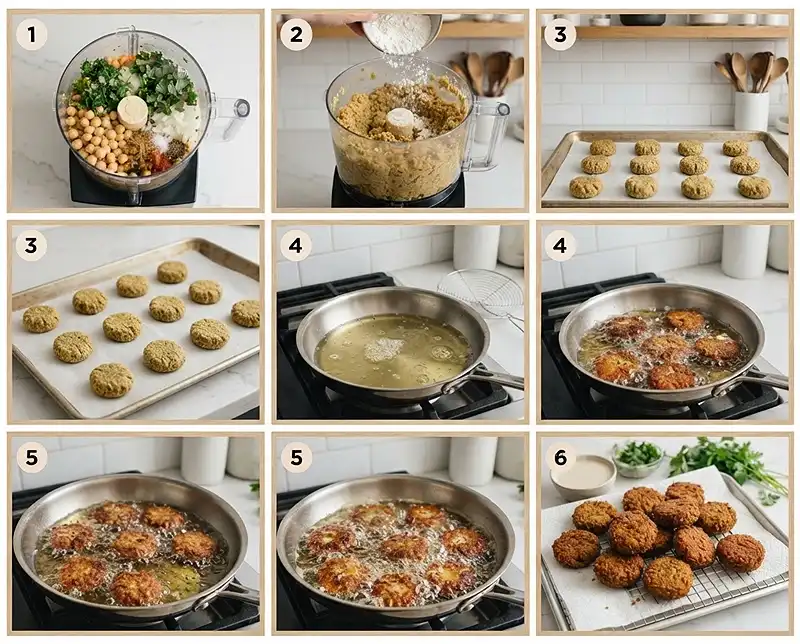
Step 1: Pulse the Base Mixture
Add your drained chickpeas, parsley, cilantro, onion, garlic, cumin, coriander, salt, black pepper, and cayenne (if you’re using it) to a food processor. Pulse it, don’t just hold the button down, until everything’s combined but still has a little texture to it.
You’re not going for hummus here. You want small, slightly coarse crumbs, not a smooth paste. My personal tip: stop a beat earlier than you think you should. The mixture will look almost too rough, and that’s exactly right.
Step 2: Add the Flour and Bind It
Sprinkle the flour over the chickpea mixture right in the food processor. Pulse a few more times, just until the mixture starts to hold together when you press it between your fingers.
This is the step that makes or breaks your falafel with canned chickpeas. If it still feels crumbly and won’t hold a shape, pulse a couple more times. If it starts looking like a paste, you’ve gone too far, so watch it closely.
Step 3: Shape Your Patties
Scoop out about 2 tablespoons of the mixture at a time and gently press it into small patties. I like to flatten mine slightly rather than keeping them round, since flatter falafel cooks through more evenly and gets more crispy surface area (more crunch, more happiness).
Don’t overwork the mixture while shaping. A light touch keeps things tender inside instead of dense.
Step 4: Fry Until Golden
Heat oil in a pan over medium-high heat. Once it’s shimmering, add your falafel patties in batches, don’t crowd the pan, and let them fry until golden and crispy, about 3 minutes per side.
Listen for the sizzle to tell you it’s hot enough before you add the first batch. Drain the finished falafel on paper towels so they stay crisp instead of getting soggy from trapped oil.
Expert Tips, Variations, and Troubleshooting
Here’s everything I’ve picked up from making this falafel with canned chickpeas more times than I can count, including a few mistakes so you don’t have to make them yourself.
My Best Tips
Pat your chickpeas dry with a paper towel after rinsing them. It sounds fussy, but that extra bit of moisture control makes a real difference in how well your patties hold together.
Let the shaped patties rest on a plate for five minutes before frying. It gives the flour a chance to fully absorb any remaining moisture, which helps them stay intact in the oil.
Tasty Variations to Try
Want a little more kick? Bump up the cayenne, or add a pinch of smoked paprika for a deeper, smokier flavor. If you’re into bold, garlicky flavors, this recipe pairs beautifully as a side alongside something like marry me chickpeas with coconut milk for a whole chickpea-forward spread.
You can also swap half the parsley for fresh dill or mint for a slightly different herby profile. It’s a fun way to keep falafel with canned chickpeas feeling new every time you make it.
Common Troubleshooting
Falafel falling apart in the oil? It’s almost always excess moisture or not enough flour. Drain and pat your chickpeas thoroughly, and don’t skip letting the mixture rest before shaping.
Falafel browning too fast on the outside but staying raw-tasting inside? Your oil is probably too hot. Drop the heat slightly and give each patty a bit more time per side.
How to Store and Reheat Your Falafel
This falafel with canned chickpeas actually holds up really well after the first day, which makes it a great make-ahead option for lunches during the week.
| Method | How Long It Lasts |
|---|---|
| Refrigerator, airtight container | Up to 4 days |
| Freezer, cooked and cooled | Up to 2 months |
To reheat, skip the microwave if you can, it turns the crust soft and sad. Instead, warm the falafel in a skillet over medium heat for a couple minutes per side, or pop them in the oven at 375°F for about 8 to 10 minutes until they’re crisp again.
For a no-waste idea, crumble up any leftover falafel with canned chickpeas over a big green salad, or tuck the pieces into a pita with hummus and veggies. Nothing goes to waste, and it barely feels like “leftovers” at all. If you’re building out a bigger chickpea rotation, this pairs nicely with a batch of high-protein black chickpeas salad for meal-prep week.
Chickpeas themselves are also a genuinely solid source of plant-based protein and fiber, according to Harvard’s nutrition source on legumes, so this isn’t just a tasty recipe, it’s a fairly nourishing one too.
Frequently Asked Questions
Can I bake this falafel with canned chickpeas instead of frying it?
Yes. Bake the shaped patties on a lined tray at 400 degrees Fahrenheit for about 20 to 25 minutes, flipping halfway through. They won’t be quite as crisp as fried, but they’ll still be flavorful and hold their shape well.
Why is my falafel with canned chickpeas mushy instead of crispy?
This usually means the chickpeas weren’t drained and dried well enough, or the mixture needed a bit more flour to bind. Pat the chickpeas dry thoroughly and let the shaped patties rest for a few minutes before frying.
Can I make falafel with canned chickpeas ahead of time?
Definitely. You can shape the patties up to a day in advance and keep them covered in the refrigerator until you’re ready to fry. This is a great trick for easy weeknight dinners.
What can I serve with this falafel?
Falafel with canned chickpeas is fantastic in pita with hummus, tucked into a salad, or served alongside a bright cucumber and tomato salad. A drizzle of tahini sauce never hurts either.
Can I use a different type of canned bean instead of chickpeas?
Chickpeas give you the most classic falafel flavor and texture, so they’re really the best choice here. If you want to experiment, white beans can work in a pinch, though the taste and texture will be noticeably softer.
Final Thoughts
If you’ve been putting off making falafel because the traditional method felt like too much of a project, this is your sign to just go for it. Learning how to make falafel with canned chickpeas is honestly one of the easiest wins in the kitchen, crispy, herby, and ready way faster than you’d expect.
Give this recipe a try this week, and if you love it as much as I do, pin it on Pinterest so you can find it again next time the falafel craving hits. I’d love to hear how yours turned out, drop a comment below and let me know what you served it with. And if you’re craving more chickpea inspiration, this homemade hummus with dried chickpeas is a perfect partner for your next falafel plate.
