
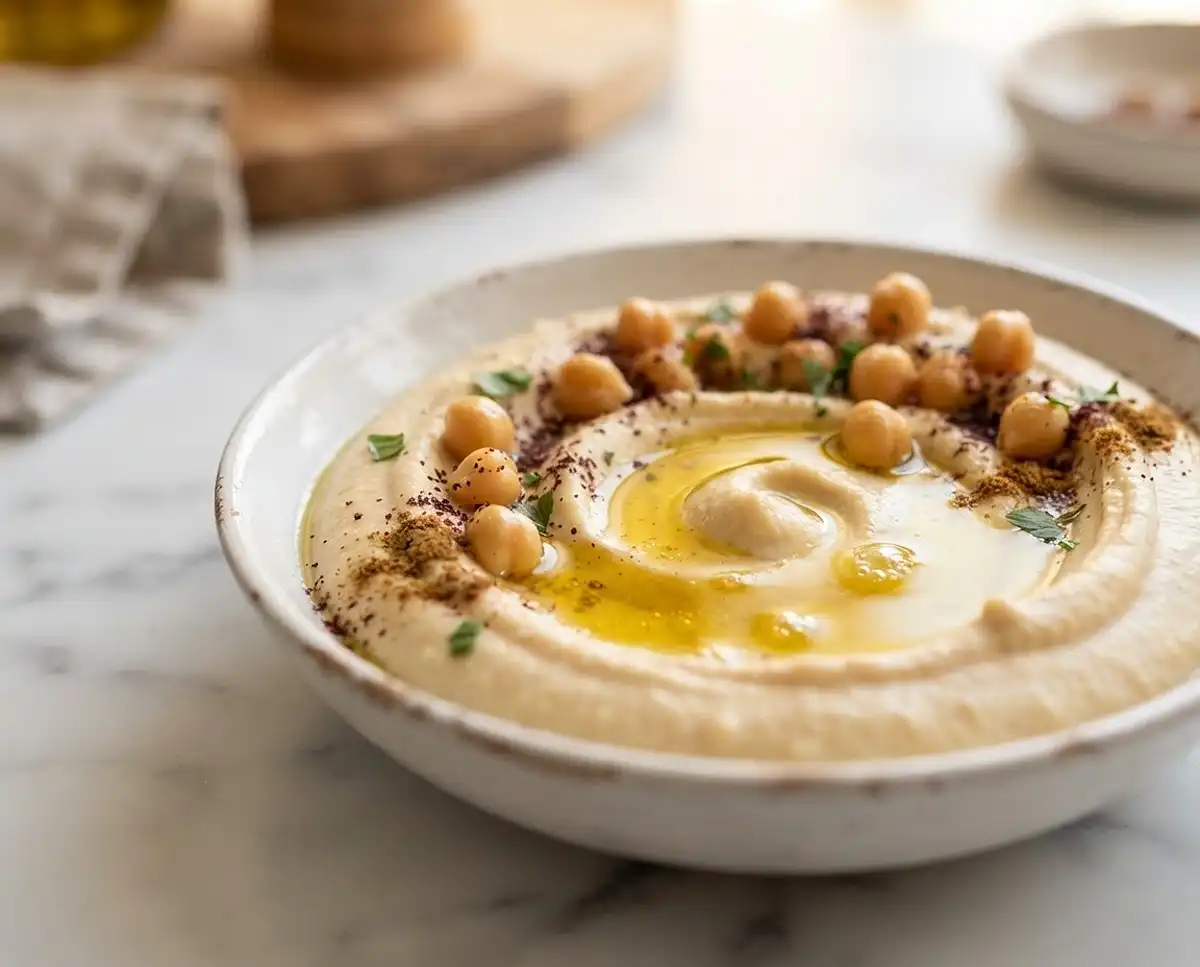
Learn how to make hummus with dried chickpeas for the silkiest, creamiest dip thats way better than store-bought, with easy steps and a big payoff.
My grandma used to say a good hummus should “disappear on your tongue,” and for years I had no idea what she meant. Then I finally ditched the canned chickpeas, soaked my own overnight, and got it. Once you taste homemade hummus with dried chickpeas, that sad tub from the grocery store just doesn’t cut it anymore.
Table of Contents
Why Dried Chickpeas Beat the Can
I get it, canned chickpeas are convenient, and there’s a quick version below for busy nights. But hummus with dried chickpeas has a texture that canned just can’t match.
Canned beans often have added preservatives that keep them firm, which is great for salads but works against you when you want something that blends into velvet. Starting from dried gives you full control over softness.
Why This Hummus Recipe Wins
This isn’t just another hummus recipe. Cooking dried chickpeas with a little baking soda gets you that whipped, cloud-like texture you usually only find at fancy Mediterranean restaurants.
No shortcuts, no gritty texture, no weird aftertaste. Just tahini, lemon, garlic, and patience doing their quiet magic.
It’s the kind of hummus recipe you’ll want on repeat: great for snacking, dressing up a lunch bowl, or impressing people at a party with basically zero effort once it’s blended.
How to Make Hummus with Dried Chickpeas
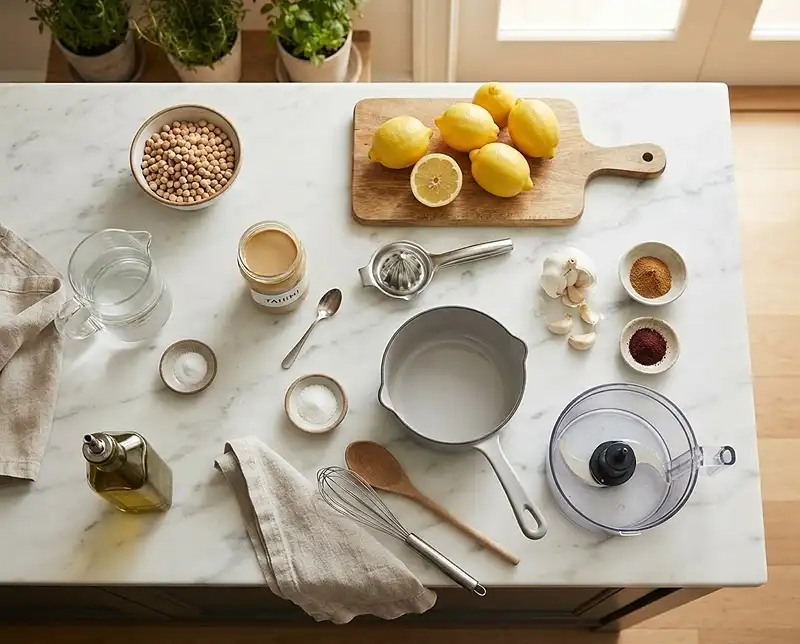
Equipment
- Large bowl
- Colander
- Medium saucepan
- Slotted spoon
- Food processor
- Measuring cups and spoons
- Shallow serving bowl
Ingredients
For Soaking
- 1 cup plus 2 tablespoons dried chickpeas about 210 g; picked over and rinsed
- 4 cups water for soaking
For Cooking
- 5 cups fresh water for cooking
- ½ teaspoon baking soda
- ½ teaspoon salt
For Blending
- cooked chickpeas reserve 1 to 2 tablespoons for garnish
- ⅓ cup hulled tahini about 85 g
- ⅓ cup fresh lemon juice about 80 ml
- 2 cloves garlic chopped
- 1 teaspoon salt
- ¼ teaspoon ground cumin optional
- ¼ cup cold water about 60 ml, plus more as needed
For Serving
- 2 tablespoons extra-virgin olive oil
- 1 pinch ground cumin and/or sumac for garnish
- 1 to 2 tablespoons reserved cooked chickpeas for garnish
Instructions
- Pick through the dried chickpeas, discarding any stones, debris, or discolored beans. Rinse well under cold water.
- Place the chickpeas in a large bowl and cover with 4 cups of water. Soak at room temperature for 8 to 12 hours, or overnight. Drain and rinse with fresh water.
- Transfer the soaked chickpeas to a medium stainless-steel or ceramic saucepan. Add 5 cups fresh water, the baking soda, and 1/2 teaspoon salt. Bring to a boil, then reduce to a steady simmer.
- Cook for 30 to 35 minutes, skimming off foam and loose skins as needed and adding hot water if the pot becomes dry. The chickpeas are ready when they collapse easily when pressed between your fingers.
- Drain the chickpeas, reserving 1 to 2 tablespoons for garnish. For an extra-silky hummus, gently rub the warm chickpeas in a bowl of water to loosen skins and skim away the skins.
- Add the drained chickpeas to a food processor and process alone for about 1 minute, until they form a smooth, stiff paste.
- Add the tahini, lemon juice, chopped garlic, 1 teaspoon salt, and cumin, if using. Process on high for 3 to 5 minutes, stopping to scrape down the sides as needed.
- With the processor running, slowly stream in the cold water. Blend until the hummus is pale, fluffy, and creamy. Add additional cold water, 1 tablespoon at a time, if needed, then taste and adjust the salt, lemon juice, or tahini.
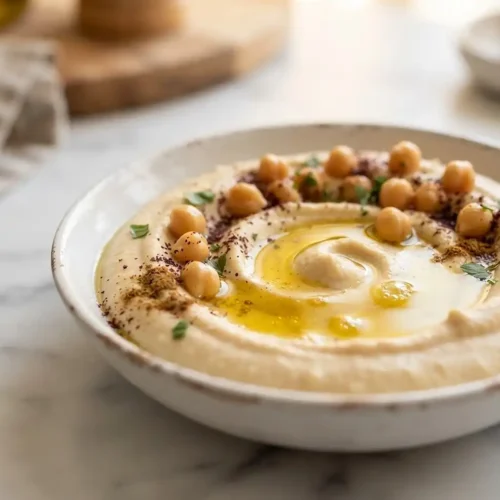
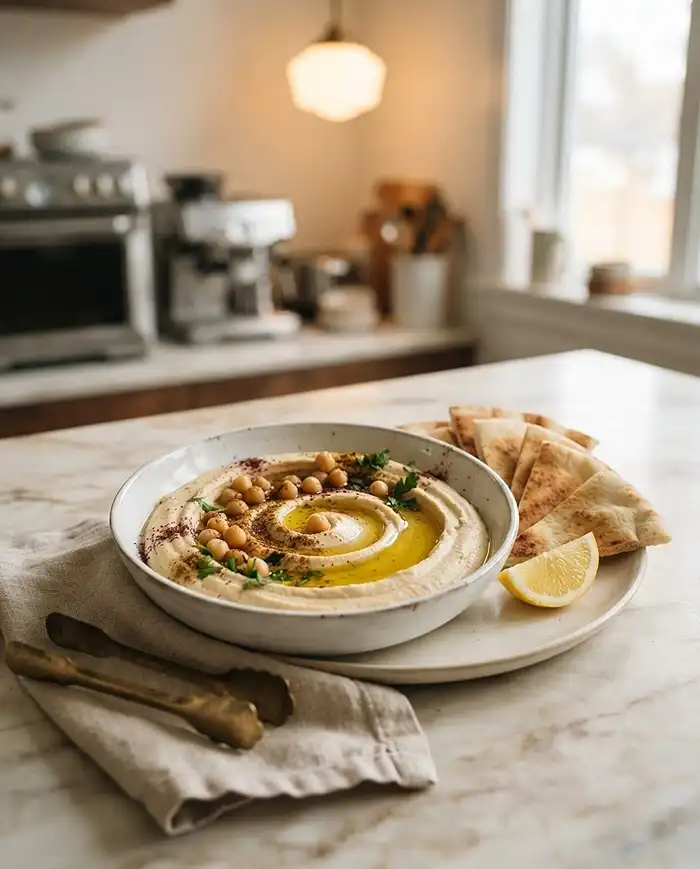
- Spoon the hummus into a shallow serving bowl and use the back of a spoon to make a swirl and well in the center. Garnish with the reserved chickpeas, olive oil, and a pinch of cumin or sumac. Serve warm or at room temperature.
Notes
What You’ll Need
Here’s everything for this hummus with dried chickpeas, grouped by step so you’re not hunting around your kitchen mid-recipe.
| For Soaking | Amount |
|---|---|
| Dried chickpeas | 1 cup plus 2 tablespoons (about 210 g) |
| Water for soaking | 4 cups |
| For Cooking | Amount |
|---|---|
| Fresh water | 5 cups |
| Baking soda | ½ teaspoon |
| Salt | ½ teaspoon |
| For Blending | Amount |
|---|---|
| Cooked chickpeas (reserve 1-2 tbsp for garnish) | All of them |
| Hulled tahini | ⅓ cup (about 85 g) |
| Fresh lemon juice | ⅓ cup (about 80 ml) |
| Garlic cloves, chopped | 2 |
| Salt | 1 teaspoon |
| Ground cumin (optional) | ¼ teaspoon |
| Cold water, plus more if needed | ¼ cup (about 60 ml) |
| For Serving | Amount |
|---|---|
| Extra-virgin olive oil | 2 tablespoons |
| Ground cumin and/or sumac | A pinch |
| Reserved chickpeas | The 1-2 tablespoons from above |
Let’s Make Hummus with Dried Chickpeas
Making hummus with dried chickpeas takes a little more planning than popping open a can, but honestly, the actual work is easy. Here’s exactly how it goes down.
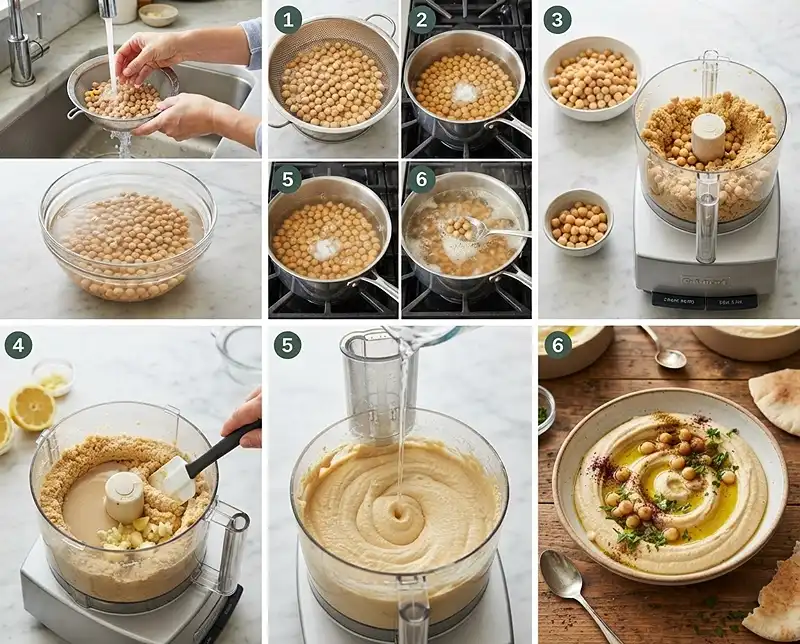
Step 1: Soak the Chickpeas
Pick through your dried chickpeas and toss any stones, debris, or weird discolored ones. Rinse them well under cold water.
Dump them into a big bowl and cover with 4 cups of water. Give them room, because these little guys puff up a lot overnight.
Let them soak at room temperature for 8-12 hours, or just leave them overnight while you sleep. When you wake up, drain and rinse them with fresh water before cooking.
Step 2: Cook Them Until Silly Soft
Move the drained chickpeas into a medium saucepan, ideally stainless steel or ceramic. Aluminum and baking soda don’t play nice together, so skip it here.
Add 5 cups fresh water, ½ teaspoon baking soda, and ½ teaspoon salt. Bring it to a boil, then drop the heat to a steady simmer.
Cook for about 30-35 minutes, checking early since timing depends on how old your beans are. Skim off any foam or skins floating on top with a slotted spoon, topping up with hot water if things look dry.
You’ll know they’re ready when a chickpea squished between your fingers just collapses. For proper hummus, softer is always better than firm.
“Softer than you think is right” is basically the golden rule here. Drain the chickpeas, saving 1-2 tablespoons for garnish later, and blend with cold water rather than the cooking liquid for that classic pale color.
Step 3: Blend It Into Something Beautiful
Toss the drained chickpeas into a food processor and blend alone for about a minute, until they form a smooth, stiff paste. This step matters more than people think.
Add the tahini, lemon juice, chopped garlic, remaining teaspoon of salt, and cumin if you’re using it. Process on high for 3-5 minutes, stopping to scrape the sides a couple of times.
With the processor still running, slowly stream in the ¼ cup of cold water. Keep blending until the hummus turns pale, fluffy, and genuinely creamy.
Too thick? Add more cold water, one tablespoon at a time, until it loosens up. Taste it and adjust the salt, lemon, or tahini as needed.
Quick tip: if your hummus tastes bitter, the tahini is usually the culprit. Old or unhulled tahini can turn a batch sour fast, so check the jar before you blame yourself.
Step 4: Plate It Like You Mean It
Spread the hummus into a shallow bowl using the back of a spoon, swirling a little well in the center. Drop in your reserved chickpeas, drizzle with olive oil, and dust with cumin or sumac.
Serve it warm or let it settle to room temperature, which actually makes the texture even softer and the flavor fuller than straight from the fridge.
Optional: Peeling the Skins
You don’t have to remove the skins, but it does give you the silkiest possible result. After cooking, rub the warm chickpeas gently between your palms in a bowl of water and skim off the loosened skins.
Since baking soda already loosens skins during cooking, you don’t need to obsess over getting every last one. A high-speed blender handles a few leftover skins just fine.
Tips, Shortcuts, and Fixes
In a Rush? Try a Quick Soak
Cover the dried chickpeas with a few inches of water, boil for 5 minutes, then cover and let sit for 1 hour off the heat. Drain, rinse, and cook as usual, no overnight wait required.
Using Canned Chickpeas Instead
If dried beans aren’t in the cards today, drain two 15-ounce cans, simmer in fresh water for about 20 minutes until very soft, then blend with the same tahini, lemon, garlic, salt, and water method.
Why Baking Soda Is the Secret Weapon
Baking soda raises the pH of your cooking water, which breaks down the pectin holding those tough chickpea skins together. According to a deep dive on the science behind baking soda and hummus, this alkaline boost is exactly what gives homemade hummus its famously silky texture.
Troubleshooting a Grainy Batch
Grainy hummus almost always means undercooked chickpeas. When in doubt, simmer a little longer; they should be embarrassingly soft, way past what you’d want for a salad.
Fun Variations to Try
Roasted red pepper, extra garlic, a swirl of harissa, or even a spoonful of pesto can all take this basic hummus recipe in new directions. Once you’ve nailed the base, it’s basically a blank canvas.
Herby versions work great too. Try blending in a handful of fresh parsley or cilantro for a green-tinted hummus that looks as good as it tastes on a grazing board.
Getting the Texture Just Right
If your hummus seems thin right after blending, don’t panic. It firms up a little as it chills, so aim for slightly looser than you want the final result to be.
On the flip side, if it’s stiff even after adding water, your tahini might be on the thicker side. A splash more lemon juice or water, blended in slowly, usually fixes it.
If you love chickpeas in other forms too, don’t sleep on crispy roasted chickpeas for something crunchy.
Or toss your extra cooked chickpeas into a high-protein black chickpeas salad for an easy lunch the next day.
Storing Your Hummus
Homemade hummus with dried chickpeas keeps beautifully, so don’t stress about making a big batch.
| Method | How Long | Notes |
|---|---|---|
| Refrigerator | Up to 5 days | Store airtight; let it sit at room temp before serving |
| Freezer | 2-3 months | Leave 1 inch space, thaw overnight, stir in cold water to loosen |
To reheat, you honestly don’t need to. Just let it come to room temperature and stir in a splash of water or olive oil if it’s thickened up in the fridge.
For a no-waste kitchen win, use leftover cooking liquid (aquafaba) to make vegan meringues or fluff up salad dressings. Nothing here needs to go to waste.
A Word on Nutrition
Beyond tasting incredible, chickpeas bring real nutritional value to the table. Research summarized by UConn Extension’s overview of chickpea health benefits notes they’re packed with plant-based protein, fiber, and complex carbohydrates, which makes this hummus recipe as functional as it is delicious.
Frequently Asked Questions
Can I make hummus with dried chickpeas without baking soda?
Yes, you can skip the baking soda, but your chickpeas will take longer to soften and the hummus may not turn out quite as silky. If you skip it, plan on a longer simmer and check for that easy-to-mash texture before draining.
Why is my homemade hummus grainy instead of smooth?
Grainy hummus almost always means the chickpeas weren’t cooked soft enough before blending. Simmer them longer next time until they practically fall apart between your fingers.
Can I make this hummus recipe ahead of time?
Absolutely. This hummus with dried chickpeas actually tastes better after a few hours in the fridge, once the flavors have had time to settle. Store it airtight for up to 5 days.
What can I substitute for tahini in hummus?
In a pinch, you can use a nut butter like almond or cashew butter, or a spoonful of plain Greek yogurt for creaminess, though the flavor will be different from classic tahini-based hummus.
Is hummus with dried chickpeas healthier than canned?
Both are nutritious, but cooking dried chickpeas yourself means no added preservatives or excess sodium from canning liquid, giving you more control over the final flavor and texture.
Conclusion
Once you learn how to make hummus with dried chickpeas, there’s really no going back to the tub in the fridge aisle. It’s cheaper, tastier, and honestly kind of fun once you get the rhythm down.
Give this hummus recipe a try this week, snap a photo of that swirly, olive-oil-drizzled bowl, and pin it for later. And if you tweak it with your own twist, come back and let me know how it turned out.
