
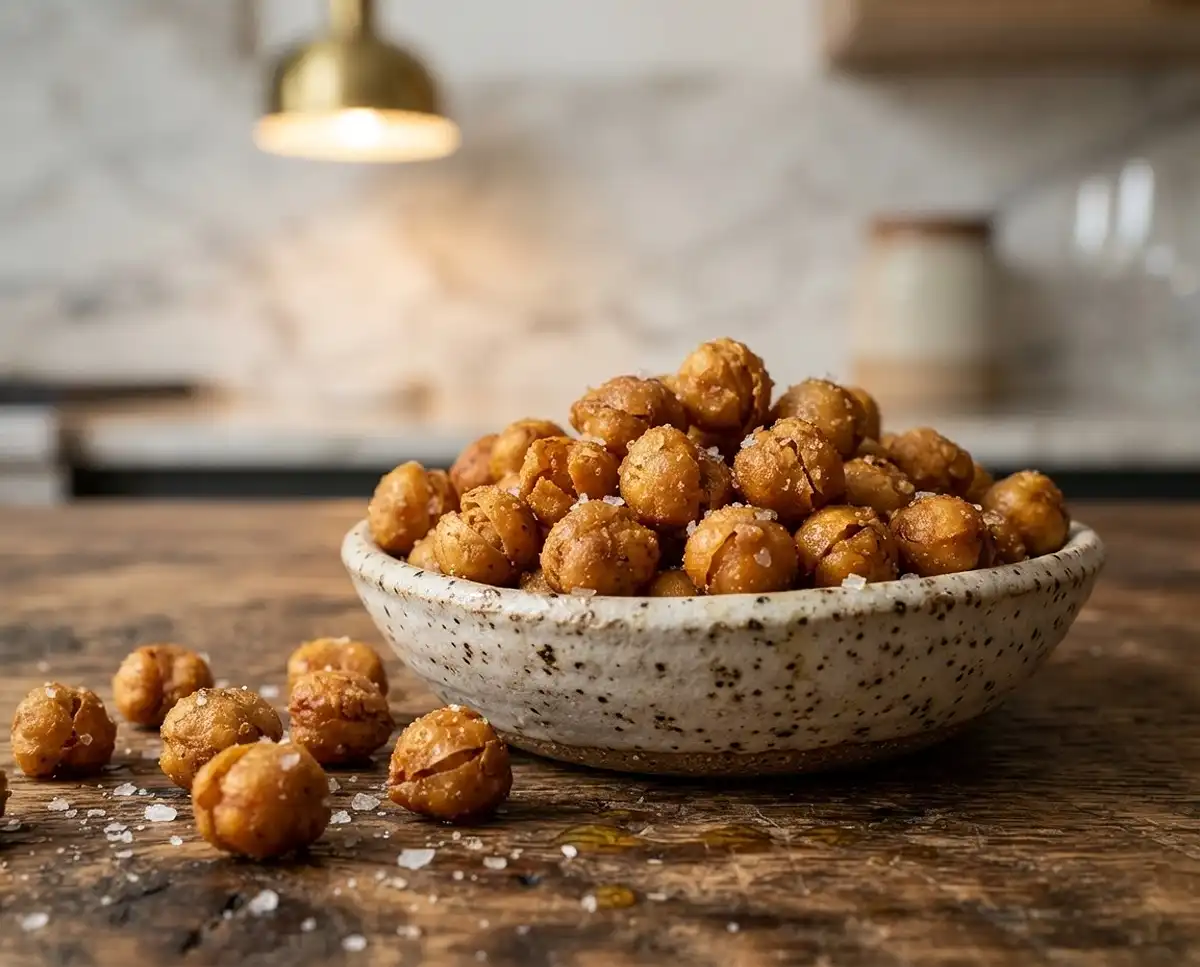
Once you learn how to bake chickpeas properly, you’ll never reach for a bag of chips again. I made these on a whim one afternoon and honestly? My whole family stood around the baking sheet eating them before they even made it to a bowl.
Table of Contents
Why You’ll Love These Crispy Roasted Chickpeas
These oven roasted chickpeas are crunchy, satisfying, and packed with plant-based protein. They take almost no effort, require just a handful of pantry staples, and come out perfectly golden every single time.
Whether you’re snacking solo or serving them at a party, roasted chickpeas deliver that addictive crunch without the guilt. And the flavor options? Completely endless.
How to Bake Chickpeas: The Crunchiest Snack Ever
Equipment
- Large rimmed baking sheet
- Parchment paper
- Paper towels or clean tea towel
- Colander
- Wide bowl
- measuring spoons
Ingredients
For the Roasted Chickpeas
- 1 15-ounce can chickpeas or 1 1/2 cups cooked chickpeas; rinsed and drained well
- 1 tablespoon olive oil added after baking for maximum crunch
- ⅛ teaspoon fine salt or to taste
- to taste optional seasonings such as smoked paprika and garlic powder, cumin and coriander, za’atar and lemon zest, nutritional yeast and onion powder, cinnamon and maple syrup, or cocoa powder
Instructions
- Preheat the oven to 400°F. Line a large rimmed baking sheet with parchment paper.
- Drain and rinse the chickpeas, then pat them very dry with paper towels or a clean tea towel. Discard any loose skins that come off naturally.
- Spread the dried chickpeas in a single, even layer on the prepared baking sheet. Do not add oil yet, and do not crowd the pan.
- Roast for 20 to 25 minutes, shaking the pan every 10 minutes, until the chickpeas are golden and firm on the outside.
- Turn off the oven, shake the pan once more, and leave the chickpeas in the oven for another 10 to 15 minutes. Watch the chickpeas around the edges so they do not overbrown.
- Transfer the roasted chickpeas to a wide bowl. Toss with olive oil, salt, and any desired seasonings. Let cool completely before storing.
Notes
Ingredients You’ll Need
The beauty of this recipe is its simplicity. You only need a few things to get started, and everything is totally customizable from there.
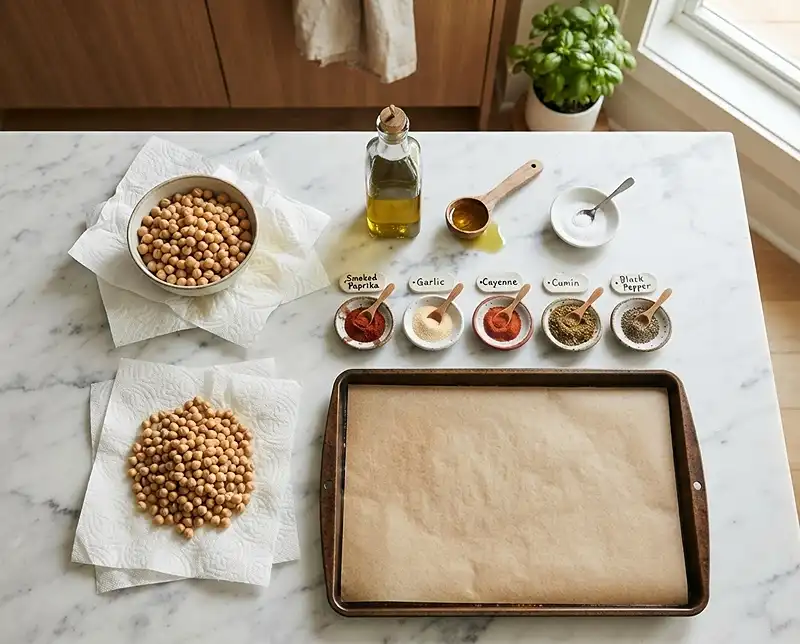
| Ingredient | Amount | Notes |
|---|---|---|
| Chickpeas (canned or cooked) | 1 can (15 oz) or 1.5 cups cooked | Rinsed and drained well |
| Olive oil | 1 tablespoon | Added after baking for max crunch |
| Fine salt | 1/8 teaspoon | Or to taste |
| Optional seasonings | To taste | See seasoning ideas below |
One thing to note: the olive oil goes on after baking, not before. This little trick is the secret to keeping your crispy roasted chickpeas crunchy for weeks, not hours.
How to Bake Chickpeas Step by Step
This method is simple, but a few key steps make all the difference between soggy and seriously crunchy. Follow these closely and you’ll nail it on the first try.
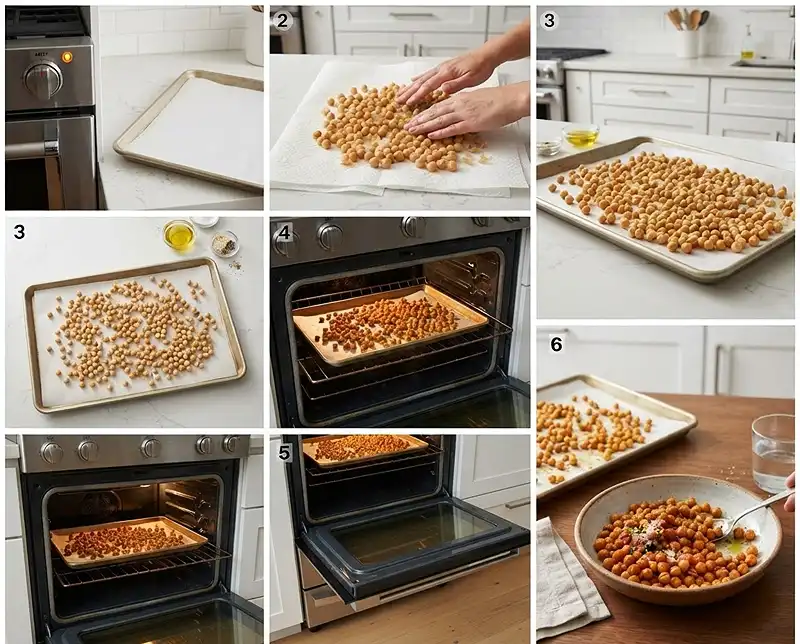
Step 1: Preheat and Prep Your Pan
Preheat your oven to 400 degrees Fahrenheit. Line a large, rimmed baking sheet with parchment paper. The parchment keeps things from sticking and makes cleanup a breeze.
Step 2: Dry the Chickpeas Thoroughly
This step is the most important one. Pat the chickpeas as dry as humanly possible using clean tea towels or paper towels. Seriously, spend a good minute on this.
As you pat them dry, some of the papery skins will come off. Discard those — they tend to turn chewy instead of crispy. You don’t need to hunt them all down, just toss the ones that fall off naturally.
“The drier the chickpea, the crunchier the result.” That’s the golden rule here.
Step 3: Roast Low and Slow (Well, Medium and Steady)
Spread the dried chickpeas in a single, even layer on your prepared baking sheet. Don’t crowd them — give them space to breathe and roast, not steam.
Roast them without any oil for 20 to 25 minutes total, shaking the pan every 10 minutes. You’re looking for golden color and a slightly firm texture on the outside.
Step 4: The Secret Oven Rest
Here’s the move that takes your oven roasted chickpeas from pretty good to ridiculously crunchy. Once the timer goes off, give the pan one more shake, then turn off the oven and leave the chickpeas inside for another 10 to 15 minutes.
Keep an eye on the ones around the edges — they can brown faster. This resting step gently dries out any remaining moisture without burning them. It’s the difference between crunchy and CRUNCHY.
Step 5: Season and Serve
Remove the chickpeas from the oven and transfer them to a wide, low bowl. Now toss them with olive oil, salt, and any seasonings you like.
Adding the oil at this stage (rather than before baking) is what keeps them crunchy. If you coat them in oil before roasting, they steam instead of crisping. Patience pays off!
Let them cool completely before storing. Serve alongside a cold drink — these are boldly crunchy and a little sip never hurts.
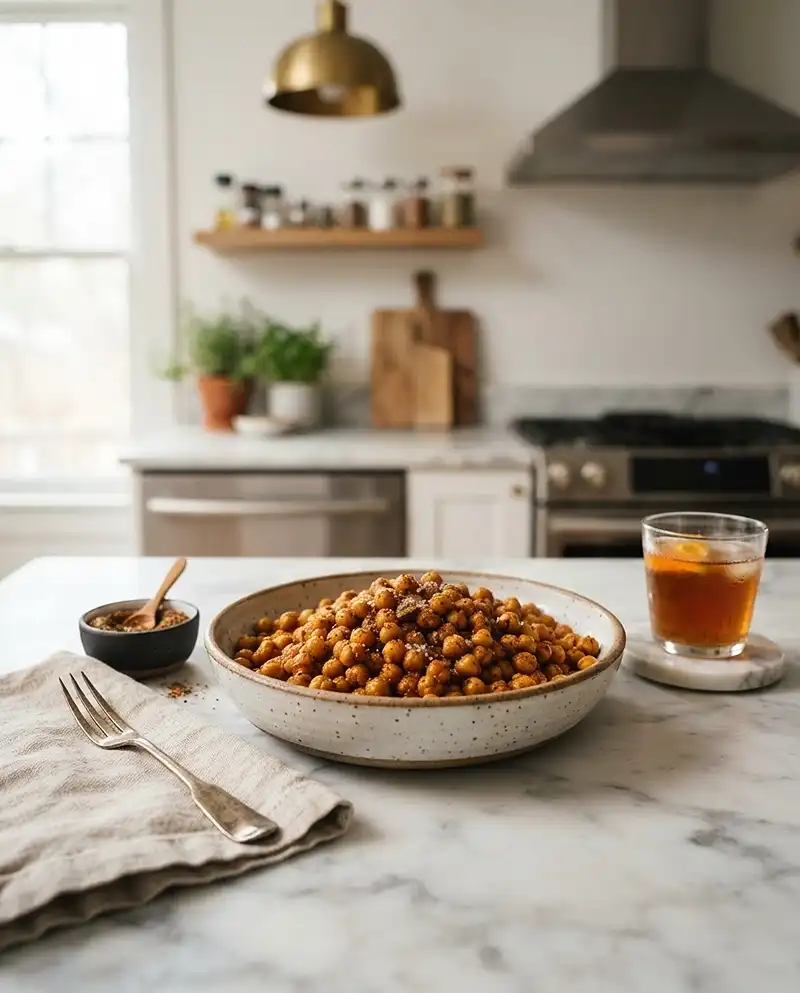
Seasoning Ideas for Roasted Chickpeas
Once you’ve got the basic method down, the fun really starts. These roasted chickpeas are basically a blank canvas for flavor. Here are some combos that work beautifully.
Savory Options
- Smoky paprika and garlic powder — classic and crowd-pleasing
- Cumin, coriander, and a pinch of cayenne — warm and earthy
- Za’atar and lemon zest — bright and herby
- Nutritional yeast and onion powder — cheesy without the cheese
Sweet Options
- Cinnamon and maple syrup — great as a granola alternative
- Cocoa powder and a touch of sea salt — surprisingly addictive
According to Harvard’s Nutrition Source, legumes like chickpeas are an excellent source of plant-based protein and fiber, making these snacks as nutritious as they are tasty.
Expert Tips for Perfect Crispy Roasted Chickpeas
Don’t Skip the Drying Step
We can’t stress this enough. Moisture is the enemy of crunch. The more thoroughly you dry the chickpeas before roasting, the better the final texture will be. A salad spinner can help speed this up if you have one.
Use Canned or Home-Cooked — Both Work
Canned chickpeas are totally fine here and super convenient. If you’ve got home-cooked chickpeas on hand, those work great too. Just make sure they’re well-drained and fully cooled before you start.
If you love cooking with chickpeas from scratch, our guide on making hummus with dried chickpeas is a great place to start.
Season After, Not Before
Adding oil or seasonings before baking can create steam and prevent the chickpeas from crisping up properly. Always toss them with everything after they come out of the oven.
Watch the Edges
Chickpeas on the outer edges of the pan always cook faster. During the oven rest phase especially, peek at those every few minutes to make sure they don’t cross from golden into burnt.
Variations to Try
Air Fryer Chickpeas
Got an air fryer? These work brilliantly in one. Cook at 390 degrees Fahrenheit for about 15 minutes, shaking halfway through. The result is just as crunchy with less time.
Spiced Chickpea Salad Topper
Instead of snacking on them straight, try these crispy roasted chickpeas as a salad topper. They add incredible texture. Our high-protein black chickpea salad is a great pairing if you want to mix things up.
Marry Me Chickpeas Style
Want something saucier and more indulgent? Take the same baked chickpeas and fold them into a creamy, tomato-based sauce. Check out our Marry Me Chickpeas with coconut milk for serious comfort food vibes.
Troubleshooting Common Problems
My Chickpeas Came Out Soft
This almost always comes down to moisture. Either they weren’t dried thoroughly enough before roasting, or they were crowded on the pan and ended up steaming. Next time, dry more aggressively and use a bigger pan if needed.
They Got Too Brown on the Outside but Feel Hollow Inside
Your oven might run hot. Try lowering the temperature by 25 degrees and extending the roast time slightly. A thermometer can help you calibrate if this keeps happening.
They Lost Their Crunch After a Day
Humidity is the culprit. Store them in a sealed bag with the air fully squeezed out, not in an open bowl or jar. Also make sure they were fully cooled before sealing — any trapped steam will make them go soft faster.
Storage Instructions
One of the best things about learning how to bake chickpeas is how well they keep. Store them right and you’ve got snacks for weeks.
| Storage Method | Container | How Long |
|---|---|---|
| Room temperature | Sealed bag, air squeezed out | Up to 1 month |
| Refrigerator | Airtight container | Up to 2 weeks (may soften) |
| Freezer | Not recommended | Texture suffers significantly |
Reheating Tips
If your chickpeas have lost some of their crunch, spread them on a baking sheet and pop them back into a 375-degree oven for about 5 to 8 minutes. They’ll crisp right back up.
An air fryer works even better for re-crisping — 2 to 3 minutes at 375 degrees and they’re practically good as new.
No-Waste Kitchen Ideas
Don’t let any go to waste. Slightly softened chickpeas are great crushed and sprinkled over soups as crouton alternatives, blended into a quick dip, or stirred into grain bowls for extra protein.
And if you want to take your chickpea game even further, our recipe for falafel made with canned chickpeas is worth a look.
More Chickpea Recipes You’ll Love
Obsessed with chickpeas now? Same. Here are a few more recipes to keep the momentum going.
- Classic crispy roasted chickpeas — the original, done perfectly
- High-protein black chickpea salad — a hearty, filling meal
- Hummus made from dried chickpeas — rich and deeply flavored
The USDA FoodData Central confirms that chickpeas are a nutritional powerhouse, offering impressive amounts of fiber, iron, and folate per serving. Snacking never felt so good.
Frequently Asked Questions
Can I use dried chickpeas instead of canned?
Yes, you can! Cook them first until just tender but not mushy, then drain, cool, and dry them thoroughly before roasting. Avoid cooking them too soft or they won’t crisp up properly in the oven.
Why are my roasted chickpeas not crunchy?
The most common reason is excess moisture. Make sure you dry the chickpeas very well before roasting, don’t crowd the pan, and don’t skip the oven rest step after turning off the heat. That rest is what takes them to the next level of crunch.
Do I need to remove all the chickpea skins?
No, you don’t need to peel them all. Simply discard any skins that fall off naturally as you pat them dry. Leaving the rest on is totally fine and saves a lot of time.
Can I add oil before baking?
It’s best not to. Adding oil before roasting creates steam, which prevents the chickpeas from getting truly crispy. Toss them with olive oil after they come out of the oven for the best crunch.
How long do baked chickpeas stay crunchy?
When stored in a sealed bag with the air squeezed out at room temperature, they stay crunchy for up to one month. Avoid storing them in the fridge, as the humidity will soften them faster.
Ready to Make the Crunchiest Snack of Your Life?
Now that you know exactly how to bake chickpeas the right way, there’s really no excuse not to try them this week. One can of chickpeas, one pan, and about 40 minutes stand between you and a seriously addictive snack.
Give this recipe a go and let us know how it turned out in the comments below! Did you try a fun seasoning combo? We’d love to hear it.
And if you loved this recipe, please save it to Pinterest so other snack lovers can find it too. It genuinely makes a difference and we appreciate every share!
