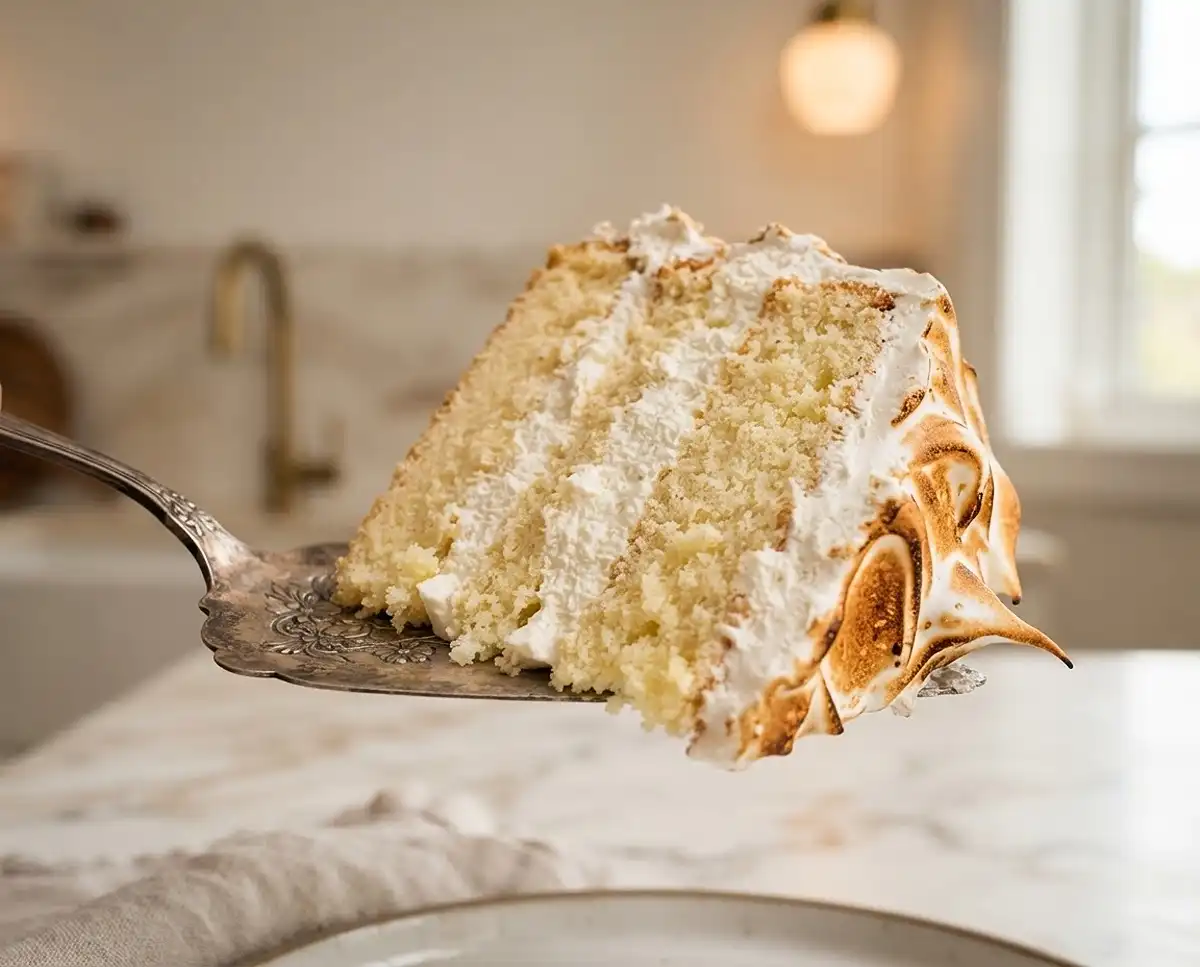
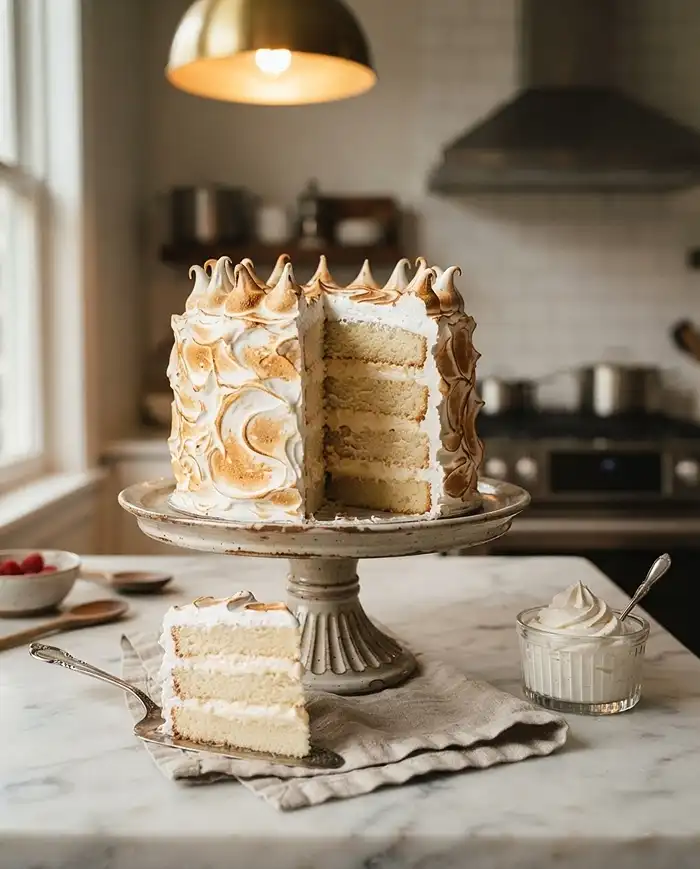
This vanilla meringue cake recipe is everything you want in a showstopper dessert — fluffy chiffon layers, billowy whipped cream, and a toasted meringue exterior that looks like it came straight out of a bakery window.
I made this for a family gathering and let’s just say there were absolutely no leftovers. Not even crumbs. If you’ve been searching for an easy vanilla meringue cake recipe that actually delivers, you’ve landed in the right place.
Table of Contents
What Makes This Vanilla Meringue Cake So Special
This cake is a beautiful combination of textures and flavours. The chiffon-style layers are incredibly light and tender, held together with pillowy vanilla whipped cream.
Then comes the meringue — a Swiss-style coating that gets toasted with a blowtorch into something golden and magical. It’s elegant enough for a celebration but surprisingly straightforward to pull off at home.
Think of it as a cousin to the iconic Sandra Bullock’s mother’s Helga cake — another dreamy layered cake that’s worth every second of effort.
Vanilla Meringue Cake
Equipment
- Two 8-inch cake tins
- Baking paper
- stand mixer or hand mixer
- mixing bowls
- Rubber spatula
- Wire cooling rack
- Serrated knife
- 8-inch springform or loose-bottom cake tin
- Heatproof bowl
- Saucepan
- Kitchen blowtorch
- Offset spatula
- Cake board or serving plate
Ingredients
For the Cake Layers
- 6 large egg whites Room temperature.
- ½ tsp cream of tartar
- 125 g granulated sugar For whipping with the egg whites.
- 6 large egg yolks Room temperature.
- 125 g granulated sugar For whipping with the egg yolks.
- 1 tbsp vanilla extract
- 80 ml vegetable oil
- 100 ml whole milk
- 200 g plain flour
- 1 tsp baking powder
- ¼ tsp salt
For the Whipped Cream Filling
- 1 litre double cream Use heavy cream with a high fat content.
- 200 g icing sugar
- 1 tbsp vanilla extract
For the Swiss Meringue
- 6 large egg whites
- 300 g granulated sugar
- ¼ tsp salt
- 2 tsp vanilla extract
Optional Variations
- fresh berries Optional; layer between cake and whipped cream.
- 1 tsp almond extract Optional substitute for vanilla in the meringue.
- 1 lemon or orange Optional; add zest to the cake batter and whipped cream.
Instructions
- Preheat the oven to 180°C. Line the bottoms of two 8-inch cake tins with baking paper circles. Do not grease the sides of the tins.
- In a large clean bowl, whip 6 egg whites with the cream of tartar until foamy. Gradually add 125 g granulated sugar while whipping, then continue until stiff, glossy peaks form. Set aside.
- In a separate large bowl, whip the 6 egg yolks, remaining 125 g granulated sugar, and 1 tablespoon vanilla extract for about 2 minutes, until lighter in color and slightly puffed.
- Whisk in the vegetable oil and milk until smooth. Add the flour, baking powder, and salt, mixing only until a smooth batter forms.
- Gently fold half of the whipped egg whites into the yolk batter, then fold in the remainder until no streaks remain. Divide the batter evenly between the prepared tins.
- Bake for 35 to 40 minutes, until a toothpick inserted into the center comes out clean. Immediately invert the cakes, still in their tins, onto a wire rack and cool completely.
- Make the filling: Whip the double cream, icing sugar, and 1 tablespoon vanilla extract in a chilled bowl until firm peaks form. Do not overwhip.
- Remove the cooled cakes from the tins, level the domed tops, and slice each cake horizontally to make 4 layers. Place the first layer in an 8-inch springform or loose-bottom tin, spread with one-third of the whipped cream, and repeat with the next 2 layers. Finish with the fourth cake layer on top.
- Chill the assembled cake for at least 1 hour to firm up.
- Make the Swiss meringue just before decorating: Bring a saucepan of water to a gentle simmer. Combine the egg whites, 300 g sugar, and salt in a heatproof bowl set over the simmering water, ensuring the bowl does not touch the water. Stir continuously until the sugar is fully dissolved and the mixture reaches about 71°C.
- Transfer the warm egg-white mixture to a stand mixer and whip on high until stiff, glossy peaks form. Add 2 teaspoons vanilla extract and mix briefly.
- Remove the chilled cake from the tin and place it on a cake board or serving plate. Cover the top and sides generously with meringue, using a spatula to create swoops and peaks.
- Toast the meringue with a kitchen blowtorch until golden in spots. Serve cold or let stand at room temperature for 15 to 20 minutes before slicing.
Notes
Ingredients You’ll Need
Here’s everything broken down by component. Nothing fancy — just good quality basics that work together beautifully.
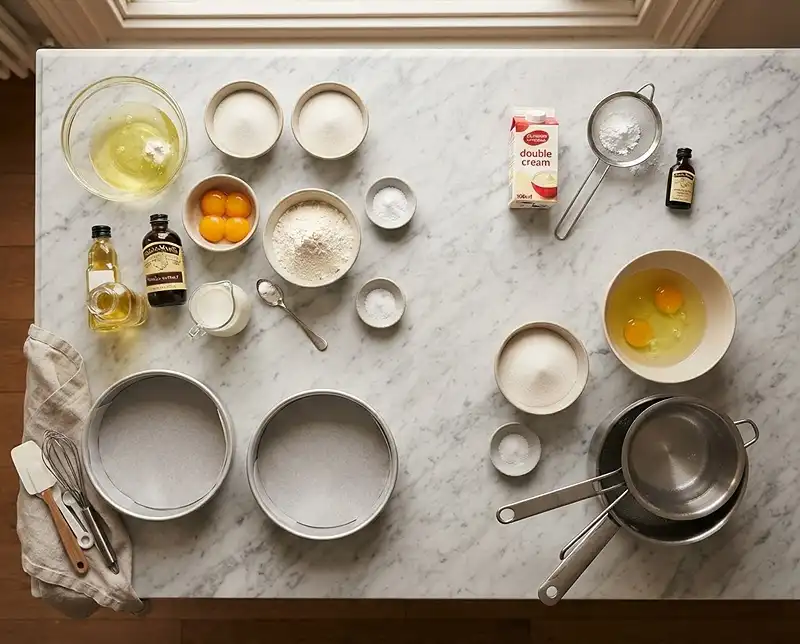
For the Cake Layers
| Ingredient | Amount |
|---|---|
| Large egg whites | 6 |
| Cream of tartar | 1/2 teaspoon |
| Granulated sugar (for whites) | 125 g |
| Large egg yolks | 6 |
| Granulated sugar (for yolks) | 125 g |
| Vanilla extract | 1 tablespoon |
| Vegetable oil | 80 ml |
| Whole milk | 100 ml |
| Plain flour | 200 g |
| Baking powder | 1 teaspoon |
| Salt | 1/4 teaspoon |
For the Whipped Cream Filling
| Ingredient | Amount |
|---|---|
| Double cream | 1 litre |
| Icing sugar | 200 g |
| Vanilla extract | 1 tablespoon |
For the Swiss Meringue
| Ingredient | Amount |
|---|---|
| Large egg whites | 6 |
| Granulated sugar | 300 g |
| Salt | 1/4 teaspoon |
| Vanilla extract | 2 teaspoons |
How to Make This Vanilla Meringue Cake
This recipe has a few components, but don’t let that put you off. Take it step by step and it’s completely manageable — even for a first-time layer cake baker.
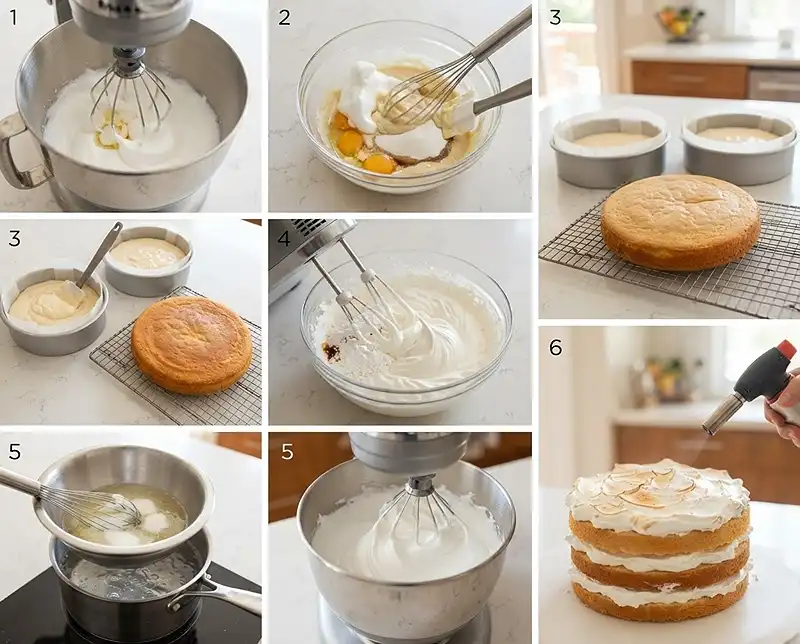
Step 1: Bake the Cake Layers
Pre-heat your oven to 180C. Line two 8-inch cake tins with circles of baking paper at the bottom — don’t grease the sides. This helps the chiffon batter climb up the tin as it bakes.
In a large bowl, whip the egg whites with the cream of tartar. Once foamy, slowly pour in the first 125 g of sugar while still whipping. Keep going until you have stiff, glossy peaks. Set this aside.
In a separate large bowl, whip the egg yolks, the second 125 g of sugar, and the vanilla extract together until the mixture lightens in colour and puffs up slightly. This should take about 2 minutes.
Pour in the oil and milk and whisk until smooth. Add the flour, baking powder, and salt, then mix just until a smooth batter forms — don’t overwork it.
Fold in half of the whipped egg whites gently, then add the rest and fold until no streaks remain. Pour the batter evenly between your two tins.
Bake for 35 to 40 minutes, until a toothpick inserted in the centre comes out clean. As soon as they’re out of the oven, flip them upside down onto a wire rack — still in the tin. Leave them to cool completely this way. This step prevents the layers from sinking.
Step 2: Make the Whipped Cream Filling
Once the cakes are fully cooled, combine the double cream, icing sugar, and vanilla in a large bowl. Whip everything together just until you reach firm peaks.
Don’t over-whip or it’ll turn grainy. You want it thick enough to hold its shape between the layers but still smooth and luscious.
Step 3: Assemble the Cake
Remove the cooled cakes from their tins and level off the domed tops with a serrated knife. Then slice each cake horizontally in half, giving you four even layers in total.
Grab a springform or loose-bottom 8-inch tin — this is your best friend during assembly. Place the first cake layer inside, then spread a third of the whipped cream over it evenly.
Repeat with the second and third layers and remaining cream, finishing with the fourth cake layer on top. No cream on top at this stage — that’s what the meringue is for.
Pop the whole thing in the fridge for at least an hour. This lets everything set up and makes the cake much easier to handle when you add the meringue.
Step 4: Make the Swiss Meringue
Make the meringue right before you’re ready to decorate. Don’t prep it ahead — it needs to go straight onto the cake while it’s still glossy and spreadable.
Bring a pot of water to a gentle simmer. In a heatproof bowl, combine the egg whites, sugar, and salt. Place the bowl over the simmering water, making sure the bottom of the bowl doesn’t touch the water.
Stir the mixture continuously as it heats. You’ll know it’s ready when you can rub a little between your fingers and feel no graininess — the sugar has fully dissolved.
Transfer immediately to a stand mixer bowl and whip on high speed with the whisk attachment. Keep going until you have stiff, glossy peaks. Add the vanilla and give it one last mix.
Step 5: Decorate and Toast
Take the chilled cake out of the tin and place it on a cake board or serving plate. Pile on the meringue generously — over the top and down the sides.
Use a spatula to create swoops and peaks. Go as dramatic or as minimal as you like here. The meringue is very forgiving and loves to look fancy with barely any effort.
Using a kitchen blowtorch, toast the meringue all over until golden in spots. Work in slow, circular motions for an even finish. Stand back and admire your work — this cake is stunning.
Expert Tips for the Best Results
Getting the Chiffon Layers Right
Flipping the cakes upside down to cool is non-negotiable. It keeps the structure light and stops the layers from collapsing under their own weight. Trust the process.
Use room temperature eggs throughout. Cold eggs don’t whip as well, and you need those whites to reach their full volume for the fluffy texture this vanilla meringue cake is known for.
Whipped Cream Tips
Keep your bowl and beaters cold before whipping the cream — pop them in the freezer for 10 minutes beforehand. Cold equipment helps the cream whip faster and hold its shape longer.
If you’re making this on a warm day, the chilling step between assembly and meringue is especially important. A firm, cold cake is much easier to coat cleanly.
Meringue Troubleshooting
If your meringue isn’t reaching stiff peaks, the bowl might have traces of grease. Any fat will prevent egg whites from whipping properly — wipe the bowl down with a little vinegar or lemon juice before you start.
No blowtorch? You can carefully place the meringue-coated cake under a hot grill for a minute or two. Watch it closely — it goes from golden to burnt very quickly under a grill.
Variations to Try
Swap the vanilla in the meringue for a teaspoon of almond extract for a subtle, nutty twist that pairs beautifully with the cream filling.
Add a layer of fresh berries between the cake and cream for a fruity contrast. Strawberries, raspberries, or blueberries all work wonderfully and add a pop of colour when you slice in.
For a citrus spin, add the zest of a lemon or orange to the cake batter and whipped cream. It’s a bright, refreshing variation that feels perfect for spring and summer gatherings.
Craving more cosy baking inspiration? This easy vanilla meringue cake recipe pairs beautifully with a warm mug of homemade banana coffee — an underrated combination worth trying.
Storage Instructions
Because of the whipped cream filling and meringue topping, this cake needs to stay chilled. Here’s how to store it properly and reduce any waste.
| Storage Method | Duration | Notes |
|---|---|---|
| Refrigerator (whole cake) | Up to 3 days | Cover loosely with cling film or a cake dome |
| Refrigerator (sliced) | Up to 2 days | Press cling film directly onto cut surfaces |
| Freezer | Not recommended | Meringue and whipped cream do not freeze well |
Reheating and Serving Tips
This cake is served cold or at room temperature — no reheating needed. If it’s been in the fridge, let it sit out for 15 to 20 minutes before slicing for the best texture.
The toasted meringue will soften slightly after a day in the fridge but still tastes wonderful. If you want to refresh the look, a quick touch-up with the blowtorch works perfectly.
No-Waste Kitchen Ideas
Any leftover cake scraps from levelling can be crumbled and layered into a trifle with leftover whipped cream and berries. Waste nothing, enjoy everything.
If you have extra whipped cream, it keeps in the fridge for a day and is incredible on a classic homemade Orange Julius — creamy, citrusy, and completely irresistible.
Frequently Asked Questions
Can I make the cake layers ahead of time?
Yes, absolutely. Bake the cake layers a day in advance, let them cool completely, then wrap them tightly in cling film and store at room temperature overnight. Assemble and add the meringue on the day you plan to serve.
Can I use a different type of cream?
Double cream (heavy cream) is essential here because of its high fat content — it whips up thick and stable. Single cream or light cream won’t hold the structure needed between the layers.
Do I need a blowtorch for the meringue?
A blowtorch gives the best control and finish, but it’s not strictly essential. You can place the finished cake under a hot grill for 1 to 2 minutes to toast the meringue — just watch it very carefully as it can burn quickly.
Why did my meringue turn out runny?
The most common culprit is fat in the bowl or on the beaters. Even a tiny trace of grease or egg yolk prevents egg whites from whipping to stiff peaks. Wipe down your equipment with a little lemon juice or vinegar before starting to prevent this.
Can I make this easy vanilla meringue cake recipe in a different tin size?
You can use 9-inch tins, but the layers will be slightly thinner and the bake time will be shorter — check from 28 to 30 minutes. Keep the springform tin for assembly the same size as your cake tins for the neatest result.
Final Thoughts
This vanilla meringue cake recipe is one of those bakes that earns you serious compliments without requiring you to be a professional pastry chef. The steps are clear, the results are stunning, and every single bite is worth it.
Whether you’re making it for a birthday, a celebration, or just because it’s Tuesday and you deserve something beautiful — this cake delivers every time.
Give this easy vanilla meringue cake recipe a go, and when you do, come back and leave a comment below telling me how it turned out. I’d love to hear about it.
And if you make it, please share it on Pinterest — a cake this gorgeous deserves to be seen!