
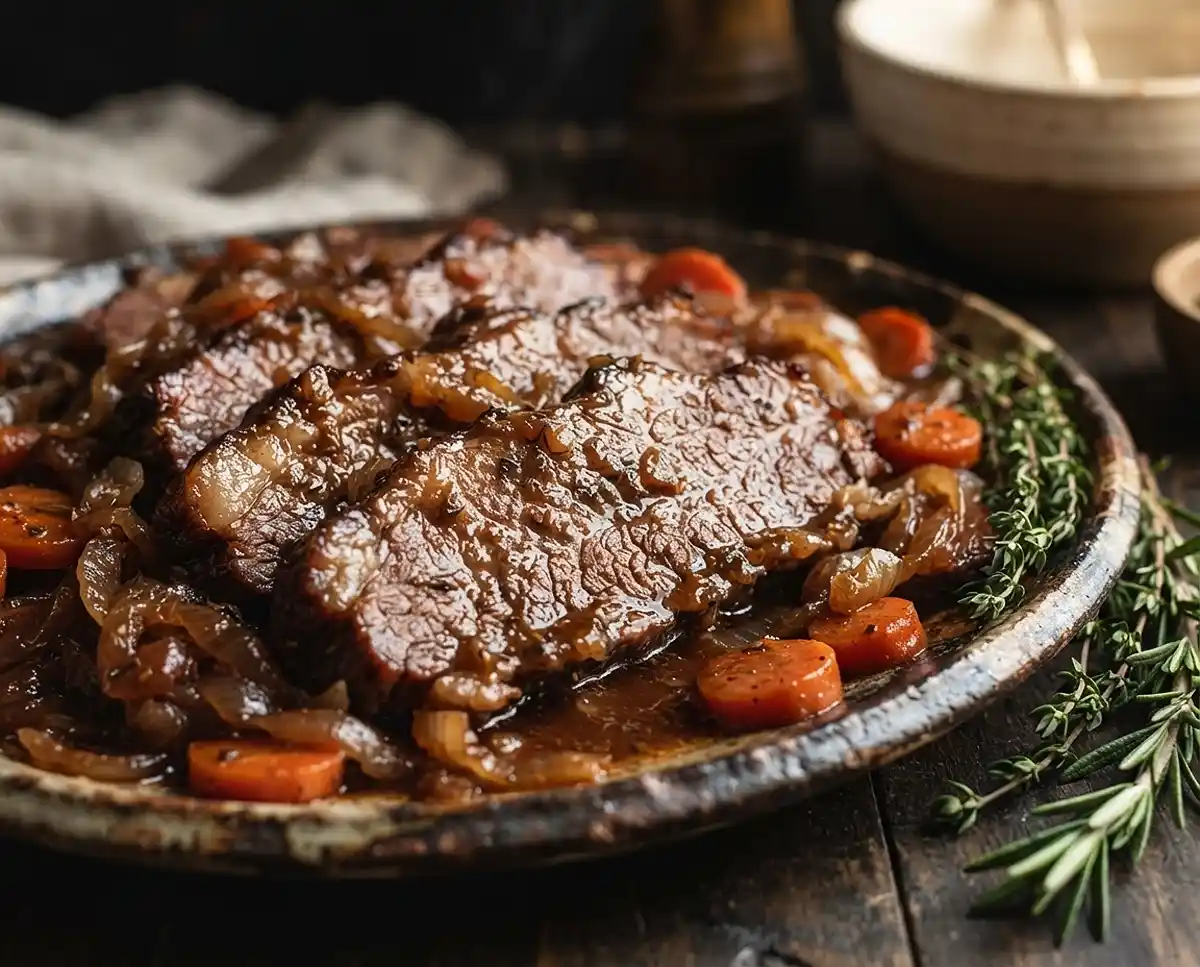
This Joan Nathan brisket recipe braises a tough cut low and slow in red wine until it’s fall-apart tender, rich, and perfect for a cozy family dinner.
My grandma used to say a good brisket recipe is basically a slow cooker with better PR. This Joan Nathan brisket recipe is the one I go back to every single time I need Sunday dinner to feel like a hug. It’s humble ingredients, one pot, and a whole lot of patience doing the heavy lifting for you.
Table of Contents
Why You’ll Love This Brisket Recipe
This brisket recipe takes an inexpensive, tough cut of beef and turns it into something silky and deeply savory using nothing fancier than onions, wine, and time. It’s a one-pot, mostly hands-off dinner, which means your oven does the real work while you do literally anything else.
It’s also the kind of dish that gets better as it sits, so it’s basically begging you to make it a day ahead.
If you love classic beef brisket or a Lipton onion soup brisket recipe, this one will feel familiar too.
This version just leans a little more old-world, with red wine and fresh herbs standing in for a soup packet.
A Little Brisket Backstory
Brisket has been the backbone of Ashkenazi Jewish cooking for generations, mostly because it was the cut families could actually afford. Cookbook author Joan Nathan has spent decades collecting recipes like this one.
Her work is basically a love letter to how a humble roast became a holiday centerpiece. If you want to go down that rabbit hole, Joan Nathan’s PBS food profile is a fun read on how she got there.
What I love about this particular brisket is that it doesn’t try too hard. No rubs, no smoker, no twelve-hour vigil. Just a Dutch oven, some wine, and a low oven doing what low ovens do best.
What You’ll Need for This Joan Nathan Brisket Recipe
Here’s the quick rundown before we get into it. This is a braised, oven-baked brisket recipe (not smoked), made in one pot, with a wine-and-vegetable gravy that basically makes itself while the meat cooks.
It works with a whole brisket, a shoulder roast, or a chuck pot roast, so you’ve got flexibility depending on what your butcher has that day. And yes, it reheats beautifully, which honestly might be the best part.
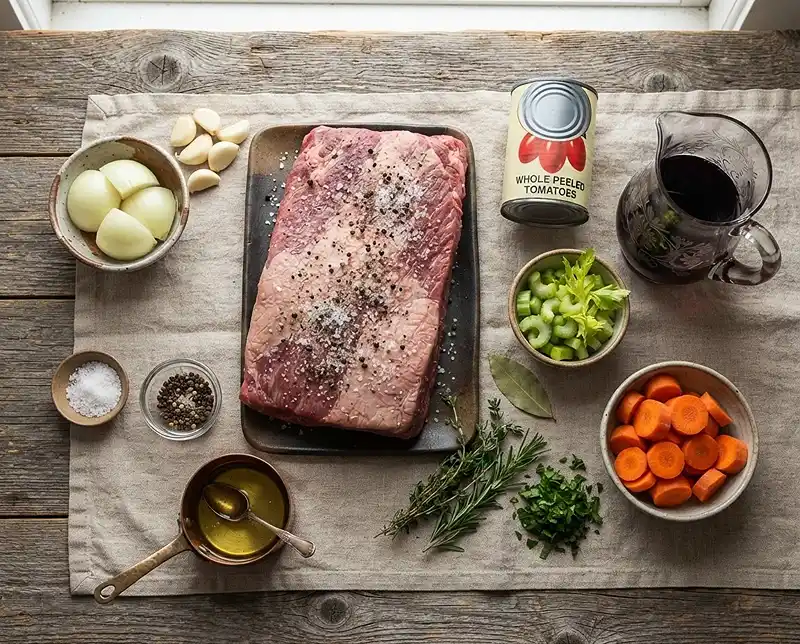
Ingredients
| The Meat and Seasoning | ||
|---|---|---|
| Whole brisket, shoulder roast, or chuck pot roast | 5 pounds | One whole piece |
| Salt | 2 teaspoons | Plus more to taste |
| Freshly ground pepper | To taste | Don’t be shy with it |
| Garlic clove | 1, peeled | You’ll rub this right onto the meat |
| Vegetable oil | 2 tablespoons | For searing |
| The Braising Liquid and Aromatics | ||
| Onions, peeled and diced | 3 onions | The foundation of the whole gravy |
| Canned tomatoes, undrained | One 10-ounce can | Juice included |
| Red wine | 2 cups | Something you’d actually drink |
| Celery with leaves, chopped | 2 stalks | Leaves add extra flavor |
| Bay leaf | 1 | |
| Fresh thyme | 1 sprig | |
| Fresh rosemary | 1 sprig | |
| The Finishing Touches | ||
| Chopped parsley | 1/4 cup | Added near the end |
| Carrots, peeled and sliced on the diagonal | 6 to 8 carrots | Cut diagonally for prettier slices |
How to Make This Brisket Recipe, Step by Step
Okay, deep breath. This looks like a lot of steps, but it’s really just sear, layer, and wait. Let’s go through it together.
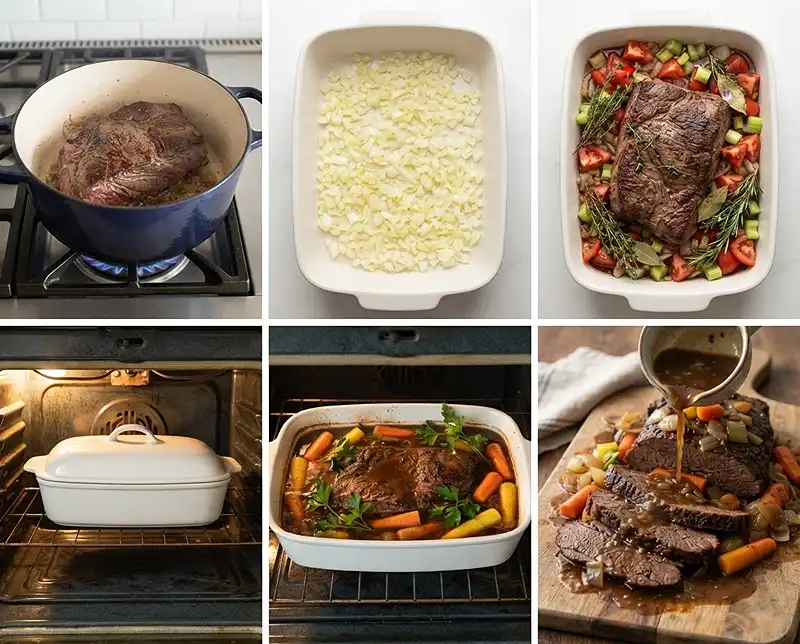
Step 1: Get the Oven and the Meat Ready
Preheat your oven to 325°F (160°C). While that’s warming up, pat your brisket dry with paper towels. This matters more than it sounds like it should, because a wet surface won’t brown properly.
Sprinkle the meat all over with the salt and pepper, then rub it with the peeled garlic clove like you’re giving it a little massage. It’s a small step, but it perfumes the whole roast.
Step 2: Sear the Brisket
Heat the vegetable oil in a Dutch oven or large skillet over medium-high heat. Add the brisket and sear it on both sides until you get a deep golden-brown crust, then pull it off the heat.
Don’t rush this part. That crust is where a huge chunk of the flavor in this brisket recipe comes from, and it only happens if the pan is actually hot.
Step 3: Build the Braise
Scatter the diced onions across the bottom of a large casserole dish or Dutch oven. Set the seared beef right on top, fatty side up, like you’re tucking it into bed on a pillow of onions.
Pour in the tomatoes with their juices, the red wine, the chopped celery and its leaves, the bay leaf, thyme, and rosemary. That’s your gravy base, and it’s going to smell incredible almost immediately.
Step 4: The Long, Slow Bake
Cover the pot and bake for about 3 hours, basting the meat with the pan juices every so often. This is the part where patience pays off, so resist peeking too often.
After 3 hours, uncover the pot, stir in the parsley and carrots, and bake uncovered for about 30 more minutes, until the carrots are tender. To check if the brisket is done, stick a fork into the flat, leaner end. If it pulls back out with just a light tug, that’s what cooks call “fork tender,” and that’s exactly what you’re after.
Step 5: Rest, Slice, and Serve
Here’s where you’ve got a choice, and honestly, the make-ahead route is my favorite. If you’ve got the time, refrigerate the whole brisket right in its pan juices overnight so the fat rises and firms up, making it much easier to skim off later.
If you’re refrigerating overnight, reheat your oven to 350°F (175°C) the next day. Trim the visible fat from the cold meat, place it fat-side down on a cutting board, and find the grain, meaning the direction the muscle fibers run.
Slice across that grain with a sharp knife, lay the slices in a roasting pan, skim the fat from the gravy, warm the gravy over medium heat, then pour it over the meat. Cover and reheat in the oven for 45 minutes.
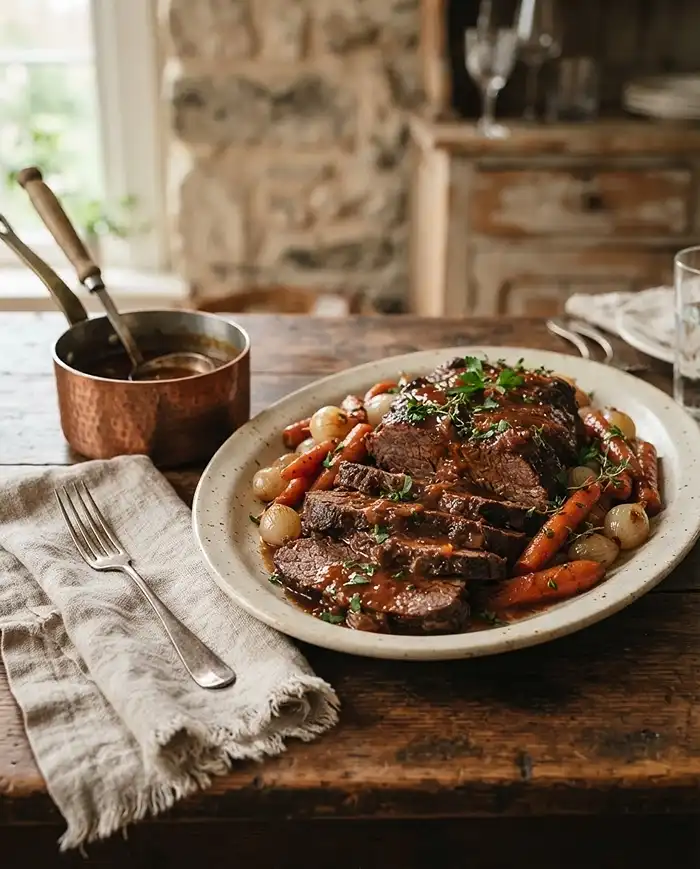
If you’re serving the brisket the same day, trim the fat, slice across the grain the same way, and arrange the slices on a platter. Skim the fat from the gravy and pour it right over the top. Some people like to strain the gravy for a smoother sauce, but I always keep the onions in, because honestly, they’re the best bite on the plate.
Expert Tips, Variations, and Troubleshooting
My Best Tips for This Brisket Recipe
Buy a brisket with a decent fat cap. That fat is what bastes the meat from above while it braises, and you’ll trim most of it off before serving anyway, so it’s doing all work and no harm.
Also, make this a day ahead whenever you can. Overnight chilling doesn’t just make slicing easier, it also lets the flavors settle and deepen, which is true of pretty much every braised dish ever invented.
Variations Worth Trying
Swap the red wine for a dry white wine or even beef broth if you want a lighter, less winey gravy. Want more veggies? Toss in some sliced parsnips or a few peeled potatoes alongside the carrots for the last hour.
If you love a smokier version, a Traeger brisket flat recipe is a fun weekend project for a totally different vibe, though it’s a much longer cook than this braised version.
Troubleshooting a Tough or Dry Brisket
If your brisket comes out tough, it almost always just needed more time, not less. Brisket is full of connective tissue that needs long, slow, moist heat to break down into that melt-in-your-mouth texture.
If it seems dry, check that your pot was actually covered for the first 3 hours, since escaping steam dries things out fast. And always slice against the grain. Slicing with the grain makes even a perfectly cooked brisket feel stringy and tough.
A Quick Note on Doneness and Safety
Braising takes this brisket well past any minimum safe temperature, but if you’re ever unsure, a food thermometer is your best friend.
The USDA has a helpful overview of safe cooking temperatures for beef roasts if you want the full breakdown.
If you’re shopping for the brisket itself, the USDA also has a nice explainer on what those USDA grade stamps actually mean, which is handy the next time you’re standing in front of the meat case looking confused.
Storage, Reheating, and No-Waste Ideas
This brisket recipe is basically designed for leftovers, so don’t feel bad about the extra portions. Here’s how to keep everything tasting just as good on day three as it did on day one.
Storage Table
| Storage Method | How Long It Lasts | Notes |
|---|---|---|
| Refrigerator | 3 to 4 days | Keep the meat submerged in its gravy in an airtight container |
| Freezer | Up to 3 months | Freeze sliced meat with gravy in a freezer-safe container |
| Reheating on the stove | 10 to 15 minutes | Warm gently over medium-low heat, covered |
| Reheating in the oven | 30 to 45 minutes at 325°F | Best for larger portions, covered with foil |
No-Waste Kitchen Ideas
Don’t toss that leftover gravy. Strain it and toss it with egg noodles for an instant second meal, or use it as a base for a quick beef and vegetable soup. Shredded leftover brisket also makes a fantastic sandwich filling piled onto crusty bread with a little extra gravy spooned over the top.
If you’ve got leftover cooked carrots and onions, blitz them with a little broth for a simple soup instead of letting them go soft in the fridge. Nothing in this brisket recipe has to go to waste.
Frequently Asked Questions
What’s the best cut of meat for this Joan Nathan brisket recipe?
A whole brisket is traditional, but a shoulder roast or chuck pot roast works just as well since they all respond beautifully to long, slow braising. Look for a piece with a good fat cap for the most flavorful results.
Can I make this brisket recipe a day ahead?
Yes, and honestly it’s better that way. Refrigerating the brisket overnight in its own gravy makes the fat easier to skim and lets the flavors deepen even further.
Why is my brisket tough after cooking?
Tough brisket almost always needs more time in the oven, not less, since the connective tissue takes hours to break down. Slicing against the grain also makes a huge difference in how tender each bite feels.
Can I substitute the red wine in this recipe?
Yes, a dry white wine or unsalted beef broth both work well if you’d rather skip the red wine. The gravy will taste slightly lighter but still rich and savory.
How long does leftover brisket last in the fridge?
Leftover brisket keeps for 3 to 4 days in the refrigerator when stored in an airtight container with its gravy. For longer storage, freeze it for up to 3 months.
Conclusion
This Joan Nathan brisket recipe is proof that the best comfort food doesn’t need a long ingredient list, just good technique and a little patience. Give it a try this weekend and see for yourself.
If you loved this brisket, I’d be so happy if you pinned it on Pinterest so you can find it again next time you need a cozy dinner win. And if you make it, come back and let me know how it turned out. You might also enjoy these enoki beef rolls for a totally different beef night.
