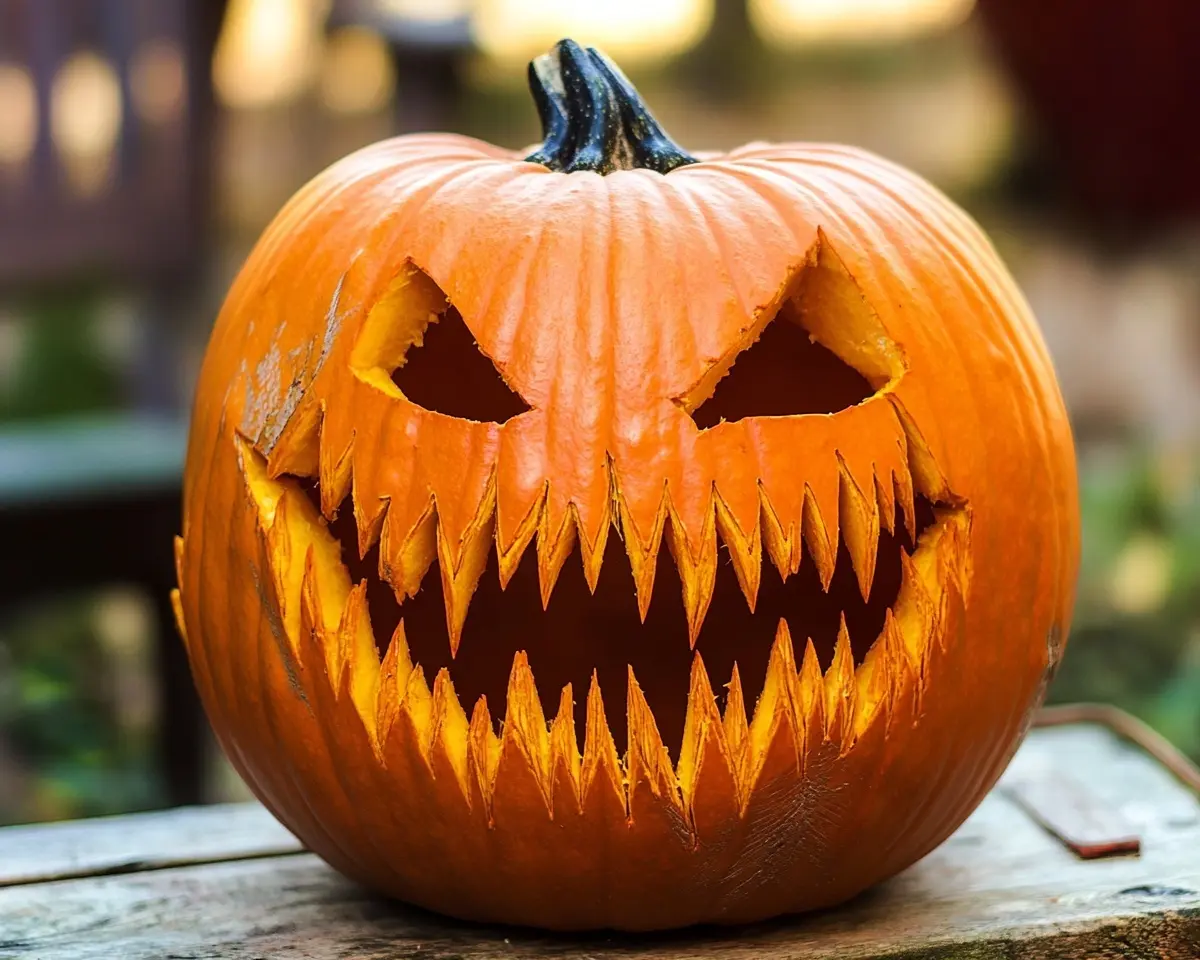
October transforms ordinary pumpkins into spine-chilling Scary Pumpkin Carving masterpieces. However, creating truly scary pumpkin carving designs requires more than random cuts and hope. This comprehensive guide reveals professional techniques that transform basic gourds into neighborhood nightmares.
Well, let me tell you about last Halloween when my “friendly” jack-o’-lantern accidentally terrified the mailman. Therefore, I learned that scary pumpkin carving demands strategic planning and proper execution.
Jump to
Easy Pumpkin Carving
Why Scary Pumpkin Carving Dominates Halloween
Scary pumpkin designs create lasting impressions on trick-or-treaters. Moreover, these frightening faces become conversation starters throughout the season. Additionally, mastering scary carving techniques elevates your Halloween decorating game significantly.
| Design Element | Fear Factor | Difficulty Level |
|---|---|---|
| Jagged teeth | High | Easy |
| Hollow eyes | Medium | Easy |
| Twisted expressions | High | Intermediate |
| Multiple faces | Very High | Advanced |
Consequently, scary pumpkins attract more attention than cute pumpkin carving alternatives. Furthermore, these designs photograph beautifully for social media sharing.
Essential Tools for Frightening Pumpkin Art
Professional scary pumpkin carving requires specific tools. Therefore, gather these items before starting your project:
Basic Carving Kit:
- Sharp paring knife
- Serrated carving knife
- Ice cream scoop
- Dry erase marker
- LED candles or battery lights
Advanced Tools:
- Dremel rotary tool
- Clay sculpting tools
- Fine-tip carving saws
- Pumpkin drill bits
Additionally, newspaper protects work surfaces from pumpkin debris. Moreover, keep paper towels nearby for frequent cleanup.
Oops! Many beginners skip the scooping step entirely. However, thorough cleaning creates better light distribution and longer-lasting designs.
Design 1: The Nightmare Grin
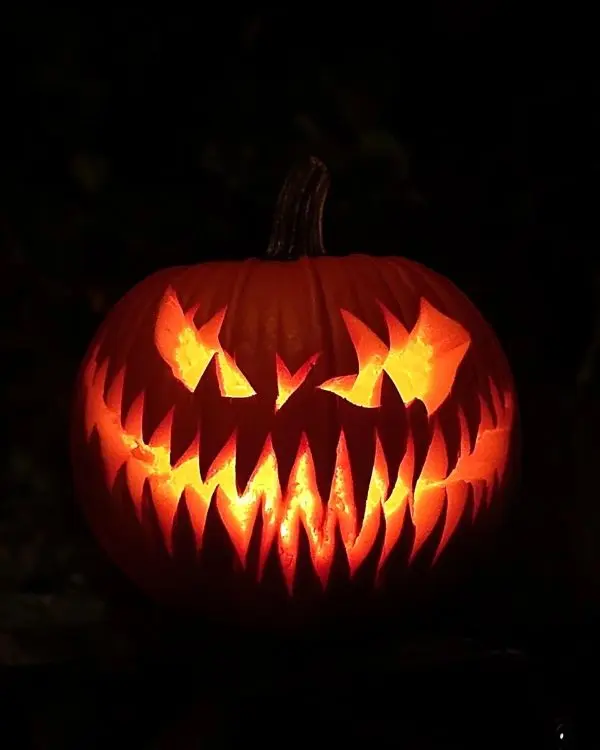
This razor-sharp smile creates instant terror. First, draw an exaggerated curved mouth stretching ear to ear. Next, add irregular triangular teeth pointing in different directions.
Last October, my neighbor’s kids refused to approach our porch because of this design. Therefore, the Nightmare Grin proves its effectiveness immediately.
Step-by-Step Instructions:
- Cut the top opening at a 45-degree angle
- Remove all pulp and seeds thoroughly
- Mark the mouth line with dry erase marker
- Carve the basic smile shape first
- Add jagged teeth using upward cuts
Furthermore, varying tooth sizes creates more realistic intimidation. Additionally, leaving some teeth partially attached adds movement when lit.
You know what makes this design particularly effective? The asymmetrical tooth arrangement mimics actual predator dentition patterns.
Design 2: Hollow Soul Eyes
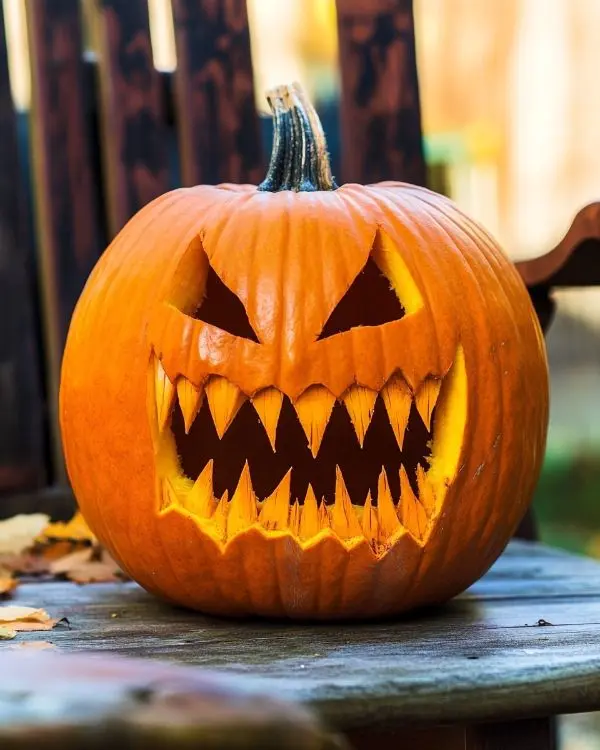
Empty eye sockets suggest supernatural possession. Moreover, this technique works perfectly for easy pumpkin carving beginners seeking maximum impact.
Create large, irregular oval shapes for eye openings. Subsequently, remove additional pumpkin flesh around the edges for depth. Finally, add small tears or cracks extending downward.
| Eye Shape | Emotional Impact | Carving Time |
|---|---|---|
| Perfect circles | Surprised ghost | 15 minutes |
| Irregular ovals | Tortured soul | 25 minutes |
| Triangular | Demonic presence | 30 minutes |
Additionally, carving different sized eyes creates psychological unease. Therefore, asymmetry enhances the scary factor significantly.
Design 3: The Screaming Banshee
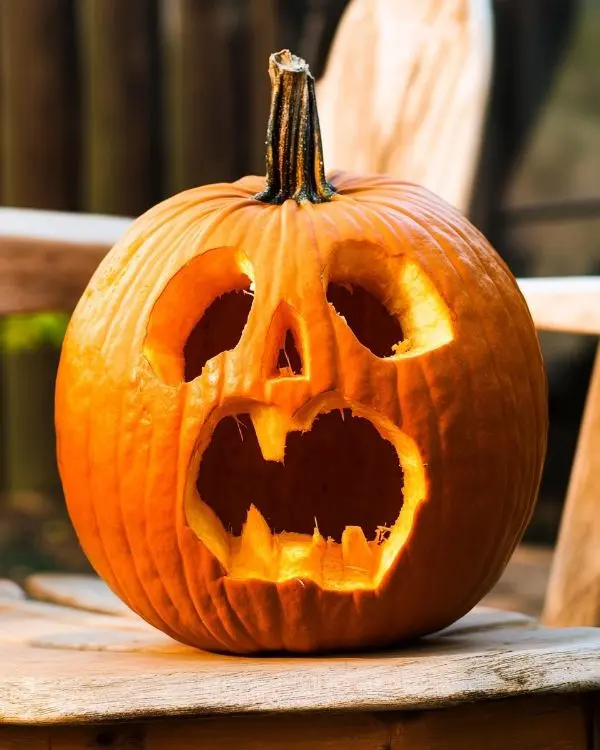
This design captures eternal torment through facial expression. First, create an enormous oval mouth opening. Next, add worried eyebrows slanting upward dramatically.
Thomas Keller once mentioned that cooking requires understanding emotional responses to visual presentations. Similarly, scary pumpkin carving manipulates viewer emotions through exaggerated features.
Advanced Techniques:
- Carve varying depths for shadowing effects
- Add wrinkle lines around the mouth
- Create hollow cheek areas
- Include tear tracks down the sides
Man, oh man, this design sounds like actual screaming when wind passes through! Therefore, position it strategically near walkways for maximum effect.
Design 4: Multi-Face Madness
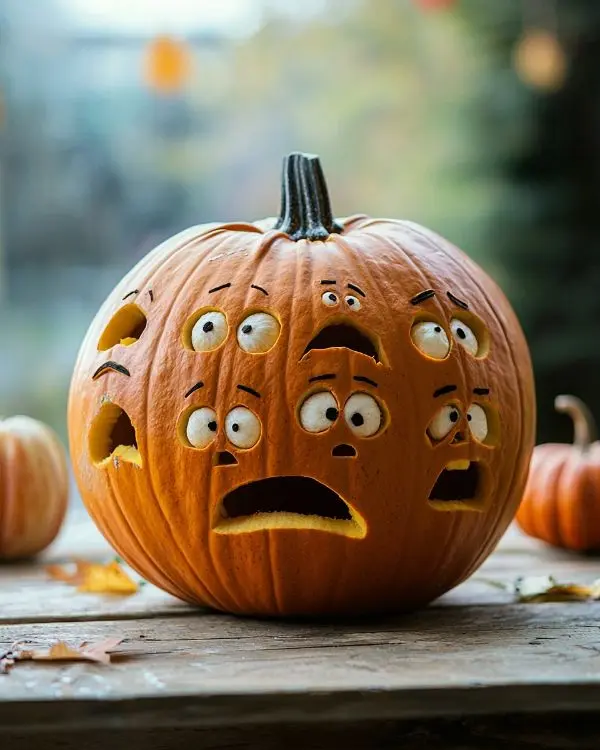
Multiple faces carved on one pumpkin create confusion and fear. Furthermore, this advanced technique showcases serious carving skills.
Plan three to four small faces around the pumpkin circumference. Subsequently, vary expressions from angry to terrified to confused. Finally, light each face separately using multiple LED sources.
My teenage daughter attempted this design last year but created more of a “confused potato” look. However, her mistake taught us that planning face placement prevents overcrowding.
Pro Tips for Success:
- Sketch all faces before carving begins
- Maintain consistent sizing across faces
- Use different expression types
- Position faces at varying heights
Additionally, rotating the pumpkin reveals new faces to viewers. Therefore, this design provides continuous entertainment value.
Design 5: The Rotting Zombie
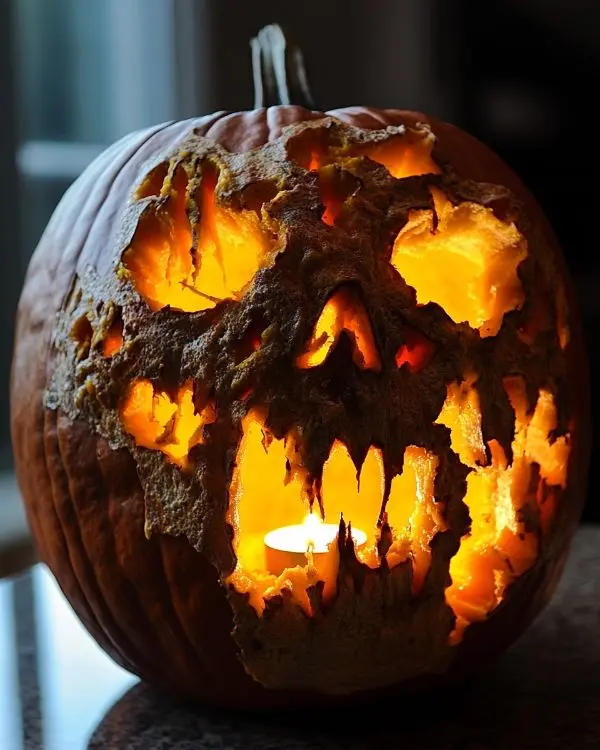
Decay effects transform ordinary pumpkins into undead horrors. Moreover, this technique requires minimal carving skills while delivering maximum fear.
Begin with basic triangle eyes and crooked mouth. Next, create irregular holes throughout the surface representing rot spots. Finally, partially carve through walls without completely removing sections.
Funny pumpkin carvings rely on humor, but zombie designs depend on disgust. Therefore, embrace imperfection and asymmetry completely.
Have you ever wondered why zombie aesthetics remain popular across generations? The answer lies in primal fears about death and decay.
Advanced Scary Pumpkin Carving Techniques
Professional scary pumpkin carving incorporates sophisticated methods. Julia Child emphasized that mastering basics enables creative exploration. Similarly, advanced pumpkin techniques build upon fundamental skills.
Depth Carving Method:
Remove varying amounts of pumpkin flesh to create dimensional effects. Consequently, shallow areas appear darker while deep cuts glow brighter. Additionally, this technique adds realistic shadowing.
Texture Integration:
Leave some pumpkin skin intact while carving surrounding areas. Therefore, textural contrast enhances visual interest significantly. Moreover, partial removal creates subtle detail work.
Multiple Light Sources:
Different colored LED lights create mood variations. Furthermore, positioning lights at various depths produces layered illumination effects.
Troubleshooting Common Scary Carving Problems
Even experienced carvers encounter challenges. However, most problems have simple solutions.
Problem: Design looks more silly than scary
Solution: Exaggerate all features dramatically. Additionally, avoid perfectly symmetrical arrangements.
Problem: Pumpkin collapses during carving
Solution: Choose firmer pumpkins initially. Moreover, carve conservatively around structural areas.
Problem: Lighting appears uneven
Solution: Remove additional flesh from thick wall areas. Furthermore, position lights strategically.
Let me tell you, my first scary pumpkin looked more like a surprised goldfish than a terrifying monster. Therefore, practice builds confidence and skill over time.
Preserving Your Scary Masterpiece
Carved pumpkins deteriorate quickly without proper care. However, several preservation methods extend display life significantly.
Daily Maintenance:
- Spray with diluted bleach solution
- Pat dry with paper towels
- Store in cool, dry location overnight
- Recut edges if they become slimy
Weather Protection: Cover during rain or snow. Additionally, bring indoors during extreme temperature fluctuations. Moreover, petroleum jelly on cut edges slows moisture loss.
| Preservation Method | Extra Days | Effort Level |
|---|---|---|
| Bleach spray | 3-5 days | Low |
| Petroleum jelly | 2-3 days | Medium |
| Refrigeration | 5-7 days | High |
Consequently, proper care keeps scary pumpkins frightening longer. Furthermore, preserved pumpkins maintain structural integrity better.
Safety Considerations for Scary Carving
Sharp tools and excited children create potential hazards. Therefore, establishing safety protocols protects everyone involved.
Essential Safety Rules:
- Adult supervision for children under 12
- Cut away from body always
- Maintain clean, dry work surface
- Use LED candles instead of flames
- Keep first aid supplies accessible
Additionally, rushing leads to accidents and poor results. Moreover, taking breaks prevents fatigue-related injuries.
Displaying Your Terrifying Creations
Strategic placement maximizes scary pumpkin impact. Furthermore, proper positioning enhances neighborhood reputation significantly.
Prime Locations:
- Front porch steps for maximum visibility
- Window sills with backlighting effects
- Garden pathways for surprise encounters
- Near motion sensors for animated scares
However, consider your audience carefully. Therefore, extremely scary designs might overwhelm young trick-or-treaters.
You know what works exceptionally well? Grouping multiple scary pumpkins creates a haunted pumpkin patch effect.
Expanding Your Scary Pumpkin Skills
Master carvers continuously develop new techniques. Additionally, studying horror movie makeup provides design inspiration. Moreover, attending local carving workshops builds community connections.
Next Level Challenges:
- Incorporate real pumpkin vines as hair
- Add fabric or mesh for ghostly effects
- Create moving parts with hidden mechanisms
- Design interconnected pumpkin scenes
Scary Pumpkin Carving Inspiration Sources
Drawing inspiration from various sources prevents repetitive designs. Moreover, studying different art forms enhances creative development.
Creative Sources:
- Classic horror movie monsters
- Gothic architecture details
- Medical anatomy illustrations
- Abstract expressionist paintings
- Nature’s own scary forms
Teaching Kids Scary Carving Basics
Children love creating their own monsters. However, age-appropriate modifications ensure safety and success.
Kid-Friendly Modifications:
- Use plastic carving tools exclusively
- Focus on large, simple shapes
- Emphasize fun over fear factor
- Provide plenty of guidance
Budget-Friendly Scary Carving Tips
Creating terrifying pumpkins doesn’t require expensive tools. Furthermore, many household items work perfectly for carving projects.
Money-Saving Alternatives:
- Kitchen knives instead of specialty tools
- Newspaper patterns instead of stencils
- Battery-powered tea lights for illumination
- Grocery store pumpkins versus farm purchases
Conclusion: Mastering the Art of Fear
Scary pumpkin carving combines artistic skill with psychological understanding. Therefore, successful designs manipulate viewer emotions through strategic visual elements. Moreover, practice develops both technical ability and creative confidence.
Remember that scary doesn’t always mean gory. Additionally, subtle psychological elements often prove more effective than obvious shock tactics. Furthermore, the best scary pumpkins tell stories through their expressions.
How to make a horror pumpkin?
To make a horror pumpkin, start by carving jagged, asymmetrical features like crooked teeth, hollow eye sockets, and twisted expressions. Use dim lighting, add fake blood or dark paint, and incorporate props like fake spiders or moss for an authentically terrifying look.
What is a scary pumpkin called?
A scary pumpkin is called a jack-o’-lantern when carved, though specific scary versions are often referred to as “horror pumpkins,” “spooky jack-o’-lanterns,” or “creepy carved pumpkins” depending on their frightening design and features
How to carve an angry pumpkin?
To carve an angry pumpkin, create a deep furrowed brow by carving diagonal lines above triangular or narrow eyes. Add a snarling mouth with jagged, uneven teeth and use angled cuts to create aggressive facial expressions that convey rage and menace
How to decorate a scary pumpkin?
To decorate a scary pumpkin, use black paint for shadowing, add fake blood or red paint drips, wrap it in cheesecloth for a ghostly effect, attach plastic spiders or snakes, and use dry ice for fog effects to create an authentically frightening display.
What is a spooky pumpkin?
A spooky pumpkin is a decoratively carved or painted pumpkin designed to create an eerie, frightening, or supernatural appearance for Halloween, featuring elements like ghostly faces, creepy expressions, or horror-themed designs that evoke fear and unease

