
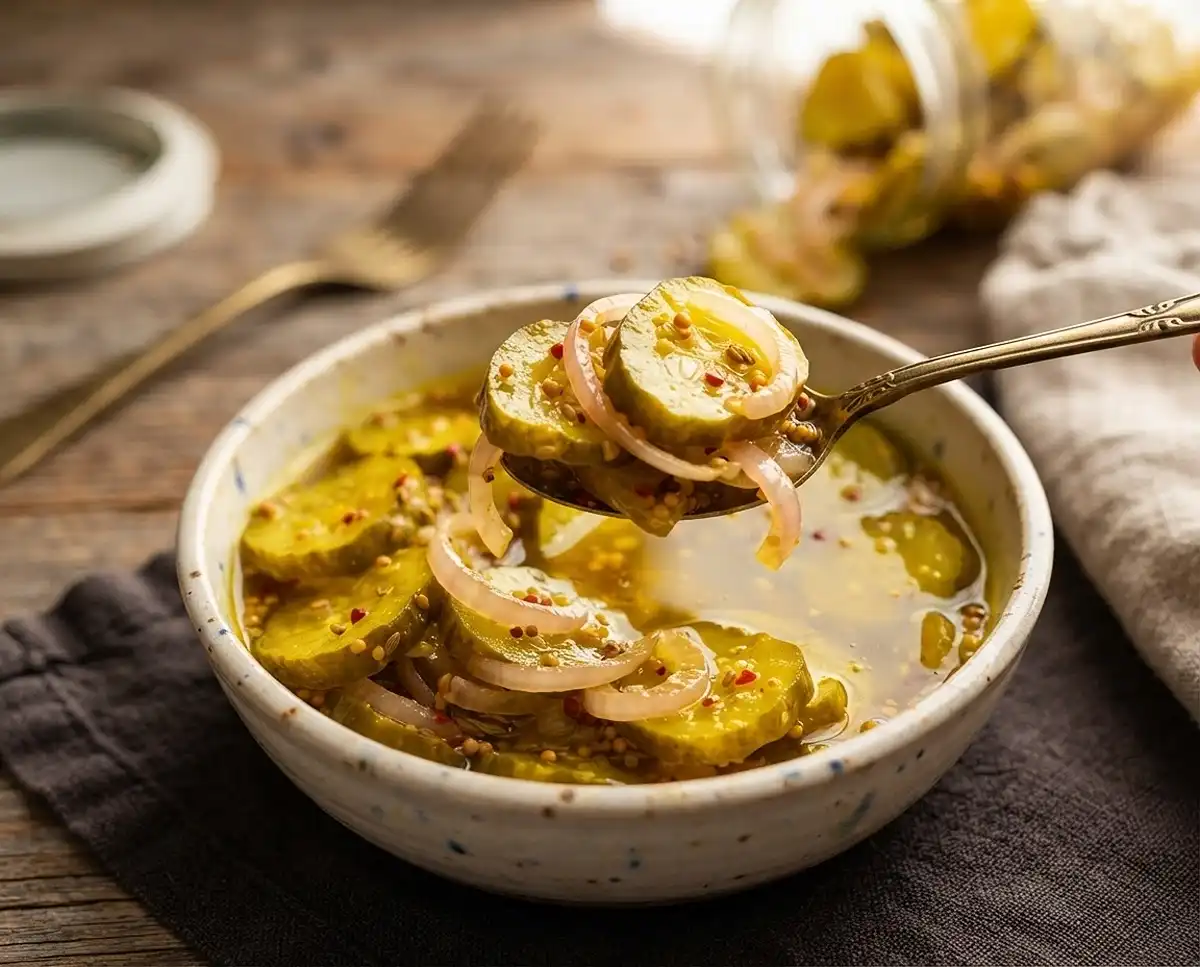
Okay, real talk — once you make homemade mount olive bread and butter pickles, store-bought just hits different. And not in a good way.
There’s something genuinely nostalgic about that sweet-tangy crunch. My grandma kept a jar on every table, and the second I nailed this recipe at home, I felt like I’d unlocked a family secret.
Table of Contents
What Makes This Recipe So Good
These classic bread and butter pickles deliver that iconic golden color, a perfectly balanced sweet-tangy brine, and a satisfying crunch in every bite.
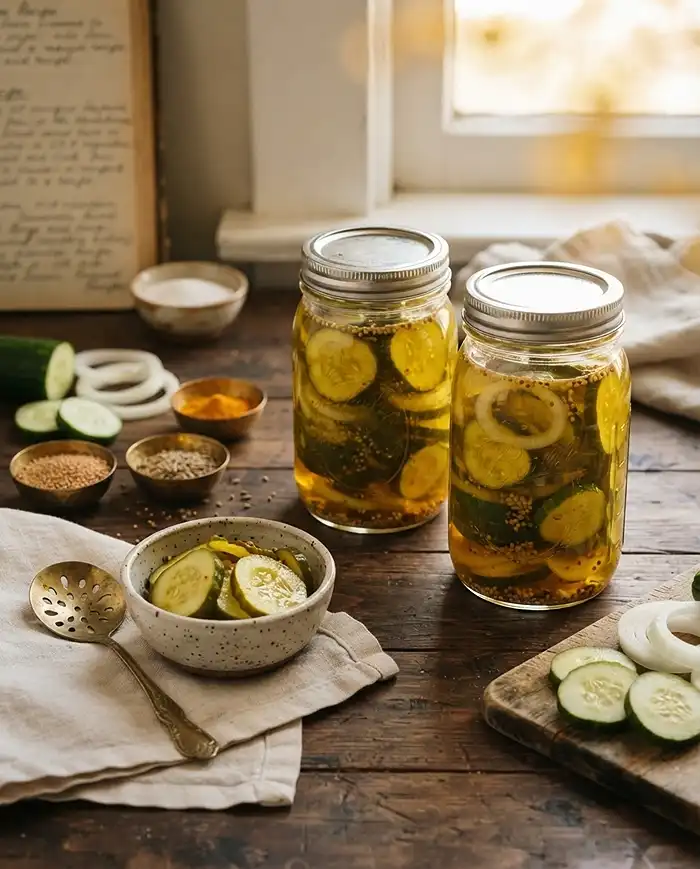
The recipe is built around the same flavor profile as your favorite store-bought version — turmeric for color, mustard seeds for depth, and a brine ratio that hits every note just right. Whether you go the refrigerator route or do a full water-bath can, this one’s a keeper.
Mount Olive Bread and Butter Pickles
Equipment
- Large bowl
- Colander
- Large pot
- Slotted spoon
- Clean sterilized jars
- Water-bath canner (optional)
Ingredients
For the Cucumbers and Salting
- 4 lbs Pickling cucumbers (Kirby), sliced into 1/4-inch rounds Kirby cucumbers stay crispier than regular ones
- 2 Medium onions, thinly sliced Yellow or white both work great
- ⅓ cup Pickling or kosher salt Do not use table salt — it clouds the brine
- Ice cubes Enough to cover; essential for keeping pickles firm
For the Brine
- 3 cups White vinegar (5% acidity) Standard white distilled vinegar works perfectly
- 2 cups Granulated sugar Bump to 2.5 cups if you like them sweeter
- 2 tablespoons Mustard seeds The classic bread-and-butter flavor signature
- 1 teaspoon Celery seeds Adds a subtle earthy depth
- 1 teaspoon Ground turmeric Gives that golden color, just like Mt. Olive
- ½ teaspoon Whole cloves Optional; adds warmth to the brine
- ½ teaspoon Ground ginger Optional; a small kick without overpowering the sweet notes
Instructions
- In a large bowl, toss the sliced cucumbers and onions together. Sprinkle over the pickling salt and mix well so every slice gets coated. Cover with a generous layer of ice cubes, set a plate on top with something heavy to weigh it down, and refrigerate for 3 to 4 hours. This pulls out excess water so your pickles stay crisp.
- After the salting time is up, dump the cucumbers and onions into a colander. Rinse them really well under cold running water to wash off the salt, then give them a good shake and let them drain fully. You want them as dry as possible before they hit the brine.
- In a large pot, combine the white vinegar, sugar, mustard seeds, celery seeds, and turmeric. Add cloves and ginger here too if you’re using them. Bring everything to a boil over medium-high heat, stirring until the sugar completely dissolves.
- Add the drained cucumber and onion slices to the hot brine and stir gently to distribute everything evenly. Bring it back to just a gentle simmer — do not let it fully boil, as a rolling boil will make the pickles mushy. Heat for just 2 to 3 minutes, until the cucumbers shift from bright green to a slightly more muted, olive-y color.
- Using a slotted spoon, pack the cucumber and onion slices tightly into clean, sterilized jars. Ladle the hot brine over the top, leaving about half an inch of headspace at the rim. Run a thin spatula or chopstick around the inside edge to pop any air bubbles, then wipe the rims clean with a damp cloth before sealing.
- For the refrigerator method, seal the jars and let them cool to room temperature, then refrigerate. They’ll be ready to eat in 24 hours and stay great for about 2 months. For shelf-stable canning, process sealed jars in a boiling water bath for 10 minutes, let them cool completely on a towel, check that the lids have sealed, and store in a cool, dark pantry.
Notes
Ingredients You’ll Need
Everything is grouped below so you can grab it all before you start. No mid-recipe scrambling required.
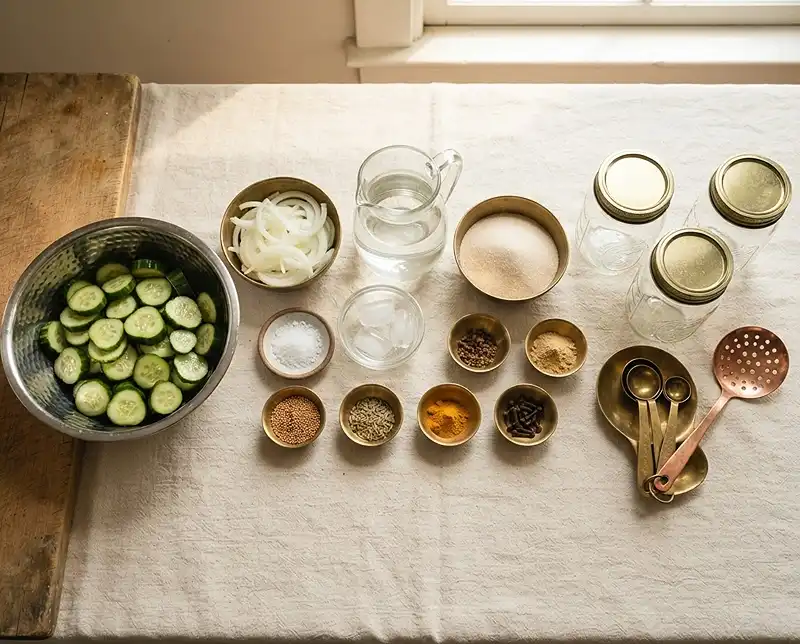
For the Cucumbers and Salting
| Ingredient | Amount | Notes |
|---|---|---|
| Pickling cucumbers (Kirby), sliced into 1/4-inch rounds | 4 lbs | Kirby cucumbers stay crispier than regular ones |
| Medium onions, thinly sliced | 2 | Yellow or white both work great |
| Pickling or kosher salt | 1/3 cup | Do not use table salt — it clouds the brine |
| Ice cubes | Enough to cover | Essential for keeping pickles firm |
For the Brine
| Ingredient | Amount | Notes |
|---|---|---|
| White vinegar (5% acidity) | 3 cups | Standard white distilled vinegar works perfectly |
| Granulated sugar | 2 cups | Bump to 2.5 cups if you like them sweeter |
| Mustard seeds | 2 tablespoons | The classic bread-and-butter flavor signature |
| Celery seeds | 1 teaspoon | Adds a subtle earthy depth |
| Ground turmeric | 1 teaspoon | Gives that golden color, just like Mt. Olive |
| Whole cloves (optional) | 1/2 teaspoon | Adds warmth to the brine |
| Ground ginger (optional) | 1/2 teaspoon | A small kick without overpowering the sweet notes |
How to Make Mount Olive Bread and Butter Pickles
Follow these steps and you’ll have jars of gorgeous, golden pickle chips ready to pop open. Take your time — the salting step is where most people rush, and it makes all the difference.
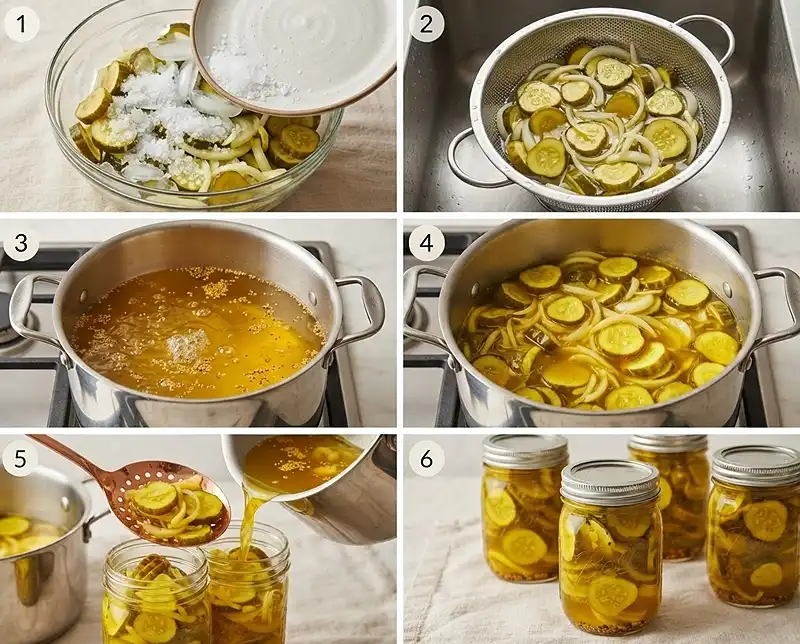
Step 1: Salt the Vegetables
In a large bowl, toss the sliced cucumbers and onions together. Sprinkle over the pickling salt and mix well so every slice gets coated.
Cover the whole thing with a generous layer of ice cubes, then set a plate on top with something heavy to weigh it down. Stick it in the fridge for 3 to 4 hours.
Why bother? This step pulls out excess water so your pickles stay crisp instead of going limp and sad in the jar. Don’t skip it.
Step 2: Rinse and Drain
After the salting time is up, dump the cucumbers and onions into a colander. Rinse them really well under cold running water to wash off the salt.
Give them a good shake and let them drain fully. You want them as dry as possible before they hit the brine — extra water just dilutes the flavor.
Step 3: Make the Brine
In a large pot, combine the white vinegar, sugar, mustard seeds, celery seeds, and turmeric. Add cloves and ginger here too if you’re using them.
Bring everything to a boil over medium-high heat, stirring until the sugar completely dissolves. Your kitchen is about to smell incredible. That vinegary, spiced steam is basically aromatherapy for pickle lovers.
The roughly 1.5-to-1 vinegar-to-sugar ratio here is exactly what gives mount olive bread and butter pickle chips that balanced sweet-tangy character you already love.
Step 4: Add the Vegetables
Add the drained cucumber and onion slices to the hot brine in the pot. Stir gently to distribute everything evenly.
Here’s the critical part: bring it back to just a gentle simmer. Do not let it fully boil. A full rolling boil will cook the cucumbers too much and you’ll end up with mushy pickles instead of that satisfying crunch.
Heat them for just 2 to 3 minutes, until the cucumbers shift from bright green to a slightly more muted, olive-y color. That’s your cue to move on.
Step 5: Pack the Jars
Using a slotted spoon, pack the cucumber and onion slices tightly into clean, sterilized jars. Then ladle the hot brine over the top, leaving about half an inch of headspace at the rim.
Run a thin spatula or chopstick around the inside edge to pop any air bubbles. Wipe the rims clean with a damp cloth before sealing — this matters a lot if you’re doing proper canning.
For a helpful overview of safe home canning practices, the National Center for Home Food Preservation’s pickling guide is the gold standard resource.
Step 6: Finish and Store
Refrigerator method: Seal the jars and let them cool to room temperature, then refrigerate. They’ll be ready to eat in 24 hours and stay great for about 2 months.
Shelf-stable canning: Process sealed jars in a boiling water bath for 10 minutes. Let them cool completely on a towel, then check that the lids have properly sealed before storing in a cool, dark pantry.
If you’re new to water-bath canning, it’s easier than it sounds — and totally worth learning. You can pair these pickles with everything from a classic burger to something unexpected like our Hawaiian bread French toast bake for a fun sweet-and-savory combo.
Expert Tips for Perfect Bread and Butter Pickles
Use the Right Cucumbers
Kirby or pickling cucumbers are non-negotiable here. Regular slicing cucumbers have too much water and too many seeds — your pickles will go soft and watery.
Pick cucumbers that feel firm with no soft spots. Fresher cucumbers = crunchier pickles, every single time.
Get the Salt Right
Stick with pickling salt or kosher salt. Regular table salt has anti-caking additives that cloud the brine and can actually affect the flavor. It’s a small thing that makes a noticeable difference.
Don’t Overcook the Cucumbers
Two to three minutes in the hot brine is all you need. The cucumbers keep cooking a little as you pack the jars, so pull them off the heat while they still have some structure.
If they start looking super translucent and floppy in the pot, you’ve gone too far. Aim for that in-between stage where they’ve softened just slightly.
Dial in the Sweetness
The base recipe lands in that classic bread-and-butter zone — sweet but not candy-sweet. If you want it closer to mount olive sweet heat bread and butter pickles, add a pinch of red pepper flakes or a sliced fresh jalapeno to the brine.
For a sweeter profile, bump the sugar up to 2.5 cups. For more tang, reduce it slightly and add a splash more vinegar.
Let Them Sit Before You Eat Them
I know it’s tempting to crack a jar open right away. Trust me, I’ve been there. But letting them sit for at least 24 hours — ideally 48 — makes a huge difference in flavor depth.
The brine needs time to really soak into those cucumber slices and develop that full, complex flavor.
Variations Worth Trying
Sweet Heat Version
Want something with a little more personality? Add 1/4 to 1/2 teaspoon of red pepper flakes to the brine, or tuck a sliced fresh jalapeno into each jar before sealing.
This is the homemade answer to mount olive sweet heat bread and butter pickles, and honestly, it might be even better than the original.
Garlic Bread and Butter Pickles
Drop 2 to 3 peeled, smashed garlic cloves into each jar before filling with brine. The garlic infuses into the pickles as they sit and adds a savory edge that pairs especially well with deli sandwiches.
Apple Cider Vinegar Swap
Replace half the white vinegar with apple cider vinegar for a slightly fruitier, more complex brine. The color will be a little less golden, but the flavor is genuinely interesting.
This works great alongside our homemade egg white bread for the crispiest pickle-sandwich combo you’ve ever had.
Storage Instructions
| Method | Container | Duration | Notes |
|---|---|---|---|
| Refrigerator (quick pickles) | Sealed glass jars | Up to 2 months | Best flavor after 24-48 hours |
| Pantry (water-bath canned) | Properly sealed mason jars | Up to 1 year | Store in a cool, dark place |
| After opening (canned jars) | Refrigerator | Up to 3 months | Always keep submerged in brine |
Reheating and No-Waste Kitchen Ideas
You don’t reheat these — they’re pickles! But the leftover brine is genuinely useful. Don’t pour it down the drain.
Use the leftover brine to quick-pickle thinly sliced radishes, carrots, or red onions. Just pour it over the vegetables, let it cool, and refrigerate. Ready in a few hours and just as delicious.
The brine also makes an unexpected but excellent addition to potato salad dressing, deviled egg filling, or as a tangy splash in a Bloody Mary. Waste nothing.
These pickles shine as a side alongside something hearty like our lotus milk cake — the sweet contrast is surprisingly perfect for a full spread.
Frequently Asked Questions
What’s the difference between bread and butter pickles and dill pickles?
Bread and butter pickles use a sweet, tangy brine with sugar, turmeric, and mustard seeds, while dill pickles are brined with dill weed, garlic, and little to no sugar. The result is a completely different flavor — sweet and mild versus sharp and savory. Classic bread and butter pickles are typically preferred on sandwiches and burgers where you want sweetness rather than heat.
Why are my homemade bread and butter pickles soft instead of crunchy?
Soft pickles are almost always caused by skipping or rushing the salting step, or letting the cucumbers cook too long in the brine. Make sure to salt and ice the cucumbers for the full 3 to 4 hours, and only simmer them in the brine for 2 to 3 minutes — not a full boil. Using fresh Kirby cucumbers instead of slicing cucumbers also makes a significant difference in texture.
Can I make these without doing a full water-bath canning process?
Absolutely. The refrigerator method is totally valid and skips the canning equipment entirely. Just seal the cooled jars and refrigerate — they’ll be ready in 24 hours and keep for up to 2 months. If you want shelf-stable jars to stock your pantry or give as gifts, then the water-bath canning method is worth the extra step.
How do mount olive bread and butter pickle chips compare to homemade?
Mount olive bread and butter pickle chips are a great baseline — that golden color, balanced sweetness, and clean crunch is what this recipe is designed to replicate at home. Homemade versions let you control the sugar level, spice profile, and freshness. Many people actually find the homemade version has a brighter, more complex flavor once the brine has had time to develop.
Can I reuse the brine to make a second batch of pickles?
You can reuse it once, but the brine weakens after the first batch since the cucumbers absorb some of the flavor and acidity. If you reuse it, add a small splash of fresh vinegar to boost the acidity before using it again. For food safety and best results with shelf-stable canning, always use fresh brine.
Final Thoughts
If you’ve ever grabbed a jar of mount olive bread and butter pickles off the shelf and thought “I wish I could make these at home” — now you can. And honestly? They’re better.
The salting step is the only part that requires patience, and everything else comes together in under 30 minutes. Once you’ve got a few jars lined up in your fridge, you’ll wonder why you waited this long.
Give this recipe a try and let me know how it goes in the comments below. Did you go sweet? Did you add a little heat? I want to hear about it.
And if you make a batch, please share it on Pinterest — it genuinely helps others find this recipe and gives you full bragging rights over your pickle game.
