

Crunchy, cloud-light meringue ducks in cheerful yellow and orange, made with just five pantry staples and a piping bag. This meringue ducks recipe is the easiest way to turn plain egg whites into the cutest spring treat on the dessert table.
Okay, I have to tell you about the first time I tried piping duck meringue instead of my usual chick shapes. I got flour… wait, no flour here, I got meringue everywhere, my kitchen looked like a crime scene, and I still couldn’t stop laughing the whole time.
These little guys are ridiculously charming, they taste like a crispy-on-the-outside, marshmallow-soft-on-the-inside dream, and they make people say “wait, you made these?” every single time. So let’s get into it.
Table of Contents
Why You’re Going to Love These Meringue Ducks
This meringue ducks recipe only needs five ingredients you probably already have in your fridge and pantry. No fancy equipment, no weird techniques, just a stand mixer and a little patience.
They’re naturally gluten-free, dairy-free, and low in fat since meringue is basically just whipped egg whites and sugar. Plus they hold up at room temperature for weeks, so you can make a batch way ahead of Easter, a baby shower, or just a random Tuesday when you need something adorable.
- Five simple ingredients, no special flours or gums
- Naturally gluten-free and dairy-free
- Stores at room temp for up to two weeks
- Endlessly customizable colors and shapes

Meringue Ducks
Equipment
- Stand mixer or electric hand mixer
- Whisk attachment
- Large flat baking sheet
- Parchment paper or silicone baking mat
- Large 18-inch piping bag
- Small 12-inch piping bag
- Small round piping tip such as Wilton 10
- Leaf piping tip such as Wilton 66
- Rubber band or piping bag clip
- spatula
Ingredients
French Meringue Ducks
- 4 large egg whites about 120g, room temperature
- ½ tsp cream of tartar optional, helps stabilize the meringue
- 1 cup superfine caster sugar or granulated sugar about 200g, added gradually while mixing
- ½ tsp vanilla extract or almond extract about 3g, optional for flavor
- 1 pinch fine salt optional, balances sweetness
- to taste yellow gel food coloring for the duck bodies
- to taste orange gel food coloring for the duck bills
Decorations
- as needed black round sprinkles for the eyes
Instructions
- Preheat the oven to 200F / 93C and line a large flat baking sheet with parchment paper or a silicone baking mat.
- Make sure the mixing bowl and whisk attachment are completely clean and free from grease. If needed, wipe them with a paper towel dipped in vinegar to remove any oily residue.
- Add the room temperature egg whites to the bowl of a stand mixer fitted with the whisk attachment. Mix on medium speed until the surface is covered in small bubbles.
- Add the cream of tartar and continue mixing until the egg whites reach soft peaks and leave visible tracks in the bowl.
- Gradually add the sugar over a few minutes on medium-low speed. Once the sugar is fully incorporated, increase the mixer speed to medium-high and whip until the meringue is close to stiff peaks.
- Add the vanilla or almond extract, fine salt if using, and a generous squirt of yellow gel food coloring. Continue whipping until the meringue forms stiff, glossy peaks, then scrape down the sides so the color is evenly mixed.
- Fit a large piping bag with a small round piping tip. Transfer most of the yellow meringue into the bag, leaving about 1/2 cup meringue in the bowl. Seal the top of the piping bag with a rubber band or clip.
- Add orange gel food coloring to the remaining meringue and gently fold until evenly colored. Transfer the orange meringue to a small piping bag fitted with a leaf piping tip.
- Using the yellow meringue, pipe an oval, slightly teardrop-shaped body for each duck onto the prepared baking sheet. Pipe a rounded head on top and two small wings on either side.
- Using the orange meringue and leaf tip, pipe a small flat bill onto each duck’s face. Add two black round sprinkles for the eyes.
- Pipe the ducks about 1 inch apart on the tray. They will not spread while baking.
- Bake on the middle rack for 90 minutes, then turn the oven off completely and leave the ducks inside for another 1 hour to cool slowly and set.
- Check that the meringue ducks feel dry to the touch all over. If they still feel tacky or damp, leave them in the residual oven heat for another 30 minutes before checking again.
- Remove the tray from the oven and let the meringue ducks cool completely to room temperature before handling. Serve once crisp and fully set.
Notes
What You’ll Need
Here’s everything that goes into the duck meringue itself, plus the little extras that make them look so darn cute.
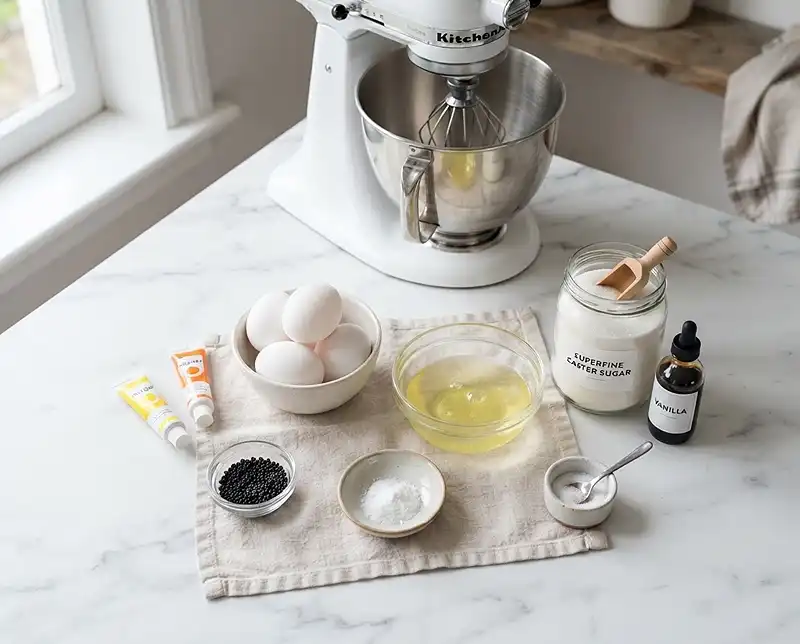
| Ingredient | Amount | Notes |
|---|---|---|
| French Meringue Ducks | ||
| Large egg whites | 4 (about 120g), room temperature | Room temp whips up fluffier and faster |
| Cream of tartar | 1/2 tsp | Optional, but helps stabilize the meringue |
| Superfine caster or granulated sugar | 1 cup (200g) | Added gradually while mixing |
| Vanilla or almond extract | 1/2 tsp (3g) | Optional, for a little extra flavor |
| Fine salt | Pinch | Optional, balances the sweetness |
| Yellow gel food coloring | To taste | For the duck’s body |
| Orange gel food coloring | To taste | For the duck’s bill |
| Decorations | ||
| Black round sprinkles | As needed | For the eyes |
You’ll also want a stand or electric mixer, a large flat baking sheet, a Silpat mat or parchment paper, a large 18-inch piping bag, a small 12-inch piping bag, a small round piping tip like a Wilton 10, and a leaf piping tip like a Wilton 66 for that classic duck bill shape.
How to Make Meringue Ducks Step by Step
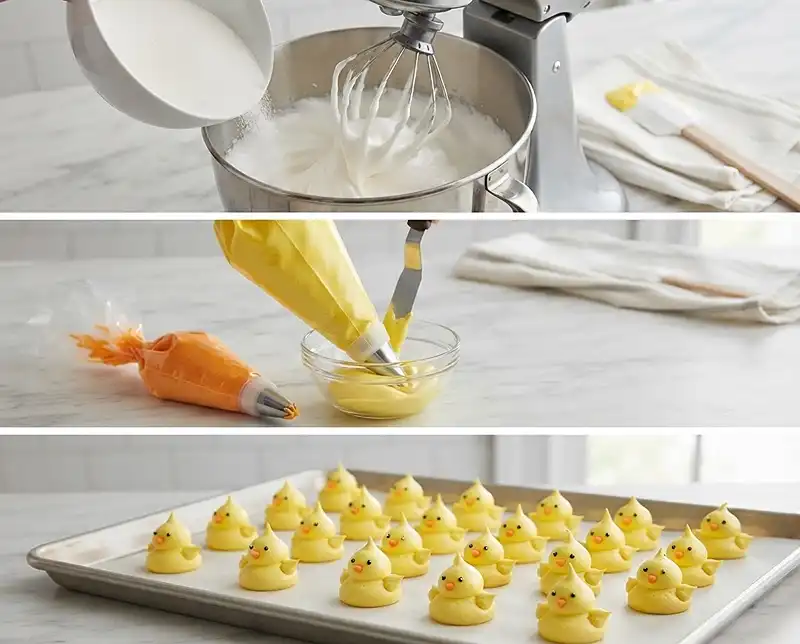
Prep Your Baking Sheet and Oven
Preheat your oven to 200F / 93C and line a large baking sheet with parchment paper or a silicone mat. Low and slow is the name of the game here, these aren’t your typical fast-baking cookies.
Make Sure Everything Is Squeaky Clean
Before you even think about whipping, double check your mixing bowl and whisk attachment for any trace of grease. Even a tiny bit of fat can stop your meringue from whipping up properly, so it’s worth the extra thirty seconds.
If you spot or feel anything oily, wipe the bowl and whisk down with a paper towel dipped in vinegar. Trust me, this one step has saved my meringue more times than I can count.
Whip the Egg Whites
Add your 4 egg whites to the bowl of a stand mixer fitted with the whisk attachment. Mix on medium speed until the surface is covered in small bubbles, then add the cream of tartar and keep mixing until you hit soft peaks that leave visible tracks in the bowl.
Add the Sugar and Whip to Stiff Peaks
Gradually mix in the granulated sugar over a few minutes on medium-low speed, this slow addition is what gives your duck meringue that glossy, marshmallow-like texture. Bump the speed up to medium-high (about a 6 on a KitchenAid) once the sugar is fully incorporated.
When the meringue is close to stiff peaks, add the vanilla or almond extract and a generous squirt of yellow gel food coloring. Keep mixing until you get stiff, glossy peaks, then scrape down the sides so every bit is evenly colored.
Color and Fill Your Piping Bags
Fit your large piping bag with the small round tip. Scoop most of the yellow meringue into it, leaving about 1/2 cup behind in the bowl, then seal the top with a rubber band or clip so nothing sneaks out.
Add a small squirt of orange gel coloring to the leftover meringue and gently fold until evenly colored. Scoop that into your small piping bag fitted with the leaf tip, this is what gives your duck its signature flat little bill.
Pipe Your Little Ducks
Using the yellow meringue, pipe an oval, slightly teardrop-shaped body for the duck, then pipe a rounded head on top and two small wings on either side. This is where the meringue ducks really start to come to life, and it’s honestly the most satisfying part.
Use the orange meringue and leaf tip to pipe a small, flat bill onto the face, then finish with two black sprinkles for the eyes. “They don’t spread while baking,” so feel free to pipe them about an inch apart on the tray.
No sprinkles on hand? No problem. Once baked, you can paint on eyes with a mix of clear alcohol or extract and black gel food coloring, or just use an edible black marker for a quick fix.
Bake Low and Slow
Bake on the middle rack for 90 minutes, then turn the oven off completely and let the ducks sit inside for another hour. This slow cooldown is key, it keeps them from cracking as they set.
They’re done when they look and feel dry to the touch all over. If they still feel tacky or damp, give them another 30 minutes in the residual oven heat before checking again.
Cool and Enjoy
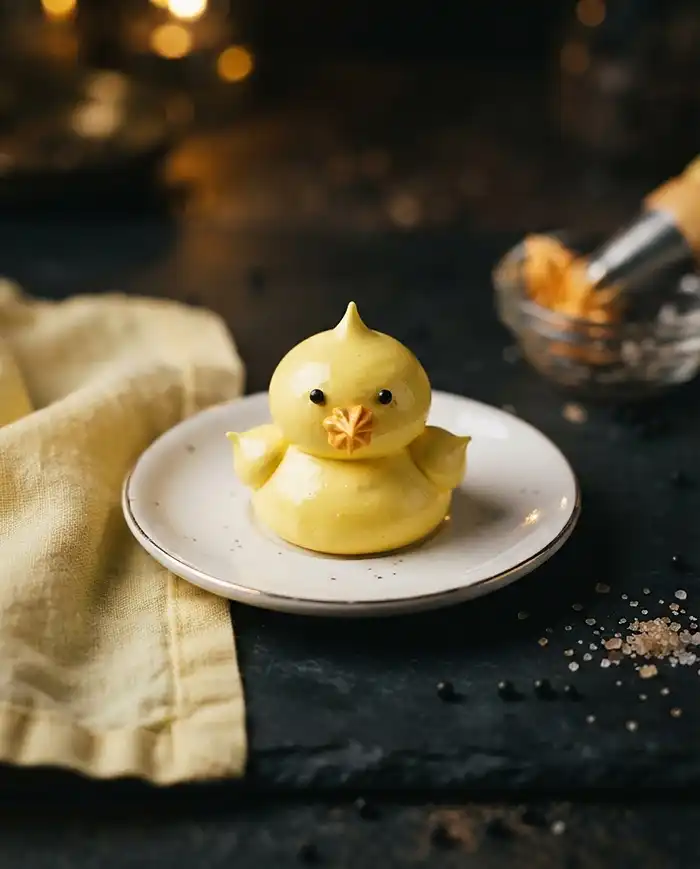
Pull the tray out and let your duck meringue cool completely to room temperature before touching them. You’re looking for a crisp, delicate shell with a soft, chewy marshmallow center underneath, it’s such a good contrast.
Expert Tips for Perfect Meringue Ducks
Getting the Texture Right
Room temperature egg whites whip up faster and hold more air, so pull them out of the fridge at least 30 minutes before starting. Humid days can also make meringue slow to dry out, so if your kitchen is muggy, give them a little extra oven time.
Coloring and Piping Tricks
Gel food coloring is your best friend here since it won’t thin out the meringue the way liquid coloring can. Start with a small amount and add more gradually, it’s way easier to deepen a color than to lighten it.
If your piping feels wobbly at first, practice a few test shapes on parchment before committing. It genuinely takes a few tries to get that classic duck silhouette looking just right.
Variations to Try
Swap the yellow and orange for pastel pink, blue, or lavender if ducks aren’t really your vibe but you still want that same technique. You can also skip the piping bags and use small duck-shaped cookie cutters as guides on parchment for a more uniform batch.
For a fun twist, try dusting the finished duck meringue with a tiny bit of edible luster dust for a shimmery, party-ready finish.
Troubleshooting Common Issues
If your meringue won’t reach stiff peaks, there’s likely a trace of grease or yolk in the mix, so start fresh with a clean bowl. Weeping or sticky meringue usually means the sugar wasn’t fully dissolved, so mix a little longer next time before adding coloring.
Cracked shells are almost always from cooling too fast, so always let them rest in the turned-off oven rather than pulling them straight out. For more on the science behind whipped egg whites, this meringue science breakdown is a genuinely fascinating read.
Storage, Reheating, and No-Waste Tips
Meringue ducks are wonderfully low-maintenance once baked, they just need a dry environment to stay crisp.
| Method | How Long | Notes |
|---|---|---|
| Room temperature, airtight container | Up to 2 weeks | Texture softens slightly over time |
| Refrigerator | Not recommended | Moisture causes meringue to turn sticky |
| Freezer, airtight container | Up to 1 month | Thaw at room temperature before serving |
These don’t really need reheating, but if they’ve gone a bit soft, a quick 10 minutes in a low oven around 200F can crisp them back up. Just let them cool fully afterward before storing again.
Got leftover egg yolks from this recipe? Don’t toss them, they’re perfect for a rich frozen pistachio latte or a batch of custard. And if you’re curious about more egg-based kitchen hacks, check out this boiled egg peeling trick that’s been going viral.
If meringue has officially become your thing, you might also love this air fryer meringue method for an even faster batch.
FAQs About Meringue Ducks
Can I make meringue ducks without a stand mixer?
Yes, a handheld electric mixer works just fine, it’ll just take a bit longer to reach stiff peaks. Whisking by hand is technically possible too, but honestly, your arm will regret it.
Why is my duck meringue not turning white or holding its color?
Gel food coloring gives the truest, most vibrant color without affecting texture, so stick with that over liquid dye. Add it gradually near the end of whipping so it doesn’t deflate your meringue.
Can I make these ahead of time for a party?
Absolutely, that’s actually one of the best things about this meringue ducks recipe. They keep well in an airtight container at room temperature for up to two weeks, so you can bake them days in advance.
Why did my meringue ducks crack while baking?
Cracking almost always comes down to temperature shock, either the oven was too hot or they cooled too quickly. Stick to the low 200F bake and let them rest in the turned-off oven to cool gradually.
Can I use liquid food coloring instead of gel?
You can, but it’s not ideal since liquid coloring adds extra moisture that can thin out your meringue. Gel coloring gives you punchier color with barely any added liquid, so it’s worth seeking out.
Give These Meringue Ducks a Try
These meringue ducks are cheap, simple, and honestly just fun to make, even if your first batch looks more like a blob than a bird. That’s part of the charm, promise.
If you give this recipe a go, I’d love to see how your ducks turn out, so snap a photo and pin it on Pinterest to save for later. Drop a comment below and let me know how yours turned out, I read every single one.
