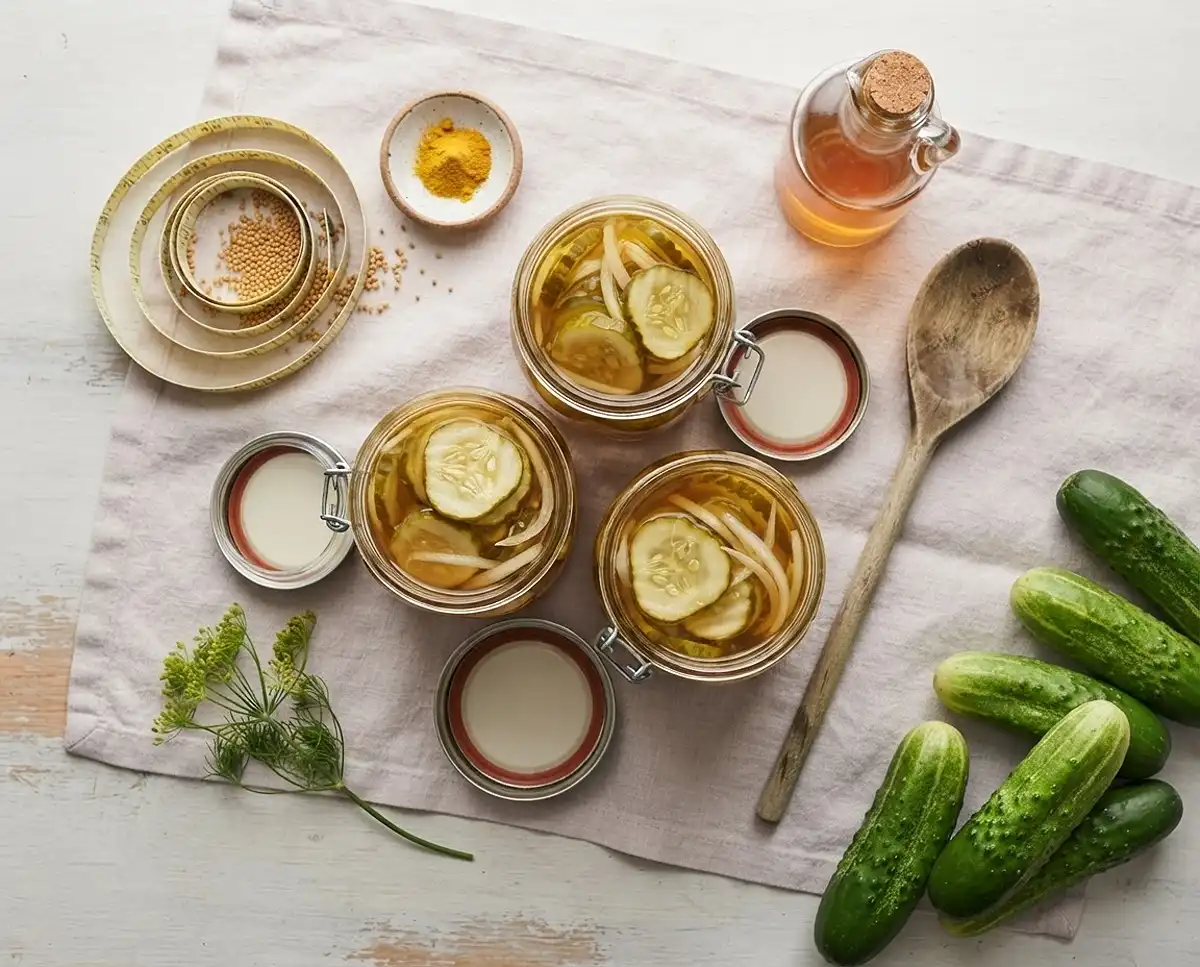
Craving a bread and butter pickle recipe for canning that actually works every single time? This sweet, tangy, crunchy classic fills your pantry with jars of sunshine, and it’s easier than you think.
Okay, real talk: my granny used to make these every August when the cucumber vines took over her backyard like they were staging a coup. I’d stand on a kitchen chair “helping” (mostly just eating cucumber slices), and the whole house would smell like vinegar and turmeric for days. Granny’s bread and butter pickles recipe is the reason I can’t walk past a jar of pickles at the store without judging it a little.
Table of Contents
Why You’ll Love This Bread and Butter Pickle Recipe for Canning
This one’s a keeper because it hits that perfect sweet-tangy balance without being fussy. You get crisp cucumber crunch, mellow onion bite, and a golden brine that tastes like summer in a jar.
It’s a classic canned bread and butter pickles recipe, meaning once you seal those jars up, they’ll sit pretty in your pantry for a year. No fridge space required, no stress, just good old-fashioned food preservation.
- Sweet, tangy, and just a little bit spiced from mustard seed and turmeric
- Shelf-stable for up to a year once properly canned
- Makes about 5 pints, perfect for gifting or hoarding (no judgment)
- A true Granny’s bread and butter pickles recipe passed down the easy way
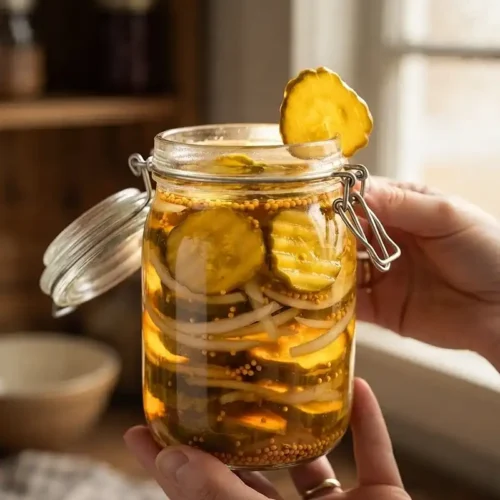
Foolproof Bread and Butter Pickle Recipe for Canning
Equipment
- Water-bath canner
- Jar rack
- 5 pint canning jars
- Canning lids
- Canning bands
- Jar lifter
- Canning funnel
- Ladle
- Bubble popper or clean thin spatula
- Large bowl
- Large pot
- Kitchen towels
- Knife
- Cutting board
- Measuring cups and spoons
- Clean towel for cooling jars
Ingredients
Vegetables
- 3 lb pickling cucumbers washed well, ends discarded, sliced into 1/4-inch rounds; use fresh firm pickling cucumbers, not waxed slicing cucumbers
- 1 lb onions peeled and thinly sliced
- ¼ cup canning or pickling salt use pure canning or pickling salt; iodized salt can make the brine cloudy
- 2 qt crushed ice or ice cubes and water for the 3-hour salt-and-ice soak
Brine
- 1 cup sugar adjust only slightly if desired; keep vinegar amount the same for safe acidity
- 1 tbsp yellow mustard seed
- 1 tsp celery seed
- 1 tsp ground turmeric adds classic golden color
- ½ tsp black peppercorns
- 3 cups apple cider vinegar must be 5% acidity; white vinegar may be substituted
Optional Variations
- sliced jalapeño optional; add to the brine for a spicier version
- red pepper flakes optional; add a pinch to the brine for heat
- white vinegar optional; use in combination with apple cider vinegar for a sharper tang, keeping total vinegar at 3 cups and 5% acidity
- cinnamon stick optional; add to the brine for a warmer old-fashioned flavor
Instructions
- Wash the pickling cucumbers well. Slice them into 1/4-inch rounds and discard the ends.
- Peel the onions and slice them thinly. Add the cucumber slices and onion slices to a large bowl and toss together.
- Sprinkle the canning or pickling salt over the cucumbers and onions. Cover with crushed ice, or ice cubes and water, using about 2 quarts total.
- Let the cucumber and onion mixture sit for 3 hours. Do not rush this step; the salt-and-ice soak draws out excess moisture and helps the finished pickles stay crisp.
- Wash jars, lids, bands, and canning tools in hot soapy water. Rinse well so no soap residue remains, then let everything air dry on a clean towel.
- Place the jar rack in the water bath canner. Load the jars into the canner, cover with water, and bring the water to a simmer around 180°F for 10 minutes. Keep the jars hot until ready to fill.
- In a large pot, combine the sugar, yellow mustard seed, celery seed, turmeric, black peppercorns, and 5% acidity apple cider vinegar or white vinegar.
- Heat the brine just to a boil, stirring as needed, until the sugar dissolves and the brine turns golden and fragrant.
- Drain the cucumber and onion slices. Rinse them under fresh water, then drain again.
- Add the drained cucumber and onion slices to the pot with the hot brine. Bring the mixture back to a boil, then reduce the heat and keep everything hot while filling the jars.
- Lay a kitchen towel on the counter. Use a jar lifter to remove one hot jar from the canner, drain it, and set it upright on the towel. Keep the remaining jars hot in the canner.
- Using a canning funnel and ladle, loosely pack the hot cucumber and onion slices into the hot jar.
- Ladle hot brine over the cucumbers and onions, leaving 1/2 inch headspace.
- Run a bubble popper or clean thin spatula through the jar to release trapped air bubbles. Make sure the vegetables remain submerged under the brine and adjust the headspace if needed.
- Wipe the jar rim clean. Center the lid on the jar and screw on the band until fingertip tight. Place the filled jar back in the canner.
- Repeat the filling process with the remaining hot jars, cucumbers, onions, and brine.
- Once all jars are in the canner, adjust the water level so the water sits 2 inches above the jar tops.
- Cover the canner and bring the water to a vigorous rolling boil over high heat.
- Once the water is boiling vigorously, process pint jars for 10 minutes if you are under 1,000 feet in altitude. If you are above 1,000 feet, increase processing time according to trusted altitude-adjustment guidance.
- When the processing time is complete, turn off the heat, remove the canner cover, and let the canner cool and settle for about 5 minutes before moving the jars.
- Lay a dry towel on the counter. Tilt the canner lid away from you so steam does not hit your face, then use a jar lifter to move the jars onto the towel. Keep the jars upright.
- Do not tighten the bands or disturb the seals. Let the jars rest undisturbed for 12 to 24 hours, until completely cool.
- After 12 to 24 hours, check each seal by pressing the center of the lid. It should not pop up or down. If a lid flexes, that jar did not seal; refrigerate it and use within 1 week.
- Remove the bands from sealed jars, wash the jars, then label and date them.
- Store sealed jars in a cool, dark place. For best flavor, let the pickles rest for 4 to 5 weeks before eating. Use within 1 year for the best crunch.
Notes
What You’ll Need: Ingredients
Nothing fancy here. This is a straightforward bread and butter pickle recipe for canning, and most of these ingredients are probably already sitting in your pantry.
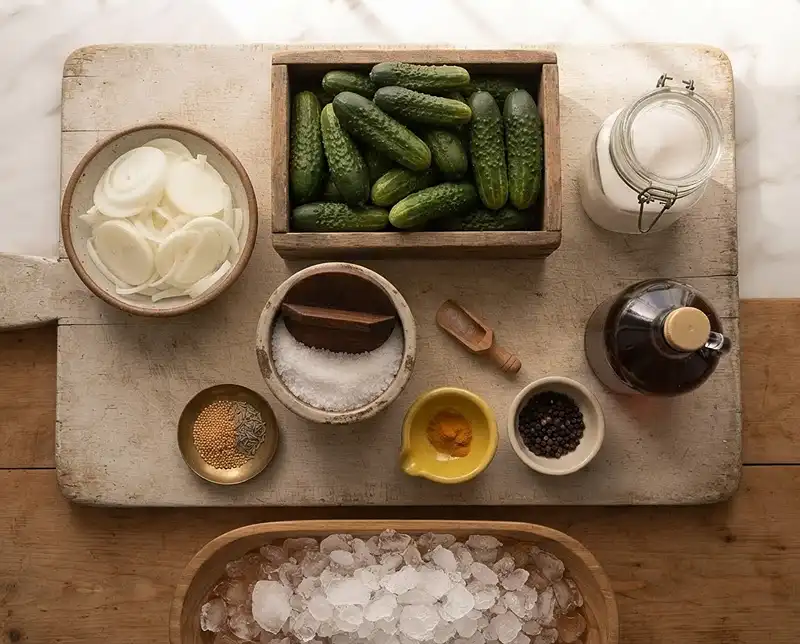
The Vegetables
| Ingredient | Amount |
|---|---|
| Pickling cucumbers | 3 pounds |
| Onions | 1 pound |
| Canning or pickling salt | 1/4 cup |
| Crushed ice or ice cubes and water | 2 quarts |
The Brine
| Ingredient | Amount |
|---|---|
| Sugar | 1 cup |
| Yellow mustard seed | 1 tablespoon |
| Celery seed | 1 teaspoon |
| Ground turmeric | 1 teaspoon |
| Black peppercorn | 1/2 teaspoon |
| Apple cider vinegar, 5% acidity (or white vinegar) | 3 cups |
Pro tip: always use pickling cucumbers, not the waxy ones from the produce aisle. Those slicing cucumbers get mushy fast, and nobody wants a soggy pickle.
Quick Overview: What This Recipe Delivers
This canned bread and butter pickles recipe gives you crisp, golden-hued pickle chips packed with sweet spice flavor. The salt-and-ice soak is the real trick, it pulls extra moisture out of the cucumbers so your final pickles stay crunchy instead of limp.
You’ll end up with roughly 5 pints, ready to seal up and forget about for a month while the flavors deepen. Patience is the hardest ingredient here, but it’s worth it.
Step-by-Step Instructions
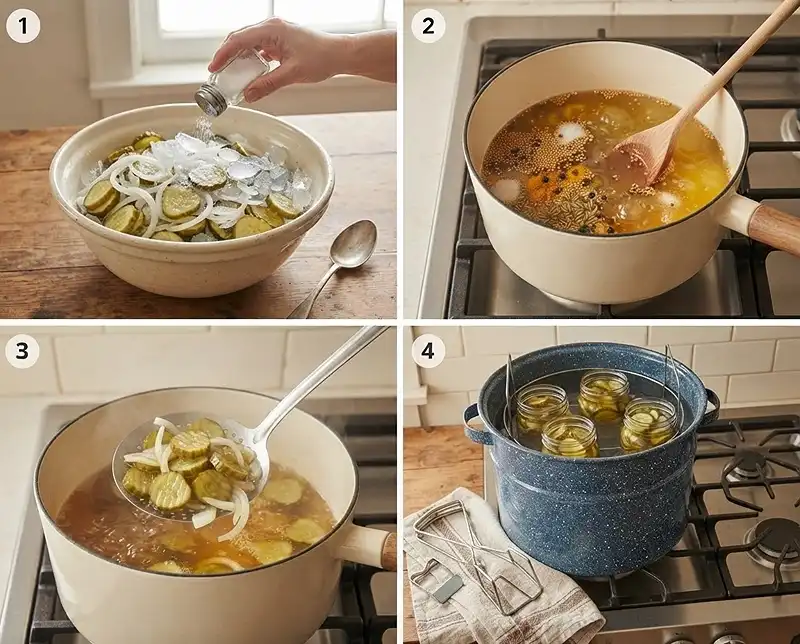
Prep Your Cucumbers and Onions
Wash your cucumbers well and slice into 1/4-inch rounds, tossing the ends. Peel your onions and slice thin, then toss everything together in a big bowl.
Sprinkle the canning salt over the top, then cover with ice and water. Let it sit for 3 hours. This is the step Granny always said you “can’t rush,” and she was right.
Get Your Canning Equipment Ready
Wash your jars, lids, bands, and tools in hot soapy water, then rinse well so there’s no soap residue lurking. Let everything air dry on a clean towel.
Set your jar rack in the water bath canner, load in the jars, and cover with water. Bring it to a simmer around 180˚F for 10 minutes, keeping those jars nice and hot.
Make the Brine and Pickle Mixture
In a large pot, combine your sugar, mustard seed, celery seed, turmeric, peppercorns, and vinegar. Heat it just to a boil, and enjoy that gorgeous golden color and warm spice smell filling your kitchen.
Drain and rinse your cucumber and onion slices under fresh water, then add them to the pot. Bring back to a boil, then reduce the heat and keep everything warm while you get your jars ready.
Time to Can Your Bread and Butter Pickles
Lay a kitchen towel on your counter. Use a jar lifter to pull a hot jar from the canner, drain it, and set it on the towel. Keep the rest of the jars warm in the canner.
Using a canning funnel and ladle, pack the hot cucumber and onion slices loosely into the jar. Ladle the hot brine over the top, keeping a 1/2 inch headspace.
Run a bubble popper through the jar to release trapped air. Make sure everything stays submerged under the brine, adjusting headspace if you need to.
Wipe the rim clean, center your lid, and screw the band on until fingertip tight. Place the jar back in the canner and repeat with the rest.
Processing the Jars
Once all jars are in the canner, adjust the water so it sits 2 inches above the jar tops. Cover the canner and bring it to a rolling boil over high heat.
Once it’s boiling vigorously, process pints for 10 minutes if you’re under 1,000 feet in altitude. Adjust your time if you’re higher up (check the note below).
When time’s up, turn off the heat, remove the cover, and let the canner cool and settle for about 5 minutes before touching anything.
Cool and Store Your Jars
Lay a dry towel on the counter. Tilt the canner lid away from you as you remove it so steam doesn’t hit your face. Use the jar lifter to move the jars onto the towel, keeping them upright.
Don’t tighten the bands or poke at the seals yet. Let the jars rest undisturbed for 12 to 24 hours to cool completely.
After that, check the seal by pressing the center of each lid. It shouldn’t pop up or down. If it flexes, that jar didn’t seal, so pop it in the fridge and use it within a week.
Remove the bands, wash the jars, then label and date them. Store somewhere cool and dark, and give the pickles 4 to 5 weeks to really develop their flavor. Use within a year for the best crunch.
This recipe yields about 5 pints, depending on how big your cucumbers are.

Expert Tips, Variations, and Troubleshooting
Getting That Perfect Crunch
The salt-and-ice soak is non-negotiable if you want crisp pickles. Skipping it or rushing it is the number one reason bread and butter pickle recipes turn out soft.
Always use fresh, firm pickling cucumbers picked within a day or two. Older cucumbers just don’t crisp up the same way, no matter how long you soak them.
Fun Variations to Try
Want a spicier kick? Toss in a sliced jalapeno or a pinch of red pepper flakes to the brine. It’s a nice twist on the classic bread & butter pickle recipes your family already loves.
You can also swap in a mix of white and apple cider vinegar for a slightly different tang, or add a cinnamon stick for a warmer, more old-fashioned flavor.
Troubleshooting Common Issues
Cloudy brine usually means your salt wasn’t a pure canning or pickling salt (iodized salt can cause this). Soft pickles usually point back to skipping the ice bath step or using older cucumbers.
If a jar doesn’t seal after the 24-hour rest, don’t panic, just refrigerate it and eat those pickles within the week. For more detailed safety guidance, the National Center for Home Food Preservation has excellent resources on canning basics.
Storage Instructions
| Storage Method | Duration |
|---|---|
| Sealed jars, cool dark pantry | Up to 1 year |
| Unsealed or opened jars, refrigerated | Up to 1 month |
No reheating needed here, these pickles are served cold or at room temp straight from the jar. Just give the jar a gentle shake before opening if the spices have settled.
For a no-waste kitchen win, save that leftover brine. It’s fantastic whisked into salad dressing or used to perk up deviled eggs. Nothing goes to waste in Granny’s kitchen, and it shouldn’t in yours either.
What to Serve With Your Pickles
These pickles are the perfect crunchy sidekick for so many meals. Try them piled on top of a chopped cheeseburger salad for extra tang, or served alongside a comforting eggplant parmesan dinner.
Honestly, they’re even great chopped up and stirred into a tomato smash pasta for a punchy, unexpected twist. Once you’ve got a stash of these canned, you’ll find excuses to use them everywhere.
Frequently Asked Questions
Do I really need pickling cucumbers for this recipe?
Yes, pickling cucumbers have thinner skin and fewer seeds, which helps them stay crisp through canning. Regular slicing cucumbers tend to turn mushy and watery instead.
How long should I wait before eating my canned bread and butter pickles?
Give the jars 4 to 5 weeks in a cool, dark spot before digging in. This resting time lets the sweet and tangy flavors fully soak into the cucumbers and onions.
Why did my jar not seal properly?
A jar that doesn’t seal usually means there was residue on the rim or the band wasn’t tight enough before processing. Just refrigerate that jar and enjoy the pickles within a week.
Can I adjust the sweetness in this bread and butter pickle recipe for canning?
Absolutely, you can reduce the sugar slightly for a more tangy pickle or add a touch more for extra sweetness. Just keep the vinegar amount the same to maintain safe acidity levels for canning.
What altitude adjustments do I need for processing time?
If you’re above 1,000 feet, you’ll need to increase your processing time slightly. The USDA’s canning guidelines have a helpful altitude chart to check your exact adjustment.
Conclusion
There’s something so satisfying about lining up jars of homemade bread and butter pickles on your pantry shelf. It’s the kind of small win that makes you feel like you’ve got your life together, even on the days you really don’t.
Give this bread and butter pickle recipe for canning a try this season, and let those cucumber vines actually earn their keep. If you make a batch, snap a photo and share it to Pinterest, and drop a comment below to let us know how yours turned out.
For more canning safety details specific to your area, check out the USDA’s home canning guidance before you get started.