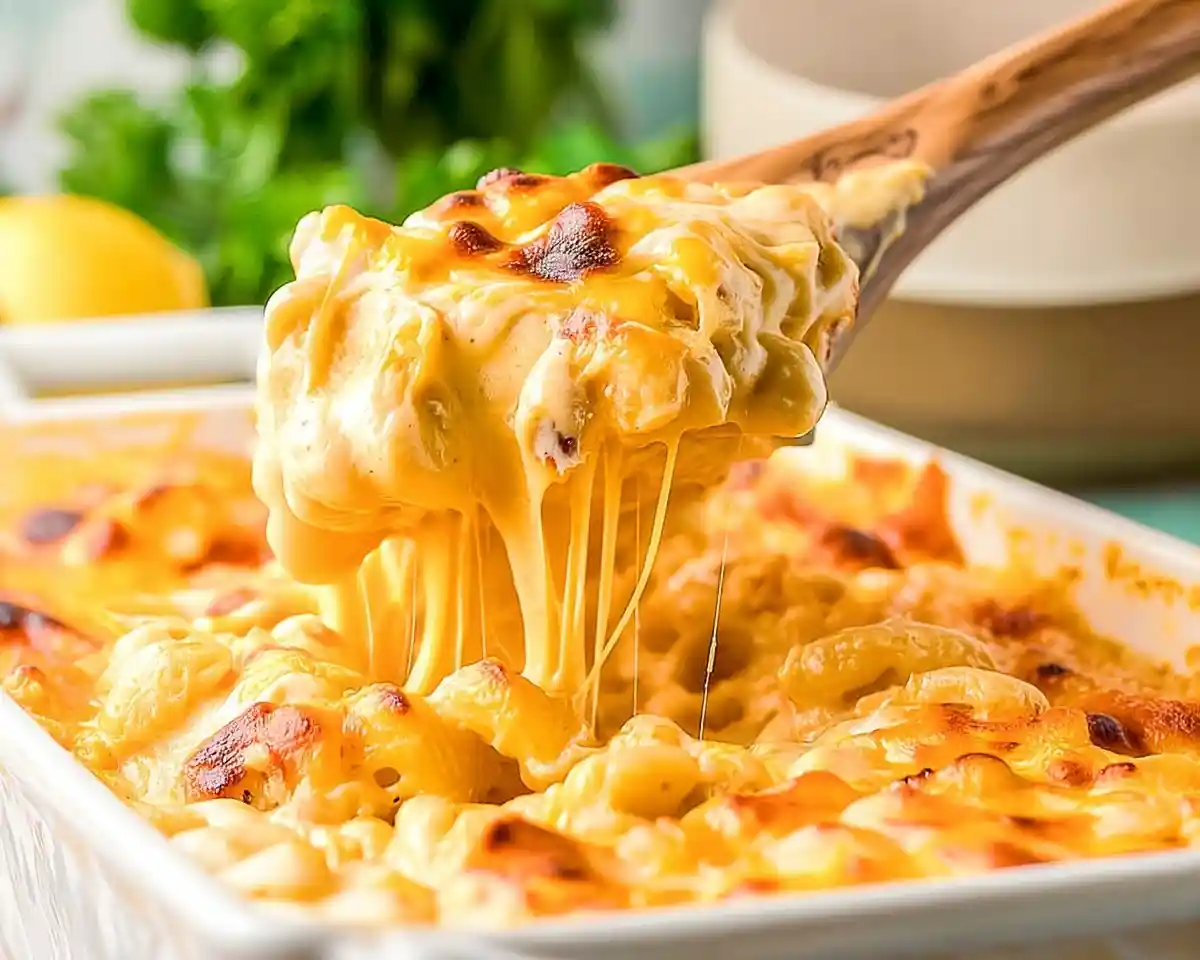
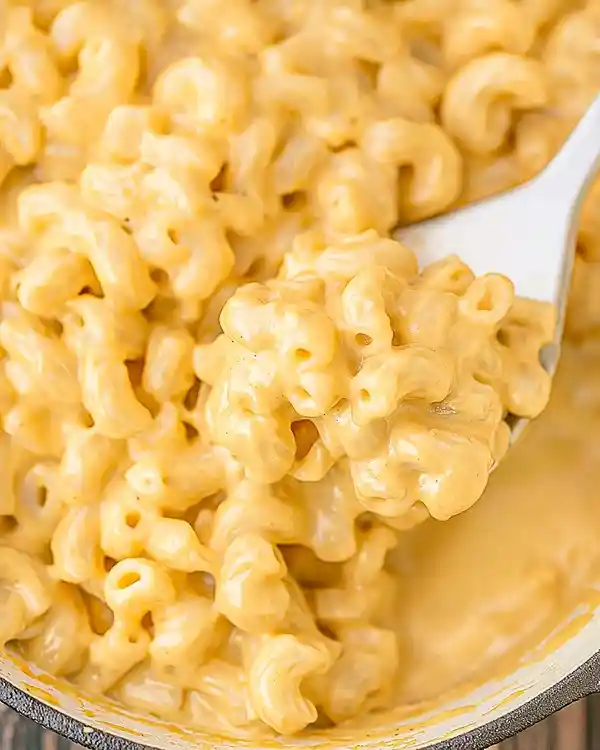
Tini’s Mac and Cheese delivers gooey, three-cheese perfection with cavatappi pasta. This baked mac and cheese recipe creates restaurant-quality comfort food at home.
Let me tell you about the day I first tasted Tini’s mac and cheese at a potluck in Charleston. One bite of that golden, bubbling masterpiece, and I knew my boxed mac days were officially over.
The problem? I had no idea how to recreate that perfectly gooey, three-cheese magic at home. Every attempt fell flat—grainy sauce, bland flavor, or worse, a greasy mess that separated in the oven.
Then I cracked the code. After testing twelve batches (yes, twelve), I finally nailed the secret: quality cheese blocks, the right pasta shape, and a foolproof roux technique. This homemade mac and cheese now graces my table every Thanksgiving, and guests literally ask for the recipe before they finish their first serving.
Tasty at Home – Where bold flavors meet everyday kitchens.
Table of Contents
What Is Tini’s Mac and Cheese?
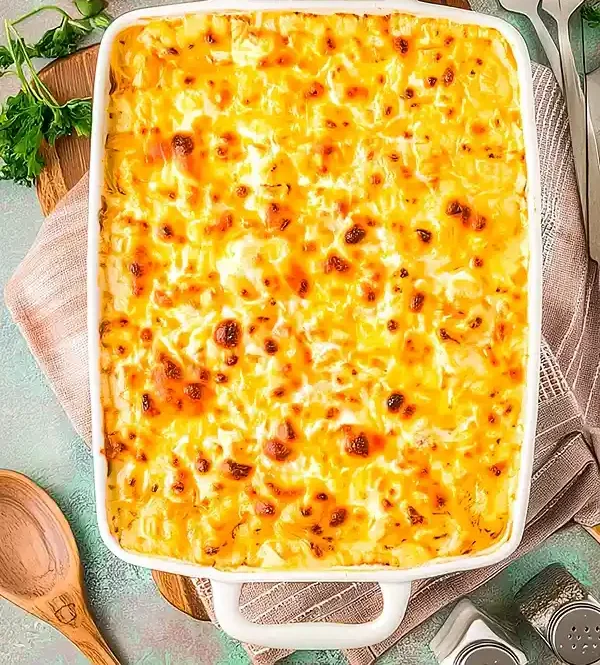
Tini’s mac and cheese is a viral three-cheese baked pasta dish that took social media by storm thanks to Chef Tini Younger’s foolproof recipe. This isn’t standard boxed mac—it’s a from-scratch masterpiece featuring cavatappi pasta swimming in a velvety cheese sauce made with mozzarella, Colby Jack, and sharp cheddar. The dish bakes to golden, bubbly perfection with crispy cheese edges that everyone fights over.
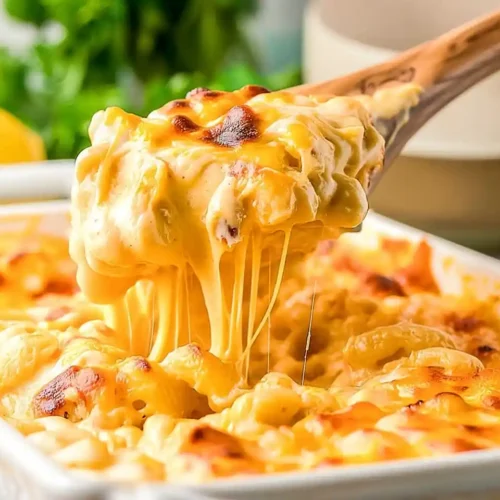
What sets this recipe apart is the technique. Tini builds a proper roux-based sauce using evaporated milk and heavy cream, then layers the mac and cheese with extra cheese in the middle and on top. The result? A gooey, stretchy, restaurant-quality dish that stays creamy even as leftovers.
Chef Tini Younger shared this recipe through her online platform, and home cooks immediately fell in love with its simplicity and spectacular results. You don’t need culinary school training or exotic ingredients—just quality cheese blocks, the right pasta shape, and a little patience. The recipe delivers consistent success whether you’re feeding a holiday crowd or meal-prepping for the week.
What Makes Tini’s Mac and Cheese So Special?
This isn’t your average baked mac and cheese. Tini’s version combines three distinct cheeses—mozzarella, Colby Jack, and sharp cheddar—creating layers of flavor that hit different notes with every forkful. The cavatappi pasta’s corkscrew shape traps more cheese sauce than traditional elbow macaroni, delivering maximum creaminess in every bite.
The real magic happens in the technique. Building a proper roux with butter and flour creates a velvety base that won’t break or become grainy during baking. The evaporated milk adds body without excess liquid, while heavy cream brings richness that coats your palate.
I source my cheese from the deli counter, not pre-shredded bags. Why? Pre-shredded cheese contains anti-caking agents that prevent smooth melting. Block cheese melts into pure, silky perfection.
Tini’s Mac and Cheese
Equipment
- Large mixing bowl
- box grater
- Heavy-bottomed skillet
- 9×13 inch baking pan
- Wire whisk
Ingredients
Cheese
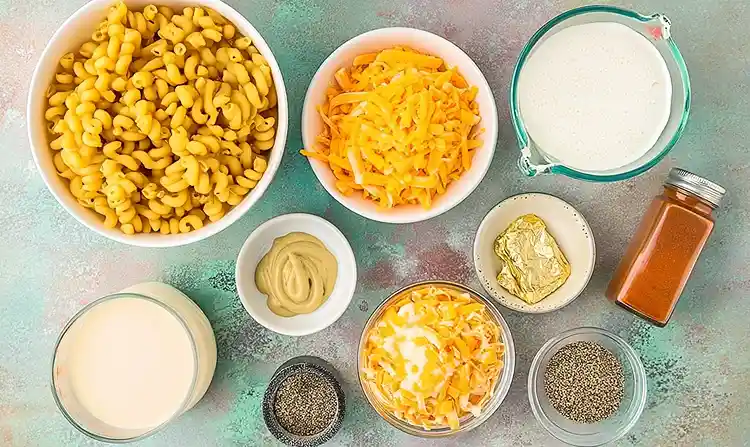
- 1 pound Mozzarella cheese (block) Get deli blocks—harder and easier to shred
- 1 pound Colby Jack cheese Provides mild, creamy base
- 8 ounces Sharp cheddar (yellow) Adds tangy depth
Pasta
- 1 pound Cavatappi pasta Corkscrew shape holds more sauce
Seasonings
- 1 teaspoon Garlic powder Season the roux
- 1 teaspoon Smoked paprika Subtle smokiness
- 1 teaspoon Coarse salt Enhances all flavors
- ½ teaspoon Black pepper Fresh ground preferred
Roux
- 3 tablespoons Salted butter Roux foundation
- 3 tablespoons All-purpose flour Thickening agent
Dairy
- 12 ounces Evaporated milk Creates body
- 2 cups Heavy cream Ultimate richness
- 1 tablespoon Dijon mustard Flavor enhancer
- To taste Fresh parsley Optional finishing touch
Instructions
- Preheat oven to 350°F. Shred all three cheese blocks and divide half for topping.
- Cook cavatappi pasta in heavily salted boiling water until al dente, drain and set aside.
- Mix garlic powder, smoked paprika, coarse salt, and black pepper in a small bowl.
- Melt butter in a skillet over medium heat, add half seasoning, then whisk in flour for 1-2 minutes.
- Whisk in evaporated milk, then add heavy cream, remaining seasoning, and Dijon mustard. Cook until sauce thickens.
- Add half the shredded cheese to the sauce gradually, stirring until melted.
- Combine pasta with cheese sauce, folding gently until fully coated.
- Layer half the mac and cheese in a 9×13-inch baking pan, sprinkle with reserved cheese, then top with remaining mac and cheese and cheese.
- Bake uncovered for 25-30 minutes, broil 1-2 minutes until golden. Let rest 5 minutes.
- Garnish with fresh parsley and serve immediately.
Notes
Essential Ingredients for Perfect Mac and Cheese
Before we dive into measurements, let’s talk quality. For the cheese trio, visit your grocery store’s deli counter and ask for blocks—they’re fresher, cheaper, and melt beautifully. Your pasta choice matters too: cavatappi’s ridged surface and hollow center create the ultimate cheese delivery system.
For the creamy base, don’t skimp on heavy cream or evaporated milk. These dairy powerhouses create the luxurious texture that makes this dish legendary. The smoked paprika adds depth without overpowering, while Dijon mustard brightens the entire flavor profile.
| Ingredient | US Measurement | Metric | Notes |
|---|---|---|---|
| Mozzarella cheese (block) | 1 pound | 454g | Get deli blocks—harder and easier to shred |
| Colby Jack cheese | 1 pound | 454g | Provides mild, creamy base |
| Sharp cheddar (yellow) | 8 ounces | 227g | Adds tangy depth |
| Cavatappi pasta | 1 pound | 454g | Corkscrew shape holds more sauce |
| Garlic powder | 1 teaspoon | 5g | Season the roux |
| Smoked paprika | 1 teaspoon | 5g | Subtle smokiness |
| Coarse salt | 1 teaspoon | 6g | Enhances all flavors |
| Black pepper | ½ teaspoon | 2g | Fresh ground preferred |
| Salted butter | 3 tablespoons | 42g | Roux foundation |
| All-purpose flour | 3 tablespoons | 24g | Thickening agent |
| Evaporated milk | 12 ounces (1 can) | 354ml | Creates body |
| Heavy cream | 2 cups | 480ml | Ultimate richness |
| Dijon mustard | 1 tablespoon | 15g | Flavor enhancer |
| Fresh parsley | For garnish | — | Optional finishing touch |
Shopping Tips for US Grocery Stores: Head to Kroger, Publix, or your local supermarket’s deli counter for cheese blocks. Avoid the pre-shredded section—those cellulose coatings ruin the texture. Find cavatappi pasta in the Italian section, often near penne and rigatoni.
Bold Add-Ins and Creative Variations
Want to customize your gooey mac and cheese? Try these flavor boosters: crispy bacon bits, roasted jalapeños for heat, or caramelized onions for sweetness. Some folks add a cup of panko breadcrumbs mixed with melted butter on top for extra crunch.
International Substitutions: If you’re outside the US, substitute mozzarella with a firm white melting cheese, Colby Jack with mild cheddar, and heavy cream with double cream. Cavatappi can be replaced with fusilli or gemelli—any twisted pasta works beautifully.
Equipment You’ll Need
You don’t need fancy gear for this three cheese mac and cheese. A large mixing bowl, sharp box grater, and heavy-bottomed skillet form your essential trio. The skillet’s thick base prevents scorching while you build the roux—absolutely critical for smooth sauce.
A 9×13-inch baking pan creates the ideal depth for even cooking and those coveted crispy cheese edges. If you only have a deeper casserole dish, reduce baking time by five minutes and watch closely. A wire whisk beats a spoon every time for lump-free sauce.
Don’t own a box grater? Use your food processor’s shredding disc to power through those cheese blocks in seconds. Thomas Keller emphasizes that proper equipment makes the difference between struggling and succeeding in the kitchen.
How To Make this Viral Tini’s Mac and Cheese Recipe
Step 1: Preheat and Prep Your Cheese
Preheat your oven to 350°F while you tackle the cheese. Shred all three cheese blocks—the mozzarella, Colby Jack, and sharp cheddar—into one large mixing bowl using the large holes on your box grater. Toss the shredded cheese together until evenly distributed, then transfer exactly half to a separate bowl for layering later.
This two-bowl system ensures you have cheese for both the sauce and the golden, bubbly topping. Well… I learned this the hard way after dumping all my cheese into the sauce once and having nothing left for the top layer. Epic fail.
Step 2: Cook the Cavatappi Pasta
Bring a large pot of heavily salted water to a rolling boil—it should taste like the ocean. Add your cavatappi pasta and cook according to package directions for al dente, usually 8-9 minutes. Drain thoroughly in a colander and set aside.
Never rinse your pasta after draining. Those surface starches help the cheese sauce cling to every ridge and curve. As Julia Child always said, pasta water is liquid gold—save a cup if you need to thin your sauce later.
Step 3: Create Your Signature Seasoning Blend
While the pasta cooks, combine garlic powder, smoked paprika, coarse salt, and black pepper in a small prep bowl. Mix thoroughly with a fork to break up any clumps. This seasoning blend gets divided between the roux and the cream for layered flavor throughout.
Step 4: Build the Foundation Roux
Melt your butter in a large skillet over medium heat until it foams and subsides. Add half your seasoning blend and stir for 30 seconds until fragrant. Immediately sprinkle in the flour and whisk constantly for 1-2 minutes.
The mixture should bubble actively and turn a light golden color. This cooking time removes the raw flour taste while creating a nutty aroma. If your roux looks dry or clumpy, your heat’s too high—reduce it immediately.
Step 5: Add the Dairy and Thicken
Pour in the evaporated milk while whisking constantly to prevent lumps. The mixture will seize up initially—keep whisking. Once it begins to thicken and bubble in the center of the pan, add your heavy cream, remaining seasoning, and Dijon mustard.
Continue whisking until the sauce coats the back of a spoon, about 3-4 minutes. You’re looking for a consistency slightly thinner than the final product—it’ll thicken more as cheese melts in. This technique, which professional chefs call a Mornay sauce, creates restaurant-quality results at home.
Step 6: Melt in the First Cheese Addition
Reduce heat to medium-low. Add half your shredded cheese mixture to the skillet, one handful at a time. Stir gently after each addition until completely melted before adding more. Rushing this step creates stringy, separated sauce instead of smooth, gooey perfection.
The sauce should be thick enough to coat the pasta heavily but still pourable. If it seems too thick, whisk in reserved pasta water one tablespoon at a time. Too thin? Let it simmer another minute while stirring.
Step 7: Combine Pasta with Cheese Sauce
Add your drained cavatappi to the cheese sauce and fold gently with a spatula until every piece glistens with coverage. Take your time here—proper coating makes the difference between good and legendary mac and cheese. The pasta should be completely enveloped in creamy, golden sauce.
Step 8: Layer Your Baking Pan
Transfer half the mac and cheese mixture to your 9×13-inch baking pan, spreading it evenly across the bottom. Sprinkle with one-third of your reserved cheese, creating a hidden molten layer. Add the remaining mac and cheese on top, then finish with all remaining cheese.
This layering technique ensures cheese in every bite, not just on top. Press down gently with your spatula to eliminate air pockets that can cause uneven baking.
Step 9: Bake to Bubbly Perfection
Bake uncovered for 25-30 minutes until the edges bubble vigorously and the center sets. The top should look pale golden but not brown yet. Switch your oven to broil and cook for 1-2 minutes more, watching constantly.
Remove when the cheese top turns golden brown with darker spots—those caramelized bits deliver incredible flavor. Let the pan rest for 5 minutes before serving. This resting period allows the sauce to thicken slightly, preventing soupy plates.
Step 10: Garnish and Serve
Sprinkle fresh chopped parsley over the top for a pop of color and fresh flavor. The herb’s brightness cuts through the richness beautifully. Serve immediately while the cheese is still stretchy and molten.

Expert Tips for Mac and Cheese Mastery
Start with room temperature cheese for faster, smoother melting. Cold cheese straight from the fridge can shock your sauce and cause separation. I pull my blocks out 20 minutes before cooking.
Never use pre-shredded cheese—those anti-caking additives prevent proper melting and create grainy texture. The five extra minutes of grating pays off in pure, silky results. Trust me on this one.
Your roux must bubble and cook fully before adding liquid. Undercooked flour tastes pasty and won’t thicken properly. Listen for that gentle sizzle and watch for light golden color.
If your sauce breaks or looks greasy, the heat was too high or you added cheese too quickly. Whisk in a tablespoon of cold milk to bring it back together. Prevention beats cure—low and slow wins every time.
Creative Variations to Try
Southern Style: Add 1 cup cooked, crumbled bacon and ½ cup diced jalapeños to the pasta before baking. The smoky-spicy combo transforms this into a barbecue side dish superstar. This variation pairs perfectly with pulled pork or fried chicken.
Lobster Mac: Fold in 1 pound cooked lobster meat after combining pasta with sauce. Swap half the Colby Jack for Gruyère cheese for sophisticated flavor. This luxurious version works beautifully for New Year’s Eve dinner.
Buffalo Chicken: Stir in 2 cups shredded rotisserie chicken and ¼ cup buffalo sauce before layering. Top with blue cheese crumbles instead of extra cheddar. Game day just got significantly better.
Veggie-Loaded: Roast 2 cups broccoli florets and 1 cup cherry tomatoes, then fold into the mac before baking. This sneaks vegetables into picky eaters while adding color and nutrients.
Holiday Prime: Replace smoked paprika with ½ teaspoon truffle oil and use all white sharp cheddar for an elegant presentation. Garnish with microgreens instead of parsley for upscale holiday gatherings.
Storage and Make-Ahead Mac and Cheese Magic
Cool leftover mac and cheese completely before transferring to airtight containers. Refrigerate for up to 4 days—the flavors actually deepen overnight. Reheat single portions in the microwave for 2-3 minutes, stirring halfway through.
For larger portions, reheat covered in a 350°F oven for 20-25 minutes until heated through. Add a splash of milk before reheating to restore creaminess. The cheese will have absorbed some liquid during storage.
This homemade mac and cheese freezes beautifully for up to 3 months. Portion into freezer-safe containers, leaving ½ inch headspace for expansion. Thaw overnight in the refrigerator before reheating.
| Storage Method | Duration | Reheating Instructions |
|---|---|---|
| Refrigerator | 4 days | Microwave 2-3 min or oven 350°F for 20 min |
| Freezer | 3 months | Thaw overnight, then reheat as above |
| Room temperature | 2 hours max | Discard if left out longer |
Make-Ahead Strategy: Assemble the entire dish through Step 8, cover tightly with foil, and refrigerate up to 24 hours. Add 10 minutes to the baking time since you’re starting cold. This timing works perfectly for Thanksgiving or Christmas dinner prep.
Perfect Pairings and Serving Suggestions
Serve this gooey mac and cheese alongside tangy green bean casserole from scratch for a complete comfort food feast. The crispy onion topping contrasts beautifully with the creamy pasta. Add roasted Brussels sprouts or a simple arugula salad to balance the richness.
For breakfast-for-dinner nights, pair it with crack breakfast casserole for an indulgent spread. The savory-sweet combination satisfies every craving. A crisp white wine like Chardonnay or a hoppy IPA cuts through the cheese perfectly.
Need more comfort food inspiration? Try it with breakfast sausage casserole for a potluck showstopper. These dishes complement each other while offering variety for different tastes.
Tini’s Mac and Cheese FAQs
What cheeses does Tini use in her mac and cheese?
What cheeses does Tini use in her mac and cheese? Tini’s mac and cheese features a three-cheese blend of mozzarella, Colby Jack, and sharp yellow cheddar. The mozzarella provides stretch and mild creaminess, Colby Jack adds smooth texture, and sharp cheddar delivers tangy depth. Using blocks from the deli counter instead of pre-shredded cheese ensures smooth, gooey results without graininess.
Why is Tini’s mac and cheese so popular?
Why is Tini’s mac and cheese so popular? This baked mac and cheese recipe gained fame for its foolproof technique and restaurant-quality results at home. The combination of three cheeses, cavatappi pasta’s unique shape, and the layering method creates unmatched creaminess. People love how it stays gooey even after reheating, unlike many homemade versions that dry out.
What kind of cheese does Chef Tini use?
What kind of cheese does Chef Tini use? Chef Tini uses one pound of mozzarella, one pound of Colby Jack, and eight ounces of sharp cheddar—all purchased as blocks from the deli. She specifically recommends harder mozzarella blocks over soft packaged balls because they shred easier and melt better. The yellow cheddar adds visual appeal and stronger flavor than white varieties.
Can Tini’s mac and cheese be made ahead?
Can Tini’s mac and cheese be made ahead? Yes, assemble the entire dish through the layering step, cover tightly with aluminum foil, and refrigerate up to 24 hours before baking. Add 10 minutes to the original baking time since the dish starts cold. You can also freeze the unbaked mac and cheese for up to 2 months—thaw completely in the refrigerator before baking with extended time.
Time to Create Your Own Mac and Cheese Magic
You now hold the secrets to legendary three cheese mac and cheese in your hands. This isn’t just another recipe—it’s the dish that’ll have your family hovering around the kitchen, asking “Is it ready yet?” every five minutes.
Remember that potluck in Charleston I mentioned? Last month, I brought this exact mac and cheese to my neighborhood block party. Three people asked for the recipe before I finished setting down the pan. That’s the power of doing comfort food right.
Pair this with Korean noodles for an unexpected fusion dinner party, or keep it classic with chilli paneer for international flavor contrast. However you serve it, this cavatappi mac and cheese delivers every single time.
Ready to make the best mac and cheese of your life? Share your results in the comments below—I want to see those gorgeous golden tops and hear about your favorite variations!

