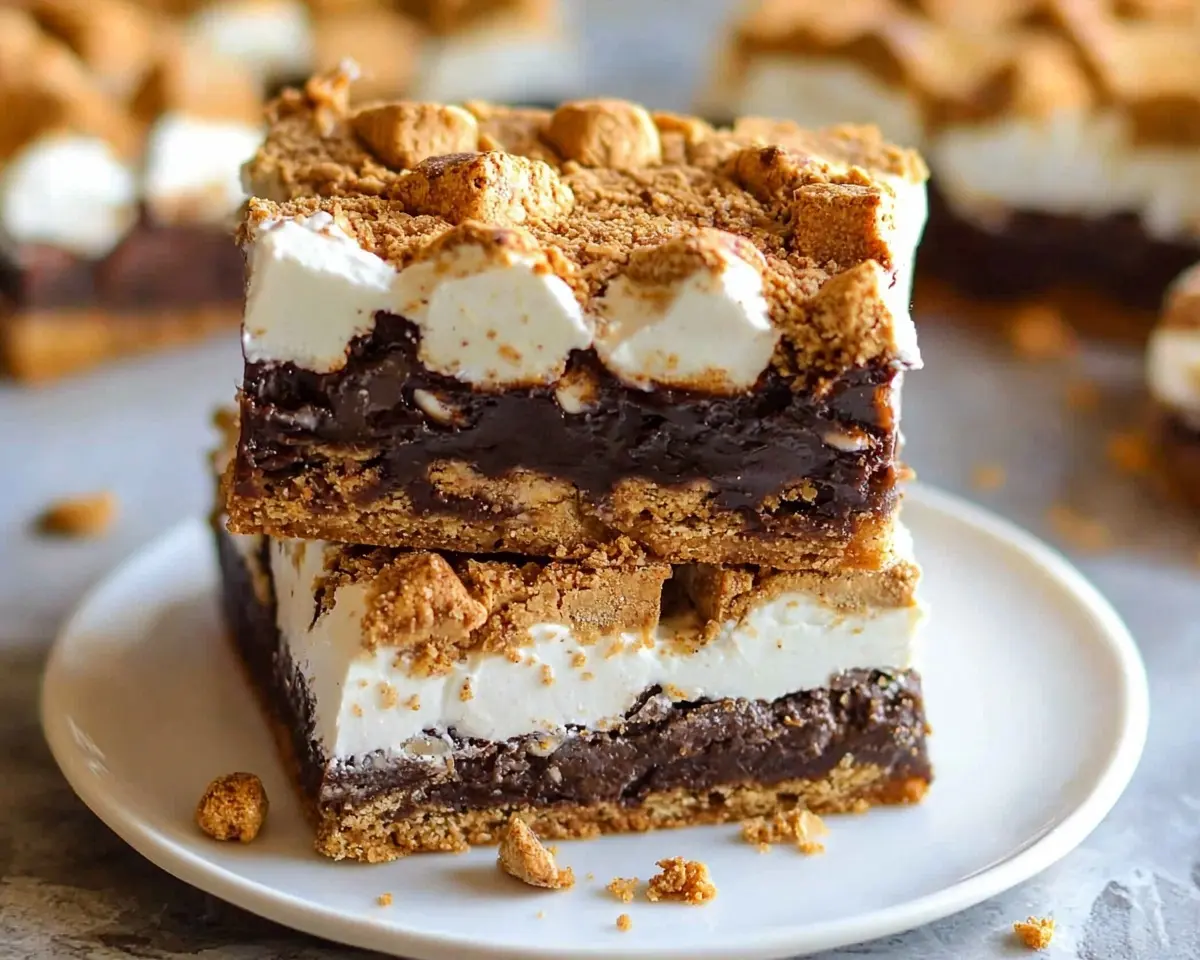
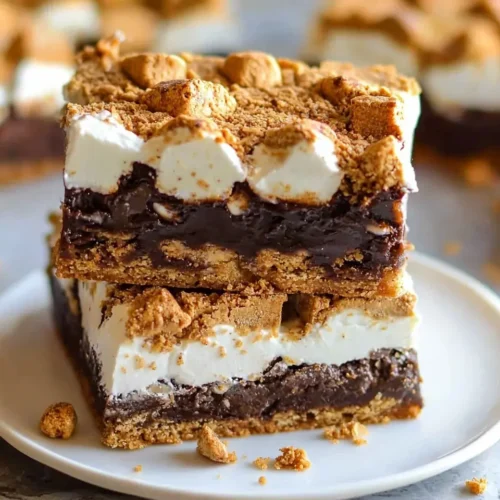
S’more Bars recipe with graham crackers, chocolate, marshmallows. Perfect easy on the go desserts ready in 30 minutes. Quick smores dessert!
Hi there, I’m Linda, and welcome to Tasty at Home—where bold flavors meet everyday kitchens. Let me tell you about the evening that changed my dessert game forever.
Picture this: a chilly October night in Vermont, surrounded by maple trees ablaze with autumn colors, and my family gathered around a crackling fire pit. We’d run out of roasting sticks for traditional s’mores, but the craving for that iconic trio of graham crackers, chocolate, and marshmallows wouldn’t quit.
Well… that’s when inspiration struck like lightning! What if I could capture all those campfire memories in a pan? After testing this s’more bars recipe seventeen times—yes, seventeen, because I’m slightly obsessed with getting the marshmallow-to-chocolate ratio just right—I finally nailed it.
These bars deliver every bit of that nostalgic campfire magic without the smoke in your eyes or the sticky fingers fumbling with roasting sticks.
Whether you’re planning a backyard gathering, need easy on the go desserts for a potluck, or simply want to satisfy that s’mores craving on a Tuesday night, this recipe transforms your kitchen into the ultimate campfire experience. Moreover, these bars stay fresh for days, making them perfect for meal prep or surprise guests.
Table of Contents
What Makes These S’more Bars Absolutely Irresistible
You know what separates mediocre s’more bars from the legendary ones? It’s all about layering technique and temperature control. After years of perfecting this recipe, I’ve discovered that pressing the graham cracker base firmly creates the ideal foundation, while the strategic chocolate-marshmallow topping ensures every bite delivers that perfect balance.
These bars solve the eternal s’mores dilemma: how do you get that gorgeous golden-brown marshmallow top without burning the chocolate underneath? The secret lies in the two-stage baking process that I learned from watching countless cooking shows featuring Thomas Keller’s precision techniques.
Furthermore, this recipe scales beautifully for crowds. Last Fourth of July, I tripled the batch for our neighborhood barbecue, and they disappeared faster than fireworks in the sky. The combination of convenience and authentic flavor makes these bars a true crowd-pleaser.
Premium Ingredients for Superior S’more Bars Results
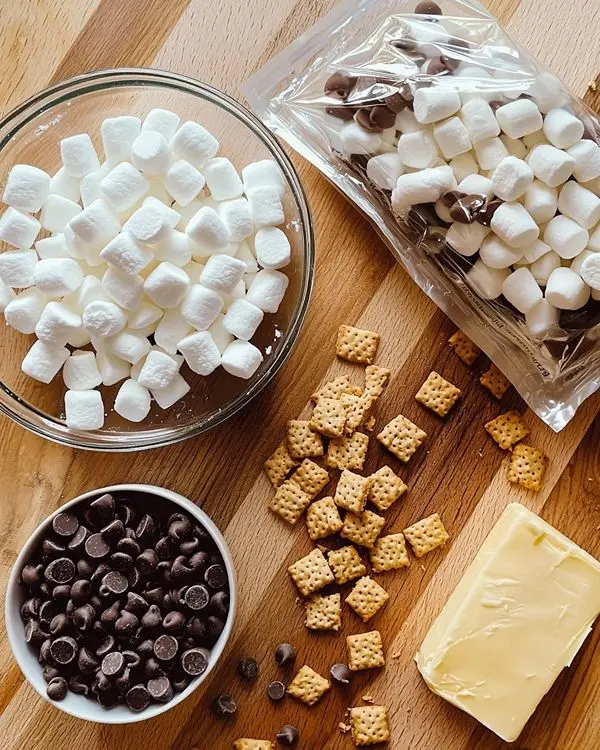
| Essential Base | US Measurement | Metric | Notes |
|---|---|---|---|
| Graham cracker crumbs | 2 cups | 240g | Use honey grahams for deeper flavor |
| Melted butter | ½ cup | 115g | Unsalted preferred for control |
| Bold Add-ins | US Measurement | Metric | Quality Tips |
|---|---|---|---|
| Chocolate chips | 4 cups | 680g | Semi-sweet or milk chocolate work best |
| Mini marshmallows | 1 package (10 oz) | 285g | Mini size distributes more evenly |
Shopping Smart at US Grocery Stores
When selecting graham crackers, head to the cookie aisle and look for brands like Honey Maid or Keebler. Oops! I almost forgot to mention this crucial tip: buy an extra sleeve of graham crackers because you’ll inevitably snack on them while baking. Trust me on this one.
For chocolate chips, Ghirardelli or Guittard offer superior melting qualities compared to generic brands. However, Nestle Toll House chips work perfectly fine and are widely available. The key indicator of quality chocolate chips? They should have a glossy appearance and break cleanly when bent.
Mini marshmallows trump regular-sized ones every time for this recipe. Jet-Puffed mini marshmallows toast evenly and create that coveted golden-brown top layer. Additionally, they don’t create those awkward large pockets that can make cutting difficult.
International Substitutions & Creative Variations
For Digestive Biscuit Lovers: Replace graham crackers with crushed digestive biscuits for a slightly less sweet base.
Gluten-Free Option: Use gluten-free graham crackers or substitute with crushed gluten-free cookies.
Vegan Transformation: Swap butter for vegan margarine and use vegan chocolate chips with vegan marshmallows.
S’more Bars Essential Equipment & Pro Setup Tips
You don’t need fancy equipment for these s’more bars, but having the right tools makes the difference between good and phenomenal results. Here’s what works best in my kitchen:
Must-Have Equipment:
- 9×13 inch baking pan (metal conducts heat better than glass)
- Large mixing bowl for combining ingredients
- Measuring cups (dry and liquid)
- Rubber spatula for pressing mixture
- Cooking spray or parchment paper
DIY Alternatives: No 9×13 pan? Two 8×8 pans work perfectly—just reduce baking time by 3-4 minutes. Missing a rubber spatula? The bottom of a measuring cup pressed with plastic wrap creates excellent pressure for firming the base.
Step-by-Step Perfection Guide
Step 1: Oven Preparation & Pan Setup
Preheat your oven to 350°F while you gather ingredients. This temperature creates the ideal environment for gradual cooking without burning the delicate marshmallow tops.
Grease your 9×13 pan thoroughly with cooking spray, paying special attention to corners where bars tend to stick. Alternatively, line with parchment paper, leaving overhang for easy removal—a technique I learned after struggling with stuck bars one too many times.
Step 2: Creating the Perfect Graham Base
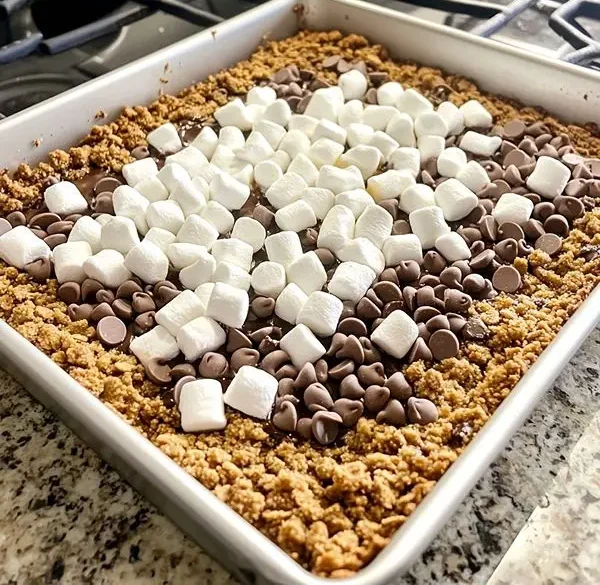
Combine graham cracker crumbs and melted butter in a large bowl. The mixture should feel like wet sand and hold together when squeezed. Man, oh man, getting this texture right is crucial for bars that hold their shape!
Pour the mixture into your prepared pan and press firmly using a rubber spatula or the bottom of a measuring cup. Focus on creating even thickness, especially along edges where the mixture tends to be thinner. Press until the surface feels compact and slightly glossy from the butter.
Step 3: First Bake for Foundation Strength
Bake the graham base for exactly 8 minutes. This pre-baking step, inspired by Julia Child’s tart-making techniques, ensures the bottom stays crisp even after adding toppings.
The base should look lightly golden and feel firm to gentle touch. If it appears too pale, give it another 1-2 minutes, but watch carefully to prevent over-browning.
Step 4: Chocolate Layer Strategy
Remove the pan from the oven and immediately sprinkle chocolate chips evenly across the hot surface. The residual heat begins melting the chocolate slightly, creating better adhesion for the final layer.
Here’s a pro tip I discovered during my testing phase: don’t spread the chocolate chips with a spoon. Instead, gently shake the pan to distribute them naturally—this prevents disturbing the graham base underneath.
Step 5: Marshmallow Magic Moment
Distribute mini marshmallows evenly over the chocolate layer. The key is achieving coverage without overcrowding—you want some chocolate peeking through for visual appeal and flavor balance.
Step 6: Final Bake to Golden Perfection
Return the pan to the oven for 20 minutes, or until marshmallows achieve that gorgeous golden-brown color reminiscent of perfect campfire toasting. The marshmallows should puff up and develop caramelized edges while maintaining soft centers.
Watch the final 5 minutes carefully—marshmallows can go from golden to burnt surprisingly quickly. If browning too fast, tent loosely with foil.
Step 7: Cooling & Setting Process
Let the bars cool completely at room temperature, then refrigerate for at least 2 hours. This cooling process allows all layers to set properly, making clean cuts possible.
For the cleanest cuts, use a sharp knife wiped clean between each slice. The refrigeration step isn’t optional—warm bars will fall apart and create a delicious but messy situation.
Expert Tips for Bakery-Quality S’more Bars Results
Temperature Control Mastery
Room temperature ingredients blend more easily, but slightly warm butter (not hot) creates better binding in the graham base. I learned this after making bars with cold butter that resulted in a crumbly, unstable foundation.
Texture Perfection Secrets
The graham cracker crumb texture makes all the difference. Too fine, and the base becomes dense. Too coarse, and it falls apart. Pulse store-bought crumbs briefly in a food processor if they seem too chunky, or crush whole graham crackers in a sealed bag with a rolling pin for better control.
Marshmallow Distribution Wisdom
Create small “valleys” between marshmallows for the chocolate to remain visible. This technique, learned from professional pastry chefs, ensures each bite contains all three components rather than overwhelming marshmallow sections.
Creative Variations for Every Occasion
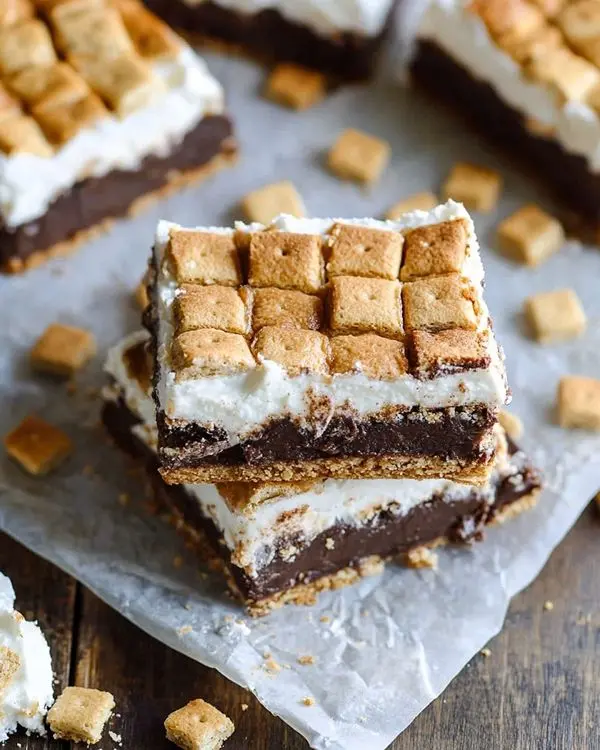
Regional American Twists
Southern Comfort Style: Add a layer of crushed pecans between chocolate and marshmallows, plus a drizzle of bourbon (alcohol cooks off during baking).
California Dreaming: Incorporate dried strawberries and white chocolate chips for a fruity twist that screams summer beach vibes.
New England Autumn: Mix in crushed maple cookies with the graham crackers and use dark chocolate chips for deeper, richer flavor.
Holiday Adaptations
Halloween Special: Use orange and black chocolate chips with ghost-shaped marshmallows for spooky seasonal fun.
Christmas Magic: Add crushed candy canes to the graham base and use red and green chocolate chips—kids absolutely love this festive version.
Dietary Modifications
Keto-Friendly Approach: Replace graham crackers with crushed sugar-free cookies and use sugar-free chocolate chips and marshmallows.
Protein Boost: Mix protein powder into the graham base for post-workout treats that satisfy sweet cravings while supporting fitness goals.
Storage & Make-Ahead Strategy
| Storage Method | Duration | Best Practices |
|---|---|---|
| Room Temperature | 3-4 days | Airtight container, parchment between layers |
| Refrigerated | 1 week | Sealed container, maintains firm texture |
| Frozen | 3 months | Wrap individually, thaw 30 minutes before serving |
S’more Bars Make-Ahead Magic
These bars actually improve after sitting overnight—the flavors meld beautifully, and the texture becomes perfectly chewy. Prepare them a day before your event for stress-free entertaining.
For party planning, cut bars into smaller squares for easier handling. They pair wonderfully with coffee, cold milk, or even vanilla ice cream for an elevated dessert experience.
Consider serving alongside other easy treats like Easy Italian Grinder Sliders for a complete party spread, or follow up with 4-Ingredient BBQ Sausage Bites for savory balance.
Troubleshooting Common Challenges
Why Are My Bars Falling Apart?
This usually indicates insufficient butter in the graham base or inadequate pressing. The mixture should hold together when squeezed—if it crumbles, add melted butter one tablespoon at a time until it coheres properly.
How Do I Prevent Burnt Marshmallows?
Position your oven rack in the center, not the top position. If marshmallows brown too quickly, reduce temperature to 325°F and extend baking time by 5 minutes. Every oven runs slightly differently, so adjust accordingly.
Can I Use Regular-Size Marshmallows?
Absolutely! Cut them in half with kitchen scissors for better distribution. However, mini marshmallows create more even browning and easier serving portions.
What If I Don’t Have Graham Crackers?
Crushed vanilla wafers, digestive biscuits, or even crushed pretzels create interesting alternative bases. Each brings its own unique flavor profile while maintaining the structural integrity needed for proper bars.
S’more Bars FAQs
How long do s’more bars need to cool before cutting?
S’more bars require complete cooling plus 2 hours of refrigeration before cutting. This allows all layers to set properly, preventing messy, crumbling cuts that ruin the beautiful presentation.
Can you make s’more bars without butter in the crust?
Yes, substitute melted coconut oil or margarine for butter in equal amounts. The key is having enough fat to bind the graham cracker crumbs into a cohesive, pressable base that won’t fall apart.
What’s the best way to cut clean s’more bar squares?
Use a sharp, thin knife wiped clean with a damp cloth between each cut. Score the surface lightly first, then cut through completely. Cold bars cut much cleaner than warm ones.
How do you store leftover s’more bars to maintain freshness?
Store s’more bars in an airtight container at room temperature for up to 4 days, or refrigerate for up to one week. Layer parchment paper between stacked bars to prevent sticking and maintain perfect texture.
Perfect Pairings & Serving Suggestions
These s’more bars shine brightest when served with complementary flavors and textures. Consider pairing them with Crock Pot Vanilla Pear Butter for an unexpected gourmet twist, or serve alongside Easy Amish Apple Fritter Bread for a complete comfort food dessert table.
For beverages, cold milk remains the classic choice, but hot coffee, chai tea, or even hot chocolate create delightful contrasts. During summer gatherings, serve with vanilla ice cream for an elevated s’mores sundae experience that guests will remember long after the last bite.
The beauty of these bars lies in their versatility—they work equally well at casual family dinners, elegant dinner parties, or packed in lunch boxes for special treats. Moreover, they transport beautifully, making them ideal for potlucks, picnics, and office celebrations.
Bringing Campfire Magic Home
Creating these s’more bars connects us to those cherished campfire memories while offering the convenience of modern kitchen precision.
Every golden-brown marshmallow top tells a story of patience and technique, while each layer delivers the nostalgic flavors we crave year-round.
The next time you’re planning a gathering or simply want to surprise your family with something special, remember that the best desserts often come from the simplest ingredients combined with a little creativity and lots of love.
These bars prove that you don’t need a campfire to create magic—sometimes all you need is a reliable oven and the willingness to transform everyday ingredients into extraordinary memories.
Share your s’more bars creations on social media and tag us—we love seeing how our recipes become part of your family traditions. After all, the best recipes are the ones that bring people together, one delicious bite at a time.
S’more Bars
Equipment
- 9×13 inch baking pan
- Large mixing bowl
- measuring cups
- Rubber spatula
- cooking spray
Ingredients
Essential Base
- 2 cups Graham cracker crumbs Use honey grahams for deeper flavor
- ½ cup Melted butter Unsalted preferred for control
Bold Add-ins
- 4 cups Chocolate chips Semi-sweet or milk chocolate work best
- 1 package Mini marshmallows 10 oz package, mini size distributes more evenly
Instructions
- Preheat oven to 350°F. Grease 9×13 pan with cooking spray, paying special attention to corners where bars tend to stick.
- Mix together the graham cracker crumbs and melted butter in a large bowl. The mixture should feel like wet sand and hold together when squeezed.
- Sprinkle mixture into the baking dish and press firmly on bottom and up the sides of the pan using a rubber spatula or measuring cup bottom. Focus on creating even thickness.
- Bake for 8 minutes until base looks lightly golden and feels firm to gentle touch.
- Remove from oven and immediately sprinkle chocolate chips evenly on top, followed by mini marshmallows. Gently shake pan to distribute naturally.
- Bake for 20 minutes, until marshmallows turn golden brown and develop caramelized edges. Watch the final 5 minutes carefully to prevent burning.
- Let cool completely at room temperature, then place in fridge for at least 2 hours before cutting. Use a sharp knife wiped clean between cuts for cleanest slices.

