Peppermint Bark Cookies combine rich chocolate cookies with creamy white chocolate frosting. Easy recipe with chocolate peppermint bark flavors, perfect for Christmas.
Hey, I’m Linda! Welcome to Tasty at Home, where bold flavors meet everyday kitchens.
Last December, I burned three batches of cookies trying to nail the perfect peppermint bark dessert. My kitchen smelled like a campfire mixed with crushed candy canes. Not exactly festive, right?
Well… after dozens of tests and one minor kitchen disaster, I cracked the code. These Peppermint Bark Cookies deliver everything you love about classic peppermint bark—rich dark chocolate, silky white chocolate, and that cooling mint burst—but in soft, chewy cookie form. The secret? Chilling the dough transforms the texture completely.
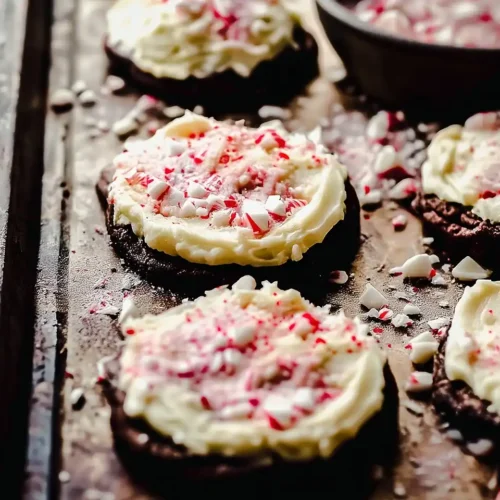
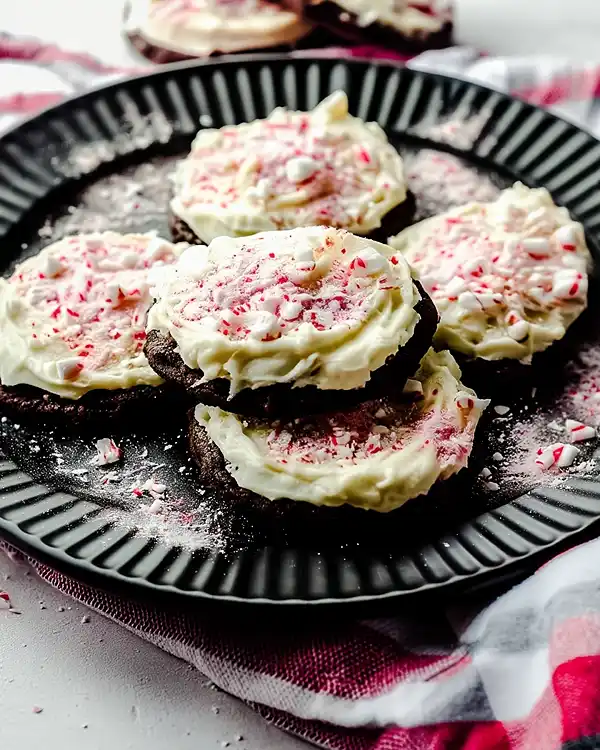
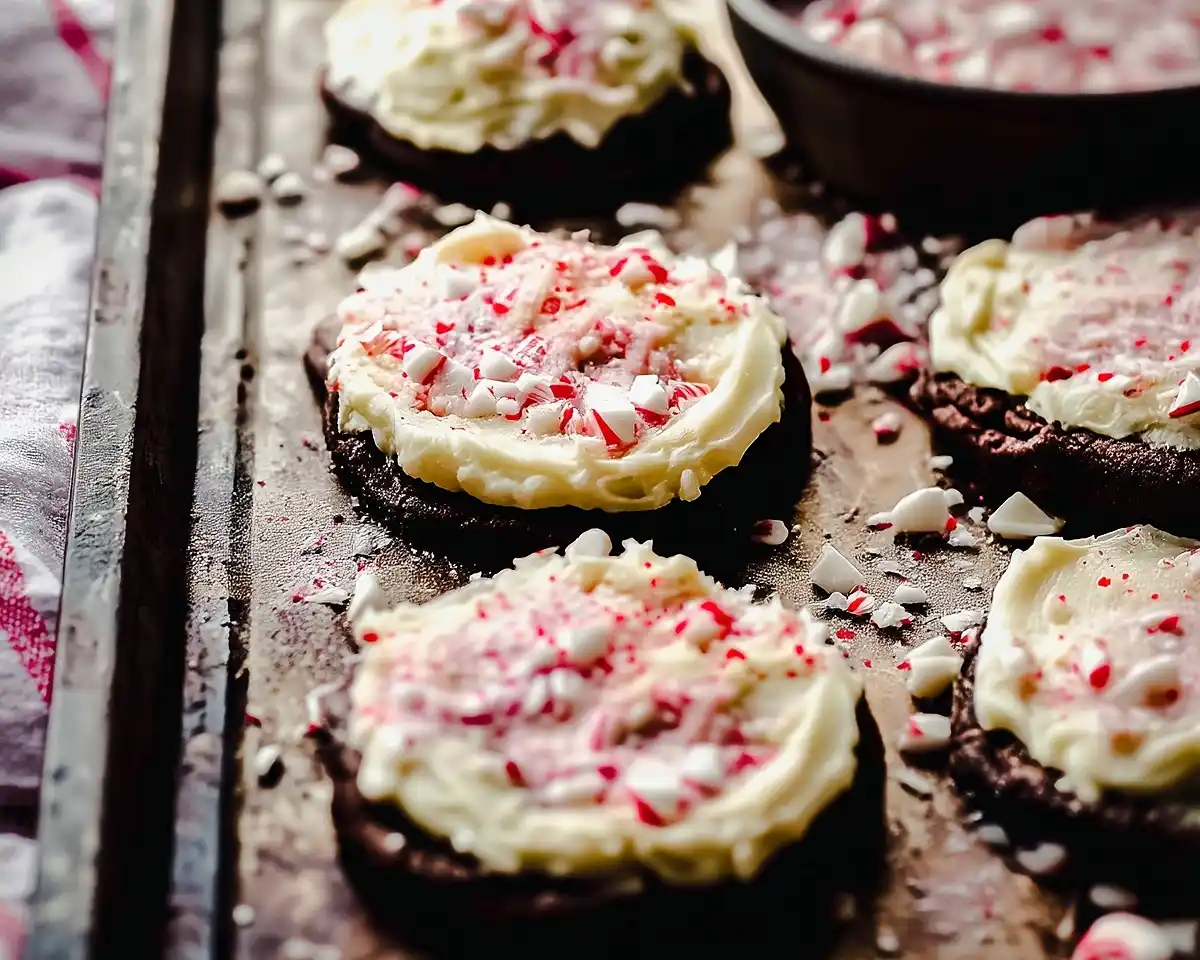
Picture this: deep chocolate cookies studded with melty chunks, topped with a cloud of white chocolate peppermint frosting, and finished with crushed candy canes that sparkle like fresh snow. Each bite tastes like December wrapped in a hug.
I’ve tested this recipe seventeen times. The results? Consistent perfection every single time. No fancy equipment needed, just your standard mixing bowls and a little patience during the chilling step.
Tasty at Home – Where bold flavors meet everyday kitchens.
Table of Contents
What Makes This Peppermint Bark Cookies Recipe Special
These aren’t your average Christmas cookies. The double chocolate base creates incredible depth—Dutch processed cocoa delivers that intense, almost fudgy flavor that makes every bite memorable. Semi-sweet chocolate chunks add pockets of melty richness throughout.
The white chocolate frosting? Man, oh man, it’s transformative. Most frosting recipes use only powdered sugar, but melting real white chocolate into the butter base creates a silky, trusting texture that spreads like a dream. The peppermint extract balances the sweetness without overwhelming your taste buds.
I learned this technique from watching Thomas Keller’s masterclass. He emphasizes using quality chocolate for baking because cheap chocolate contains stabilizers that prevent smooth melting. Trust me, spending an extra two dollars on good white chocolate chips makes all the difference.

Peppermint Bark Cookies
Equipment
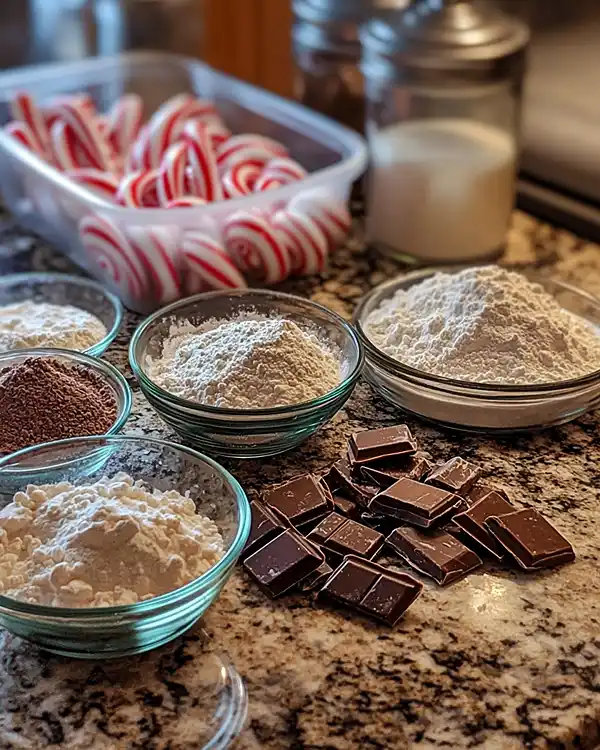
- mixing bowls
- Hand mixer or stand mixer
- Baking sheet
- Parchment paper
- Offset spatula
Ingredients
Cookie Dough
- 150 g All-purpose flour
- 36 g Dutch processed cocoa
- 2.5 g Baking soda
- 1.5 g Salt
- 113 g Unsalted butter Room temperature
- 200 g Granulated sugar
- 1 Large egg Room temperature
- 5 mL Vanilla extract
- 113 g Semi-sweet chocolate Coarsely chopped
White Chocolate Frosting
- 113 g White chocolate (melted)
- 113 g Unsalted butter Room temperature
- 180 g Powdered sugar Sifted
- 7.5 mL Vanilla extract
- 1.25 mL Peppermint extract
- 30-45 mL Heavy cream Adjust consistency
- 57 g White chocolate (chopped)
- 5 Candy canes Crushed for topping
Instructions
- Whisk together flour, cocoa, baking soda, and salt. Cream butter and sugar, then add egg and vanilla. Mix in dry ingredients and fold in chocolate. Chill dough for at least 1 hour.
- Preheat oven to 350°F (177°C). Scoop dough onto a baking sheet and bake 8–10 minutes. Cool completely before frosting.
- Prepare frosting by beating butter and powdered sugar, then adding melted white chocolate, extracts, cream, and chopped white chocolate.
- Frost cooled cookies and top with crushed candy canes.
Notes
Premium Ingredients for Superior Results
Quality matters tremendously when baking chocolate peppermint bark cookies. Dutch processed cocoa powder creates that signature deep color and rich flavor that natural cocoa simply cannot match. Look for brands like Droste or Guittard at your local grocery store.
Choose white chocolate with cocoa butter listed as the first ingredient—avoid “white chips” or “vanilla coating” products. Real white chocolate melts smoothly and tastes infinitely better. For candy canes, grab standard peppermint ones rather than novelty flavors.
Fresh baking soda makes cookies rise properly. If yours has been sitting in your pantry since 2019, replace it. Room temperature butter creams beautifully with sugar, creating that light, fluffy texture Julia Child always championed for perfectly structured baked goods.
Ingredient Table: Everything You Need

| Ingredient | US Measure | Metric | Notes |
|---|---|---|---|
| All-purpose flour | 1¼ cups | 150g | Spoon and level for accuracy |
| Dutch processed cocoa | ¼ cup + 2 Tbsp | 36g | Adds rich chocolate depth |
| Baking soda | ½ tsp | 2.5g | Must be fresh |
| Salt | ¼ tsp | 1.5g | Balances sweetness |
| Unsalted butter (cookies) | ½ cup | 113g | Room temperature |
| Granulated sugar | 1 cup | 200g | Creates chewy texture |
| Large egg | 1 | 50g | Room temperature |
| Vanilla extract | 1 tsp | 5mL | Pure, not imitation |
| Semi-sweet chocolate | 4 oz | 113g | Coarsely chopped |
| White chocolate (melted) | 4 oz | 113g | For frosting base |
| Unsalted butter (frosting) | ½ cup | 113g | Room temperature |
| Powdered sugar | 1½ cups | 180g | Sifted prevents lumps |
| Vanilla extract | 1½ tsp | 7.5mL | Pure preferred |
| Peppermint extract | ¼ tsp | 1.25mL | Start small, add more if needed |
| Heavy cream | 2-3 Tbsp | 30-45mL | Adjusts consistency |
| White chocolate (chopped) | 2 oz | 57g | For texture in frosting |
| Candy canes | 5 | – | Crushed for topping |
Shopping Tips for US Grocery Stores
Find Dutch processed cocoa in the baking aisle near regular cocoa powder. Hershey’s Special Dark works perfectly if you cannot locate Droste. Ghirardelli and Guittard white chocolate chips give excellent results and melt beautifully without seizing.
Candy canes appear in stores right after Halloween. Stock up early because popular flavors sell out quickly. Standard peppermint works best—skip the weird bacon or pickle varieties unless you enjoy culinary chaos.
Room temperature ingredients blend faster and create better texture. Pull butter and eggs from the refrigerator about ninety minutes before baking. Cold butter creates dense, flat cookies that spread too much during baking.
Smart Substitutions & Bold Variations
Can’t find Dutch processed cocoa? Natural cocoa works but reduces the deep chocolate color. Add an extra tablespoon to compensate for milder flavor. You know what though? The taste difference barely shows through that incredible frosting.
Need dairy-free options? Swap butter for vegan butter sticks (not margarine spreads). Use coconut cream instead of heavy cream in the frosting. Dark chocolate chips replace semi-sweet chunks. These adaptations work beautifully for friends with dietary restrictions.
No peppermint extract? Crush three extra candy canes and steep them in the heavy cream for twenty minutes. Strain before adding to frosting. This method infuses natural peppermint flavor without extracts containing alcohol.
International readers can substitute plain flour plus ¼ teaspoon baking powder for all-purpose flour. Caster sugar works instead of granulated. Double cream replaces heavy cream perfectly for UK bakers creating these Christmas peppermint bark desserts.
Essential Equipment & Step-by-Step Instructions
What You’ll Need
Grab two mixing bowls—one medium, one large. A handheld electric mixer works great, though a stand mixer saves arm strength. You’ll also need measuring cups and spoons, a cookie scoop (size #50 creates perfect portions), parchment paper or silicone baking mats, and one large baking sheet.
For melting white chocolate, use either a double boiler or a small saucepan. Microwave works too, but requires careful attention to prevent scorching. A small offset spatula spreads frosting smoothly across cookie tops like a professional bakery finish.
No cookie scoop? Roll dough between your palms into golf-ball-sized portions. They won’t be perfectly uniform, but honestly, rustic cookies taste just as delicious. No offset spatula? The back of a regular spoon works surprisingly well.
Making the Chocolate Cookie Base
Combine Your Dry Ingredients
Whisk together flour, Dutch processed cocoa, baking soda, and salt in your medium bowl. Oops! I forgot this step once and ended up with cocoa powder pockets throughout my cookies. Whisking ensures even distribution and consistent chocolate flavor in every single bite.
Set this bowl aside while you work on the butter mixture. The dry ingredients can sit for hours without affecting final results. Some bakers prep this step the night before to save time during busy holiday baking marathons.
Cream Butter and Sugar
Add softened butter and granulated sugar to your large bowl. Beat on medium-high speed for two to three minutes until the mixture turns light and fluffy. This step incorporates air, creating tender cookies rather than hockey pucks.
The mixture should lighten in color and increase slightly in volume. Scrape down the bowl sides halfway through to ensure everything combines evenly. Under-creaming creates dense cookies that never achieve that perfect chewy texture.
Add Wet Ingredients
Reduce mixer speed to medium. Add the egg and vanilla extract, then beat until fully combined. The mixture might look slightly curdled—this is completely normal. The egg needs about thirty seconds to incorporate properly into the butter mixture.
Room temperature eggs blend faster than cold ones pulled straight from the refrigerator. Cold eggs can cause the butter to seize up, creating an uneven texture throughout your cookie dough base.

Incorporate Dry Mixture
Turn mixer to low speed. Slowly add your flour and cocoa mixture, beating until just combined. Stop mixing as soon as you no longer see dry flour streaks. Over-mixing develops gluten, resulting in tough, cake-like cookies instead of tender ones.
Fold in the coarsely chopped semi-sweet chocolate by hand or with the mixer on the lowest setting. Distribute chunks evenly throughout the dough for chocolate in every bite. Let me tell you, nothing disappoints more than biting into a chocolate cookie and finding zero chocolate chunks.
Chill the Dough (Critical Step)
Cover your bowl with plastic wrap pressed directly against the dough surface. Refrigerate for at least one hour, though overnight works even better. Chilling firms up the butter, preventing cookies from spreading into thin, crispy disasters during baking.
I once skipped this step because dinner guests were arriving early. Those cookies spread into one giant chocolate pancake. Learn from my mistake—proper chilling is non-negotiable for thick, bakery-style cookies with those beautiful crackled tops.
The dough keeps refrigerated for up to three days. Make it Monday, bake it Wednesday. This flexibility makes holiday baking so much less stressful during December’s busy schedule.
Baking Your Cookies to Perfection
Prepare Your Oven
Preheat oven to 350°F (177°C). Position the rack in the center for even heat circulation. Line your baking sheet with parchment paper or a silicone mat—cookies slide right off without sticking, and cleanup becomes effortless.
Never bake on an ungreased or bare metal sheet. Cookies will stick stubbornly, and you’ll lose those beautiful bottoms when trying to remove them. Invest in parchment paper or reusable silicone mats—they pay for themselves in saved sanity.
Shape and Bake
Use a #50 cookie scoop to portion dough into uniform balls. Roll each portion briefly between your palms for smooth, round shapes. Place them two inches apart on your prepared baking sheet—they spread slightly but not excessively during baking.
Bake for eight to ten minutes. Edges should look set while centers remain slightly soft and no longer appear shiny. They’ll look underbaked, but trust the process. Cookies continue cooking on the hot baking sheet after leaving the oven.
Over-baking creates dry, crumbly cookies. Remove them when they still look soft in the middle. The residual heat firms them up perfectly over the next five minutes. This technique, endorsed by countless professional bakers, guarantees chewy centers every time.
Cool Properly
Leave cookies on the baking sheet for five minutes after removing from the oven. This resting period allows them to set without breaking apart. Transfer them carefully to a wire cooling rack using a thin metal spatula.
Cool completely before frosting—warm cookies will melt your beautiful white chocolate frosting into a puddle. Patience here prevents frustration later. I usually bake cookies in the morning and frost them after lunch.
Creating the Peppermint White Chocolate Frosting
Melt White Chocolate
Chop four ounces of white chocolate coarsely and place in a small saucepan over low heat. Stir constantly until melted and smooth. Remove from heat immediately—white chocolate scorches faster than dark chocolate due to milk solids.
Let melted chocolate cool at room temperature for at least twenty minutes. Hot chocolate will melt your butter, creating soupy frosting that won’t hold its shape. I usually melt the chocolate before mixing other frosting ingredients to give it proper cooling time.
Microwave method works too—use fifteen-second intervals at fifty percent power, stirring between each burst. Never rush white chocolate melting. Patience prevents seized chocolate that turns grainy and unusable.
Beat Butter Base
Add softened butter to a medium bowl. Beat on medium speed for one full minute. This aerates the butter, creating light frosting rather than dense, heavy spreads. Scrape bowl sides halfway through for even consistency.
Reduce mixer speed to low and gradually add powdered sugar. Start slowly to prevent a sugar cloud explosion in your kitchen. Once sugar begins incorporating, you can increase speed slightly. Mix until the texture resembles coarse sand.
Combine Chocolate and Flavorings
Stir cooled white chocolate until smooth. Add it to your butter-sugar mixture and increase mixer speed to medium. Beat for two full minutes until creamy, fluffy, and thoroughly combined. The frosting should lighten in color as air incorporates.
Reduce speed to low again. Add vanilla extract, peppermint extract, and salt. Start with the smaller peppermint amount—you can always add more, but you cannot remove it. Beat until evenly distributed throughout the frosting.
Adjust Consistency
Add heavy cream one tablespoon at a time, mixing after each addition. Stop when frosting reaches your desired spreading consistency. I prefer mine thick enough to hold shape but soft enough to spread easily with an offset spatula.
Fold in finely chopped white chocolate pieces by hand. These create delightful texture surprises throughout the frosting, mimicking the chunky bits found in traditional peppermint bark desserts. The small pieces add visual appeal and extra white chocolate flavor.
Frost and Garnish
Use a small offset spatula to spread frosting generously across each cooled cookie. Don’t be shy—these deserve a thick, luxurious frosting layer. Sprinkle crushed candy canes immediately over wet frosting so pieces stick properly.
Crush candy canes by placing them in a sealed plastic bag and smashing with a rolling pin. You want a mix of fine dust and small chunks for varied texture. The red and white swirls create that iconic peppermint bark appearance everyone loves.

Expert Tips for Bakery-Quality Results
Temperature Control Matters
Room temperature ingredients blend smoothly and create superior texture. Cold butter won’t cream properly with sugar, resulting in dense cookies. Cold eggs can cause butter to seize into lumps instead of staying smooth and fluffy.
Pull ingredients from the refrigerator ninety minutes before starting. Press your finger into the butter—it should leave an indent without sinking completely through. Eggs should feel cool but not cold from the refrigerator.
Measuring Flour Correctly
Spoon flour into measuring cups and level with a knife edge. Never scoop directly from the bag—this packs flour, adding up to twenty-five percent more than recipes intend. Too much flour creates dry, tough cookies that crumble instead of staying chewy.
Kitchen scales provide most accurate measurements. Invest in an inexpensive digital scale for consistent baking results every single time. Professional bakers weigh ingredients rather than using volume measurements for good reason.
The Chilling Step Changes Everything
Refrigerating cookie dough for at least one hour prevents excessive spreading during baking. Chilled butter melts slower in the oven, giving cookies time to set before flattening into thin wafers. This step creates those thick, bakery-style cookies with beautiful crackled tops.
Overnight chilling develops deeper flavors as ingredients marry together. The chocolate chunks firm up, preventing them from completely melting during baking. You’ll notice more intense chocolate taste in dough chilled for twenty-four hours versus one hour.
Frosting Consistency Troubleshooting
Frosting too thick? Add more heavy cream, one teaspoon at a time. Frosting too thin? Add more powdered sugar in two-tablespoon increments. The ideal consistency spreads smoothly without dripping off cookie edges.
White chocolate temperature affects final texture dramatically. If chocolate feels warm when added to butter, the frosting will turn soupy. Always let melted chocolate cool completely before proceeding with the recipe.
Creative Variations to Try
Double Mint Chocolate – Add ½ cup crushed Andes mints to cookie dough along with chocolate chunks. Use mint chocolate chips instead of semi-sweet for extra minty punch. These taste like thin mint Girl Scout cookies upgraded to gourmet status.
Mocha Peppermint Bark – Replace one tablespoon cocoa powder with instant espresso powder. The coffee enhances chocolate flavor without tasting like coffee. Add espresso powder to frosting too for sophisticated, grown-up cookies perfect for holiday parties.
Dark Chocolate Version – Use dark chocolate chunks instead of semi-sweet. Replace white chocolate frosting with dark chocolate ganache topped with crushed peppermints. These satisfy serious chocolate lovers who prefer less sweet desserts during the holiday season.
Gluten-Free Adaptation – Substitute cup-for-cup gluten-free flour blend for all-purpose flour. Add ¼ teaspoon xanthan gum if your blend doesn’t already include it. Chill dough for at least two hours for best texture results.
Stuffed Cookie Version – Flatten dough balls slightly, place a peppermint patty in the center, and wrap dough around it. Bake as directed. The hidden peppermint center creates a delightful surprise with every bite.
Storage and Make-Ahead Instructions

Store frosted cookies in a single layer in airtight containers at room temperature. They stay fresh for three days maximum. Layer unfrosted cookies with parchment paper between layers—they keep up to five days this way.
Frosted cookies soften slightly as they sit. The crushed candy canes begin dissolving into the frosting after about six hours, though many people prefer this slightly sticky texture. Store separately if you want maximum crunch from candy cane pieces.
| Storage Method | Duration | Best Practices |
|---|---|---|
| Room temperature (frosted) | 3 days | Airtight container, single layer |
| Room temperature (unfrosted) | 5 days | Airtight container, parchment between layers |
| Refrigerated (frosted) | 5 days | Airtight container, bring to room temp before serving |
| Frozen (baked, unfrosted) | 2 months | Wrap individually, freeze flat |
| Frozen (dough balls) | 3 months | Flash freeze, then bag, add 1-2 min bake time |
Perfect Pairings and Serving Ideas
Serve these chocolate peppermint bark cookies alongside homemade hot cocoa with marshmallows for an unforgettable winter dessert experience. The warm chocolate drink complements cool peppermint flavors beautifully, creating balanced sweetness that never overwhelms.
Package cookies in clear cellophane bags tied with red ribbon for gorgeous holiday gifts. Include a small card with storage instructions so recipients know these treats stay fresh at room temperature. Homemade gifts always feel more meaningful than store-bought items.
Create a stunning Christmas cookie platter combining these with traditional stuffed shells, sugar cookies, and gingerbread. The variety of textures and flavors impresses guests at holiday gatherings without requiring hours of complicated baking.
Peppermint Bark Cookies FAQs
Can I make peppermint bark cookies without a stand mixer?
Yes, a handheld electric mixer works perfectly for this peppermint bark cookies recipe. Beat butter and sugar on high speed for an extra thirty seconds to compensate for less powerful motors. You can even mix by hand using a wooden spoon and serious elbow grease, though creaming takes longer.
What makes these cookies stay soft and chewy?
The combination of proper butter-to-sugar ratio, under-baking slightly, and storing in airtight containers maintains that perfect chewy texture. Remove cookies when centers still look slightly underdone—they firm up during cooling without becoming dry or crumbly.
How do I prevent frosting from melting off warm cookies?
Always cool cookies completely to room temperature before frosting. Warm cookies melt butter-based frostings, creating a soupy mess. Wait at least thirty minutes after removing cookies from the cooling rack before decorating with white chocolate peppermint frosting.
Can I use mint extract instead of peppermint extract?
Peppermint extract provides that classic candy cane flavor essential for authentic chocolate peppermint bark cookies. Mint extract tastes more like spearmint, which creates a different flavor profile. Use peppermint for best results matching traditional peppermint bark desserts.
Best way to crush candy canes without making a mess?
Place unwrapped candy canes in a heavy-duty zip-top bag and seal tightly. Wrap the bag in a dish towel to prevent punctures. Use a rolling pin or meat mallet to crush into your desired size. This method contains the mess completely.
Make These Holiday Cookies Your New December Tradition
These Peppermint Bark Cookies bring together everything magical about the holiday season. Rich chocolate, cool peppermint, and sweet white chocolate create flavor harmony that makes December feel complete. Every batch disappears faster than the last.
Remember my kitchen disaster with those burned cookies? Well, now this recipe is my most-requested holiday treat. Friends text me in November asking if I’m making “those peppermint cookies” again this year.
Pair these beauties with cranberry roast beef for a complete Christmas dinner spread. The sweet cookies balance savory main courses perfectly. Don’t forget to brew fresh coffee or pour cold milk for dunking—it’s practically mandatory.
Try making a double batch. Trust me on this one—you’ll want extras for spontaneous cookie exchanges and midnight snacking.
What’s your favorite holiday cookie tradition? Drop a comment below sharing your Christmas baking memories. I’d love to hear which recipes make your December special every single year.
Ready to expand your holiday baking repertoire? Check out our apple and cranberry grilled cheese for a savory option, or dive into blueberry cream cheese bars for another sweet treat that disappears fast at parties.

