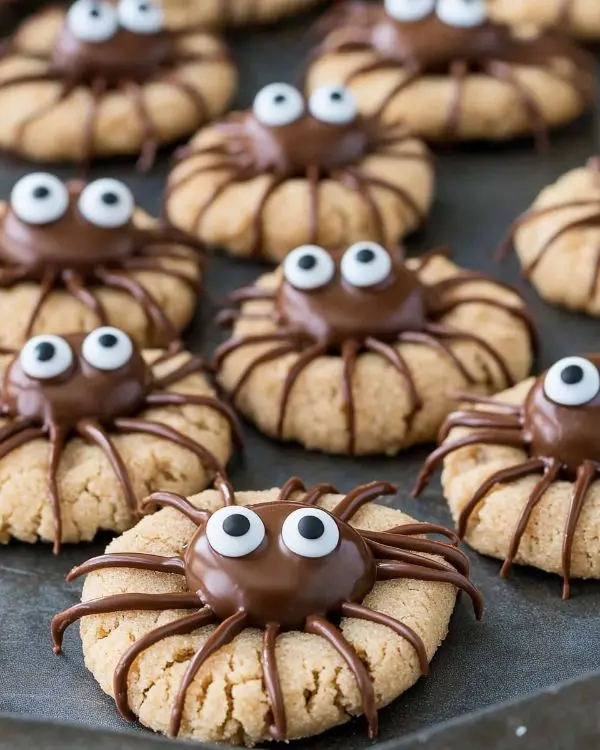
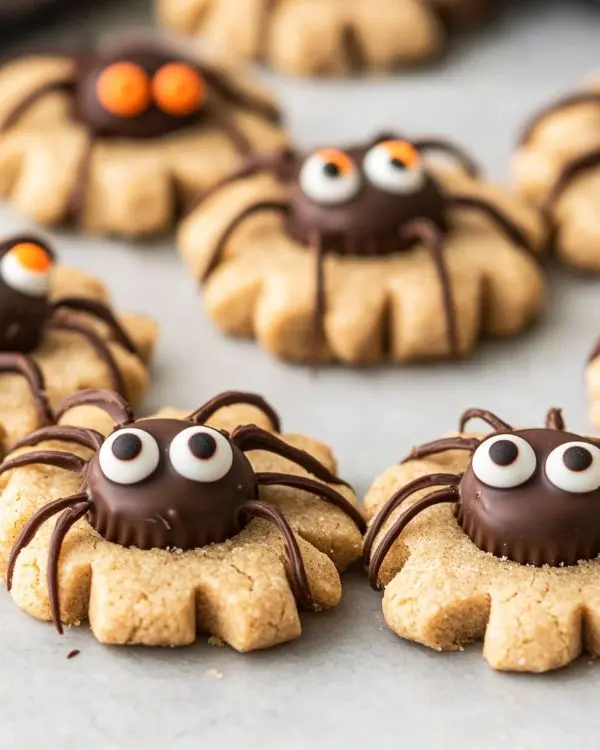
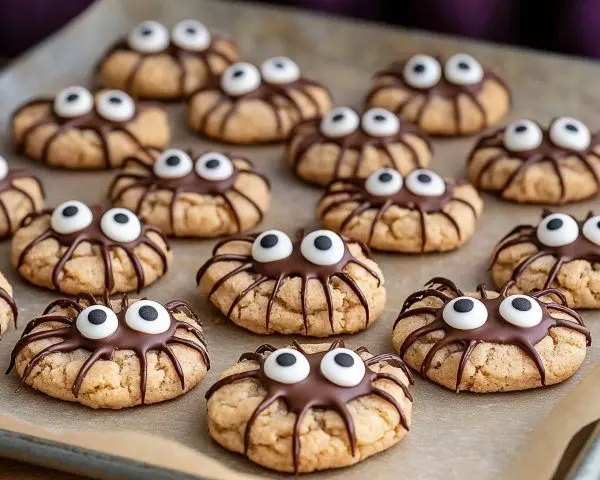
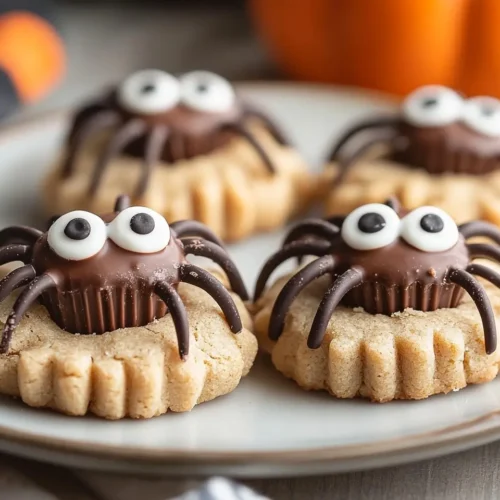
Peanut Butter Spider Cookies with Reese’s cups create spooky Halloween treats. Easy recipe with chocolate legs and candy eyes for amazing results.
Hi, I’m Linda, and welcome to Tasty at Home—where bold flavors meet everyday kitchens. Last October, my neighbor’s six-year-old knocked on my door wearing a vampire costume. Well, he took one look at my Peanut Butter Spider Cookies cooling on the counter and declared them “scarier than real spiders but way more delicious.”
Man, oh man, that kid had a point. These Halloween Nutter Butter Cookies—well, my version anyway—pack all the creepy-crawly fun without the eight-legged terror. I’ve spent three Halloween seasons perfecting this recipe, burning more chocolate than I care to admit and learning the hard way that timing matters when you’re dealing with melted Reese’s cups.
You know what makes these Peanut Butter Cup Spider Cookies special? They strike that perfect balance between nostalgic childhood Halloween memories and sophisticated flavors that make adults reach for seconds. Whether you’re planning a Halloween party or just want to surprise the trick-or-treaters, this recipe transforms simple ingredients into edible art.
Let me tell you, after testing dozens of variations, I’ve cracked the code on creating spiders that actually look scary-cute rather than just messy. The secret lies in freezing those mini Reese’s cups and getting your chocolate consistency just right for drawing those perfect spider legs.
These Reese’s Spider Cookies will become your go-to Halloween treat. Trust me on this one—I’ve watched kids and adults alike light up when they see these creepy-crawly confections. The combination of soft peanut butter cookie, melty chocolate center, and those adorable (yet spooky) candy eyes creates pure Halloween magic.
Tasty at Home – Where bold flavors meet everyday kitchens.
Table of Contents
What Makes These Peanut Butter Spider Cookies Irresistible

These aren’t your average Halloween cookies. Furthermore, they combine three beloved American treats: peanut butter cookies, Reese’s peanut butter cups, and chocolate decoration artistry. The result? A cookie that delivers both visual impact and incredible taste.
The genius lies in the timing and technique. First, you create a soft, chewy peanut butter cookie base using the perfect ratio of brown sugar to granulated sugar. Then, while the cookies are still warm from the oven, you press frozen mini Reese’s cups into their centers. Finally, you transform them into eight-legged creatures using melted chocolate and candy eyes.
What sets this recipe apart from other Halloween treats? The texture contrast keeps every bite interesting. Additionally, the frozen Reese’s cups maintain their shape instead of melting completely into the cookie.
Essential Ingredients for Perfect Spider Cookies
| Cookie Base | US Measure | Metric | Notes |
|---|---|---|---|
| Unsalted butter | ½ cup (1 stick) | 113g | Room temperature |
| Brown sugar | ½ cup | 107g | Packed |
| Granulated sugar | ⅓ cup | 66g | Plus extra for rolling |
| Creamy peanut butter | ¾ cup | 201g | Not natural style |
| Large egg | 1 | 1 | Room temperature |
| Vanilla extract | 1 tsp | 5ml | Pure extract preferred |
| All-purpose flour | 1½ cups | 180g | Spooned and leveled |
| Baking soda | 1 tsp | 5g | Fresh for best rise |
| Baking powder | ½ tsp | 2.5g | Double-acting |
| Salt | ½ tsp | 3g | Fine sea salt |
| Decoration Essentials | Amount | Purpose |
|---|---|---|
| Mini Reese’s cups | 24 pieces | Spider bodies |
| Semi-sweet chocolate chips | ½ cup (85g) | Spider legs |
| Candy eyeballs | 48 pieces | Spooky eyes |
Shopping Tips for US Grocery Stores
When shopping for these Halloween Nutter Butter Cookies, head straight to the seasonal candy aisle first. Most major chains like Target, Walmart, and grocery stores stock candy eyeballs near Halloween decorating supplies. However, if you can’t find them, check the baking aisle year-round—they’re often available with cake decorating supplies.
For the best results, choose Jif or Skippy creamy peanut butter rather than natural varieties. Natural peanut butter contains more oil, which can make your cookies spread too much. Moreover, stick with name-brand mini Reese’s cups since store brands sometimes have different melting points.
Bold Add-ins for Creative Variations:
- Orange food coloring (1-2 drops) for Halloween-themed cookie dough
- Mini chocolate chips mixed into the dough for extra texture
- Crushed Oreo cookies for “dirt” around your spiders
- Halloween sprinkles for additional spooky decoration
International Substitutions
Can’t find mini Reese’s cups outside the US? Use any small chocolate-peanut butter candy or even mini peanut butter cups from local confectionery shops. Similarly, candy eyeballs can be replaced with white chocolate chips dotted with dark chocolate for pupils.
Equipment and Step-by-Step Instructions
Essential Equipment (Plus DIY Alternatives)
You’ll need a few key tools to create perfect Peanut Butter Cup Spider Cookies. First, an electric mixer makes the cookie dough preparation effortless, though you can cream butter and sugars by hand with vigorous whisking. Additionally, a small cookie scoop ensures uniform spider bodies, but a tablespoon works just fine.
Must-Have Tools:
- Electric mixer (hand mixer or stand mixer)
- Large mixing bowl
- Small cookie scoop or tablespoon
- Silicone-lined baking sheets
- Microwave-safe bowl for melting chocolate
- Squeeze bottle or zip-top bag for chocolate decoration
Pro tip from my kitchen disasters: I learned the hard way that parchment paper doesn’t work as well as silicone mats for these cookies. The silicone prevents sticking and makes transferring easier without disturbing those delicate spider legs.
Step 1: Prepare Your Spider Bodies (The Freezer Trick)
Unwrap approximately 24 mini Reese’s cups and place them in a bowl. Then, put the bowl directly in your freezer. This crucial step prevents the candy from completely melting when pressed into hot cookies.
Meanwhile, preheat your oven to 350°F. This temperature creates the perfect balance—hot enough to bake the cookies properly but not so hot that your Reese’s cups turn into chocolate soup.
Step 2: Create the Perfect Cookie Base
In your mixing bowl, combine the room-temperature butter, brown sugar, and granulated sugar. Beat with your electric mixer for exactly one minute until the mixture becomes smooth and fluffy. You’ll know it’s ready when the color lightens slightly and the texture resembles whipped frosting.
Next, add the peanut butter, egg, and vanilla extract. Beat again for less than one minute—overbeating can make your cookies tough. The mixture should be well combined and creamy.
Common mistake I made: Don’t skip bringing your egg to room temperature. Cold eggs can cause the butter to seize up, creating lumpy dough instead of smooth cookie base.
Step 3: Mix in the Dry Ingredients
Add the flour, baking soda, baking powder, and salt to your wet mixture. Mix on low speed or fold with a spatula until just combined. Seriously, stop as soon as you don’t see flour streaks. Overmixing develops gluten, resulting in tough cookies instead of the tender texture we’re after.
The finished dough should be soft but not sticky. If it seems too wet, refrigerate for 15 minutes before shaping.
Step 4: Shape and Sugar-Roll Your Cookies
Use your cookie scoop or tablespoon to form uniform balls of dough. Roll each ball between your palms to create perfect spheres, then roll them in granulated sugar. This sugar coating creates a delightful crackled exterior that’s both beautiful and delicious.
Place cookies 2-3 inches apart on your silicone-lined baking sheets. They’ll spread slightly during baking, so adequate spacing prevents spider cookie collisions.
Step 5: Bake to Golden Perfection
Bake for 8-11 minutes, watching for edges that begin to crack and turn golden brown. The centers might look slightly underdone—that’s perfect. They’ll continue cooking on the hot pan after removal.
Timing matters here. Underbaked cookies won’t hold the Reese’s cups properly, while overbaked ones become too crispy for pressing in the candy.
Step 6: Create Your Spider Bodies
Remove cookies from the oven and immediately press one frozen mini Reese’s cup into each cookie’s center. Press gently but firmly—you want the candy to nestle into the warm cookie without sinking completely.
Here’s where patience pays off: Allow cookies to cool for 15-20 minutes before moving them to a cooling rack. Moving them too early causes the Reese’s cups to lose their shape, and nobody wants flat-bodied spiders.
Step 7: Master the Chocolate Spider Legs
Place chocolate chips in a microwave-safe bowl. Microwave on 50% power for three minutes, stirring after each minute. Continue microwaving in 30-second intervals until completely smooth.
The key to perfect spider legs? Getting the chocolate consistency just right. It should flow easily but not be so thin that it runs everywhere. Transfer melted chocolate to a squeeze bottle or zip-top bag with the corner snipped off.
Famous chef inspiration: Julia Child always emphasized the importance of proper chocolate tempering, and while we’re not fully tempering here, controlling the melting process creates much better results.
Step 8: Bring Your Spiders to Life
Draw four legs on each side of every cookie, starting from the Reese’s cup body and extending outward. Make legs slightly curved rather than straight—it looks more realistic and spooky.
For the eyes, use a tiny dab of melted chocolate on the back of each candy eyeball to attach them to the Reese’s cup. Two eyes per spider is classic, but feel free to get creative with extra eyes for more dramatic effect.
Allow the chocolate to set completely before moving cookies to your serving platter. This usually takes about 30 minutes at room temperature.

Expert Tips and Creative Variations
Professional Secrets for Perfect Results
After making hundreds of these Peanut Butter Spider Cookies, I’ve discovered several game-changing techniques. First, the cookie dough can be made a day ahead and refrigerated. Cold dough actually shapes more easily and results in less spreading during baking.
Moreover, if your chocolate gets too thick while decorating, add a teaspoon of vegetable shortening and microwave for 15 seconds. This brings it back to the perfect consistency without affecting the taste.
Storage and make-ahead magic: These cookies actually improve after sitting overnight. The flavors meld together, and the texture becomes perfectly chewy.
Creative Variations That’ll Amaze Your Guests
Regional Halloween Twist: In the South, try adding a pinch of cayenne pepper to the cookie dough for a subtle kick that complements the peanut butter beautifully. Northern cooks might prefer a touch of maple extract instead of vanilla for a fall-inspired flavor.
Dietary Modifications:
- Gluten-free: Substitute cup-for-cup gluten-free flour blend
- Dairy-free: Use vegan butter and dairy-free chocolate chips
- Reduced sugar: Replace half the granulated sugar with sugar substitute designed for baking
Holiday Adaptations:
- Christmas spiders: Use green food coloring and red candy eyes
- Valentine’s Day: Pink dough with white chocolate legs
- Easter: Pastel-colored dough with different candy centers
Storage and Serving Suggestions
| Storage Method | Duration | Best Practices |
|---|---|---|
| Room temperature | 5-7 days | Airtight container with parchment between layers |
| Refrigerator | 2 weeks | Same container method, bring to room temp before serving |
| Freezer | 3 months | Freeze without decoration, add legs and eyes after thawing |
These Halloween Nutter Butter Cookies pair beautifully with cold milk or hot apple cider. For adult Halloween parties, serve alongside our famous Halloween punch for a complete spooky spread.
Additionally, they make fantastic additions to Halloween cookie platters combined with these marshmallow rice krispies Halloween brains for a truly creepy dessert table.
Peanut Butter Spider Cookies FAQs
Can I make Peanut Butter Spider Cookies ahead of time?
Absolutely! Bake the cookies and add the Reese’s cups up to three days ahead. Store in airtight containers and add the chocolate legs and eyes on the day of serving for best appearance.
Why do my spider legs keep breaking when I pipe them?
Your chocolate is likely too thick or too cool. Reheat gently and add a tiny amount of vegetable shortening to improve flow. Practice piping on parchment paper first.
What’s the best way to transport these Halloween cookies?
Use a sturdy container with tight-fitting lid and place parchment between layers. The spider legs are delicate, so avoid stacking too high or jostling during transport.
Can I use regular-sized Reese’s cups instead of mini ones?
Mini cups work best because they’re proportional to the cookie size and don’t overwhelm the spider appearance. Regular cups would create giant spider bodies that look less realistic.
How do I prevent the Reese’s cups from sinking into the cookies?
The freezing step is crucial—it keeps the candy firm when pressed into warm cookies. Also, don’t overbake the cookies, as they’ll be too soft to support the weight.
Conclusion: Your New Halloween Tradition Awaits

These Peanut Butter Spider Cookies represent everything I love about Halloween baking—they’re spooky enough to thrill kids but delicious enough to satisfy grown-up taste buds. The combination of soft peanut butter cookies, melty chocolate centers, and those adorable candy eyes creates pure Halloween magic in every bite.
Remember that neighbor’s kid I mentioned at the beginning? He’s now a teenager, and guess what he still requests every October? These exact spider cookies. That’s the power of a truly great recipe—it becomes part of your family’s Halloween story.
Serve these alongside a warm mug of hot chocolate or pair them with our ground beef stovetop chili for a complete Halloween dinner that balances spooky sweets with hearty comfort food. The kids will love the theatrical presentation, while adults appreciate the sophisticated peanut butter and chocolate flavors.
I’d love to see your spider cookie creations! Tag us on social media with your photos—especially if you try any of the creative variations I’ve shared. There’s something magical about seeing these little chocolate creatures come to life in kitchens across America.
What Halloween memory will these Peanut Butter Cup Spider Cookies create in your home? I have a feeling they’re about to become your new October tradition. After all, the best recipes don’t just fill our stomachs—they create the sweet memories that make holidays special.

Peanut Butter Spider Cookies
Equipment
- Electric mixer
- Large mixing bowl
- Small cookie scoop or tablespoon
- Silicone-lined baking sheets
- Microwave-safe bowl
- Squeeze bottle or zip-top bag
Ingredients
Cookie Base
- ½ cup Unsalted butter Room temperature
- ½ cup Brown sugar Packed
- ⅓ cup Granulated sugar Plus extra for rolling
- ¾ cup Creamy peanut butter Not natural style
- 1 Large egg Room temperature
- 1 tsp Vanilla extract Pure extract preferred
- 1 ½ cups All-purpose flour Spooned and leveled
- 1 tsp Baking soda Fresh for best rise
- ½ tsp Baking powder Double-acting
- ½ tsp Salt Fine sea salt
Decoration Essentials
- 24 pieces Mini Reese’s cups Spider bodies
- ½ cup Semi-sweet chocolate chips Spider legs
- 48 pieces Candy eyeballs Spooky eyes
Instructions
- Unwrap mini Reese’s cups and freeze them. Preheat oven to 350°F (175°C).
- Cream butter, brown sugar, and granulated sugar until fluffy. Add peanut butter, egg, and vanilla, mixing until combined.
- Mix in flour, baking soda, baking powder, and salt until just combined. Chill dough if too sticky.
- Shape dough into balls, roll in sugar, and place on lined baking sheets.
- Bake 8–11 minutes until edges are golden and centers look slightly underdone.
- Press frozen Reese’s cups gently into warm cookies. Let cool 15–20 minutes.
- Melt chocolate chips, transfer to piping bag or zip-top bag, and pipe 8 spider legs per cookie.
- Attach candy eyeballs with melted chocolate. Let set before serving.

