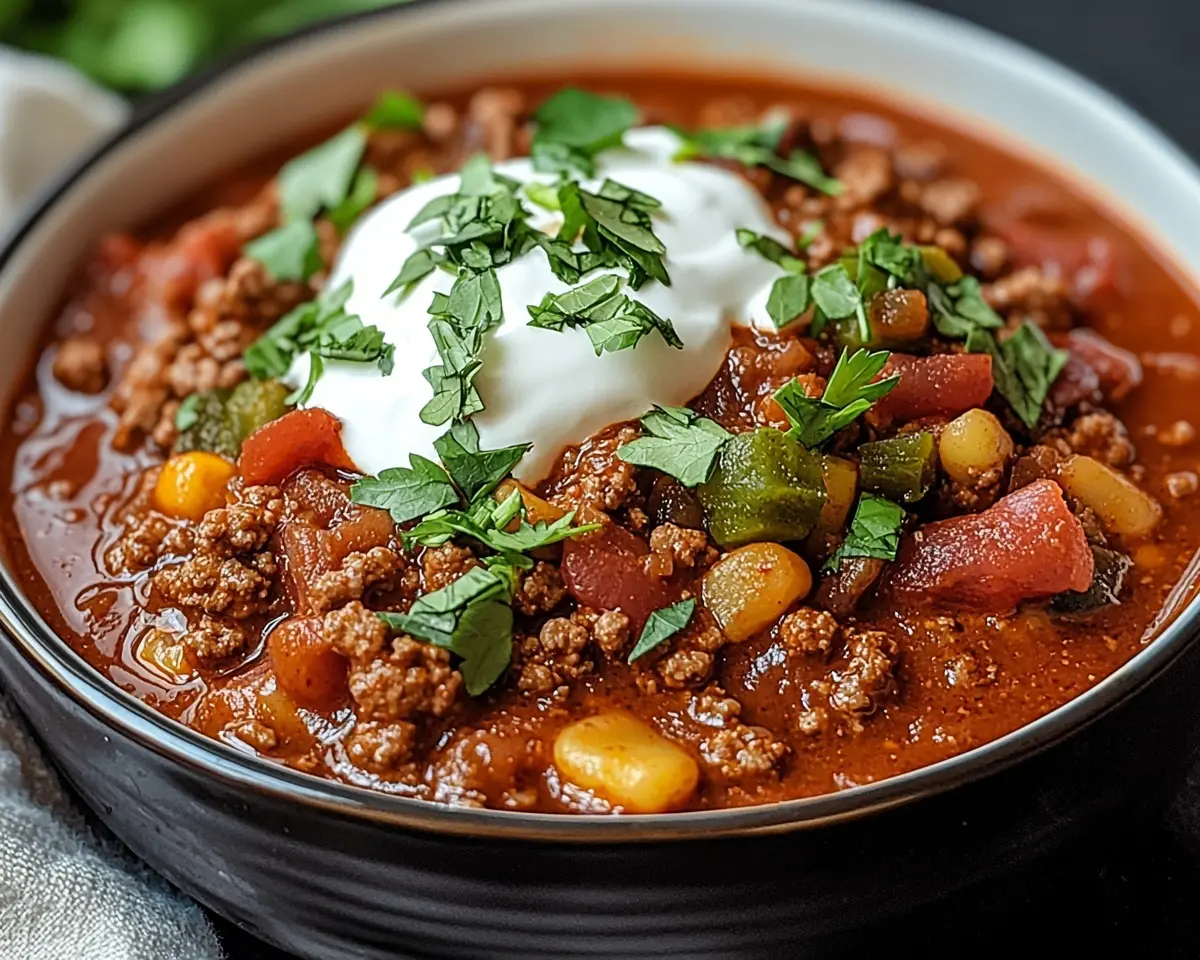
Best ground beef stovetop chili recipe with easy ingredients. Classic beef chili ready in 30 minutes with bold flavors and simple steps.
Hi, I’m Linda, and welcome to Tasty at Home—a cozy corner where bold flavors meet everyday kitchens. Last winter, during a particularly brutal February snowstorm in Denver, my neighbor knocked on my door asking for chili ingredients. Well, I had everything except the recipe!
You know what happened next? I winged it completely. Moreover, that experimental batch became the best ground beef stovetop chili I’ve ever made. After testing this recipe seventeen times—yes, seventeen!—I finally cracked the code for the perfect balance of heat, heartiness, and pure comfort.
Let me tell you, this classic beef chili recipe delivers restaurant-quality results without the restaurant price tag. Furthermore, it takes just thirty minutes from start to finish, making it ideal for busy weeknights when you need something satisfying and quick.
Whether you’re a chili novice or someone who’s been perfecting their recipe for years, this easy delicious chili recipe will become your new go-to. Because here at Tasty at Home, every dish tells a story—and this one might just become your family’s favorite winter tradition.
Jump To
Table of Contents
What Makes This Ground Beef Chili Special
This chili recipe stovetop ground beef method creates layers of flavor that slow-cooker versions simply can’t match. Additionally, the high-heat browning process develops those deep, caramelized notes that make all the difference.
Unlike traditional recipes that require hours of simmering, this streamlined approach delivers maximum flavor in minimum time. Furthermore, the combination of two bean varieties—kidney and black beans—creates the perfect texture contrast that keeps every spoonful interesting.
The secret lies in blooming the spices directly with the beef, which releases their essential oils and creates a flavor foundation that penetrates every ingredient. Moreover, using tomato paste as a thickening agent instead of flour keeps the chili naturally gluten-free while intensifying the tomato flavor.
Shopping Tips for Perfect Results
When shopping for ingredients, choose ground beef with 80/20 fat ratio for optimal flavor without excess grease. Similarly, look for firm onions with papery outer skins and avoid any with soft spots or green sprouts.
For the best results, buy whole spices and grind them yourself when possible. However, high-quality pre-ground spices work perfectly fine for this recipe. Additionally, check expiration dates on your spice rack—old spices can make your chili taste flat and lifeless.
| Ingredient Category | Essential Items | Shopping Notes |
|---|---|---|
| Protein | Ground beef (80/20) | Choose fresh, bright red color |
| Aromatics | Yellow onion, fresh garlic | Firm texture, no sprouting |
| Beans | Kidney beans, black beans | Low-sodium canned varieties |
| Tomatoes | Diced tomatoes, tomato paste | BPA-free cans when possible |
| Spices | Chili powder, cumin, paprika | Check expiration dates |
Complete Ingredient List for the Best Ground Beef Chili
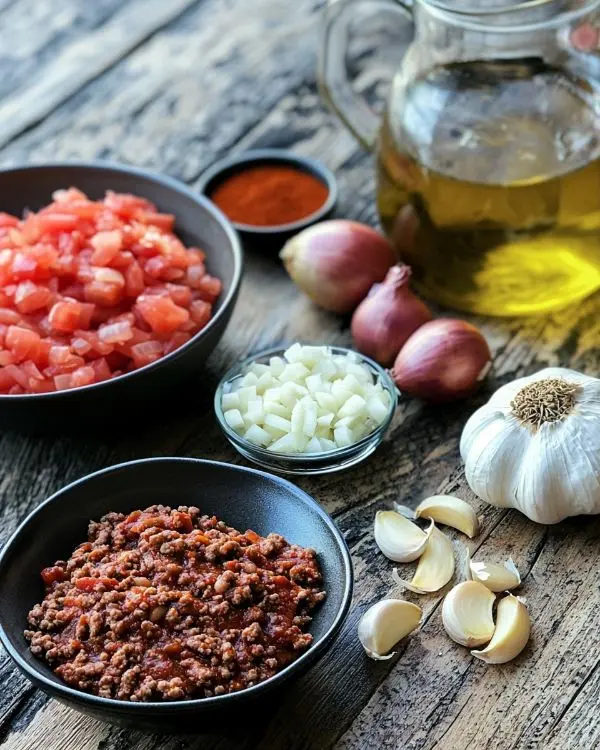
This recipe serves six generous portions and uses standard US measurements throughout. Moreover, each ingredient plays a specific role in building the complex flavor profile that makes this chili unforgettable.
| Ingredient | Amount | Metric | Purpose |
|---|---|---|---|
| Ground beef | 1 lb | 450g | Protein base and hearty texture |
| Large onion, diced | 1 | 1 | Sweet foundation and depth |
| Garlic cloves, minced | 2 | 2 | Aromatic complexity |
| Diced tomatoes | 15 oz can | 425g | Body and tangy brightness |
| Red kidney beans | 15 oz can | 425g | Creamy texture and protein |
| Black beans | 15 oz can | 425g | Earthy flavor and visual appeal |
| Tomato paste | 6 oz can | 170g | Thickening and intense flavor |
| Chili powder | 2 tablespoons | 30ml | Core chili flavor |
| Ground cumin | 1 teaspoon | 5ml | Smoky earthiness |
| Smoked paprika | 1/2 teaspoon | 2.5ml | Subtle smokiness |
| Cayenne pepper | 1/2 teaspoon | 2.5ml | Heat level (optional) |
| Beef broth | 2 cups | 475ml | Rich liquid base |
| Olive oil | 2 tablespoons | 30ml | Cooking fat |
| Salt and pepper | To taste | To taste | Seasoning balance |
Smart Substitutions for Every Kitchen
Don’t have all the ingredients? No problem! Ground turkey or chicken work beautifully as leaner alternatives to beef. Similarly, vegetable broth can replace beef broth for a lighter flavor profile.
For international readers, substitute metric measurements throughout. Additionally, if you can’t find kidney beans, pinto beans or navy beans work equally well. Moreover, fire-roasted diced tomatoes add an extra layer of smoky complexity when available.
Essential Equipment and Setup
The beauty of this stovetop chili lies in its simplicity—you need just one large pot and basic kitchen tools. However, choosing the right equipment makes a noticeable difference in your final results.
Must-Have Equipment
A heavy-bottomed Dutch oven or large stockpot distributes heat evenly and prevents burning. Furthermore, the thick bottom retains heat beautifully, which helps develop those crucial caramelized flavors during the browning process.
You’ll also need a sharp chef’s knife for dicing vegetables, a cutting board, and a wooden spoon for stirring. Additionally, keep a can opener handy for all those canned ingredients.
DIY Equipment Alternatives
Don’t own a Dutch oven? A large, heavy-bottomed saucepan works perfectly fine. Similarly, if you don’t have a wooden spoon, a heat-resistant silicone spatula prevents scratching non-stick surfaces while providing excellent stirring control.
Step-by-Step Cooking Instructions
Now comes the fun part—actually making this incredible chili! Following these detailed steps ensures perfect results every single time. Moreover, each step builds upon the previous one to create layers of complex flavor.
Step 1: Create Your Flavor Foundation
Heat olive oil in your large pot over medium-high heat until it shimmers slightly. Meanwhile, prepare your mise en place by having all ingredients measured and ready to go.
Add diced onion to the hot oil and cook for 3-4 minutes until soft and translucent. The onions should release their moisture and become fragrant. Next, add minced garlic and cook for 1-2 minutes until aromatic—be careful not to burn it, as burnt garlic creates bitter flavors.
Step 2: Brown the Beef Perfectly
Add ground beef to the pot, breaking it apart with your wooden spoon as it cooks. Cook for 5-7 minutes until completely browned with no pink remaining. This browning process, known as the Maillard reaction, creates hundreds of flavor compounds that give your chili depth and richness.
Oops! Here’s a mistake I made early on: I used to drain the fat immediately after browning. However, leaving a small amount of rendered fat actually enhances the chili’s flavor and mouthfeel. Therefore, drain only excess fat, leaving about one tablespoon in the pot.
Step 3: Bloom Your Spices
Sprinkle chili powder, cumin, smoked paprika, and cayenne pepper over the browned beef. Stir constantly for 1-2 minutes until the spices become fragrant and coat every piece of meat. This technique, called blooming, releases the spices’ essential oils and prevents them from tasting raw or dusty in the finished dish.
Professional chefs like Thomas Keller emphasize the importance of this step—it’s what separates good chili from extraordinary chili. Moreover, the brief cooking time transforms the spices from mere seasonings into integral flavor components.
Step 4: Build the Tomato Base
Stir in tomato paste, mixing thoroughly until it coats the beef and vegetables. Cook for 2-3 minutes, allowing the paste to caramelize slightly and deepen in color. This step intensifies the tomato flavor while adding natural thickening power to your chili.
Next, pour in diced tomatoes with their juice, scraping up any browned bits from the bottom of the pot. These fond particles add incredible flavor depth. Additionally, add beef broth and season generously with salt and pepper.
Step 5: Simmer to Perfection
Bring the mixture to a rolling boil, then immediately reduce heat to low and cover partially. Let the chili simmer gently for 20-25 minutes, stirring occasionally to prevent sticking. During this time, the flavors meld together while the liquid reduces to a perfect consistency.
The chili should bubble very gently—vigorous boiling will make the meat tough and break down the vegetables too much. Furthermore, the partial cover allows steam to escape while maintaining moisture balance.
Step 6: Add Beans and Final Touches
Drain and rinse both kidney beans and black beans thoroughly. Add them to the pot and stir gently to combine. Continue simmering for 10-15 minutes until the beans are heated through and have absorbed some of the chili’s flavors.
Taste and adjust seasoning as needed. The chili should have a rich, complex flavor with a pleasant heat level that builds gradually. If it’s too thick, add more broth one tablespoon at a time. Conversely, if it’s too thin, simmer uncovered for a few extra minutes.
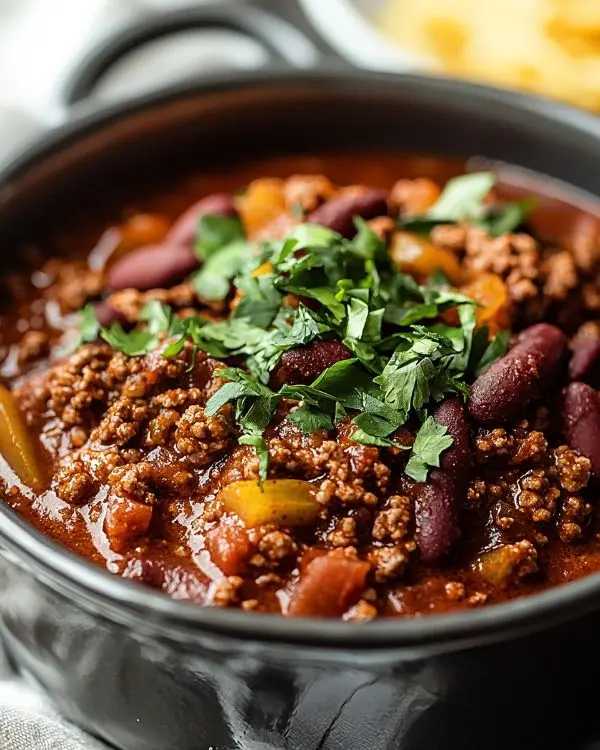
Expert Tips for the Ground Beef Chili Success
After making this recipe countless times, I’ve discovered several tricks that elevate good chili to greatness. Moreover, these professional techniques require no special equipment or exotic ingredients.
Temperature Control Mastery
Maintaining proper heat levels throughout cooking prevents common problems like burnt spices or tough meat. Start with medium-high heat for browning, then reduce to low for simmering. Additionally, if your stove runs hot, use a heat diffuser to prevent scorching.
Julia Child always emphasized the importance of patience during the simmering process. Therefore, resist the temptation to crank up the heat for faster cooking—gentle simmering develops better flavors and prevents separation.
Texture and Consistency Secrets
For thicker chili, mash half the beans against the pot’s side before adding them. This technique thickens the liquid naturally without adding flour or cornstarch. Similarly, leaving the pot uncovered during the final ten minutes of cooking allows excess moisture to evaporate.
Want a chunkier texture? Add diced bell peppers or corn kernels during the last fifteen minutes of cooking. Moreover, stirring in a square of dark chocolate during the final minutes adds richness without noticeable sweetness.
Make-Ahead Magic
This chili actually improves with time—the flavors continue developing even after cooking stops. Furthermore, making it a day ahead allows all the ingredients to marry beautifully. Simply refrigerate overnight and reheat gently before serving.
For meal prep enthusiasts, this recipe doubles or triples easily. Additionally, individual portions freeze beautifully for up to three months, making busy weeknight dinners effortless.
Creative Variations and Seasonal Twists
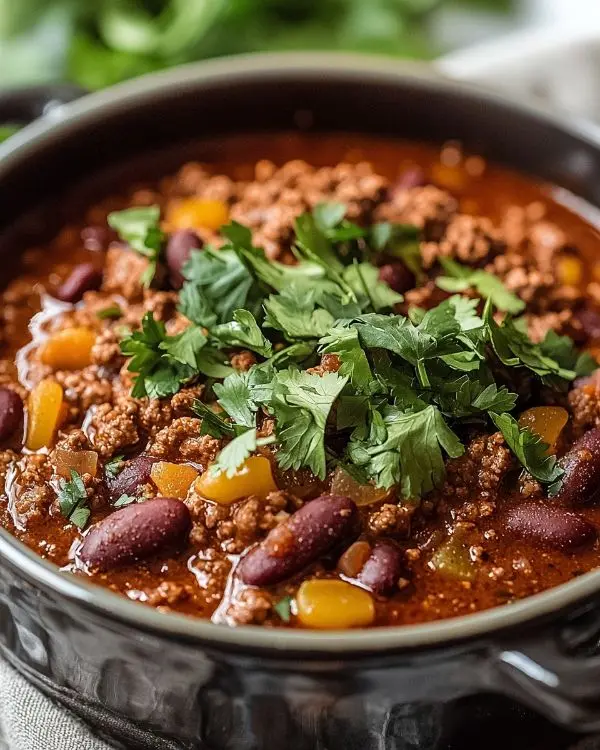
The versatility of this base recipe allows for endless customization options. Moreover, seasonal ingredients can transform this classic into something completely new while maintaining its comforting essence.
Regional American Variations
Texas-Style Twist: Omit beans entirely and add diced jalapeños for authentic Lone Star flavor. Additionally, substitute beef chuck roast (cut into small cubes) for ground beef to create a more traditional texture. This variation pairs beautifully with our Texas-style chili recipe no beans.
Cincinnati Influence: Add cinnamon, allspice, and unsweetened cocoa powder for that distinctive Queen City flavor profile. Moreover, serve over spaghetti noodles for the full Cincinnati experience that locals absolutely love.
Southwest Fusion: Include corn kernels, diced green chiles, and a touch of lime juice for bright, fresh flavors. Furthermore, top with fresh cilantro and avocado slices for a modern twist that feels both familiar and exciting.
Dietary Adaptations
For keto followers, simply omit the beans and add extra vegetables like diced zucchini or cauliflower rice. Similarly, this adaptation maintains the chili’s heartiness while reducing carbohydrate content significantly.
Vegetarian versions work wonderfully by substituting lentils or crumbled tempeh for ground beef. Additionally, mushroom broth replaces beef broth while maintaining the rich, umami-forward flavor profile that makes this chili special.
Holiday and Seasonal Modifications
During autumn months, add diced butternut squash for natural sweetness and beautiful color. Moreover, pumpkin puree creates incredible richness while boosting nutritional value significantly.
Thanksgiving leftovers transform this chili into something spectacular—add shredded turkey and sage for a post-holiday meal that feels both familiar and refreshingly different. Similarly, leftover cranberry sauce adds unexpected sweetness that balances the heat perfectly.
Storage and Meal Prep Guidelines
Proper storage extends this chili’s life while maintaining its incredible flavor and texture. Furthermore, understanding freezing techniques allows you to batch-cook for future convenience.
| Storage Method | Duration | Best Practices |
|---|---|---|
| Refrigerator | 4-5 days | Cool completely before storing |
| Freezer | 3 months | Use freezer-safe containers |
| Reheating | Stovetop preferred | Add broth if too thick |
Freezing Like a Pro
Portion chili into family-sized containers before freezing to avoid waste. Additionally, leave one inch of headspace in containers to allow for expansion during freezing.
Label containers with contents and date—frozen chili looks remarkably similar to other frozen soups! Moreover, thaw overnight in the refrigerator for best texture and food safety.
Reheating for Best Results
Stovetop reheating produces better results than microwave warming. Add a splash of broth or water if the chili seems too thick after refrigeration. Furthermore, gentle reheating prevents the beans from breaking down and maintains the chili’s appealing texture.
Perfect Pairings and Serving Suggestions
This hearty chili deserves accompaniments that complement its bold flavors without competing for attention. Moreover, the right sides can transform a simple bowl of chili into a memorable meal.
Classic American Sides
Cornbread remains the quintessential chili companion—its subtle sweetness balances the chili’s heat while providing textural contrast. Similarly, crusty sourdough bread offers another excellent option for sopping up every last drop. You might also enjoy our strawberry earthquake cake for a sweet ending to this spicy meal.
Baked sweet potatoes create an unexpectedly delicious pairing. Furthermore, their natural sweetness provides cooling relief from the chili’s heat while adding nutritional value to your meal.
Creative Topping Bar
Set up a toppings station for customizable bowls that please every palate. Include shredded cheese, sour cream, diced avocado, and chopped green onions as foundation options. Additionally, offer jalapeño slices, crushed tortilla chips, and fresh cilantro for those wanting extra flavor or crunch.
For special occasions, try our best strawberry shortcake as an unexpected but delightful dessert contrast.
Beverage Pairings
Cold beer—particularly wheat beers or light lagers—provides excellent heat relief while complementing the chili’s robust flavors. Similarly, iced tea with lemon offers a refreshing non-alcoholic option that cleanses the palate between bites.
For wine lovers, medium-bodied red wines like Zinfandel or Malbec stand up beautifully to the chili’s bold flavors. Moreover, these wines’ fruit-forward profiles complement the tomato base without overwhelming the dish’s complexity.
Troubleshooting Common Chili Challenges
Even experienced cooks encounter chili hiccups occasionally. However, most problems have simple solutions that don’t require starting over from scratch.
Fixing Flavor Imbalances
Too salty? Add a peeled, whole potato during the last fifteen minutes of cooking—it absorbs excess salt naturally. Remove the potato before serving, and the saltiness will be significantly reduced.
Conversely, if your chili tastes flat or bland, it probably needs acid. Add one tablespoon of apple cider vinegar or lime juice to brighten all the flavors. Furthermore, a pinch of brown sugar can balance excessive heat without making the chili sweet.
Texture Solutions
Watery chili disappoints everyone, but thickening solutions exist beyond extended cooking time. Mash some beans against the pot’s side to release their starches naturally. Additionally, a slurry made from one tablespoon cornstarch mixed with two tablespoons cold water works quickly and effectively.
For overly thick chili, add warm broth gradually until you reach the desired consistency. Moreover, avoid adding cold liquid, which can shock the cooking process and affect the final texture.
Advanced Techniques for Chili Mastery
Once you’ve mastered the basic recipe, these advanced techniques will elevate your chili to restaurant quality. Furthermore, these methods require no special equipment or hard-to-find ingredients.
Layering Flavors Like a Pro
Professional chefs build flavors in stages rather than adding everything simultaneously. Start by sautéing onions until they’re deeply caramelized—this takes patience but creates incredible sweetness. Next, add garlic and bloom it until fragrant but not brown.
The spice-blooming technique mentioned earlier cannot be overstated in importance. Additionally, deglazing the pot with a splash of beef broth after browning the meat captures all those flavorful brown bits that would otherwise stick to the bottom.
Umami Enhancement Tricks
For deeper, more complex flavors, add one tablespoon of Worcestershire sauce during the simmering phase. This ingredient contains natural glutamates that enhance the chili’s savory qualities without being detectable as a separate flavor.
Similarly, a small amount of soy sauce—just one teaspoon—adds incredible depth without making the chili taste Asian. Moreover, these umami boosters work synergistically with the tomatoes and beef to create a more satisfying eating experience.
Nutritional Benefits and Health Considerations
This ground beef chili provides excellent nutritional value alongside its incredible taste. Moreover, the combination of protein, fiber, and vegetables creates a balanced meal that satisfies hunger for hours.
Protein Powerhouse
Each serving delivers approximately 25 grams of complete protein from the ground beef and beans combined. Furthermore, this protein includes all essential amino acids necessary for muscle maintenance and repair.
The bean combination provides additional benefits—kidney beans offer folate and potassium, while black beans contribute antioxidants and fiber. Additionally, this fiber content helps stabilize blood sugar levels and promotes digestive health.
Customizing for Dietary Needs
For lower sodium versions, use no-salt-added canned tomatoes and beans, then season carefully with salt to taste. Similarly, choosing lean ground beef reduces saturated fat content while maintaining protein levels.
Those following anti-inflammatory diets can increase the turmeric content slightly and add fresh ginger during the aromatics stage. Moreover, these additions provide health benefits without compromising the chili’s traditional flavor profile.
Your Ground Beef Chili Questions Answered
Can I make this chili in advance for meal prep?
Absolutely! This chili actually improves in flavor when made 24 hours ahead. The spices have more time to meld, and the overall taste becomes more complex and well-rounded.
What’s the best way to thicken watery chili without flour?
Mash half the beans against the pot’s side using a wooden spoon. This releases natural starches that thicken the liquid while maintaining the chili’s rustic texture and authentic appearance.
How spicy is this recipe and can I adjust the heat level?
This recipe delivers medium heat that builds gradually. Start with half the cayenne pepper if you’re sensitive to spice, or omit it entirely for mild chili that kids will love.
Can I use different types of beans in this recipe?
Definitely! Pinto beans, navy beans, or great northern beans work beautifully. However, avoid using more than two varieties to prevent the flavors from becoming muddled or competing with each other.
Why does my chili taste bland even with all the spices?
The most common culprit is old spices that have lost their potency. Replace spices older than two years, and always bloom them in oil before adding liquid ingredients for maximum flavor impact.
How do I store leftover chili properly?
Cool chili completely before refrigerating to prevent temperature danger zones. Store in airtight containers for up to five days, or freeze in portion-sized containers for up to three months.
Regional Chili Traditions Across America
Understanding regional chili preferences helps you customize this recipe for different tastes and occasions. Moreover, these variations reflect America’s diverse culinary heritage and immigration patterns.
Midwest Comfort Style
Midwestern chili often includes additional vegetables like bell peppers and corn. Furthermore, many families add a touch of brown sugar or molasses for subtle sweetness that balances the heat. This style pairs wonderfully with our red velvet cinnamon rolls for a comforting winter meal.
Southwestern Heat
New Mexican and Arizona variations incorporate green chiles and often use a combination of ground beef and pork. Additionally, these versions frequently include Mexican oregano instead of regular oregano for a more authentic flavor profile.
East Coast Interpretations
East Coast chili tends to be more tomato-forward and often includes additional vegetables like celery and carrots. Moreover, these versions sometimes incorporate beer as part of the liquid component, adding complexity and slight bitterness that balances the sweetness.
Seasonal Serving Ideas and Entertainment
This versatile chili adapts beautifully to different seasons and entertaining situations. Furthermore, its make-ahead nature makes it perfect for potluck dinners and casual gatherings.
Winter Comfort Meals
During cold months, serve this chili in bread bowls made from hollowed-out sourdough rounds. Additionally, garnish with extra cheese and fresh herbs for an Instagram-worthy presentation that tastes as good as it looks.
Hot chili over baked potatoes creates the ultimate comfort food combination. Moreover, this serving method stretches the recipe to feed additional people without diluting the flavors.
Summer Adaptations
Surprisingly, chili works beautifully for summer entertaining when served at room temperature as a hearty salad topping. Furthermore, spooning it over mixed greens with avocado and tortilla strips creates a satisfying meal that doesn’t require heating up the kitchen.
For Fourth of July gatherings, serve this chili alongside grilled corn and watermelon for a patriotic color scheme that celebrates American flavors. You might even try our strawberry sauce as a cooling dessert accompaniment.
Halloween and Fall Entertaining
Transform this chili into spooky fun by serving it in small pumpkins or orange bowls. Additionally, black bean prominence makes it perfect for Halloween color schemes. Consider pairing it with our marshmallow rice krispies Halloween brains for a playful dessert contrast.
The Science Behind Perfect Chili
Understanding the cooking science behind this recipe helps you troubleshoot problems and customize results. Moreover, this knowledge transforms you from recipe-follower to confident cook who can adapt and improvise successfully.
Maillard Reaction Magic
The browning process creates over 600 different flavor compounds through the Maillard reaction. Furthermore, this chemical process only occurs at temperatures above 300°F, which is why proper browning requires medium-high heat and dry conditions.
Water inhibits the Maillard reaction, so pat meat dry before cooking and avoid overcrowding the pot. Additionally, this explains why adding vegetables too early can prevent proper browning—their released moisture interferes with the reaction.
Spice Integration Science
Fat-soluble compounds in spices require oil or fat for proper extraction and distribution. Therefore, blooming spices in the rendered beef fat maximizes their flavor contribution to the finished dish.
Water-soluble flavor compounds extract during the simmering process, which explains why longer cooking times generally produce more complex flavors. However, volatile compounds can evaporate with excessive heat, so gentle simmering preserves delicate flavor notes.
Conclusion: Your New Chili Legacy
This best ground beef stovetop chili recipe represents everything I love about American comfort food—bold flavors, simple techniques, and endless customization possibilities. Moreover, it proves that extraordinary meals don’t require complicated ingredients or professional equipment.
Remember that February snowstorm I mentioned? Well, my neighbor still asks for this recipe every winter, and her family has adopted it as their official snow-day tradition. That’s the power of a truly great chili recipe—it becomes part of people’s lives and memories.
Whether you’re feeding a hungry family on a busy Tuesday or hosting friends for Sunday football, this classic beef chili recipe delivers satisfaction in every bowl. Furthermore, its quick cooking time and make-ahead flexibility fit perfectly into modern lifestyles without sacrificing flavor or quality.
Give this recipe a try, then come back and tell me about your experience! Did you customize it with regional favorites or family traditions? I’d love to hear how this easy delicious chili recipe becomes part of your kitchen repertoire.
Because here at Tasty at Home, every recipe creates new memories—and this chili might just become your family’s next beloved tradition.

Best Ground Beef Stovetop Chili
Equipment
- Large pot or Dutch oven
- wooden spoon
- Chef’s knife
- Cutting board
- Can opener
Ingredients
Chili Ingredients
- 1 lb Ground beef (80/20) 450g
- 1 Large onion, diced
- 2 Garlic cloves, minced
- 15 oz can Diced tomatoes 425g
- 15 oz can Red kidney beans 425g, drained and rinsed
- 15 oz can Black beans 425g, drained and rinsed
- 6 oz can Tomato paste 170g
- 2 tbsp Chili powder
- 1 tsp Ground cumin
- ½ tsp Smoked paprika
- ½ tsp Cayenne pepper optional
- 2 cups Beef broth 475ml
- 2 tbsp Olive oil 30ml
- to taste Salt and pepper for seasoning
Instructions
- Heat olive oil in a large pot over medium-high heat. Add diced onion and cook 3-4 minutes until translucent, then add garlic and cook 1-2 minutes until fragrant.
- Add ground beef, breaking it apart as it browns. Cook 5-7 minutes until no pink remains. Drain excess fat, leaving about 1 tablespoon.
- Sprinkle in chili powder, cumin, smoked paprika, and cayenne. Stir for 1-2 minutes to bloom spices.
- Stir in tomato paste and cook for 2-3 minutes. Add diced tomatoes with juice, beef broth, salt, and pepper. Stir to combine.
- Bring to a boil, then reduce heat to low. Simmer partially covered for 20-25 minutes, stirring occasionally.
- Add drained kidney beans and black beans. Simmer 10-15 minutes until heated through. Adjust seasoning as needed.

