No-Bake Cinnamon Roll Cookies combine cinnamon sweetness with easy prep. Perfect natural sweet snacks ready in 30 minutes—no oven needed!
Last December, my oven decided to quit right before my annual cookie swap. Well… talk about terrible timing! I had promised to bring something spectacular, and there I stood in my kitchen, staring at my dead appliance like it had personally betrayed me.
You know what they say about necessity being the mother of invention? That frantic afternoon birthed these No-Bake Cinnamon Roll Cookies, and honestly, I haven’t looked back since. Instead of panicking, I grabbed what I had—oats, peanut butter, and my trusty cinnamon—and created something that tasted like those gooey cinnamon rolls from the mall, minus the three-hour commitment.
These impossible cookies changed everything. They solve that age-old problem of craving something sweet but not having the time, energy, or functioning oven to make it happen. Within 30 minutes, you’ll have batch after batch of cookies that taste like weekend mornings but fit into your Tuesday afternoon.
I’ve tested this recipe seventeen times since that holiday disaster. Each version got better, and now I’m sharing my perfected formula with you. These aren’t just emergency cookies anymore—they’re my go-to for busy weeknights, unexpected guests, and those moments when you need something delicious right now.
Table of Contents
What Makes These No-Bake Cinnamon Roll Cookies Special
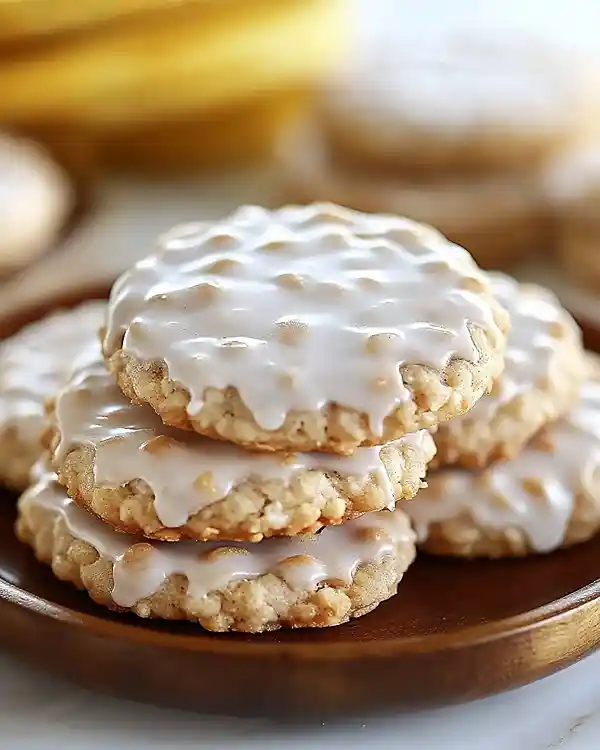
These cinnamon roll cookies represent everything I love about smart baking. They deliver that classic cinnamon roll experience—warm spice, sweet glaze, comforting texture—without turning on your oven. After years of recipe development, I’ve learned that simplicity often beats complexity, especially when you’re working with quality ingredients.
The magic happens when creamy peanut butter meets rolled oats. This combination creates a texture that’s simultaneously chewy and substantial, mimicking traditional cookie dough without any baking required. Furthermore, the cinnamon weaves through every bite, bringing that signature warmth we associate with lazy Sunday mornings.

No-Bake Cinnamon Roll Cookies
Equipment
- Large mixing bowl
- Sturdy spoon or spatula
- Baking sheet or tray
- Small mixing bowl
- Whisk or fork
- Measuring cups and spoons
Ingredients
Cookie Base
- 2 cups Rolled oats Old-fashioned
- 1 cup Peanut butter Natural or regular
- ½ cup Honey or maple syrup Grade A maple preferred
- ½ cup Powdered sugar Sifted
- 1 tablespoon Cinnamon Ceylon
- 1 teaspoon Vanilla extract Pure
- Pinch Salt
Glaze
- ½ cup Powdered sugar
- 1 tablespoon Milk Any variety
- ½ teaspoon Vanilla extract
Instructions
- Combine all cookie base ingredients in a large mixing bowl and stir vigorously for 2–3 minutes until a cohesive dough forms.
- Roll tablespoon-sized portions of dough into balls, place on a parchment-lined tray, and flatten to 1/4-inch thickness.
- Refrigerate the shaped cookies for at least 30 minutes until firm.
- Whisk powdered sugar, milk, and vanilla in a small bowl to create the glaze, adjusting consistency as needed.
- Drizzle glaze over chilled cookies using a spoon or piping bag; let set 5–10 minutes before serving.
Notes
Ingredients That Work Together
Let me tell you, ingredient quality matters tremendously here. Since we’re not baking these cookies, each component shines through clearly. Choose natural peanut butter without added oils for the best texture and flavor. Meanwhile, old-fashioned rolled oats provide structure better than quick oats ever could.
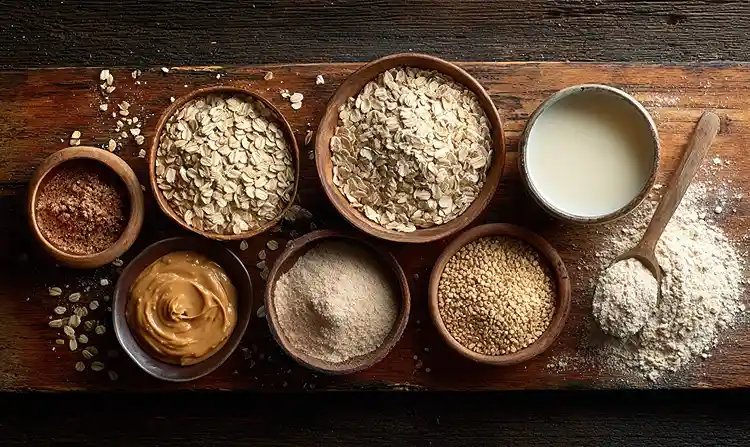
| Ingredient | US Measurement | Metric | Notes |
|---|---|---|---|
| Rolled oats | 2 cups | 180g | Old-fashioned, not quick oats |
| Peanut butter | 1 cup | 260g | Natural or regular |
| Honey/maple syrup | 1/2 cup | 120ml | Grade A maple preferred |
| Powdered sugar (cookies) | 1/2 cup | 60g | Sifted for smoothness |
| Cinnamon | 1 tablespoon | 8g | Ceylon for milder flavor |
| Vanilla extract | 1 teaspoon | 5ml | Pure, not imitation |
| Salt | Pinch | – | Enhances sweetness |
| For Glaze: | |||
| Powdered sugar | 1/2 cup | 60g | Additional for drizzling |
| Milk | 1 tablespoon | 15ml | Any variety works |
| Vanilla extract | 1/2 teaspoon | 2.5ml | Complements cinnamon |
Shopping Tips for American Grocery Stores
Head to the baking aisle for your oats and powdered sugar. Most major chains like Kroger, Safeway, or Whole Foods stock multiple oat varieties—grab the canister labeled “old-fashioned” or “rolled.” Additionally, you’ll find natural peanut butter near the regular spreads, though health food sections often carry better options.
For honey, local farmers’ markets offer superior flavor compared to commercial brands. However, supermarket honey works perfectly fine for these natural sweet snacks. If you’re substituting maple syrup, look for Grade A amber color—it provides the ideal balance of sweetness and depth.
Bold Add-Ins & Creative Variations:
- Chopped pecans (1/2 cup) for extra crunch
- Mini chocolate chips (1/3 cup) for a dessert twist
- Dried cranberries (1/4 cup) for tartness
- Coconut flakes (1/3 cup) for tropical notes
- Espresso powder (1 teaspoon) for sophisticated depth
Ingredient Substitutions
International readers often ask about peanut butter alternatives. Almond butter works beautifully, though it costs more. Likewise, sunflower seed butter accommodates nut allergies while maintaining that creamy consistency. Just remember that different nut butters have varying oil content, which might require slight adjustments.
Vegans can confidently use maple syrup instead of honey—the flavor profile shifts slightly sweeter but remains delicious. Moreover, plant-based milk works perfectly in the glaze. I’ve tested almond, oat, and soy milk with excellent results across the board.
Quality Indicators for Best Results
Select oats that smell fresh and slightly nutty. Stale oats lack flavor and won’t bind properly. Similarly, your peanut butter should have minimal separation—excessive oil on top indicates it’s been sitting too long. Fresh cinnamon smells potent and spicy; if yours has been in your cabinet since 2019, replace it for these cookies.
According to baking expert Dorie Greenspan, ingredient temperature matters even in no-bake recipes. Room temperature peanut butter mixes more smoothly than cold, creating better texture throughout.
Essential Equipment & Preparation
Man, oh man, do I love recipes that don’t require fancy equipment! These impossible cookies need minimal tools, making them perfect for college dorms, office break rooms, or any kitchen with basic supplies.
What You’ll Need
Large mixing bowl – Glass or metal works best for sturdy mixing. Your bowl should hold at least 3 quarts since this dough gets thick. If you’re doubling the recipe (which you should, because they disappear fast), use a 4-quart bowl instead.
Sturdy spoon or spatula – Wooden spoons provide the leverage needed for combining thick dough. Silicone spatulas work too, though they flex more under pressure. Consequently, you might prefer wooden utensils for easier mixing.
Baking sheet or tray – Any flat surface works here. Line it with parchment paper for easy cleanup and to prevent sticking. I’ve even used large plates when making small batches for quick snacking.
Small mixing bowl – For your glaze preparation. A 2-cup capacity bowl makes whisking simple without splashing.
Whisk or fork – Either tool smoothly combines glaze ingredients. I slightly prefer whisks for achieving that perfect drizzle consistency.
Measuring cups and spoons – Precision matters more than you’d think with no-bake recipes. Unlike traditional baking where heat compensates for minor variations, these cookies need accurate ratios for proper texture.
DIY Alternatives
Don’t have parchment paper? Wax paper works in a pinch since we’re not applying heat. Alternatively, lightly grease your tray with coconut oil. Without a proper mixing bowl, a large pot serves the same purpose—just ensure it’s completely dry before starting.
Missing measuring cups? Use a standard coffee mug (typically 8 ounces) as your cup measure. For tablespoons, remember that three teaspoons equal one tablespoon, and most silverware tablespoons approximate accurate measurements.
How to Make the Best No-Bake Cinnamon Roll Cookies
Step 1: Create Your Cookie Base
Combine all cookie ingredients in your large mixing bowl. Start by adding the peanut butter first—it acts as your binding agent and needs thorough distribution. Next, pour in your honey or maple syrup, followed by the powdered sugar.
Sprinkle the cinnamon evenly across the mixture rather than dumping it in one spot. This ensures uniform flavor distribution throughout your dough. Then add your vanilla extract and that crucial pinch of salt, which brightens all the other flavors.
Now comes the workout portion. Stir vigorously for 2-3 minutes until everything comes together. The mixture will resist at first, seeming too dry. Keep stirring! Eventually, the natural oils from the peanut butter and moisture from the honey will transform everything into cohesive dough.
Pro tip: If your dough seems crumbly after thorough mixing, add one tablespoon of milk or water at a time. Conversely, if it’s too sticky, incorporate another 1/4 cup of oats gradually.
Common mistake I made: I once tried rushing this step, thinking 30 seconds of mixing would suffice. Wrong! Insufficient mixing leaves dry pockets that fall apart when shaped. Take your time here—proper incorporation makes or breaks these cookies.
Step 2: Shape Your Cookies
Grab approximately one tablespoon of dough and roll it between your palms. The warmth from your hands slightly softens the peanut butter, making rolling easier. Each ball should measure about one inch in diameter—roughly the size of a walnut still in its shell.
Place each ball onto your parchment-lined tray, spacing them about one inch apart. They won’t spread since there’s no baking involved, but a little breathing room helps with the next step. You should get approximately 20-24 cookies from this recipe, depending on your sizing.
Now gently flatten each ball using the back of a spoon or your fingertips. Press down until each cookie measures about 1/4 inch thick. Don’t worry about perfect circles—slightly rustic shapes add homemade charm. However, try maintaining consistent thickness so they chill uniformly.
Technique tip from Ina Garten: Keep a small bowl of water nearby. Dampening your fingers slightly prevents sticking while shaping, though you’ll need to reapply after every few cookies.
Step 3: The Crucial Chilling Phase
Transfer your cookie-laden tray directly into the refrigerator. This step isn’t optional—it’s where the magic happens. The cold temperature firms up the peanut butter and allows the oats to absorb moisture, transforming loose dough into proper cookie texture.
Set your timer for 30 minutes minimum. During this time, the cookies undergo a remarkable transformation from soft dough to firm treats. Honestly, I recommend chilling for 45 minutes if you’ve got the patience. The extra time creates even better texture.
While waiting, resist the temptation to check them every five minutes. Opening the refrigerator repeatedly lets warm air in, slowing the chilling process. Instead, use this time to prepare your glaze or clean up your workspace.
Sensory indicator: Properly chilled cookies feel firm to the touch but not rock-hard. They should hold their shape when gently pressed but still have slight give. Too firm means they’ve been in too long; too soft means they need more time.
Step 4: Prepare the Perfect Glaze
Grab your small mixing bowl and add the powdered sugar first. Sift it if you’ve got the time—lumpy glaze looks unprofessional. Pour in your tablespoon of milk, then add the vanilla extract.
Whisk these ingredients together briskly for about 30 seconds. The glaze should flow smoothly off your whisk but leave a thin coating on the wires. If it’s too thick and pasty, add milk in half-teaspoon increments. Too thin and runny? Whisk in more powdered sugar, one tablespoon at a time.
The ideal consistency resembles heavy cream—it should drizzle in thin ribbons without immediately pooling. Test by lifting your whisk: the glaze should fall in a steady stream and slowly disappear back into the bowl.
Step 5: The Glaze Application
Remove your chilled cookies from the refrigerator. They’re ready for their final touch! You’ve got two application methods here, depending on your desired presentation and available tools.
Spoon method: Dip your spoon into the glaze, then hold it about two inches above each cookie. Move your hand back and forth in quick motions, creating elegant drizzle patterns. This technique works perfectly for rustic presentation and requires zero special equipment.
Piping bag method: Transfer glaze to a small zip-top bag, snip off a tiny corner, and pipe controlled lines across each cookie. This approach creates more uniform, professional-looking results. However, it’s entirely unnecessary unless you’re serving these at a formal event.
Let the glaze set for 5-10 minutes at room temperature. It will firm up slightly, creating that signature cinnamon roll appearance. Oops! If you’re impatient like me, you might eat one immediately—the glaze will be messy but delicious.
Step 6: Serve and Store

These no-bake cinnamon roll cookies are now ready to enjoy! They taste fantastic immediately, offering that perfect balance of chewy texture and sweet cinnamon flavor. The glaze adds just enough sweetness without overwhelming the nutty undertones from the oats and peanut butter.
Serve them with your favorite beverage—coffee, cold milk, or even a glass of coquito for a festive twist. These cookies pair beautifully with afternoon tea or as an after-dinner treat that won’t leave you feeling overly stuffed.
Expert Tips for Perfect Cinnamon Roll Cookies Every Time
After making these cookies countless times, I’ve discovered several secrets that separate good batches from exceptional ones. First, measure your peanut butter by weight if possible. One cup of loosely scooped peanut butter differs significantly from one cup of packed peanut butter, affecting your final texture dramatically.
Second, the type of honey matters more than you’d expect. Wildflower honey provides mild, versatile sweetness. Buckwheat honey delivers bold, almost molasses-like depth. Clover honey hits the middle ground—my personal favorite for these particular cookies.
Third, don’t skip the salt! Even that tiny pinch transforms these from one-dimensional sweet treats into complex, crave-worthy snacks. Salt enhances the cinnamon’s warmth while balancing the honey’s sweetness.
Temperature considerations: Room temperature ingredients combine more easily than cold ones. Let your peanut butter sit out for 15 minutes before mixing if it’s been refrigerated. This simple step saves you significant stirring effort.
Make them prettier: Before the glaze fully sets, sprinkle a tiny pinch of cinnamon or crushed pecans over each cookie. This adds visual appeal and hints at the flavors inside.
Creative Variations to Try
Chocolate Lover’s Version
Swap half the cinnamon for unsweetened cocoa powder. Add 1/3 cup mini chocolate chips to the base mixture. Drizzle with chocolate glaze instead of vanilla by mixing 2 tablespoons cocoa powder into your standard glaze recipe. These taste remarkably similar to fudgy red velvet crinkle cookies but require zero baking.
Maple Pecan Twist
Use maple syrup exclusively (no honey option). Mix 1/2 cup finely chopped toasted pecans into the dough. Replace the glaze with pure maple butter thinned with a splash of milk. This variation screams fall flavors and pairs perfectly with hot apple cider.
Holiday Spice Edition
Add 1/4 teaspoon each of ground ginger, nutmeg, and cardamom alongside your cinnamon. Use molasses instead of honey for deeper flavor. Mix in 1/4 cup finely chopped crystallized ginger. These become festive treats that rival traditional Crumbl Christmas sugar cookies for holiday appeal.
Protein Power Version
Substitute 1/4 cup of the powdered sugar with unflavored protein powder. Add 2 tablespoons ground flaxseed for extra fiber and omega-3s. These become substantial post-workout snacks that still satisfy sweet cravings while supporting your fitness goals.
Tropical Coconut Variation
Replace 1/2 cup oats with unsweetened shredded coconut. Add 1/4 teaspoon coconut extract to the dough. Use coconut milk in your glaze. Top each cookie with toasted coconut flakes before the glaze sets completely.
Storage and Make-Ahead Strategies

These impossible cookies store remarkably well, making them perfect for meal prep or gift-giving. Proper storage maintains their texture and flavor for extended periods, unlike many no-bake treats that deteriorate quickly.
| Storage Method | Duration | Best Practices |
|---|---|---|
| Room temperature | 3-4 days | Airtight container, cool location |
| Refrigerated | 2 weeks | Sealed container, separate layers with parchment |
| Frozen (unglazed) | 3 months | Freezer-safe bag, single layer initially |
| Frozen (glazed) | 6 weeks | Airtight container, don’t stack until frozen solid |
Make-ahead strategy: Prepare the cookie dough balls and freeze them unglazed. When you need fresh treats, thaw desired quantities in the refrigerator for 2 hours, then apply fresh glaze. This method ensures you always have cookies ready within minutes.
Gift-giving tip: Layer these cookies in decorative tins with parchment paper between levels. They transport beautifully and last several days at room temperature, making them ideal for holiday cookie exchanges or hostess gifts.
Perfect Pairings and Serving Ideas
These cinnamon roll cookies shine in various serving contexts. For breakfast, pair them with Greek yogurt and fresh berries—the protein and fruit balance the cookies’ sweetness. Additionally, they make excellent afternoon pick-me-ups alongside hot coffee or chai tea.
Consider serving them as part of a dessert spread with cannoli cookies and fresh fruit. The textural variety keeps guests interested while the flavor profiles complement rather than compete.
For a truly indulgent treat, warm them slightly (10 seconds in the microwave) and serve with vanilla ice cream. The contrast between warm, soft cookie and cold, creamy ice cream creates an unforgettable dessert experience that’s surprisingly sophisticated for such simple treats.
Beverage pairings:
- Strong black coffee cuts through the sweetness beautifully
- Cold milk remains the classic choice for good reason
- Hot chai tea echoes the cinnamon notes perfectly
- Iced almond milk offers a lighter, refreshing option
- Red wine (Port specifically) makes these elegant dinner party desserts
No-Bake Cinnamon Roll Cookies FAQs
How long do you cook cinnamon rolls?
Traditional cinnamon rolls typically bake for 20-25 minutes at 350°F until golden brown, though these no-bake cinnamon roll cookies skip the oven entirely and firm up in just 30 minutes of refrigeration.
How long does it take for no bake cookies to harden?
No bake cookies generally need 30-45 minutes in the refrigerator to firm up properly, with the peanut butter and oats binding together as they chill to create the ideal chewy texture.
Do cinnamon rolls need to be refrigerated after baking?
Traditional baked cinnamon rolls don’t require refrigeration if consumed within 2 days, but these no-bake versions stay freshest when stored in an airtight container in the refrigerator for up to 2 weeks.
How long are no bake cookies safe to eat?
No bake cookies remain safe to eat for 3-4 days at room temperature or up to 2 weeks refrigerated in a sealed container, with the natural preservative properties of honey and the absence of dairy (except minimal glaze milk) extending their shelf life.
Final Thoughts on These Game-Changing Treats
Remember that panicked December afternoon when my oven quit? That kitchen disaster became one of my greatest recipe victories. These No-Bake Cinnamon Roll Cookies prove that limitations spark creativity, and sometimes the best solutions come from unexpected challenges.
You’ve now got a reliable recipe that delivers consistent results without requiring professional equipment or baking expertise. These cookies work equally well for busy weeknight snacking, last-minute party contributions, or thoughtful homemade gifts. Moreover, they accommodate various dietary preferences through simple substitutions.
The beauty of these natural sweet snacks lies in their versatility and accessibility. Anyone can make them successfully, regardless of baking experience. They’re foolproof, delicious, and endlessly adaptable to your preferences.
Try making a batch this weekend. Experiment with different add-ins until you discover your signature version. Then share them with someone who needs a sweet pick-me-up—these cookies have a remarkable way of brightening people’s days.
What variation will you try first? Tag your creations on social media so I can see your creative spins on this recipe. I’m always amazed by how differently people personalize these impossible cookies while maintaining their essential charm.
Serve these alongside something savory like vegetable korma for an unexpected fusion meal, or keep it classic with coffee and good conversation. Either way, you’re about to discover why these no-bake treats have become my kitchen staple year-round.

