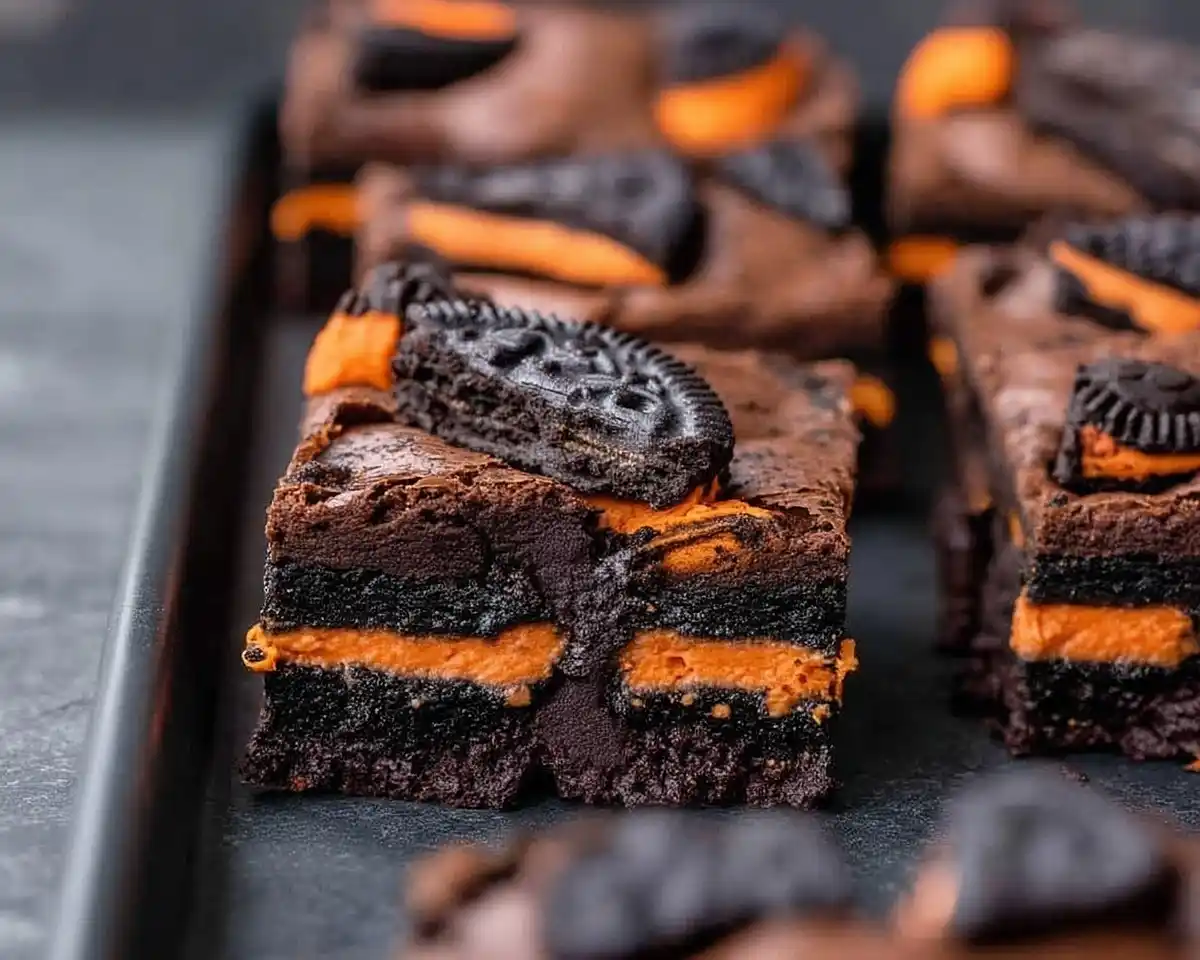
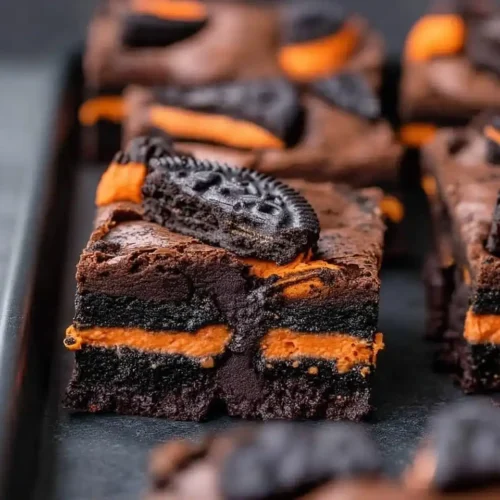
Halloween Oreo Brownies combine fudgy chocolate with festive cookies for the ultimate spooky dessert. Ready in 30 minutes!
Let me tell you, discovering these Halloween Oreo Brownies changed my entire approach to holiday baking.
Last October, I found myself staring at a bag of orange-stuffed Oreos and a box of brownie mix at 9 PM. My daughter’s class party was the next morning. Instead of panicking, I decided to experiment by layering the cookies directly into homemade brownie batter.
Best. Decision. Ever.
The result? Fudgy, gooey brownies with pockets of creamy Oreo filling that stayed perfectly soft even after baking. Moreover, the festive orange color peeking through each slice made them Instagram-worthy without any fancy decorating skills.
I’ve spent the last three years perfecting this recipe through countless Halloween parties and school events. Consequently, I can promise you’ll nail it on your first try. These brownies solve the classic holiday baking problem: creating something impressive without spending hours in the kitchen.
Table of Contents
What Makes These Halloween Oreo Brownies Special
This Halloween brownies recipe stands out because it uses a from-scratch base that’s actually easier than boxed mix. You know, most brownie recipes require multiple bowls and complicated techniques. This one? Everything melts together in one microwave-safe bowl.
The secret lies in the unusual method of dissolving sugar directly into melted butter. This technique, popularized by chef Alice Medrich, creates that signature crackly top and fudgy center simultaneously. Furthermore, microwaving the butter-sugar mixture develops deeper caramel notes that boxed mixes simply can’t match.
Ingredient Breakdown
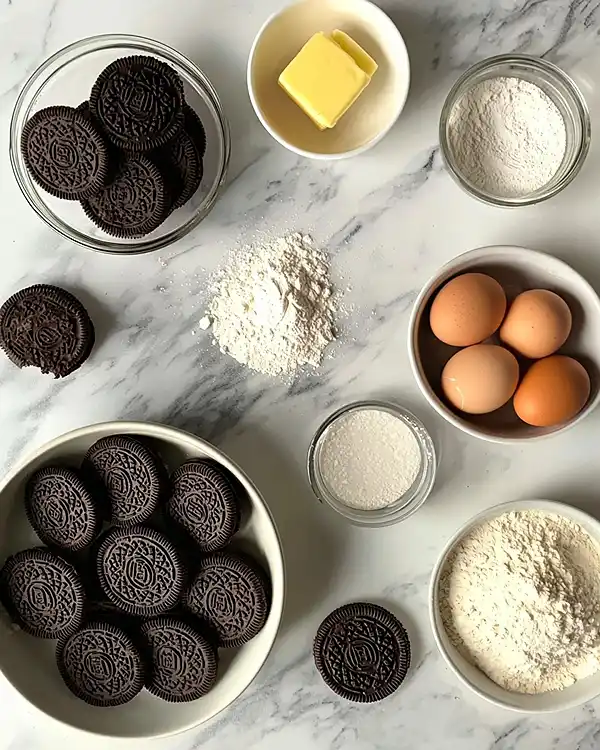
| Ingredient | US Measure | Metric | Purpose |
|---|---|---|---|
| Butter | 2/3 cup | 150g | Creates richness and structure |
| Vegetable oil | 1/4 cup | 60ml | Keeps brownies moist for days |
| Granulated sugar | 1 cup | 200g | Builds crackly top |
| Brown sugar | 1/3 cup | 65g | Adds chewiness |
| Cocoa powder | 2/3 cup | 65g | Deep chocolate flavor |
| Eggs | 2 large | 100g | Binds ingredients |
| Vanilla extract | 1 tsp | 5ml | Enhances chocolate |
| Salt | 1/2 tsp | 3g | Balances sweetness |
| All-purpose flour | 1/2 cup | 65g | Minimal structure |
| Halloween Oreos | 15 cookies | — | Festive surprise layer |
Shopping Smart at American Grocery Stores
Halloween Oreos typically hit store shelves in late August. Look for them in the seasonal aisle at Target, Walmart, or your local supermarket. Additionally, standard Oreos work perfectly if you’re making these year-round.
For cocoa powder, choose Dutch-processed for deeper flavor or natural cocoa for brighter chocolate notes. I prefer Ghirardelli or Hershey’s Special Dark for these brownies. Both brands deliver consistent results without breaking the bank.
Pro tip: Buy two packages of Oreos. You’ll want extras for topping and, well, quality control snacking.
Ingredient Substitutions
Butter: Replace with coconut oil for dairy-free brownies
Vegetable oil: Canola or melted coconut oil work equally well
White sugar: Coconut sugar creates a caramel-like depth
Regular Oreos: Use Double Stuf for extra filling
All-purpose flour: Gluten-free 1:1 blend produces nearly identical results
Essential Equipment and Setup
You’ll need surprisingly little equipment for this Oreo brownies recipe. In fact, that’s part of what makes it foolproof for busy home bakers.
Must-Have Tools
8×8-inch baking pan: Metal pans create crispier edges while glass bakes more evenly
Parchment paper: Prevents sticking and makes cleanup effortless
Microwave-safe bowl: Large enough to hold all ingredients (at least 2-quart capacity)
Hand mixer or whisk: Electric mixer incorporates air for better texture
Wire cooling rack: Prevents soggy bottoms
DIY alternative: No hand mixer? Whisk vigorously for 2 minutes straight. Your arm will burn, but the brownies will turn out perfectly.
Step-by-Step Instructions
Prepare Your Workspace
Preheat your oven to 350°F. This temperature is crucial—too hot and the Oreos burn, too cool and the brownies turn cakey instead of fudgy.
Line your 8×8-inch pan with parchment paper, leaving overhang on two sides. This creates handles for easy removal later. Trust me, you’ll thank yourself when it’s time to slice.
Create the Brownie Base
Combine butter, vegetable oil, granulated sugar, and brown sugar in your microwave-safe bowl. Microwave in 30-second bursts, stirring between each interval, until completely melted.
Here’s where my technique differs from traditional recipes: After everything melts, microwave for one additional minute. Then stir vigorously for 30 seconds. This extra step dissolves sugar crystals and creates that coveted shiny top.
Oops! I once skipped this vigorous stirring and ended up with grainy brownies. Don’t be like early-me.
Add Eggs and Vanilla
Let the butter mixture cool for 2 minutes. Otherwise, you’ll scramble your eggs (learned that the hard way). Add eggs one at a time, beating thoroughly after each addition.
The batter should become glossy and start pulling away from the bowl sides slightly. This means you’ve incorporated enough air for proper rise. According to techniques from Thomas Keller’s Bouchon Bakery, this emulsion creates the fudgiest texture.
Stir in vanilla extract until evenly distributed.
Incorporate Dry Ingredients
Add flour, cocoa powder, and salt all at once. Fold gently with a spatula—about 20 strokes total. You should still see a few flour streaks. Overmixing develops gluten and creates tough, cakey brownies.
The batter will look thick and slightly grainy. That’s exactly right.
Layer the Oreos
Pour half the brownie batter into your prepared pan. Spread it evenly to all corners using an offset spatula or the back of a spoon.
Arrange 15 Halloween Oreos in a single layer over the batter. I create three rows of five cookies each. They can touch—actually, they should touch for maximum Oreo-to-brownie ratio.
Dollop the remaining batter over the Oreos. Spread gently to cover, working from the center outward. Some cookie edges peeking through are fine.
Final Touches and Baking
Crush 5 additional Oreos into large chunks. Scatter these pieces across the top for dramatic presentation and extra crunch.
Bake for exactly 30 minutes. The edges should look set while the center remains slightly jiggly. A toothpick inserted 2 inches from the edge should come out with moist crumbs, not wet batter.
Critical step: Let brownies cool completely on a wire rack. I mean it—at least 2 hours. Cutting warm brownies creates a gooey mess instead of clean squares. Well, it’s delicious chaos, but not Instagram-ready.
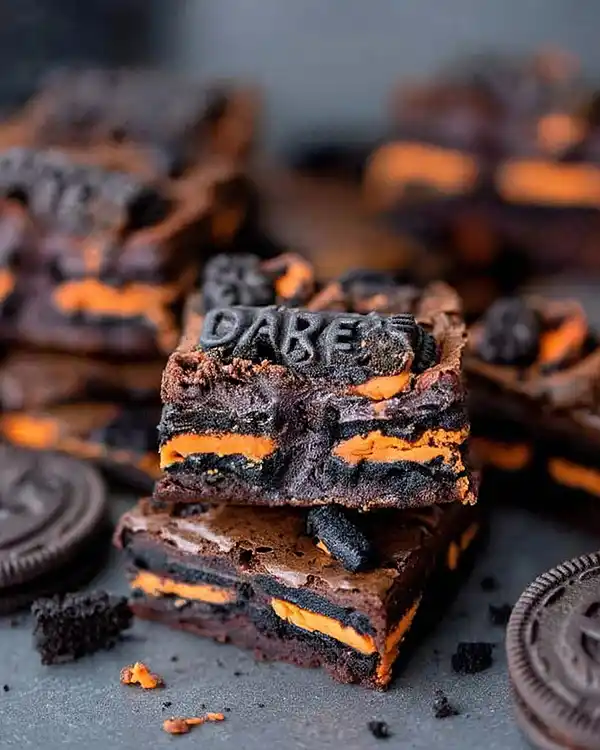
Expert Tips for Perfect Results
Temperature matters: Cold eggs straight from the fridge prevent curdling when mixed with hot butter
Don’t overbake: These brownies continue cooking as they cool
Line, don’t grease: Parchment paper prevents sticking better than any spray
Use quality cocoa: Cheap cocoa tastes chalky and bitter
Creative Variations
Peppermint twist: Add crushed candy canes and use mint Oreos for Christmas
Peanut butter swirl: Drizzle 1/4 cup melted peanut butter over batter before baking
Double chocolate: Press chocolate chips into the top layer
Birthday version: Use Golden Oreos and add rainbow sprinkles
Espresso boost: Mix 1 tablespoon instant espresso into dry ingredients
Man, oh man, the espresso version tastes like grown-up brownies in the best way possible.
Storage and Make-Ahead Magic
| Storage Method | Duration | Instructions |
|---|---|---|
| Room temperature | 3 days | Store in airtight container with parchment between layers |
| Refrigerated | 1 week | Wrap tightly in plastic wrap |
| Frozen | 3 months | Cut into squares, wrap individually, freeze in freezer bag |
These Halloween Oreo brownies actually taste better on day two. The flavors meld together and the texture becomes even fudgier. Therefore, baking them a day ahead reduces last-minute stress.
Serving suggestions: Pair with vanilla ice cream and caramel sauce. Or serve alongside Halloween sugar cookie bars for a complete dessert spread. Additionally, they’re fantastic with hot chocolate at fall bonfires.
For an impressive party platter, arrange brownies with cauldron cookies and Halloween chocolate pretzel spider webs.
Halloween Oreo Brownies FAQs
Can I put Oreos in brownies?
Absolutely—Oreos hold their shape and texture beautifully when baked inside brownie batter. The cream filling softens slightly while the cookies remain intact, creating pockets of contrasting texture throughout each bite.
Are Halloween Oreos the same as normal Oreos?
Halloween Oreos taste identical to regular Oreos but feature bright orange or purple cream filling. The formula remains unchanged, making them interchangeable in any recipe that calls for standard Oreos.
How much does a brownie Oreo cupfection cost?
Commercial Oreo brownie cupfections typically cost $3-5 at fast food chains. Making these Halloween brownies at home costs approximately $8 for the entire pan, yielding 16 servings at just 50 cents each.
What is the flavor of Halloween Oreos?
Halloween Oreos maintain the classic vanilla cream flavor despite their festive orange color. The cocoa cookies and sweet cream taste exactly like original Oreos—only the appearance changes for the season.
Make These Halloween Brownies Your New Tradition
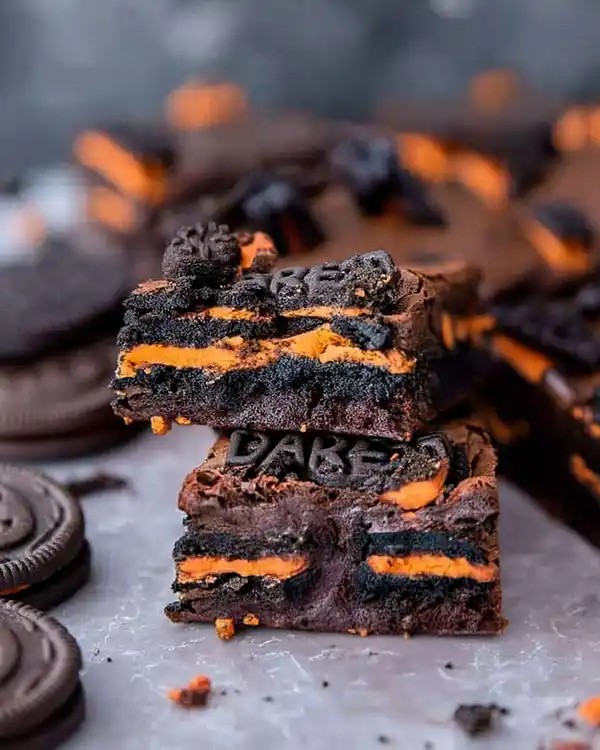
These Halloween Oreo brownies deliver everything you want in a holiday dessert. They’re foolproof enough for novice bakers yet impressive enough for experienced home cooks. Furthermore, they solve the eternal problem of what to bring to Halloween parties.
Remember my 9 PM panic baking session? Now these brownies have become our official Halloween tradition. My daughter requests them every October without fail. She even helps arrange the Oreo layer now.
The beauty of this recipe lies in its simplicity. You’re not wrestling with complicated techniques or expensive ingredients. Instead, you’re creating something memorable with pantry staples and festive cookies.
Quick wins: Takes 10 minutes to mix, requires one bowl, makes everyone think you’re a baking genius.
Pair these with spooky Halloween buffalo dip for a sweet-and-savory party spread. Or serve them at your next fall gathering alongside jack-o’-lantern quesadillas.
What’s your favorite Halloween baking memory? Drop a comment below with your brownie creations. I love seeing how everyone customizes this recipe.
Now grab those Halloween Oreos before they disappear from store shelves. Your new favorite brownie recipe is waiting.
Halloween Oreo Brownies
Equipment
- 8×8-inch baking pan
- Parchment paper
- Microwave-safe bowl
- Hand mixer or whisk
- Wire cooling rack
Ingredients
Brownie Batter
- 150 g Butter melted
- 60 ml Vegetable oil
- 200 g Granulated sugar
- 65 g Brown sugar
- 65 g Cocoa powder Dutch-processed preferred
- 2 large Eggs
- 1 tsp Vanilla extract
- ½ tsp Salt
- 65 g All-purpose flour
Oreo Layer
- 15 cookies Halloween Oreos plus 5 extra for topping
Instructions
- Preheat oven to 350°F (175°C) and line an 8×8-inch baking pan with parchment paper, leaving overhang for easy removal.
- In a microwave-safe bowl, combine butter, vegetable oil, granulated sugar, and brown sugar. Microwave in 30-second intervals until melted, stirring between each. Microwave one extra minute and stir vigorously for 30 seconds to dissolve sugar crystals.
- Let mixture cool slightly, then beat in eggs one at a time. Stir in vanilla extract until glossy and smooth.
- Add flour, cocoa powder, and salt all at once. Fold gently with a spatula about 20 times—do not overmix.
- Spread half of the brownie batter into the pan. Arrange 15 Halloween Oreos in a single layer over the batter.
- Top with the remaining batter, spreading gently to cover. Crush 5 additional Oreos and scatter over the top.
- Bake for 30 minutes until edges are set and the center is slightly jiggly. A toothpick inserted 2 inches from the edge should come out with moist crumbs.
- Cool completely on a wire rack for at least 2 hours before slicing into squares.

