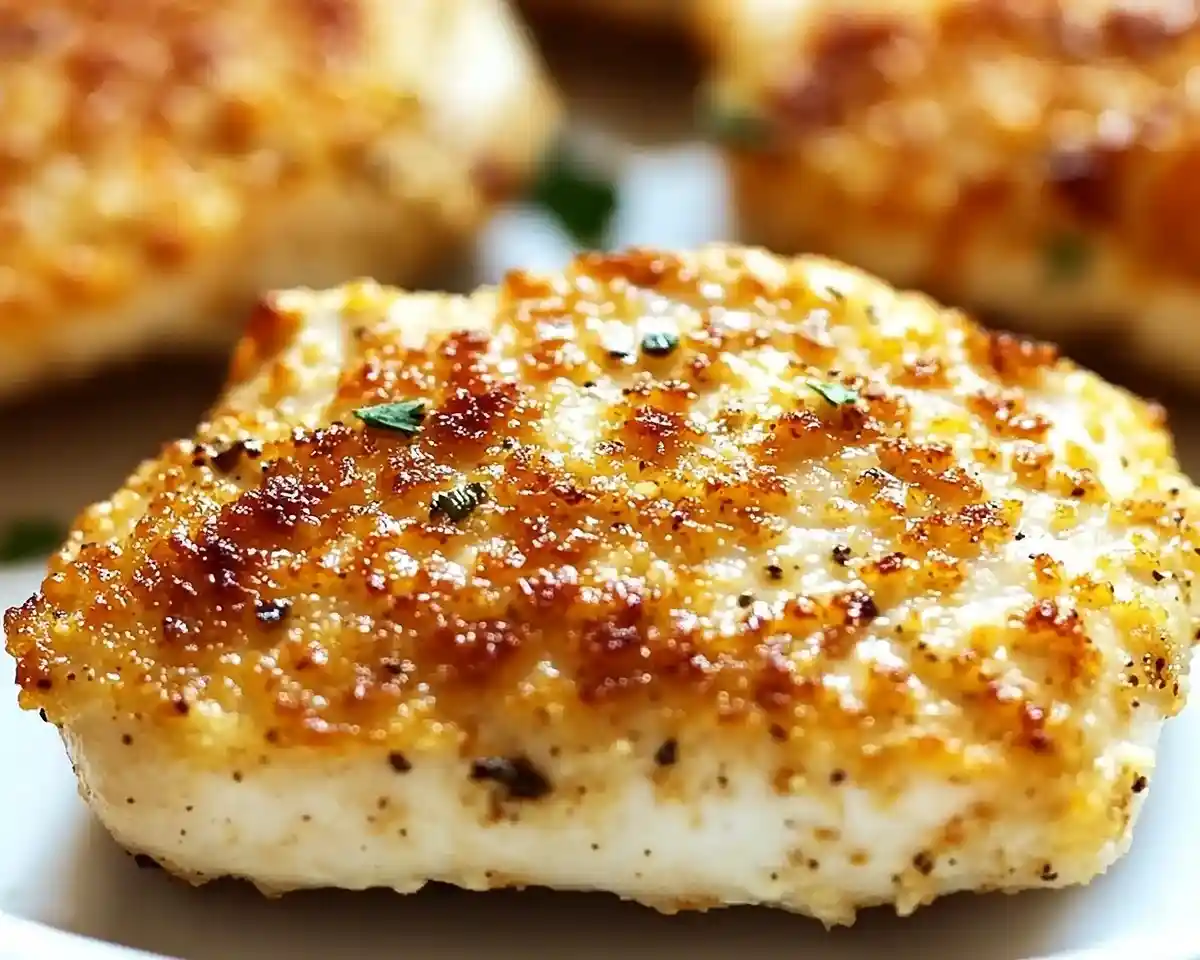
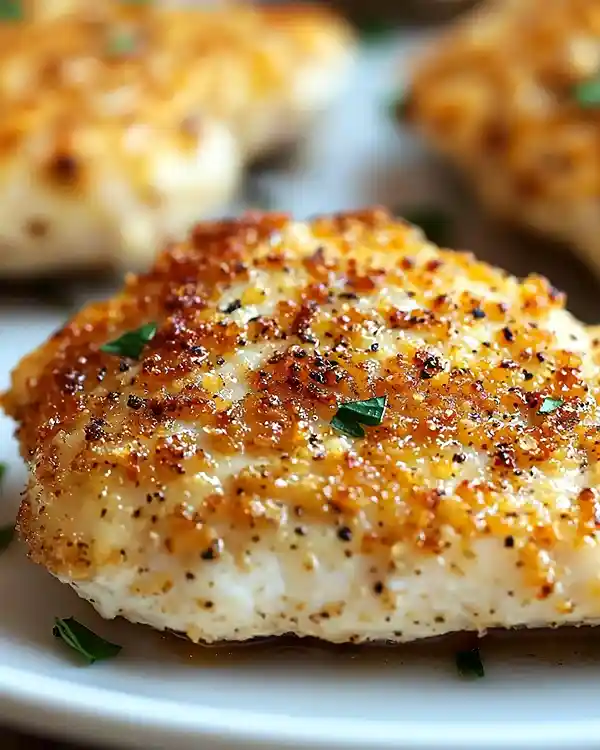
Golden Chicken Breast or Melt in your mouth chicken breast with creamy Parmesan coating. This easy oven chicken recipe delivers restaurant-quality results in just 45 minutes.
Hey, I’m Sofia! Welcome to Tasty at Home, where bold flavors meet everyday kitchens.
Let me tell you about the night I almost gave up on chicken breasts forever. Dry, rubbery, flavorless—I’d had enough. Then my neighbor Linda knocked on my door with a casserole dish that smelled like heaven wrapped in garlic and cheese. One bite of her melt in your mouth chicken breast changed everything.
The coating. Man, oh man, that creamy Parmesan topping creates a golden crust that locks in every drop of moisture. The chicken practically falls apart on your fork. I begged Linda for the recipe, tested it six different ways, and now I’m sharing the perfected version with you.
This isn’t your average oven chicken. It’s a quick and easy weeknight dinner that tastes like you spent hours in the kitchen. Four ingredients plus chicken—that’s it. No complicated techniques, no fancy equipment, just pure comfort food that actually delivers.
Table of Contents
What Makes This Recipe Absolutely Unbeatable
The secret lies in the mayo-Parmesan mixture. While most chicken recipes leave you with dried-out protein, this coating acts as both a marinade and a protective barrier during baking.
The mayonnaise (yes, really!) keeps the meat incredibly moist while the Parmesan creates that irresistible golden crust. As Julia Child always said, fat is flavor—and this technique proves it without drowning your dinner in butter.
I’ve tested this recipe with Greek yogurt for a lighter version, and honestly? Both work beautifully. The yogurt gives you tang, while mayo delivers pure richness. Your choice depends on what you’re craving.
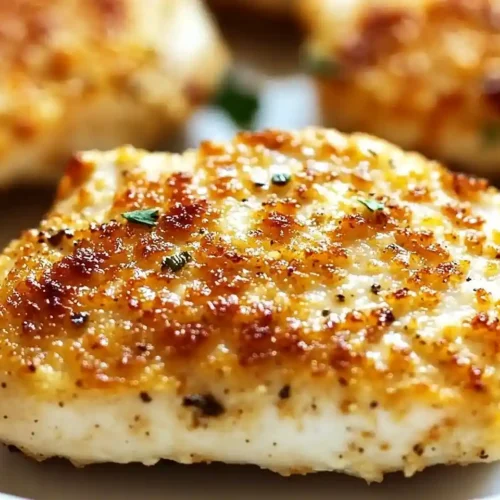
Melt In Your Mouth Chicken Breast
Equipment
- 9×13 inch baking dish
- meat mallet or heavy skillet
- Mixing bowl
- Measuring cups and spoons
- Instant-read thermometer
- parchment paper (optional)
Ingredients
Chicken
- 4 breasts Boneless, skinless chicken breasts Even size preferred
- 1 cup Mayonnaise Or Greek yogurt
- 0.5 cup Grated Parmesan cheese Fresh only, not pre-grated
- 1 tsp Garlic powder Not garlic salt
- 1 tsp Onion powder Fresh flavor essential
- 1 tsp Salt Kosher or sea salt
- 0.5 tsp Black pepper Freshly ground
- 0.5 tsp Paprika or Italian seasoning Optional topping
Instructions
- Preheat oven to 375°F (190°C). Grease a 9×13-inch baking dish or line with parchment paper.
- Pound chicken breasts between plastic wrap or parchment paper to ¾ inch thickness using a meat mallet or heavy skillet.
- Combine mayonnaise, Parmesan, garlic powder, onion powder, salt, and black pepper in a mixing bowl until smooth.
- Pat chicken dry, place in prepared dish, and coat generously with Parmesan mixture.
- Sprinkle optional paprika or Italian seasoning on top and bake uncovered for 35-45 minutes until internal temperature reaches 165°F (74°C).
- Let chicken rest for 5 minutes before serving to allow juices to redistribute.
Notes
Premium Ingredient Selection Guide
For the coating base, choose full-fat mayonnaise or 2% Greek yogurt—low-fat versions won’t create the same luxurious texture. The Parmesan must be freshly grated from a wedge, not the pre-shredded stuff in a canister. Quality cheese melts differently and tastes noticeably better.
For the chicken itself, look for breasts that are similar in size for even cooking. Organic, free-range chicken offers superior flavor, but standard grocery store chicken works perfectly fine. The key is even thickness, which we’ll achieve through pounding.
Ingredients: Your Shopping List
Here’s everything you need to create this restaurant-quality miym chicken at home:
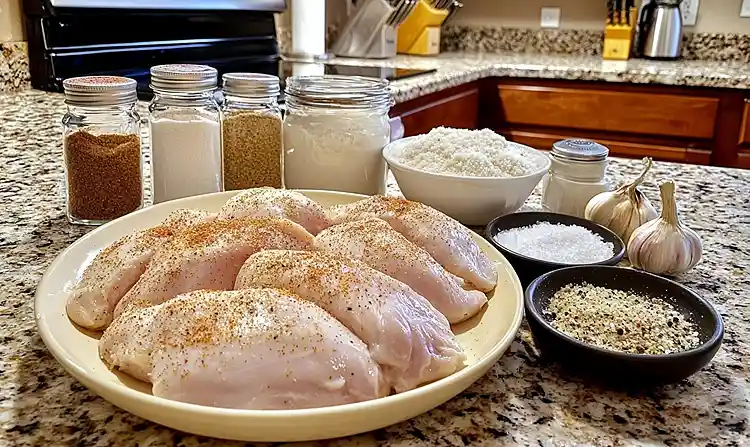
| Ingredient | US Measurement | Metric | Notes |
|---|---|---|---|
| Boneless, skinless chicken breasts | 4 breasts (6-8 oz each) | 680-900g total | Even size preferred |
| Mayonnaise | 1 cup | 240ml | Or Greek yogurt |
| Grated Parmesan cheese | ½ cup | 50g | Fresh only, not pre-grated |
| Garlic powder | 1 teaspoon | 5ml | Not garlic salt |
| Onion powder | 1 teaspoon | 5ml | Fresh flavor essential |
| Salt | 1 teaspoon | 5ml | Kosher or sea salt |
| Black pepper | ½ teaspoon | 2.5ml | Freshly ground |
| Paprika or Italian seasoning | ½ teaspoon | 2.5ml | Optional topping |
Smart Shopping Tips for US Grocery Stores
You’ll find everything at your local supermarket. Buy Parmesan wedges from the deli section rather than pre-shredded cheese—the texture difference is enormous. For mayonnaise, brands like Hellmann’s or Duke’s work beautifully. Oops! I once grabbed Miracle Whip by mistake, and the sweetness threw off the whole dish.
Check the meat counter for chicken breasts around the same size. If you grab a variety pack with different sizes, plan to adjust cooking times slightly for smaller pieces.
International Substitutions Table
| US Ingredient | International Alternative |
|---|---|
| Mayonnaise | Crème fraîche or sour cream |
| Parmesan cheese | Grana Padano or aged Pecorino |
| Kosher salt | Fine sea salt (use slightly less) |
Essential Equipment & Preparation
You don’t need fancy tools for this recipe. A basic 9×13-inch baking dish, a meat mallet, and a mixing bowl get the job done perfectly.
Equipment List
- 9×13-inch baking dish (glass or ceramic)
- Meat mallet or heavy skillet (for pounding)
- Medium mixing bowl
- Measuring cups and spoons
- Instant-read thermometer (game-changer for perfect doneness)
- Parchment paper (optional but makes cleanup easier)
No meat mallet? Use a heavy skillet or rolling pin. Just place the chicken between plastic wrap or parchment paper to avoid a messy splatter situation.
Step-by-Step Cooking Instructions
Step 1: Preheat and Prepare Your Baking Dish
Set your oven to 375°F (190°C) and let it fully preheat—this takes about 15 minutes. Grease your 9×13-inch baking dish with cooking spray or butter, or line it with parchment paper for effortless cleanup. As Thomas Keller emphasizes, proper preparation prevents kitchen chaos and ensures even cooking results.
Step 2: Pound the Chicken to Even Thickness
Place each chicken breast between two sheets of plastic wrap or parchment paper. Using a meat mallet or heavy skillet, gently pound from the center outward until each breast reaches about ¾ inch thick throughout. Even thickness is non-negotiable here—it prevents those dreaded overcooked edges and raw centers.
This step takes maybe three minutes total. Don’t skip it, even if you’re tempted.
Step 3: Create the Creamy Parmesan Coating
In your medium bowl, combine the mayonnaise, grated Parmesan, garlic powder, onion powder, salt, and black pepper. Stir until completely smooth and well-combined—no streaks of mayo should remain. The mixture should be thick but spreadable, like a luxurious savory frosting.
Taste it (yes, before it touches raw chicken—just take a tiny bit off your spoon). You should detect garlic, cheese, and a balanced saltiness. Too bland? Add another pinch of salt.
Step 4: Coat Each Chicken Breast Generously
Pat the pounded chicken breasts dry with paper towels—excess moisture prevents the coating from adhering properly. Place them in your prepared baking dish, spacing them slightly apart. Using a spoon or offset spatula, spread the Parmesan mixture evenly over the top of each breast, covering the entire surface like you’re frosting a cake.
Don’t be shy with the coating. A thick layer equals maximum flavor and moisture protection. Each breast should wear a generous blanket of that creamy goodness.
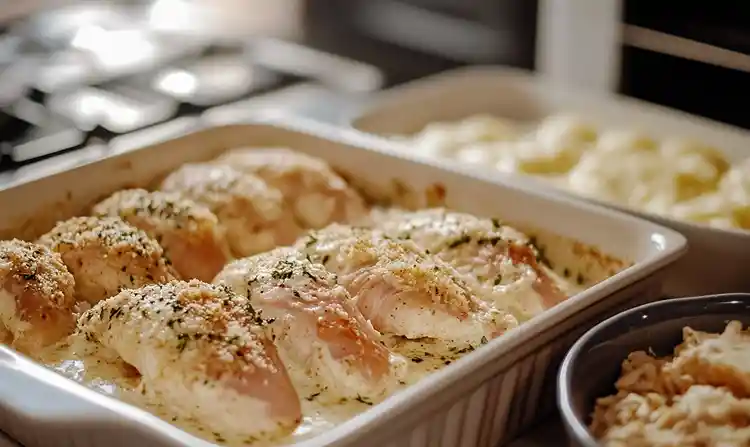
Step 5: Add Optional Seasonings and Bake
If using paprika or Italian seasoning, sprinkle it lightly over the coated chicken breasts for extra color and flavor. Slide the dish into your preheated oven on the center rack. Bake uncovered for 35-45 minutes, depending on the thickness of your chicken.
Well, here’s where most people panic about timing. The coating should turn golden brown and slightly crispy on top. More importantly, the internal temperature must reach 165°F (74°C) when you insert an instant-read thermometer into the thickest part.
Step 6: Rest Before Serving
Remove the dish from the oven and let the chicken rest for 5 minutes before cutting or serving. This resting period allows the juices to redistribute throughout the meat, guaranteeing that melt-in-your-mouth texture you’re after. I learned this the hard way—slice too soon, and those precious juices run all over your cutting board instead of staying in the meat.
Cover the dish loosely with foil during resting if you’re worried about it cooling too much.
Expert Tips for Perfect, Golden Chicken Breast Results Every Time
Temperature Matters More Than Time Always use an instant-read thermometer. Cooking times vary based on oven calibration and chicken thickness. According to the USDA guidelines on poultry safety, 165°F guarantees both safety and optimal texture without overcooking.
Don’t Skip the Pounding Step Even thickness means even cooking. Period. Thick ends stay raw while thin edges dry out if you skip this crucial step. Spend those extra three minutes—your dinner depends on it.
Let the Chicken Come to Room Temperature Take the chicken out of the fridge 15-20 minutes before coating and baking. Cold chicken going into a hot oven cooks unevenly. Room temperature chicken bakes more predictably and stays juicier.
Customize Your Coating Mixture Add ½ teaspoon of smoked paprika for depth, or mix in fresh herbs like chopped parsley or basil for brightness. A pinch of cayenne brings subtle heat without overwhelming the dish. Experiment until you find your signature version.
Creative Variations to Try
Italian-Inspired Version
Replace the garlic and onion powder with 1 tablespoon of Italian seasoning. Add ½ cup of shredded mozzarella to the Parmesan mixture for extra gooeyness. Serve alongside Southern chicken spaghetti casserole for an Italian feast.
Spicy Southwest Style
Mix 1 teaspoon of chili powder and ½ teaspoon of cumin into the coating. Top with pepper jack cheese during the last 5 minutes of baking. This pairs beautifully with Mexican rice or black beans for a complete quick and easy weeknight dinner.
Herb Garden Fresh
Fold 2 tablespoons of fresh chopped herbs (basil, thyme, rosemary) into your coating mixture. The herbs perfume your kitchen and add restaurant-level sophistication. This variation works especially well for spring and summer dinners.
Keto-Friendly Version
Swap mayonnaise for full-fat sour cream and increase the Parmesan to ¾ cup. Add ½ teaspoon of ground mustard for tanginess. Serve with cauliflower rice or roasted vegetables instead of traditional sides.
Holiday Cranberry Glaze
After baking, brush the chicken with a mixture of cranberry sauce, Dijon mustard, and a splash of balsamic vinegar. Return to the oven for 5 minutes. This Thanksgiving-worthy variation impresses guests without adding complexity.
Storage, Make-Ahead, and Reheating Guide
Storage Instructions
Store leftover Golden chicken breast in an airtight container in the refrigerator for up to 4 days. The coating stays flavorful, though it softens slightly compared to fresh-from-the-oven texture. Slice before storing for easier meal prep throughout the week.
Freezing Guidelines
Freeze cooked chicken in individual portions wrapped tightly in plastic wrap, then placed in freezer bags. Properly stored, it maintains quality for up to 3 months. Thaw overnight in the refrigerator before reheating.
Reheating Methods
Reheat in a 350°F oven for 15-20 minutes until warmed through. Cover loosely with foil to prevent the coating from burning. Microwave reheating works in a pinch (2-3 minutes on 50% power), but the oven preserves that golden crust better.
Make-Ahead Strategy
Coat the raw chicken breasts up to 24 hours in advance. Cover tightly with plastic wrap and refrigerate. When ready to cook, bring to room temperature for 15 minutes, then bake as directed. This trick saves precious time on busy weeknights.
| Storage Method | Duration | Best Practice |
|---|---|---|
| Refrigerated (cooked) | 4 days | Airtight container |
| Frozen (cooked) | 3 months | Individual portions |
| Raw (coated) | 24 hours | Covered, refrigerated |
Perfect Pairings and Serving Suggestions
This oven chicken deserves equally delicious sides. I love serving it with cheesy ranch potatoes and smoked sausage for a complete comfort food experience. The creamy potatoes echo the richness of the chicken coating while adding textural contrast.
For lighter meals, pair with roasted green beans, Caesar salad, or garlic bread to soak up any pan juices. Mashed potatoes, rice pilaf, or buttered egg noodles also work wonderfully. You know what? This chicken even makes incredible sandwiches the next day—slice it thin and pile it on crusty bread with lettuce and tomato.
Wine pairing? A crisp Chardonnay or light Pinot Grigio complements the creamy Parmesan coating without overwhelming the dish. For beer lovers, a wheat beer or pilsner cuts through the richness perfectly.
Check out these cheesy garlic chicken wraps for another way to transform leftover miym chicken into tomorrow’s lunch. The flavors work beautifully together in a tortilla with fresh vegetables.
melt in your mouth chicken breast FAQs
Can I use chicken thighs instead of breasts for this recipe?
Can I use chicken thighs instead of breasts? Absolutely! Bone-in, skin-on thighs need about 45-50 minutes at 375°F, while boneless, skinless thighs cook in 30-35 minutes. Thighs stay even more moist than breasts due to higher fat content. Just verify they reach 165°F internal temperature before serving.
What’s the best way to prevent dry chicken breast?
What’s the best way to prevent dry chicken? Even thickness through pounding ensures uniform cooking, while the mayo-Parmesan coating seals in moisture during baking. Never cook past 165°F—carryover cooking adds another 5 degrees during resting. Those two tricks guarantee juicy results every single time.
How do I know when the chicken is fully cooked without a thermometer?
How do I know when chicken is done? Insert a knife into the thickest part—juices should run clear, not pink. The meat should feel firm but not hard when pressed gently. However, an instant-read thermometer remains the most reliable method for food safety and prevents guesswork entirely.
Can I prepare this chicken breast recipe ahead for meal prep?
Can I meal prep this recipe? Yes! Cook the full batch, let it cool completely, then portion into meal prep containers with your chosen sides. Refrigerate for up to 4 days or freeze for longer storage. This quick and easy weeknight dinner strategy saves hours during busy weeks while maintaining incredible flavor.
Transform Your Weeknight Dinners Forever
You’ve just discovered the ultimate solution to boring chicken dinners. This golden chicken breast delivers restaurant-quality results without the stress, expense, or complicated techniques. Four ingredients plus chicken—that’s genuinely all you need for dinner tonight.
Ready to make your family beg for seconds? Grab your ingredients and get that oven preheating. Whether you’re feeding picky eaters, hosting last-minute guests, or just treating yourself to something special, this recipe never disappoints.
Want to complete the meal? Try pairing it with cheesy ground beef and potato casserole for the ultimate comfort food spread. And don’t forget dessert—these easy cheesecake cups require minimal effort but deliver maximum wow factor.
What variations will you try first? Drop a comment below and let me know how your melt in your mouth chicken turned out. Did you go classic or experiment with the spicy Southwest version? Your kitchen adventures inspire my next recipe tests!
Tasty at Home – Where bold flavors meet everyday kitchens

