
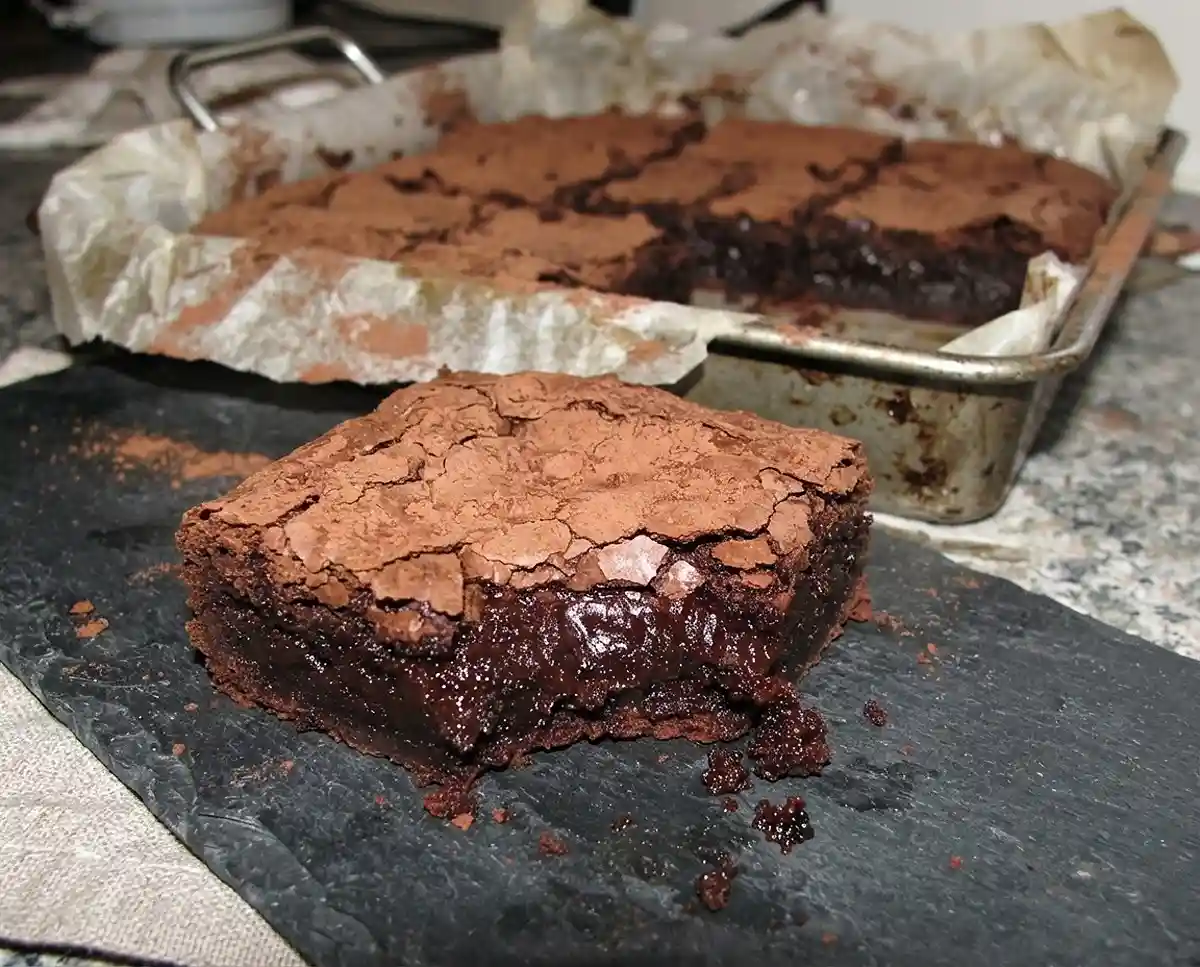
Fudgy miso brownies with deep dark chocolate and a quiet savory hum. Easy, no-mixer comfort you can make tonight, and the secret ingredient might surprise you.
My grandmother kept a tiny tub of miso at the back of her fridge, right behind the pickles, and she swore a spoonful could fix almost any soup. I never imagined it belonged in dessert until a rainy Sunday when I was out of salt and feeling curious.
The first batch of these fudgy miso brownies disappeared before the pan was even cool, and yes, I ate the corners standing at the counter like a raccoon.
Table of Contents
Why These Fudgy Miso Brownies Are a Keeper
Here’s the thing about miso in a brownie recipe: it doesn’t taste like soup. It tastes like the chocolate got a little more grown-up, with a salty, toasty depth that makes every bite feel rounder and richer. Think of how a pinch of salt works in caramel, only deeper.
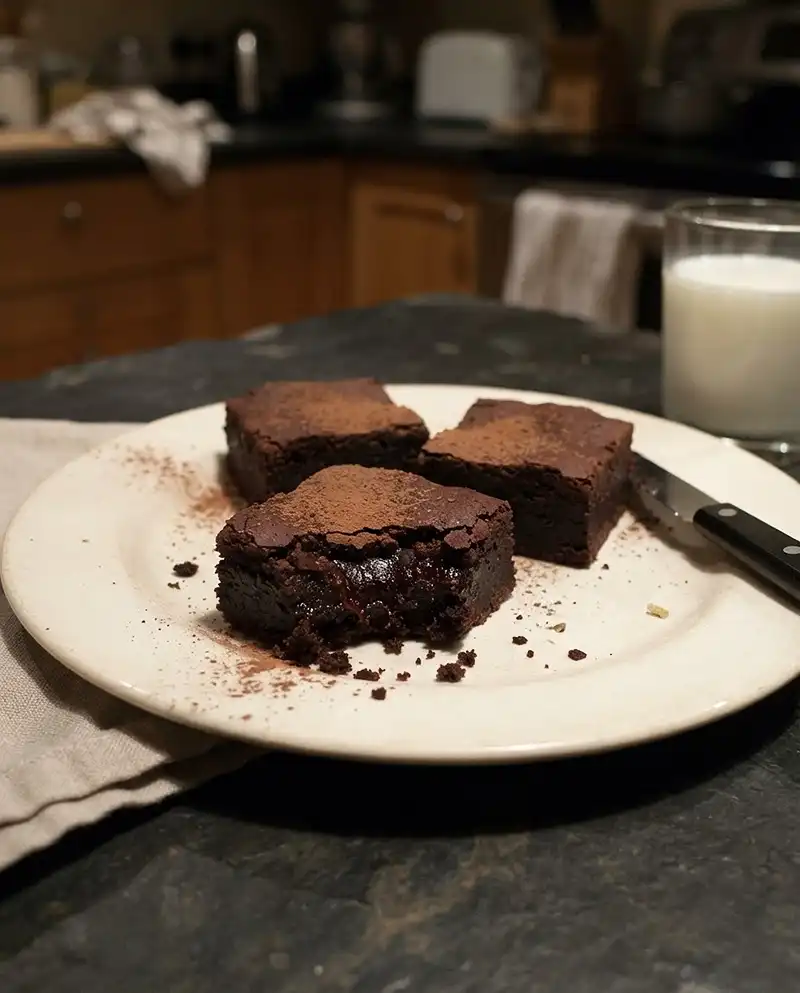
The texture is the other reason I keep coming back. These are properly fudgy, dense and glossy in the middle with edges that hold their shape, the kind of chocolate brownie that makes people go quiet for a second.
And there’s no electric mixer, no fussy creaming, and no hunting for obscure ingredients. If you can stir chocolate in a bowl, you can make these. They’re also a lovely bit of baked goods trivia to bring to a party, because everyone asks what’s in them.
If you’re building a whole cozy weekend menu, my apple crisp recipe with oats sits happily beside these on a dessert table.
Fudgy Miso Brownies
Equipment
- 8-inch square baking pan
- Parchment paper
- Saucepan
- Heatproof bowl
- Spatula or wooden spoon
- small bowl
- Sifter or fine mesh sieve
- Sharp knife
- Measuring cups and spoons
Ingredients
The Chocolate Base
- ½ cup coconut oil butter works too
- 1 cup dark dairy-free chocolate or 70% dark chocolate chopped bars or chips
- 2.5 tbsp miso paste white or yellow miso is mildest
- 1.5 tsp coffee powder boosts the chocolate flavor
The Sweet and Wet Stuff
- 1 cup raw sugar regular white sugar is fine
- ½ cup coconut yogurt or Greek yogurt, or 2 eggs instead
- 1.5 tsp vanilla extract
The Dry Ingredients
- ½ cup all-purpose flour spoon and level, don’t scoop
- 1 tsp baking powder
- ¼ cup cocoa powder plus extra for dredging
Instructions
Prepare
- Heat the oven to 180C (about 350F). Line an 8-inch square pan with parchment paper or grease it well.
Melt the Chocolate
- Heat water in a saucepan until it just starts to simmer, then set a heatproof bowl on top. Make sure the bottom of the bowl doesn’t touch the water.
- Add the coconut oil and chocolate to the bowl and stir until almost melted. Add the miso paste and keep stirring until the mixture is shiny and smooth.
- Take the bowl off the heat and stir in the coffee powder. Then add the sugar right away and stir until combined. The mixture will look a little thick and grainy. Let it cool for a few minutes.
Make the Batter
- Mix in the coconut yogurt (or Greek yogurt, or 2 eggs), then stir in the vanilla extract. If you’re using eggs, wait until the bowl feels barely warm before adding them.
- Sift the flour, baking powder, and cocoa powder together in a small bowl. Fold them into the chocolate mixture just until no white streaks remain. Don’t overmix.
Bake
- Pour the batter into the prepared pan and smooth the top. Bake for 22 to 25 minutes, until the edges are set and the center is still slightly soft.
Chill and Serve
- Let the brownies cool completely in the pan, then refrigerate for 1 to 2 hours before slicing.
- Dust the tops with cocoa powder, cut into squares with a sharp knife (wipe it clean between cuts), and serve.
Notes
What You’ll Need for Fudgy Miso Brownies
The ingredient list is short and friendly. I’ve grouped everything the way I actually lay it out on the counter, so you can see the whole plan at a glance.
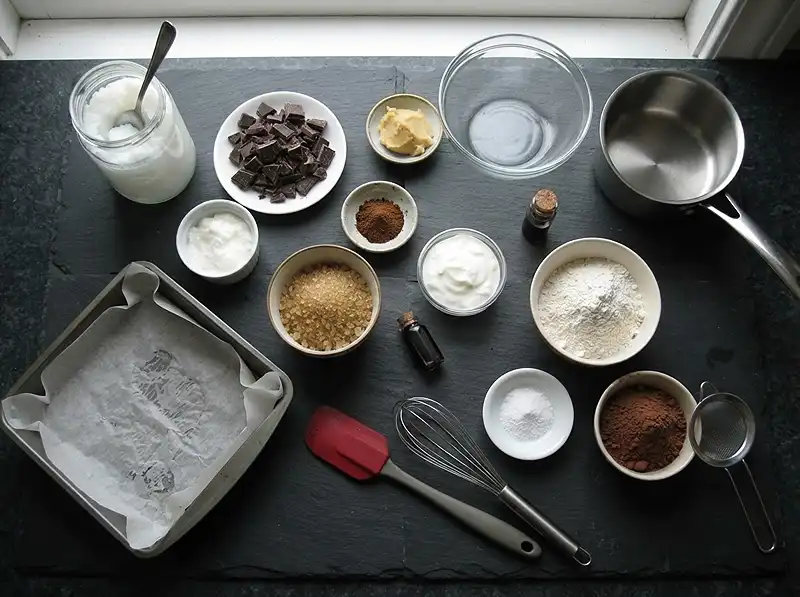
| Ingredient | Amount | Quick Note |
|---|---|---|
| The Chocolate Base | ||
| Coconut oil | 1/2 cup | Butter works too |
| Dark dairy-free chocolate or 70% dark chocolate | 1 cup | Chopped bars or chips both work |
| Miso paste | 2.5 tbsp | White or yellow miso is the mildest |
| Coffee powder | 1.5 tsp | Boosts the chocolate flavor |
| The Sweet and Wet Stuff | ||
| Raw sugar | 1 cup | Regular white sugar is fine |
| Coconut yogurt | 1/2 cup | Greek yogurt, or 2 eggs instead |
| Vanilla extract | 1.5 tsp | The real stuff if you have it |
| The Dry Ingredients | ||
| All-purpose flour | 1/2 cup | Spoon and level, don’t scoop |
| Baking powder | 1 tsp | Just a little lift |
| Cocoa powder | 1/4 cup | Plus extra for dredging |
A Few Notes on the Ingredients
Let’s talk miso paste first, since it’s the star. White or yellow miso is the gentlest, with a mellow, almost sweet saltiness. Red miso is bolder and can take over, so save it for your second batch. If you’re curious about where this fermented soybean paste comes from, Britannica’s guide to miso is a lovely read.
For the dark chocolate, choose something you’d happily nibble on its own. Around 70% gives you that grown-up bittersweet flavor without turning the brownies sharp. A dairy-free bar keeps the whole recipe plant-based, and chips melt just fine if that’s what’s in your pantry.
The coffee powder won’t make these taste like coffee. It simply turns up the volume on the chocolate, the way a good friend makes everyone else at the party funnier. Use regular cocoa powder for the batter and a little extra for the dusting at the end.
Coconut yogurt keeps the brownie batter soft and tangy-rich. Greek yogurt works beautifully too, and if you’d rather go the classic route, two eggs will do the same job.
How to Make Fudgy Miso Brownies, Step by Step
Get the Oven and Pan Ready
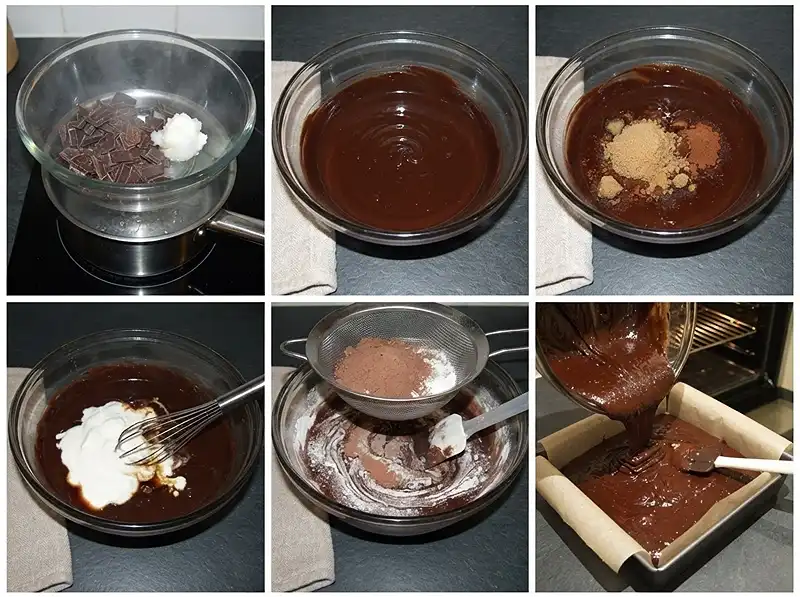
Heat your oven to 180C (about 350F). Line an 8-inch square pan with parchment paper, or grease it really well. I’ve skipped this step exactly once, and I spent a long evening chiseling brownies out like an archaeologist.
Set Up a Gentle Double Boiler
Heat some water in a saucepan until it just starts to simmer, then set a heatproof bowl on top. The bottom of the bowl must not touch the water. You want gentle steam, not a bath.
My grandmother always said, “Chocolate is shy. Coax it, don’t shout at it.” She was right, as she was about most things.
Melt the Chocolate and Stir In the Miso
Add the coconut oil and chocolate to the bowl and stir until it’s almost melted. You’ll smell it first, that warm, bittersweet cloud rising from the pot.
Now add the miso paste and keep stirring until the mixture turns shiny and smooth. It’ll look like glossy mud in the best possible way.
Add the Coffee and Sugar, Then Take a Breather
Lift the bowl off the heat and stir in the coffee powder. Mix well, then immediately add the sugar and stir until combined. The mixture will turn a little thicker and grainy-looking, which is exactly right.
Let it cool for a few minutes. This pause matters, because you don’t want hot chocolate scrambling the yogurt in the next step.
Stir In the Yogurt and Vanilla
Mix in the coconut yogurt (or Greek yogurt, or eggs), then stir in the vanilla extract. The batter will loosen and turn a deeper, silkier brown.
If you’re using eggs, make sure the bowl has cooled enough that it feels barely warm, not hot, against your wrist.
Fold in the Dry Ingredients
Sift the flour, baking powder, and cocoa powder together in a small bowl. Sifting feels fussy, but cocoa loves to hide in lumps, and nobody wants a surprise pocket of dry powder.
Fold the dry mixture into the chocolate until no white streaks remain. Don’t overmix. Stop the moment it comes together, even if your arm wants to keep going.
Bake Until Just Set
Pour the batter into the prepared pan and smooth the top with the back of a spoon. Bake for 22 to 25 minutes, until the edges are set and the center is still slightly soft.
The kitchen will smell like a chocolate shop by the end. Resist the urge to peek every two minutes, because I’ve burned this at least twice by wandering off, so learn from me and set a timer.
Chill, Slice, and Dredge
Let the brownies cool completely in the pan, then refrigerate for 1 to 2 hours before slicing. This is the hardest part, and also the secret to clean, fudgy squares.
Dust the tops with cocoa powder, cut into squares, and enjoy. Each slice should feel dense and silky, with a faint salty finish that lingers.
Tips, Swaps, and Variations
Little Tips That Help
Use a sharp knife and wipe it clean between cuts. Warm the blade under hot water if the brownies are very cold, and you’ll get bakery-neat edges.
Dredge with cocoa powder just before serving. If you do it hours ahead, the cocoa slowly soaks into the surface and loses that pretty matte finish.
Easy Swaps
No coconut oil? Butter works too and adds a slightly richer, rounder flavor. No coconut yogurt? Greek yogurt or two eggs will step in without a fuss. Raw sugar gives a hint of molasses, but regular white sugar is perfectly fine.
Miso Caramel Brownies
Want to take it up a notch? Warm a little caramel sauce and drizzle it over the cooled squares, or swirl a few spoonfuls into the batter just before baking. These miso caramel brownies are gloriously sticky and very hard to share.
For a playful dessert spread, pair a tray of them with my viral Jell-O boba for a fun chewy-and-fudgy contrast.
When Things Go Sideways
The chocolate looks grainy or stiff. A drop of water probably snuck in, or the bowl got too hot. Keep the heat gentle, keep the bowl dry, and whisk in a teaspoon of warm oil if it needs rescuing.
The brownies came out cakey. Overmixing is the usual culprit. Fold just until the white streaks vanish, then stop.
The middle seems too gooey. That’s partly the point, since these are meant to be fudgy. But if it’s soupy, give it a few more minutes next time, and make sure you chilled it fully before slicing.
They taste too salty. Your miso paste may be a bolder variety. Switch to white or yellow miso, or trim the amount by half a tablespoon.
Storing Your Brownies and Using Up Leftovers
| Where | How | How Long |
|---|---|---|
| Refrigerator | Airtight container, parchment between layers | Up to 4 days |
| Freezer | Wrapped individually, then in a freezer bag | Up to 2 months |
| Counter | Covered, for serving only | No more than 2 hours |
Because these are made with yogurt, I keep them chilled. For more on keeping food safe, here’s what the USDA says about leftovers.
Reheating Advice
Fudgy brownies love a little warmth. Microwave a single square for 10 to 15 seconds, or pop it into a low oven for a few minutes. Frozen squares can thaw in the fridge overnight first.
No-Waste Ideas for Leftovers
Crumble stale or broken pieces over vanilla ice cream or stir them into yogurt for a quick treat. You can also fold crumbs into pancake batter, or press them into a jar with whipped cream for a cheerful little parfait.
If you want a savory dinner before dessert, my mini cottage pies make a very good opening act.
Frequently Asked Questions
Do fudgy miso brownies taste salty or like soup?
Not at all. The miso paste adds a subtle savory depth that makes the chocolate taste richer, a bit like salted caramel does. Most people can’t name the secret ingredient.
Which miso paste is best for brownies?
White or yellow miso is the mildest and the best place to start. Red miso is stronger and can overpower the chocolate.
Can I use eggs instead of yogurt?
Yes. Two eggs can replace the coconut yogurt, and Greek yogurt works too. Just let the chocolate mixture cool slightly first.
Why do I need to chill the brownies before slicing?
Chilling firms up the fudgy center so you get clean squares instead of a soft mess. One to two hours in the fridge is enough.
Can I make miso caramel brownies from this recipe?
Absolutely. Drizzle warm caramel sauce over the cooled brownies, or swirl some into the batter before baking.
Final Thoughts From My Kitchen Table
If you’ve been on the fence about putting miso in dessert, consider this your gentle nudge. These fudgy miso brownies are the kind of treat I make when the day felt long and I want something warm, chocolatey, and just a little bit surprising.
I’d love for you to bake a pan and tell me how it went. Pin this recipe on Pinterest so you can find it later, and leave a comment or a star rating below. Tell me whether you went classic or tried the caramel twist, and grab a cup of tea while you’re at it.
