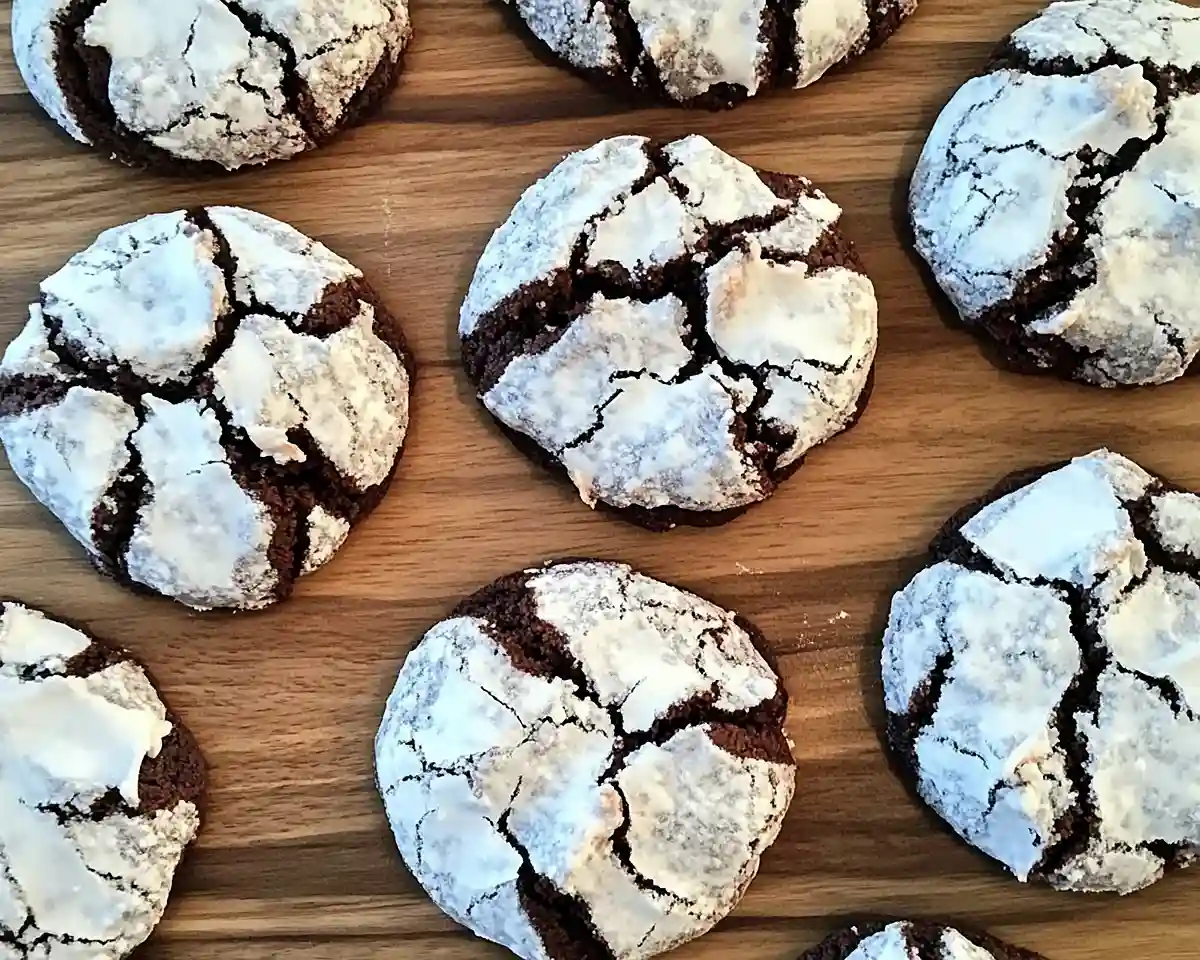
Chocolate Peppermint Crinkle Cookies with candy cane swirls and snowy powdered sugar. Perfect Christmas cookies peppermint chocolate for your holiday table.
Let me tell you, my first batch of these cookies was a complete disaster. The dough stuck to my hands like cement, and the “crinkles” looked more like sad wrinkles. But after five years of holiday baking and more than a dozen batches, I finally cracked the code to these stunning Chocolate Peppermint Crinkle Cookies.
These aren’t your average holiday treats. They combine rich cocoa with cool peppermint in a way that makes every bite feel like unwrapping a gift. The outside shatters with sweetness while the inside stays impossibly fudgy.
Well, I’ve tested this recipe through three Christmases, countless cookie exchanges, and one very memorable New Year’s party. Now they’re requested by name every December. The secret? Patience with the chill time and a generous hand with that peppermint extract.
Tasty at Home – Where bold flavors meet everyday kitchens.
Table of Contents
What Makes These Hot Chocolate Crinkle Cookies Irresistible
These cookies bridge the gap between brownie and cookie with spectacular results. The dough develops intense chocolate flavor through Dutch-process cocoa, while peppermint extract adds that signature candy cane twist. Unlike basic chocolate cookies, these create their own visual drama through temperature contrast—cold dough meeting hot oven creates those gorgeous cracks.
The texture rivals anything from high-end bakeries. You know those cookies that look too pretty to eat? These are those cookies, but homemade and way more affordable.
I tested both natural and Dutch-process cocoa for this recipe. Dutch-process wins every time for deeper color and smoother taste. For the peppermint, pure extract beats artificial versions hands down—the flavor stays bright even after baking.
Premium Ingredients for Perfect Results
Start with quality cocoa powder for the deepest chocolate foundation. Fresh baking powder ensures proper rise and creates those signature crinkles. Pure vanilla and peppermint extracts deliver authentic flavor that artificial versions can’t match.
Chocolate Peppermint Crinkle Cookies
Equipment
- mixing bowls
- Hand mixer or stand mixer
- Measuring cups and spoons
- Fine-Mesh Sieve
- Plastic wrap
- Sheet pans
- Parchment paper
- Cookie scoop
Ingredients
Main
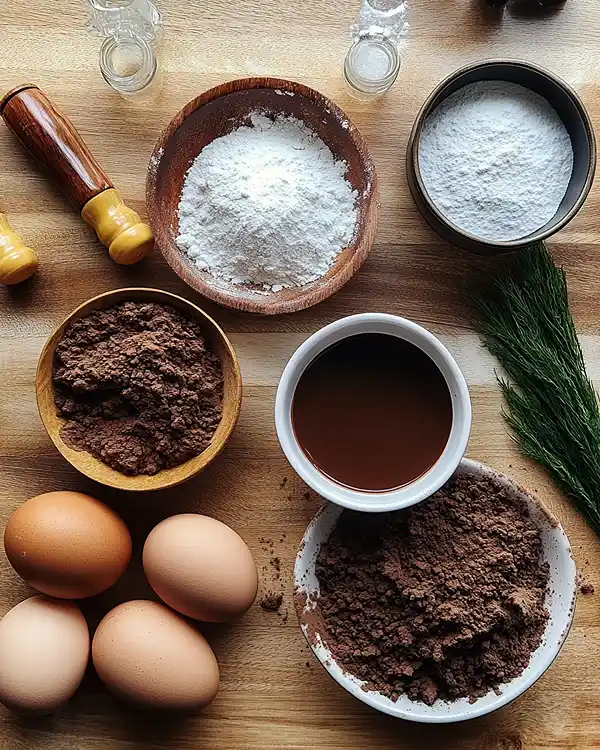
- 2 cups Granulated sugar
- 1 cup Cocoa powder Dutch-process preferred
- ½ tsp Salt
- ½ cup Vegetable oil
- 4 large Eggs
- 2 cups All-purpose flour Sifted
- 2 tsp Baking powder
- ⅓ cup Powdered sugar For coating
- 1 ½ tsp Vanilla extract
- ½ tsp Peppermint extract
Instructions
- Sift together sugar, cocoa powder, and salt. Add vegetable oil and mix, then beat in vanilla, peppermint, and eggs until smooth.
- Sift flour and baking powder. Add dry ingredients to the chocolate mixture in three additions, mixing just until combined.
- Wrap dough tightly in plastic wrap and chill for at least 5 hours or overnight.
- Preheat oven to 350°F (175°C) and line baking sheets with parchment paper. Place powdered sugar in a shallow bowl.
- Roll cold dough into balls and coat generously in powdered sugar. Arrange on baking sheets spaced 2 inches apart.
- Bake 10–12 minutes until edges are set but centers remain soft. Cool on the baking sheet for 5 minutes before transferring to a rack.
Notes
Ingredients
| Ingredient | US Measurement | Metric | Notes |
|---|---|---|---|
| Granulated sugar | 2 cups | 400g | Creates crispy exterior |
| Cocoa powder | 1 cup | 85g | Dutch-process preferred |
| Salt | ½ tsp | 3g | Enhances chocolate flavor |
| Vegetable oil | ½ cup | 120ml | Keeps cookies fudgy |
| Eggs | 4 large | 200g | Room temperature works best |
| All-purpose flour | 2 cups | 240g | Sift for lighter texture |
| Baking powder | 2 tsp | 10g | Check expiration date |
| Powdered sugar | ⅓ cup | 40g | For coating |
| Vanilla extract | 1½ tsp | 7ml | Pure extract only |
| Peppermint extract | ½ tsp | 2.5ml | Start conservative |
Shopping Tips for US Grocery Stores
Head to the baking aisle for Hershey’s Special Dark cocoa if you want that professional bakery look. Target and Walmart stock it year-round. Grab your peppermint extract near the vanilla—McCormick makes a reliable version, though specialty stores carry more intense options.
For eggs, choose large grade A. They’re standard in American baking and create the right consistency. Oops! I once used extra-large eggs and the dough spread like pancake batter.
Essential Ingredients: Sugar, cocoa, flour, and eggs form your base. These deliver the classic chocolate crinkle structure.
Bold Add-ins: Try adding ½ cup crushed candy canes to the dough for extra peppermint punch. Mini chocolate chips work beautifully too—fold in ¾ cup after mixing. Some readers love a pinch of espresso powder to deepen the chocolate notes.
Substitutions That Actually Work
International bakers can swap vegetable oil for melted coconut oil at a 1:1 ratio. The slight coconut flavor complements peppermint surprisingly well. Can’t find peppermint extract? Crush four candy canes into fine powder and add with the dry ingredients.
For gluten-free versions, use a quality 1:1 baking blend. King Arthur’s Measure for Measure performs beautifully in testing. The cookies spread slightly more but maintain that signature crinkle.
Equipment You’ll Need
Gather two mixing bowls—one large, one medium. A hand mixer or stand mixer saves serious arm workout time. You’ll also need measuring cups, spoons, a fine-mesh sieve for sifting, and plastic wrap for chilling.
For baking, grab two sheet pans and parchment paper. The parchment prevents sticking and makes cleanup instant. A cookie scoop ensures uniform size—I use a 1½-tablespoon scoop for perfect portions.
No cookie scoop? Two spoons work fine. Just keep sizes consistent so everything bakes evenly.
Step-by-Step Instructions
Step 1: Mix Your Chocolate Base
Sift together sugar, cocoa powder, and salt in your large bowl. This prevents cocoa lumps that create bitter spots in finished cookies. Add the vegetable oil and beat on medium speed until the mixture resembles wet sand—about 1 minute.
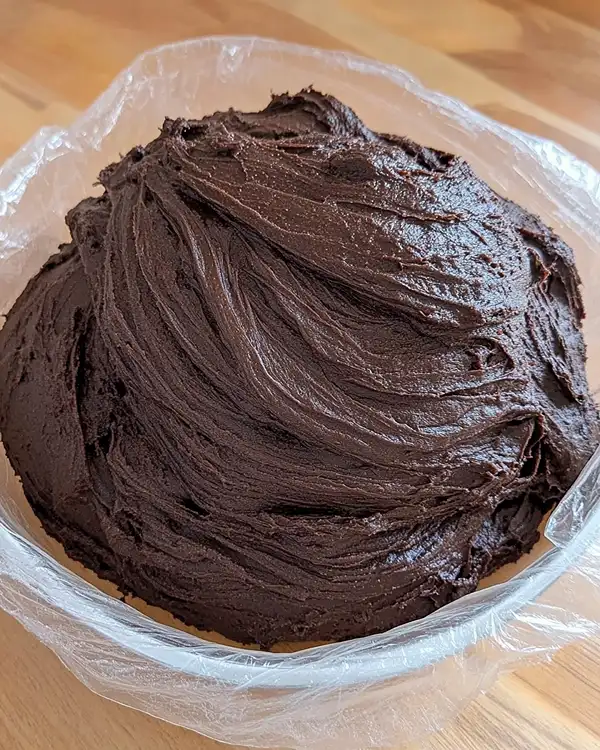
Add vanilla extract, peppermint extract, and eggs. Beat for 2 minutes until completely smooth and slightly glossy. The mixture should look like thick chocolate syrup. This step incorporates air that helps create those dramatic crinkles later.
Step 2: Build the Dough Structure
In your second bowl, sift flour and baking powder together. This distributes the leavening evenly, which matters more than you’d think for consistent crinkles. Add the flour mixture to the chocolate base in three additions, mixing on low speed between each addition.
Stop mixing once you no longer see white streaks. Overmixing develops gluten and creates tough cookies—nobody wants that. The dough will look thick and fudgy, similar to brownie batter but slightly stiffer.
Thomas Keller always says proper mixing makes the difference between amateur and professional results. He’s absolutely right here.
Step 3: The Critical Chill
Scrape dough onto a large sheet of plastic wrap. Fold the wrap completely around the dough ball, pressing gently to remove air pockets. Refrigerate for at least 5 hours, though overnight produces even better results.
This step isn’t optional—room temperature dough spreads into flat puddles instead of thick, crinkled cookies. Man, oh man, I learned this the hard way at 2 AM before a holiday party. The cold dough holds its shape when powdered sugar coating hits hot oven, creating that stunning crackled effect.
Some bakers try to rush this with freezer time. Don’t. Freezing makes dough too hard to scoop and roll easily.
Step 4: Prep for Baking
Preheat your oven to 350°F (175°C). Position racks in the upper and lower thirds if baking two sheets simultaneously. Line your baking sheets with fresh parchment paper—reusing old parchment creates uneven browning.
Pour powdered sugar into a small, shallow bowl. You’ll need more than you think—plan on refilling at least once per batch. Set everything within easy reach of your refrigerated dough.
Step 5: Shape and Coat
Working quickly to keep dough cold, scoop out portions using your cookie scoop or spoon. Roll each portion between your palms to create smooth balls about 1½ inches in diameter. Drop each ball into powdered sugar and roll until completely coated—the coating should look thick and generous.
Place coated balls on prepared baking sheets, spacing them 2 inches apart. They’ll spread during baking. Don’t flatten or press the balls—they need that dome shape to crinkle properly.
Julia Child emphasized the importance of confident shaping in her chocolate cookie recipes. Handle dough quickly and decisively for best results.
Step 6: Bake to Perfection
Bake for 10-12 minutes, rotating pans halfway through if using two racks. Cookies are done when edges look set but centers still appear slightly underdone and puffy. They should feel soft when gently pressed—this is normal and correct.
The tops will develop those gorgeous cracks during baking, revealing dark chocolate beneath the white coating. Remove from oven when you see this happen. Cookies firm up considerably during cooling, so slightly underbaked is better than overbaked.
Let cookies cool on the baking sheet for 5 minutes before transferring to a wire rack. This prevents breakage and allows the structure to set. Moving them too soon causes crumbling.
Expert Tips for Bakery-Quality Results
Measure flour correctly by spooning it into measuring cups and leveling with a knife. Scooping directly from the bag packs flour too tightly, creating dry, cakey cookies. This single tip transforms results more than any other adjustment.
Use fresh baking powder for maximum lift. Check the expiration date—old leavening creates flat cookies with minimal crinkles. Test baking powder by dropping ½ teaspoon in hot water—it should fizz vigorously.
Don’t skip the overnight chill. Longer refrigeration develops flavor complexity and creates better texture. Plan ahead and mix dough the day before your baking session.
Roll dough balls in powdered sugar twice for extra-dramatic contrast. First coating, brief rest, then second coating before baking creates that professional bakery look. The technique adds 30 seconds per cookie but delivers stunning visual impact.
Creative Variations to Try
Peppermint Bark Version: Add ½ cup white chocolate chips and ¼ cup crushed candy canes to the dough. These Christmas Cookies Peppermint Chocolate style treats taste like festive peppermint bark in cookie form.
Double Chocolate Deluxe: Increase cocoa powder to 1¼ cups and reduce flour to 1¾ cups. Fold in ¾ cup dark chocolate chips. This creates an ultra-fudgy interior with intense chocolate flavor.
Orange Peppermint Twist: Replace peppermint extract with ¾ teaspoon orange extract. Add 1 tablespoon orange zest to the dough. The citrus brightens chocolate beautifully.
Mocha Peppermint: Add 2 tablespoons instant espresso powder with the cocoa. Coffee amplifies chocolate without tasting like coffee cookies. This sophisticated variation works perfectly for adult holiday parties.
Mexican Hot Chocolate Style: Add ½ teaspoon cinnamon and ⅛ teaspoon cayenne pepper with the cocoa. The warming spices create depth without overwhelming peppermint.
Storage and Make-Ahead Strategies
Store baked cookies in an airtight container at room temperature for up to 5 days. Layer cookies between parchment paper sheets to prevent powdered sugar transfer. They maintain that signature texture throughout storage.
Unbaked cookie dough balls freeze beautifully for up to 3 months. Form balls, freeze on a baking sheet until solid, then transfer to freezer bags. Bake from frozen, adding 2-3 minutes to baking time.
The prepared dough keeps refrigerated for up to 3 days before shaping. This flexibility lets you mix dough early in the week and bake fresh cookies throughout your holiday season.
| Storage Method | Duration | Notes |
|---|---|---|
| Room temperature (baked) | 5 days | Airtight container |
| Refrigerated (dough) | 3 days | Wrapped tightly |
| Frozen (dough balls) | 3 months | Freeze on tray first |
| Frozen (baked) | 2 months | May lose some texture |
Perfect Pairings
Serve these Peppermint Crinkle Cookies Recipe treats with hot cocoa topped with whipped cream and crushed candy canes. The temperature contrast between warm drink and room-temperature cookie creates an incredible sensory experience. Try them alongside classic Christmas stuffed shells for a complete holiday menu.
These cookies shine on dessert platters with cranberry roast beef and apple cranberry grilled cheese for a festive spread. The peppermint cuts through rich dinner flavors perfectly.
Coffee pairing? Go with a medium roast. Dark roasts compete with the chocolate instead of complementing it.
Chocolate Peppermint Crinkle Cookies FAQs
What is the secret to crinkle cookies?
The secret to crinkle cookies lies in using chilled dough and generous powdered sugar coating. Cold dough resists spreading when it hits the hot oven, forcing the surface to crack as the interior expands. This temperature contrast creates those dramatic cracks that reveal dark chocolate beneath white sugar.
Do chocolate and peppermint go together?
Chocolate and peppermint go together beautifully because peppermint’s cool, bright flavor balances chocolate’s rich intensity. This classic American combination appears in everything from candy canes to holiday drinks. The menthol in peppermint literally cools your mouth while chocolate provides warmth and depth.
Why don’t my crinkle cookies crinkle?
Your crinkle cookies don’t crinkle because the dough wasn’t cold enough, you used too much flour, or your baking powder lost potency. Warm dough spreads too quickly for cracks to form. Always refrigerate dough for at least 5 hours and check that your baking powder fizzes vigorously in hot water before using.
What country are crinkle cookies from?
Crinkle cookies originated in the United States during the 1950s when chocolate desserts gained popularity in American home baking. Some food historians trace them to Betty Crocker cookbooks, while others credit regional bakers in the Midwest. They’ve since become a global holiday favorite, especially popular in Middle Eastern and Southeast Asian bakeries
Make These Your Holiday Tradition
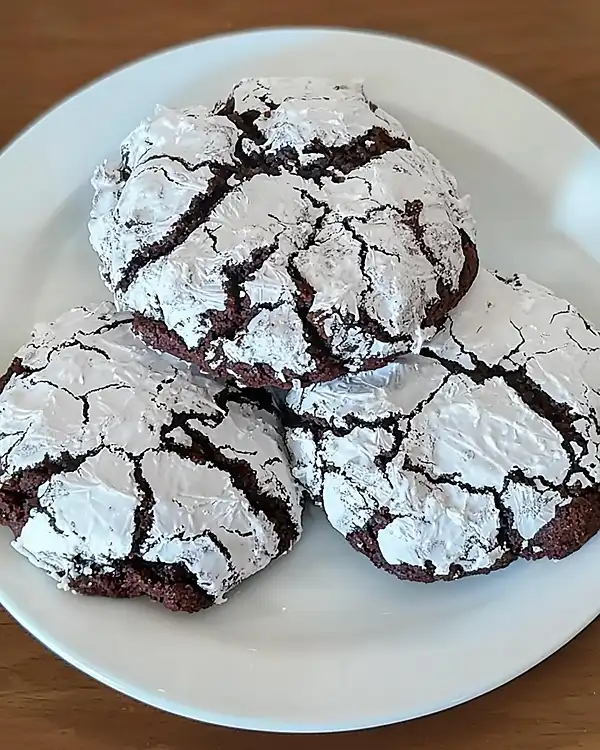
These Chocolate Peppermint Crinkle Cookies deliver showstopping looks with surprisingly simple technique. The combination of deep chocolate flavor and refreshing peppermint makes every bite memorable. After five years of perfecting this recipe, I’m confident you’ll love these as much as my family does.
Pair them with eggnog or peppermint hot chocolate for the ultimate holiday experience. The cookies look stunning on dessert tables, taste incredible, and freeze beautifully for advance preparation. Serve them after dinner alongside blueberry cream cheese bars for a dessert spread that covers all flavor preferences.
Try making a double batch—these disappear faster than you’d expect. Share your results in the comments below, and let me know which variation becomes your favorite. Happy baking!

