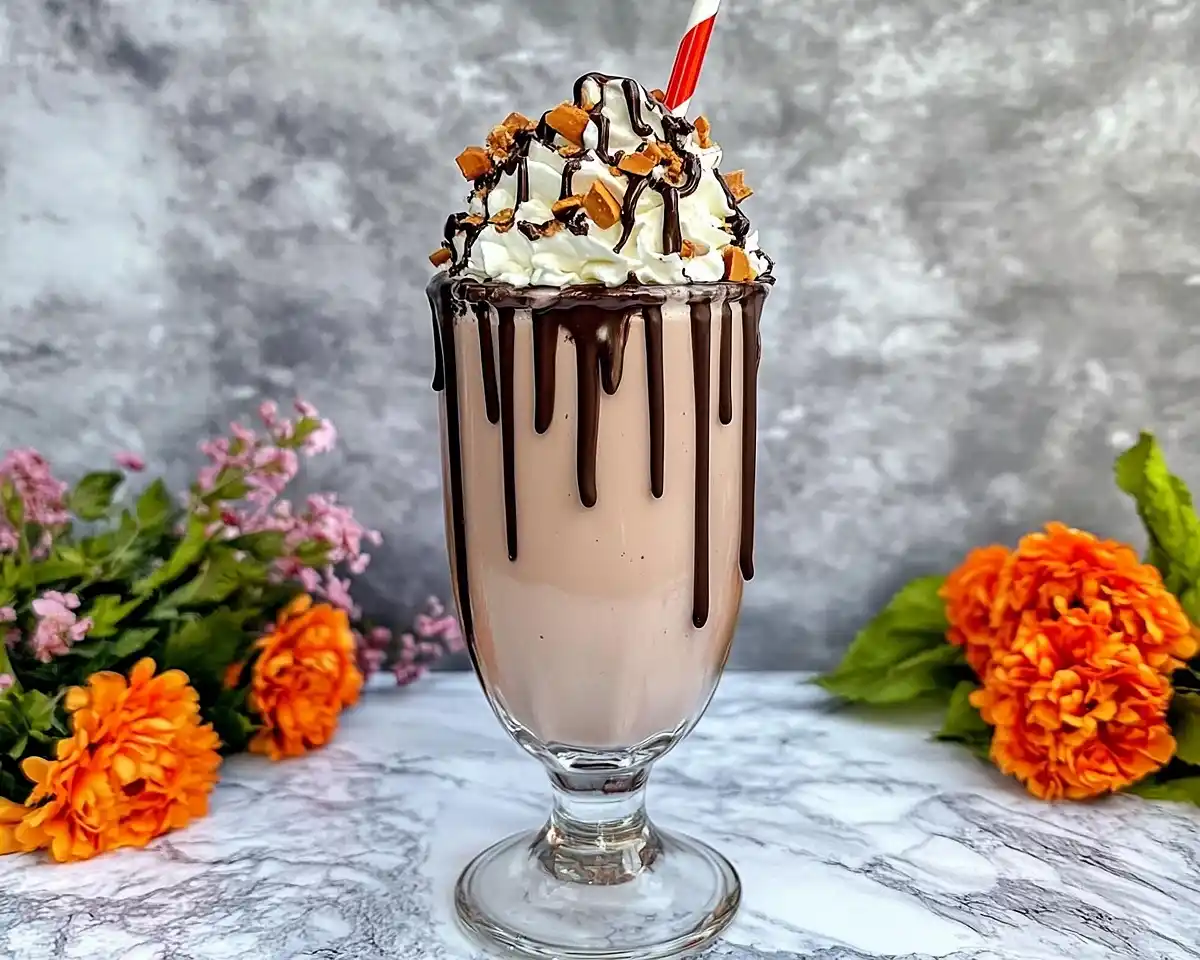
Chocolate Peanut Butter Milkshakes blend creamy ice cream with rich peanut butter. This homemade milkshake takes 5 minutes and tastes absolutely incredible.
Well… I’ll never forget the summer my nephew visited from Chicago. He ordered a chocolate peanut butter milkshake at a local diner, and I watched his eyes light up like fireworks on the Fourth of July.
That moment changed everything for me. I spent the next two weeks testing every ratio imaginable—too thin, too thick, not enough peanut butter punch.
My kitchen counter looked like a candy store exploded. But after dozens of attempts, I finally nailed it: the perfect balance of chocolate ice cream, creamy peanut butter, and just enough milk to make it sippable. This Chocolate Peanut Butter Milkshake became our family’s go-to summer treat, and I’ve made it at least fifty times since then.
Tasty at Home – Where bold flavors meet everyday kitchens.
Table of Contents
What Makes This Peanut Butter Chocolate Milkshake Special
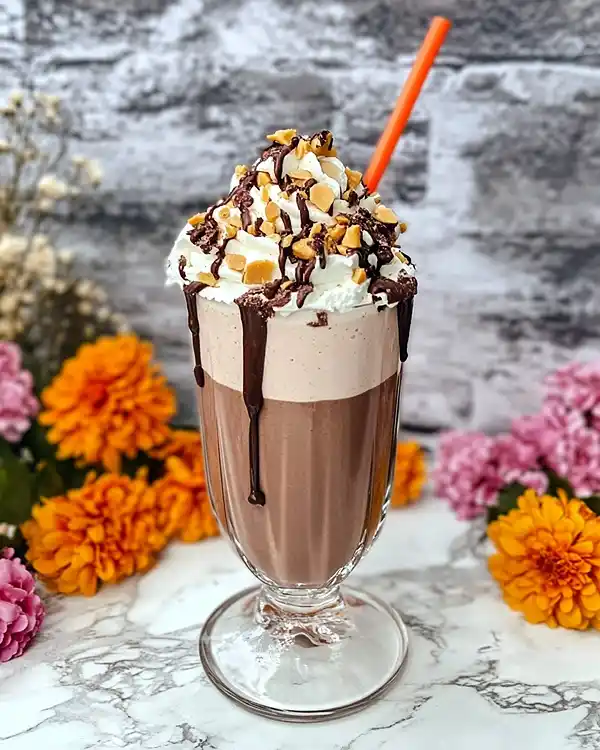
This recipe strips away all the complicated steps you’ll find in fancy dessert shops. You need just four ingredients and about five minutes from start to finish.
The secret? Using quality chocolate ice cream as your base eliminates the need for chocolate syrup or cocoa powder. The peanut butter integrates smoothly without clumping, creating that signature nutty richness we all crave.
I’ve tested this with both natural and commercial peanut butter. Commercial brands like Jif or Skippy work better here because they blend more smoothly and don’t separate. Natural peanut butter can leave oil streaks in your milkshake—not the look we’re going for.
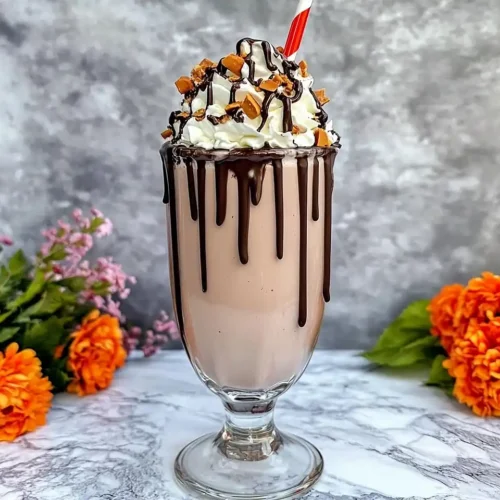
Chocolate Peanut Butter Milkshakes
Equipment
- Blender
- Tall glass
- spatula
- measuring spoons
- Piping bag
Ingredients
Milkshake Ingredients
- 1 ½ cups Chocolate ice cream Premium brands recommended
- 2 tbsp Milk Whole or 2% preferred
- 1 tbsp Peanut butter Creamy, not natural
- To taste Whipped cream Homemade or canned
- To taste Crushed Reese’s Pieces Or Reese’s Peanut Butter Cups
Instructions
- Let your chocolate ice cream soften at room temperature for about five minutes until it reaches soft-serve consistency.
- Pour 2 tablespoons of cold milk into your blender followed by 1 tablespoon of creamy peanut butter.
- Add softened chocolate ice cream to the blender. Blend on medium speed for about two minutes, scraping sides halfway through.
- Pour milkshake into a chilled glass. Top with whipped cream and sprinkle crushed Reese’s Pieces on top. Serve immediately.
Notes
Ingredients You’ll Need
The foundation of any great homemade milkshake starts with premium ice cream. Look for chocolate ice cream with a deep, dark color—that signals real cocoa content, not just artificial flavoring. Fresh whole milk works best for texture, though 2% delivers excellent results too.
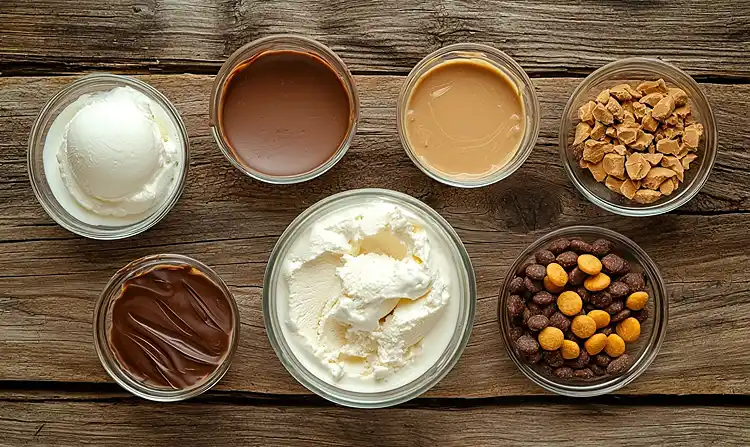
| Ingredient | US Measurement | Metric | Notes |
|---|---|---|---|
| Chocolate ice cream | 1 1/2 cups | 360 ml | Premium brands recommended |
| Milk | 2 tbsp | 30 ml | Whole or 2% preferred |
| Peanut butter | 1 tbsp | 15 g | Creamy, not natural |
| Whipped cream | For topping | To taste | Homemade or canned |
| Crushed Reese’s Pieces | For garnish | To taste | Or Reese’s Peanut Butter Cups |
Shopping Tips for the Best Results
Head to your local grocery store’s ice cream aisle first. Brands like Häagen-Dazs, Ben & Jerry’s, or Breyers deliver consistently smooth textures. Check the label—you want real cream listed in the first three ingredients.
Grab creamy peanut butter from the baking aisle. Skip the “natural” or “organic” versions for this recipe, as their oil separation creates textural issues. Jif, Skippy, or Peter Pan blend seamlessly.
For garnish, Reese’s Pieces add the perfect crunch and burst of color. You can also crush Reese’s Peanut Butter Cups for a more indulgent finish. Either works beautifully.
Bold Add-Ins & Creative Variations
Want to elevate your Peanut Butter Chocolate Milkshake even further? Try these flavor boosters:
Classic Upgrades: Add 1 tsp vanilla extract or a pinch of sea salt to intensify the chocolate-peanut butter combo. A tablespoon of chocolate syrup creates extra richness.
Protein Power: Blend in a scoop of chocolate protein powder for a post-workout treat. It thickens the shake slightly, so add an extra tablespoon of milk.
Cookie Crunch: Crush two Oreos or graham crackers and blend them in. You’ll get delightful texture contrasts in every sip.
Ingredient Substitutions
Lactose-intolerant? Swap regular milk for almond milk or oat milk. The texture stays creamy, though you might need to reduce the amount slightly since plant milks are thinner.
No peanut butter? Almond butter or cashew butter work beautifully. Sunflower seed butter offers a nut-free alternative that’s perfect for schools or allergies.
Vegan friends can use coconut-based chocolate ice cream and dairy-free whipped topping. The results rival the traditional version—I’ve tested both side by side.
Equipment & Step-by-Step Instructions
What You’ll Need
A standard blender does the heavy lifting here. You don’t need anything fancy—even a basic 3-speed model works perfectly. I use my 15-year-old KitchenAid, and it churns out flawless milkshakes every time.
You’ll also need a tall glass (at least 16 ounces), a spatula for scraping, and measuring spoons. A piping bag makes whipped cream application prettier, but honestly? I just spoon mine on top.
Can’t find your blender? An immersion blender in a deep bowl gets the job done. Just blend carefully to avoid splattering your kitchen walls (ask me how I know).
Step 1: Prepare Your Ice Cream
Let your chocolate ice cream soften at room temperature for about five minutes. This step matters more than you’d think—rock-hard ice cream puts unnecessary strain on your blender motor and creates an uneven texture.
You want the consistency of soft-serve. Press your spoon into the container—if it glides in easily, you’re ready. If you’re meeting resistance, wait another two minutes.
Measure exactly 1 1/2 cups. Too much ice cream makes your shake impossible to sip through a straw. Too little, and you’ll end up with chocolate milk instead of a proper milkshake.
Step 2: Add Milk and Peanut Butter
Pour 2 tablespoons of cold milk into your blender first. This creates a liquid base that helps the blades catch and start blending immediately.
Add 1 tablespoon of peanut butter next. Make sure you’re using a level tablespoon—too much peanut butter overwhelms the chocolate flavor and makes the shake too thick. I learned this the hard way during my testing phase when I accidentally doubled the amount.
Some recipes suggest warming the peanut butter first, but I’ve found that completely unnecessary. Room-temperature peanut butter blends perfectly fine.
Step 3: Blend to Perfection
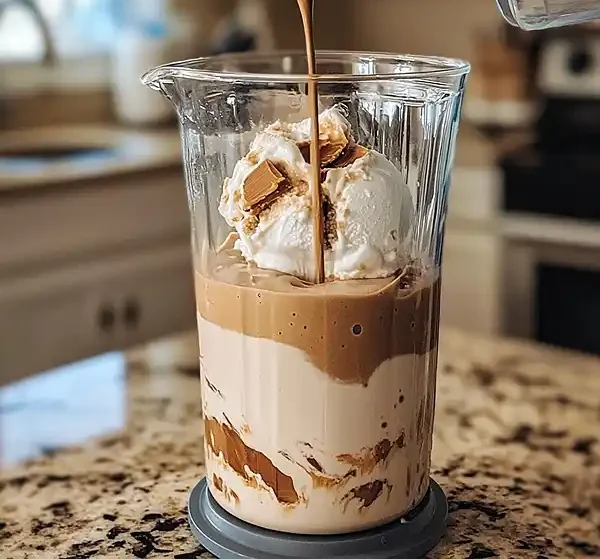
Add your softened chocolate ice cream to the blender. Secure the lid tightly—nobody wants a kitchen ceiling covered in milkshake (yes, that happened during test batch number seven).
Start on medium speed. High speed incorporates too much air and creates a foamy texture rather than the dense, creamy consistency we’re after. Blend for about two minutes, stopping halfway to scrape down the sides with your spatula.
Listen for the sound change—when the motor smooths out and you hear a consistent whir, you’re done. The mixture should look glossy and move like slow lava when you tilt the blender. That’s your signal to stop.
Step 4: Pour and Garnish Like a Pro
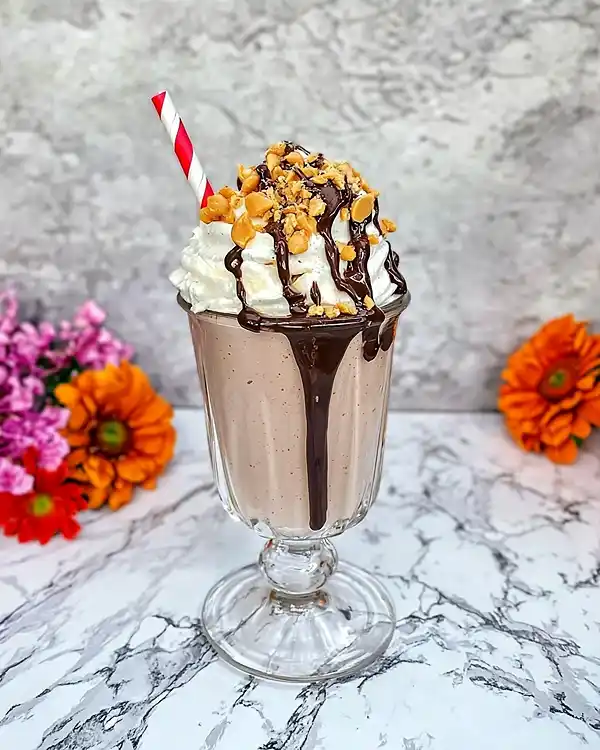
Pour your Chocolate Peanut Butter Milkshake into a chilled glass. I keep mine in the freezer for ten minutes before serving—cold glass, cold shake, pure perfection.
Leave about an inch of space at the top for your whipped cream. Pipe or spoon a generous swirl on top. Don’t be shy here—Julia Child always said more is more when it comes to cream.
Crush your Reese’s Pieces by placing them in a zip-top bag and tapping gently with a rolling pin. Sprinkle generously over the whipped cream. The candy pieces should stick to the cream, creating those gorgeous, colorful, Instagram-worthy peaks.
Insert a thick straw and serve immediately. This homemade milkshake waits for no one—it’s best enjoyed within the first ten minutes.
Expert Tips for the Ultimate Milkshake Experience
Achieving the Perfect Consistency
The ratio of ice cream to milk determines everything. If your shake’s too thick to drink, add milk one teaspoon at a time until it reaches your preferred consistency. Blend for 10 seconds after each addition.
Too thin? Add another scoop of ice cream and blend briefly. I keep extra ice cream in my freezer specifically for these adjustments—it happens more often than you’d think.
Temperature matters tremendously. If your kitchen’s warm, work quickly and serve immediately. Summer heat can turn your thick, creamy shake into soup faster than you’d believe.
Flavor Variations Worth Trying
Elvis Style: Add a sliced banana before blending. This creates the famous peanut butter-banana-chocolate combo that’ll make your taste buds sing.
Salted Caramel Twist: Drizzle 1 tablespoon of caramel sauce into the glass before pouring your shake. Add a pinch of flaky sea salt on top. Mind-blowing.
Cookie Dough Heaven: Fold in small chunks of edible cookie dough after blending. This works especially well with peanut butter cookie dough—check out our professional no-bake cookie collection for safe, eggless dough recipes.
Holiday Peppermint: During December, add 1/4 tsp peppermint extract and garnish with crushed candy canes instead of Reese’s Pieces. Your Christmas dessert table will thank you.
Protein-Packed Version: As mentioned earlier, add chocolate protein powder for a post-gym treat. Balance it with our quick 1-minute microwave brownie for the ultimate workout recovery combo.
Make-Ahead and Storage Guidance
Let me tell you… milkshakes don’t store well, unfortunately. The ice crystals that form during freezing destroy that silky texture we worked so hard to create.
That said, you can pre-measure your ingredients. Keep small containers in your freezer with pre-scooped ice cream, measured peanut butter, and milk. When craving strikes, dump everything in the blender and go.
Planning a party? Make the base mixture and keep it in the freezer in an airtight container. When guests arrive, let it soften for five minutes, give it a quick re-blend, and serve. You’ll look like a dessert genius.
| Storage Method | Duration | Quality Notes |
|---|---|---|
| Refrigerator | Not recommended | Melts and separates within hours |
| Freezer (pre-made) | Up to 1 week | Requires re-blending; texture changes |
| Pre-measured ingredients | Up to 1 month | Best method for convenience |
Perfect Pairings
This Peanut Butter Chocolate Milkshake pairs beautifully with salty snacks. Serve alongside our famous Amish caramel corn recipe for the ultimate sweet-and-salty experience.
Classic American burgers and fries? Absolutely. The rich, creamy shake cuts through the salt and fat perfectly. Thomas Keller often emphasizes balance in flavor profiles—this combination delivers exactly that.
For a lighter pairing, try it with fresh strawberries or apple slices. The fruit’s acidity contrasts wonderfully with the shake’s sweetness.
Troubleshooting Common Issues
Problem: My peanut butter won’t blend smoothly—it’s leaving streaks.
Solution: Your peanut butter’s too cold. Let it sit at room temperature for 15 minutes before blending. Natural peanut butter always causes this issue, so stick with commercial brands for this recipe.
Problem: The milkshake’s too icy, not creamy.
Solution: You didn’t let the ice cream soften enough. Next time, wait the full five minutes before blending. Also check your blender speed—high speed incorporates too much air.
Problem: It tastes good but won’t stay on my spoon—too runny.
Solution: You added too much milk. Start with just 1 tablespoon next time, then add more if needed. Better to go slow than overshooting.
Chocolate Peanut Butter Milkshakes FAQs
How do you make a peanut butter chocolate milkshake?
How do you make a peanut butter chocolate milkshake? Blend 1 1/2 cups of softened chocolate ice cream with 2 tablespoons of milk and 1 tablespoon of creamy peanut butter for about two minutes on medium speed. Pour into a glass and top with whipped cream and crushed Reese’s Pieces. The whole process takes just five minutes from start to finish.
Do chocolate and peanut butter go together?
Do chocolate and peanut butter go together? Absolutely—chocolate and peanut butter create one of the most beloved flavor combinations in American dessert history. The rich, slightly bitter notes of chocolate balance perfectly with peanut butter’s creamy, salty sweetness. This pairing appears in countless treats, from Reese’s candy to elaborate layer cakes, because the flavors enhance rather than compete with each other.
Can you mix peanut butter with chocolate milk?
Can you mix peanut butter with chocolate milk? Yes, you can mix peanut butter with chocolate milk for a quick drink, but it won’t deliver the thick, creamy texture of a true homemade milkshake. The ice cream base creates that signature dense consistency that makes milkshakes so satisfying. If you’re short on ingredients, try blending 1 cup of chocolate milk with 2 tablespoons of peanut butter and a handful of ice cubes for a lighter alternative.
Is peanut butter good for milkshakes?
Is peanut butter good for milkshakes? Peanut butter is excellent for milkshakes because it adds protein, healthy fats, and incredible flavor depth. Just one tablespoon transforms a basic chocolate shake into something memorable. The natural oils in peanut butter also contribute to that silky-smooth mouthfeel. For more creative ways to use peanut butter in no-bake desserts, explore our refreshing lemon oatmeal no-bake cookies.
Final Thoughts: Your New Go-To Summer Treat
This Chocolate Peanut Butter Milkshake proves that simple recipes often deliver the most satisfaction. You don’t need fancy equipment, expensive ingredients, or culinary school training to create something spectacular.
Remember my nephew from Chicago? He’s now a sophomore in college, and every time he visits, this milkshake’s his first request. That’s the beauty of a truly great recipe—it creates memories that last long after the glass is empty.
Pair this with our incredible no-bake cinnamon roll cookies for a complete dessert spread that’ll impress any crowd. The combination of cold, creamy milkshakes and sweet, cinnamony cookies hits every craving simultaneously.
Grab your blender right now and make this happen. Seriously—you probably have everything you need already sitting in your kitchen. Blend it, garnish it, sip it, and then come back here to tell me what you think. Did you add your own twist? I’d love to hear about it in the comments below.
What’s your favorite milkshake memory? Share your story with the Tasty at Home community!
For more nutritional information on chocolate desserts and their health benefits, visit the American Heart Association’s guidelines on treating yourself mindfully.

