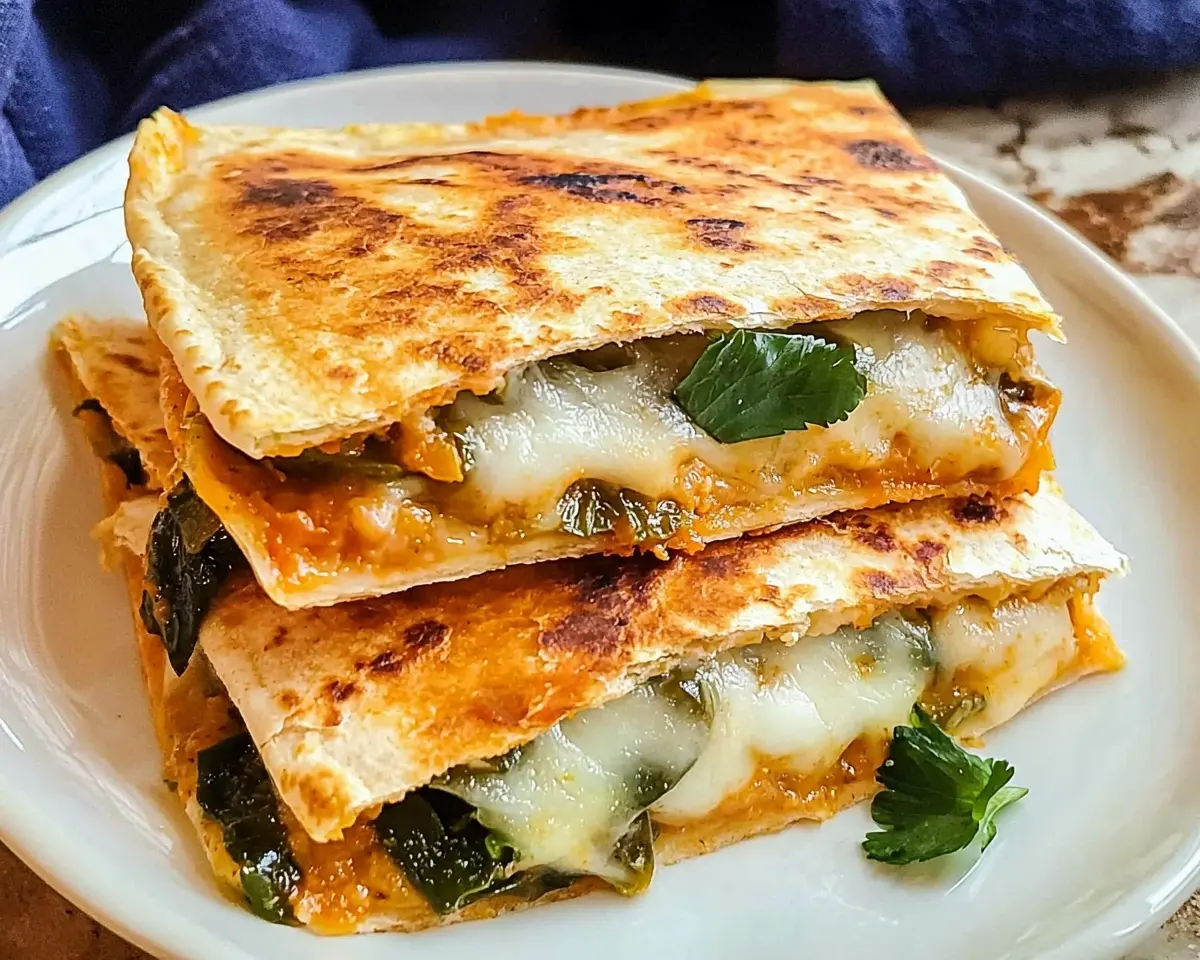
Chile Relleno Quesadilla combines roasted poblanos with melted cheese in crispy tortillas. Quick 15-minute recipe with step-by-step instructions.
Hi, I’m Linda, and welcome to Tasty at Home—where bold flavors meet everyday kitchens. Last summer in Phoenix, I watched my neighbor Maria flip perfect quesadillas while her poblanos charred over an open flame.
The smoky aroma drifted across our fence, and suddenly I had an idea that would change my weeknight dinner game forever — it was time to dive into stuffed poblanos recipes for something bold, flavorful, and surprisingly easy.
What if I combined the soul of chile rellenos with the simplicity of quesadillas? After burning three tortillas and perfecting the poblano-to-cheese ratio, I created this Chile Relleno Quesadilla that delivers restaurant-quality flavors in just 15 minutes.
This fusion recipe bridges Mexican tradition with modern convenience. Furthermore, it transforms intimidating chile rellenos into an accessible weeknight meal.
Whether you’re new to poblano peppers or a seasoned Mexican food lover, this recipe will become your new obsession.
Table of Contents
What Makes This Chile Relleno Quesadilla Special
This Chile Relleno Quesadilla captures the essence of traditional stuffed poblanos without the complex battering and frying process. Instead, we roast the poblanos until their skins blister and char, creating that signature smoky flavor.
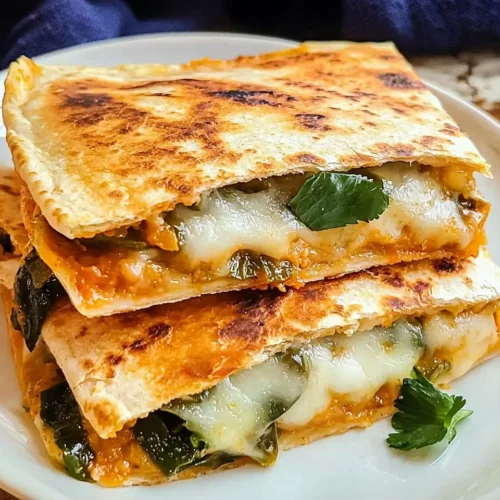
The magic happens when the roasted poblano meets melted Monterey Jack cheese inside a perfectly crispy tortilla. Moreover, the garlic powder adds depth while fresh cilantro provides a bright finish that elevates every bite.
After testing this recipe dozens of times, I’ve discovered the perfect balance of heat and comfort. The poblano pepper offers mild warmth without overwhelming spice, making it perfect for families with varying heat preferences.
Chile Relleno Quesadilla Ingredient Breakdown and Shopping Tips
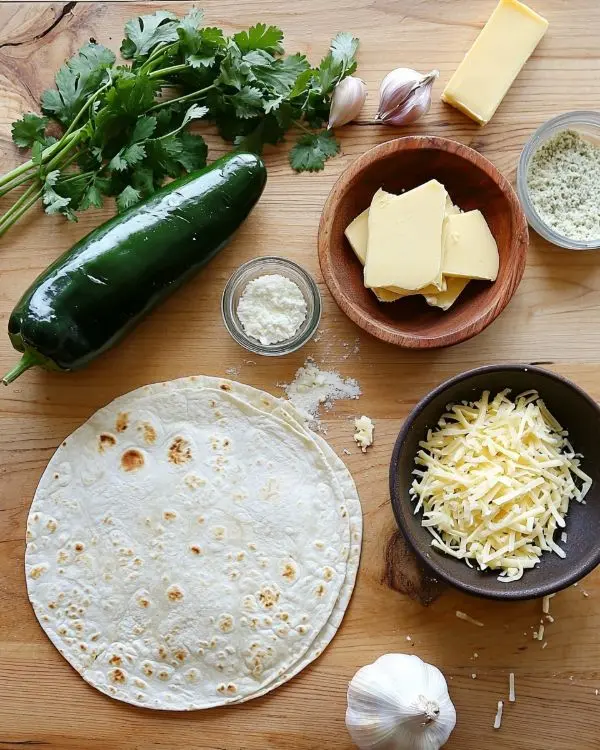
| Ingredient | Amount | US Measurement | Notes |
|---|---|---|---|
| Unsalted butter | ½ tablespoon | 0.25 oz | Essential for golden browning |
| Large flour tortilla | 1 | 10-12 inch diameter | Choose pliable, fresh tortillas |
| Monterey Jack cheese | ¾ cup shredded | 3 oz | Can substitute mozzarella or pepper jack |
| Poblano pepper | ½ roasted | Medium-sized pepper | Look for glossy, firm skin |
| Garlic powder | ⅙ teaspoon | Pinch | Fresh garlic burns too quickly |
| Fresh cilantro | ½ tablespoon chopped | Optional garnish | Adds bright, fresh notes |
Shopping at US Grocery Stores: Find poblano peppers in the fresh produce section near jalapeños and bell peppers. They’re typically labeled as “poblano” or sometimes “pasilla” peppers. Additionally, choose peppers that feel heavy for their size with unblemished, dark green skin.
Quality Indicators: Fresh poblanos should have thick walls and glossy skin. Avoid peppers with soft spots or wrinkled skin. Similarly, select pre-shredded cheese for convenience, but freshly grated cheese melts more smoothly.
Essential Ingredients vs. Bold Add-ins
Essential Base:
- Butter creates the perfect golden crust
- Flour tortilla provides the crispy foundation
- Monterey Jack melts beautifully without separating
Bold Add-ins for Variation:
- Pepper Jack cheese for extra heat
- Mexican crema instead of sour cream
- Roasted corn kernels for sweetness
- Diced tomatoes for fresh acidity
International Substitutions:
- Replace Monterey Jack with Oaxaca cheese if available
- Substitute poblanos with Anaheim peppers for milder heat
- Use Mexican flour tortillas for authentic flavor
Equipment and Preparation Steps
Essential Equipment
You’ll need a large nonstick skillet for even heating and easy flipping. A gas burner or oven broiler works perfectly for roasting poblanos. Additionally, keep a spatula handy for smooth folding and flipping.
DIY Alternatives: No nonstick skillet? A well-seasoned cast iron pan works beautifully. Furthermore, if you lack a gas burner, your oven’s broiler setting delivers excellent results for roasting peppers.
Step-by-Step Instructions
Step 1: Prepare Your Poblano Peppers
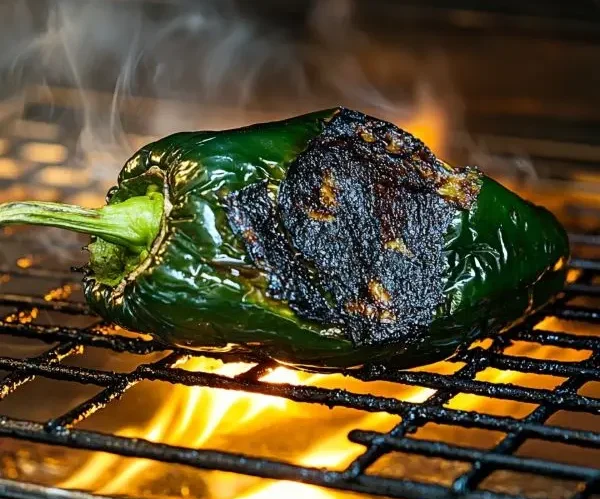
Position poblano peppers on your oven’s top shelf under the broiler setting. Leave the oven door slightly cracked for proper ventilation. Roast until the skin blisters and turns black in spots, approximately 2-3 minutes per side.
Pro Tip: The skin should look charred and bubbly when properly roasted. Don’t worry about some black spots—they add fantastic smoky flavor.
Step 2: Steam and Peel the Peppers
Immediately transfer roasted poblanos to a sealed plastic bag or covered container. This steaming process loosens the skin, making peeling effortless. Wait until cool enough to handle, then scrape off the blistered skin with a knife.
Common Mistake Alert: I once skipped the steaming step and spent 20 minutes wrestling with stubborn pepper skin. Trust me, steaming saves time and frustration.
Step 3: Clean and Slice Your Poblanos
Remove stems and seeds from the steamed poblanos. The peppers might tear slightly—this is completely normal and won’t affect the final result. Slice into strips that will lay flat across your tortilla.
Step 4: Heat Your Skillet
Place your nonstick skillet over medium heat. This temperature ensures the tortilla crisps without burning while the cheese melts completely. Have all ingredients within arm’s reach for quick assembly.
Step 5: Build Your Quesadilla
Add butter to the heated skillet. As soon as it melts and begins to foam, place your tortilla in the pan. Immediately sprinkle shredded cheese across half the tortilla, leaving a small border around the edges.
Technique Note: Work quickly but confidently. The butter should sizzle gently, not aggressively bubble.
Step 6: Layer the Poblano Strips
Arrange roasted poblano strips evenly across the cheese. Sprinkle garlic powder over the peppers, then add fresh cilantro if using. The heat will release the garlic’s aroma while wilting the cilantro perfectly.
Step 7: Fold and Cook
When cheese begins melting around the edges, fold the empty half of the tortilla over the filled side. Press gently with your spatula to seal. Cook for 2 minutes until the bottom develops golden-brown spots.
Visual Cue: Look for light golden coloring and slight puffing—these indicate perfect doneness.
Step 8: Flip and Finish
Carefully flip the quesadilla using a wide spatula. Cook another 1-2 minutes until the second side matches the first in color. The cheese should be fully melted and slightly oozing at the edges.
Step 9: Rest and Serve
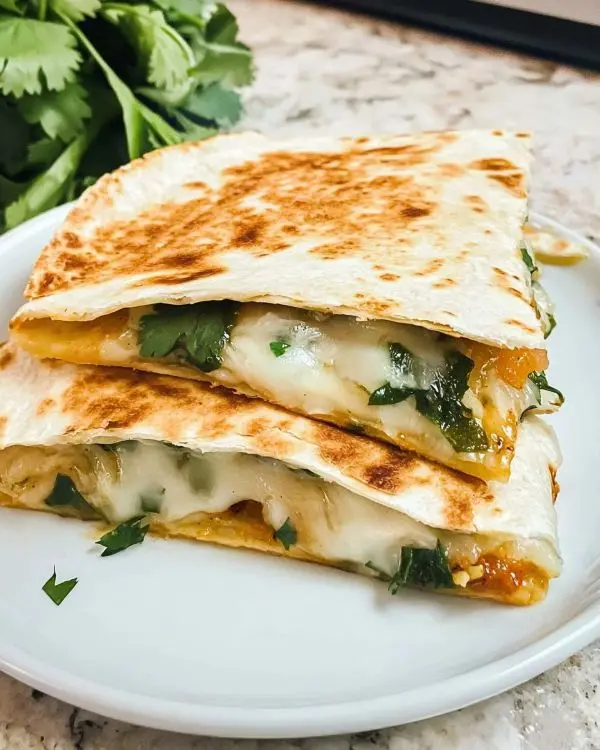
Transfer to a cutting board and rest for 1–2 minutes. This brief cooling allows the cheese to set slightly, preventing a molten mess when you cut — a key step in many recipes with poblanos. Slice into triangles and serve immediately.
Expert Tips and Variations for Chile Relleno Quesadilla
Professional Techniques for Perfect Results
Temperature Control: Medium heat is crucial for achieving crispy exteriors without burning. High heat will char the tortilla before the cheese melts completely.
Cheese Distribution: Spread cheese evenly but avoid overfilling. Too much cheese creates a soggy center that won’t crisp properly.
Poblano Preparation: Roast poblanos until well-charred for maximum flavor development. Under-roasted peppers lack that signature smoky taste that makes this recipe special.
Creative Variations
Southwest Style: Add roasted corn kernels and diced jalapeños for extra heat and sweetness. This variation pairs beautifully with cowboy queso for dipping.
Protein Power: Include shredded rotisserie chicken or lefted carnitas for a heartier meal. The poblanos complement both proteins perfectly.
Veggie Loaded: Layer in sautéed bell peppers and onions alongside your poblanos. This creates a colorful, nutrient-dense filling.
Holiday Twist: During fall, add roasted butternut squash cubes for seasonal flair. The sweetness balances the poblanos’ subtle heat beautifully.
Breakfast Version: Scramble eggs with the poblanos before adding to the quesadilla. Top with salsa verde and fresh avocado slices.
Storage and Make-Ahead Options
| Storage Method | Timeline | Instructions |
|---|---|---|
| Refrigerator | 2-3 days | Wrap in aluminum foil |
| Freezer | 1 month | Double-wrap in plastic and foil |
| Meal Prep | 3 days | Store components separately |
Reheating Instructions: Warm in a 350°F oven for 5–7 minutes to restore crispiness — especially important for stuffed poblanos recipes, where texture makes all the difference. Microwaving works for quick reheating but sacrifices that satisfying bite.
Make-Ahead Strategy: Roast and prepare poblanos up to 3 days in advance. Store cleaned, sliced peppers in the refrigerator until ready to use.
Chile Relleno Quesadilla Perfect Pairings
Serve your Chile Relleno Quesadilla with Mexican coleslaw for refreshing crunch. The cool, creamy slaw provides perfect contrast to the warm, melted cheese.
For a complete Mexican-inspired meal, pair with dairy-free Mexican street corn quinoa salad. The bright flavors complement the smoky poblanos beautifully.
Beverage Suggestions: Ice-cold Mexican beer, fresh lime agua fresca, or horchata enhance the authentic flavors — especially when paired with bold recipes with poblanos. For wine lovers, a crisp Sauvignon Blanc cuts through the rich cheese perfectly
Frequently Asked Questions
What does chile relleno contain?
Traditional chile relleno contains poblano peppers stuffed with cheese or meat, coated in egg batter, and deep-fried until golden. Our quesadilla version simplifies this classic by combining roasted poblanos with melted cheese inside a crispy tortilla.
What is the history of chili relleno?
Chile relleno originated in Puebla, Mexico, in the 16th century when Spanish colonists introduced European cheeses to indigenous poblano peppers. According to the Mexican Cultural Institute, this dish represents the beautiful fusion of Old and New World ingredients that defines Mexican cuisine.
Is chile relleno burrito good?
Chile relleno burritos are delicious alternatives that wrap the traditional flavors in flour tortillas with rice and beans. However, our quesadilla version offers better texture contrast with its crispy exterior and melted interior.
What is a Mexican quesadilla made of?
Authentic Mexican quesadillas typically contain just cheese and sometimes squash blossoms or herbs folded in corn tortillas. Our fusion version honors this simplicity while incorporating the beloved flavors of stuffed poblanos.
Making It Your Own
This Chile Relleno Quesadilla represents everything I love about modern Mexican cooking—bold flavors without intimidating techniques. The recipe respects traditional ingredients while embracing practical preparation methods.
Start with quality poblanos and don’t rush the roasting process. Those charred, blistered skins develop the complex smokiness that transforms simple ingredients into something extraordinary. Furthermore, the brief resting period after cooking prevents cheese explosions and ensures clean cuts.
Spice Level Adjustment: Poblanos offer mild warmth, but you can increase heat by leaving some seeds or adding sliced jalapeños. Conversely, remove all seeds and ribs for the mildest version.
Cheese Experiments: While Monterey Jack melts beautifully, try Oaxaca cheese for authenticity or pepper jack for extra kick. Each variety creates subtle flavor variations worth exploring.
Consider serving this alongside creamy vegetable soup for a cozy dinner combination. The soup’s richness complements the quesadilla’s crispy texture perfectly.
Remember that perfect poblano selection makes all the difference. Choose peppers that feel substantial and have glossy, unblemished skin. These visual cues indicate peak freshness and optimal flavor development.
Whether you’re meal-prepping for busy weeknights or creating weekend comfort food, this Chile Relleno Quesadilla delivers consistent results. The technique is forgiving enough for beginners yet satisfying for experienced cooks seeking quick, flavorful meals.
Share your variations and tag us on social media—I love seeing how different families make this recipe their own. After all, the best recipes evolve through shared experiences and creative adaptations.
Tasty at Home – Where bold flavors meet everyday kitchens
Chile Relleno Quesadilla
Equipment
- Large nonstick skillet
- spatula
- Oven broiler
- Sealed plastic bag
- Cutting board
Ingredients
Main Ingredients
- ½ tablespoon unsalted butter
- 1 large flour tortilla
- ¾ cup Monterey Jack cheese, shredded or mozzarella, or pepper jack
- ½ poblano pepper, roasted and peeled
- ⅙ teaspoon garlic powder
- ½ tablespoon fresh cilantro, chopped optional
Instructions
- Position poblano peppers on your oven’s top shelf under the broiler setting. Leave the oven door slightly cracked for proper ventilation. Roast until the skin blisters and turns black in spots, approximately 2-3 minutes per side.
- Immediately transfer roasted poblanos to a sealed plastic bag or covered container. This steaming process loosens the skin, making peeling effortless. Wait until cool enough to handle, then scrape off the blistered skin with a knife.
- Remove stems and seeds from the steamed poblanos. The peppers might tear slightly—this is completely normal and won’t affect the final result. Slice into strips that will lay flat across your tortilla.
- Place your nonstick skillet over medium heat. This temperature ensures the tortilla crisps without burning while the cheese melts completely. Have all ingredients within arm’s reach for quick assembly.
- Add butter to the heated skillet. As soon as it melts and begins to foam, place your tortilla in the pan. Immediately sprinkle shredded cheese across half the tortilla, leaving a small border around the edges.
- Arrange roasted poblano strips evenly across the cheese. Sprinkle garlic powder over the peppers, then add fresh cilantro if using. The heat will release the garlic’s aroma while wilting the cilantro perfectly.
- When cheese begins melting around the edges, fold the empty half of the tortilla over the filled side. Press gently with your spatula to seal. Cook for 2 minutes until the bottom develops golden-brown spots.
- Carefully flip the quesadilla using a wide spatula. Cook another 1-2 minutes until the second side matches the first in color. The cheese should be fully melted and slightly oozing at the edges.
- Transfer to a cutting board and rest for 1-2 minutes. This brief cooling allows the cheese to set slightly, preventing a molten mess when you cut. Slice into triangles and serve immediately.

