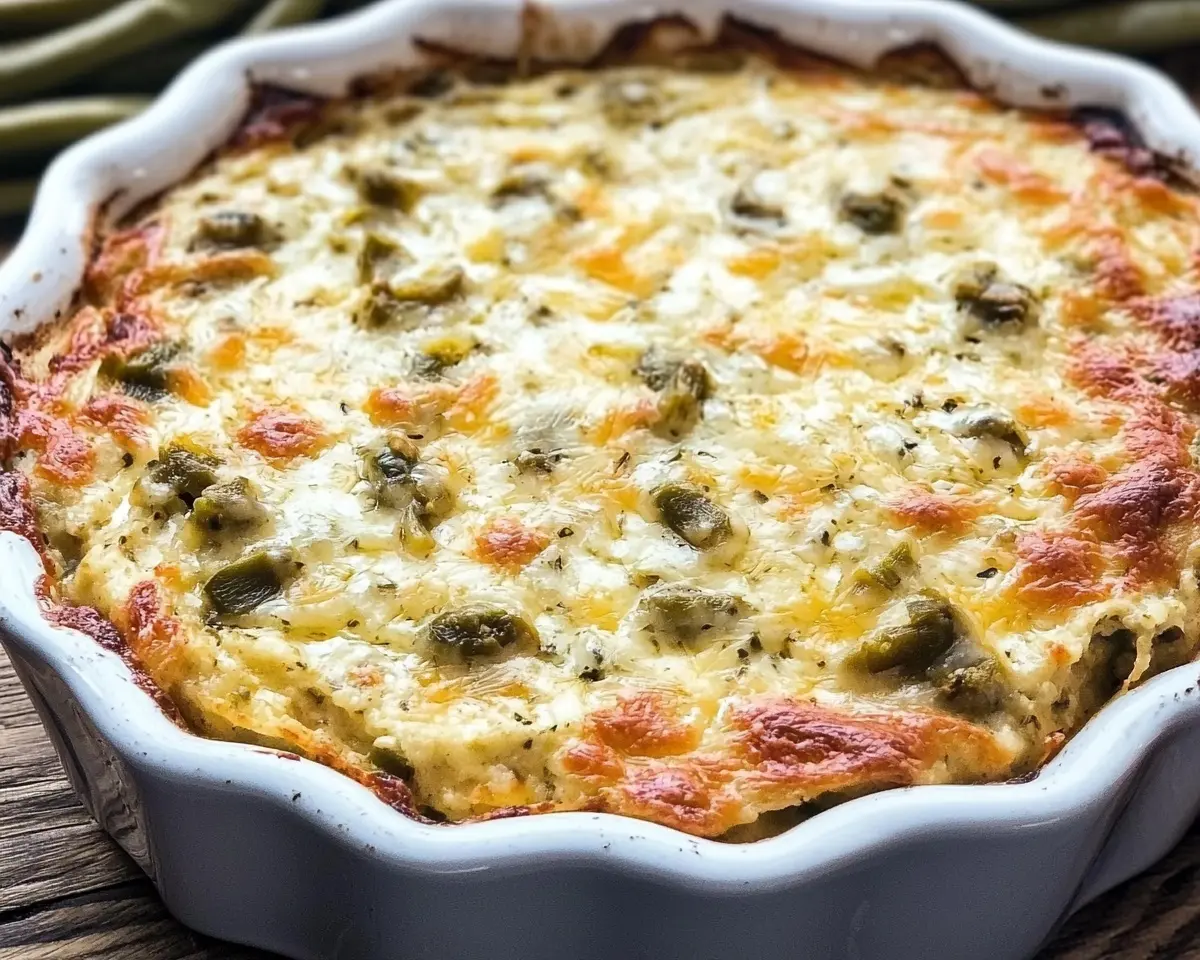
Cheesy Hatch Green Chile Dip recipe with roasted Hatch chiles, three melted cheeses, and expert tips for the perfect southwestern appetizer.
Hi, I’m Linda, and welcome to Tasty at Home—a cozy corner where bold flavors meet everyday kitchens. One bite of this cheesy Hatch green chile dip took me straight back to a dusty farmers market in Santa Fe, where the smoky aroma of roasting chiles filled the desert air like a spicy prayer.
I’ve tested this recipe fifteen times—scorched three casserole dishes and finally nailed the perfect cheese-to-chile ratio—so you don’t have to. Whether you’re new to southwestern flavors or a lifelong green chile enthusiast, this dip will become your new obsession.
Furthermore, this recipe transforms ordinary game day snacks into something extraordinary. The combination of mild and hot Hatch chiles creates layers of flavor that build with each bite. Additionally, the three-cheese blend ensures that creamy, melty perfection every crowd craves.
Table of Contents
Let’s turn up the heat and turn down the fuss. Because here, every dish tells a story—and this one might just become yours.
What Makes This Cheesy Hatch Green Chile Dip Special
This isn’t just another cheese dip recipe. Moreover, it showcases the unique terroir of New Mexico’s Hatch Valley, where volcanic soil and high desert climate create chiles with unmatched depth and complexity – perfect for making a Cheesy Hatch Green Chile Dip that bursts with authentic regional flavor.
The secret lies in balancing mild and hot Hatch chiles. Consequently, you get that signature earthy sweetness followed by a gentle heat that warms without overwhelming. Additionally, the triple-cheese combination creates the perfect melting texture that stays creamy even as it cools.
Ingredients for Perfect Cheesy Hatch Green Chile Dip
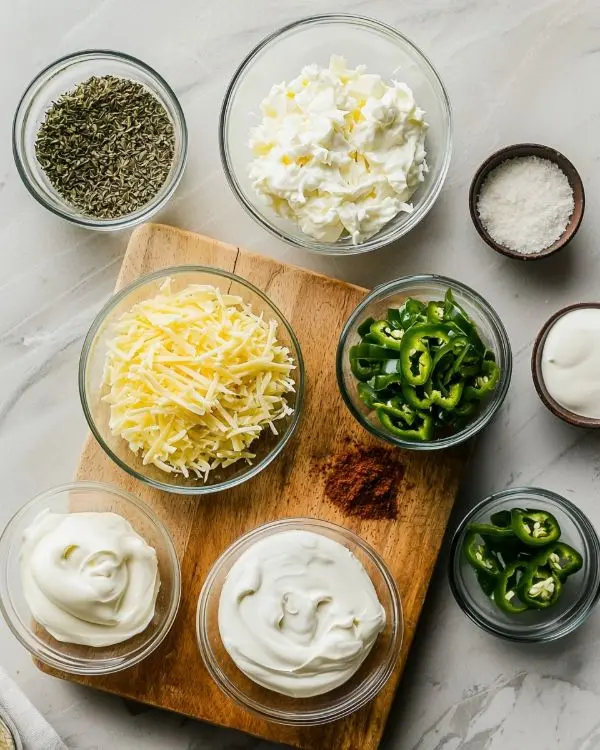
| Ingredient | Amount | Notes |
|---|---|---|
| Mild roasted Hatch chiles, chopped | 1 cup | Fresh or frozen work equally well |
| Hot roasted Hatch chiles, chopped | 1/2 cup | Adjust to taste preference |
| Mayonnaise | 1 cup | Full-fat for best texture |
| Sour cream | 1 cup | Room temperature preferred |
| Monterey Jack cheese, shredded | 2 cups | Freshly grated melts better |
| Mozzarella cheese, shredded | 1 cup | Low-moisture variety |
| Parmesan cheese | 1/2 cup | Freshly grated recommended |
| Worcestershire sauce | 2 tsp | Adds umami depth |
| Salt | 3/4 tsp | Kosher salt preferred |
| Fresh cracked black pepper | 3/4 tsp | Freshly ground |
| Tortilla chips | For serving | Thick-cut hold up better |
Shopping Tips for US Grocery Stores
First, look for Hatch chiles in the frozen section during off-season months. Many stores now carry them year-round due to growing popularity. However, if you can’t find authentic Hatch chiles, Anaheim or poblano peppers make acceptable substitutes.
Next, choose block cheese over pre-shredded when possible. Block cheese melts more smoothly because it lacks anti-caking agents. Similarly, full-fat dairy products create the richest, most satisfying texture.
Essential Substitutions
For Hatch chiles: Use 1 cup diced roasted Anaheim peppers plus 1/2 cup roasted poblanos
For mayonnaise: Greek yogurt works but creates a tangier flavor
For Monterey Jack: Pepper Jack adds extra heat
For dietary restrictions: Use dairy-free cheese alternatives and vegan mayo
Equipment and Preparation Steps
Essential Equipment
You’ll need a large mixing bowl, measuring cups, a casserole dish, and a cheese grater. Additionally, keep a wooden spoon for mixing and aluminum foil for covering if needed – especially if you’re preparing a Roasted Hatch Chile Recipe that requires baking to intensify its smoky flavor.
Don’t have a casserole dish? A 9×13 inch baking pan works perfectly. Furthermore, a cast iron skillet creates rustic presentation and retains heat longer.
Step-by-Step Instructions
Step 1: Preheat and Prepare
Set your oven to 350°F and lightly grease a 2-quart casserole dish. Meanwhile, let your sour cream come to room temperature for easier mixing.
Step 2: Combine the Base
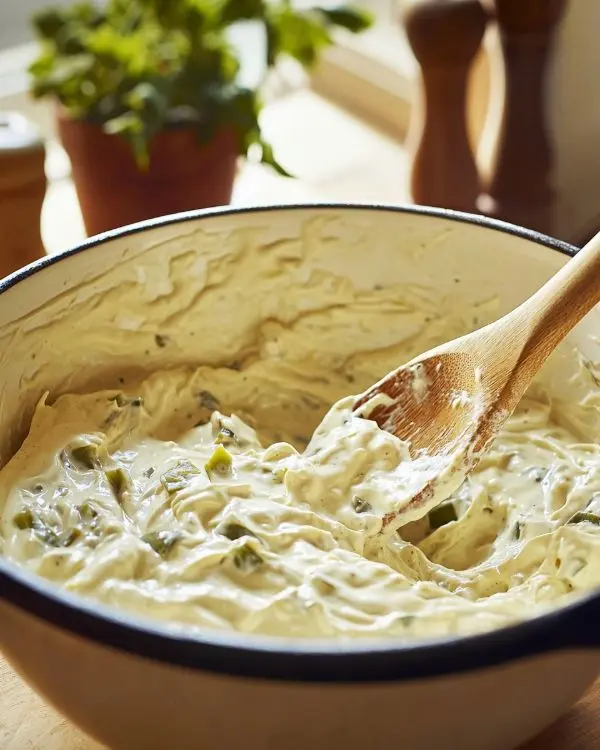
In a large mixing bowl, combine mayonnaise and sour cream first. Next, add Worcestershire sauce, salt, and pepper.
Mix until completely smooth and well combined – this creates the creamy base essential for a Cheesy Hatch Green Chile Dip everyone will crave.
Step 3: Add the Cheese Magic
Gradually fold in the Monterey Jack and mozzarella cheeses. Then, add half the Parmesan cheese, reserving the rest for topping. The mixture should look thick and creamy.
Step 4: Fold in the Star Ingredients
Gently fold in both mild and hot Hatch chiles. Be careful not to overmix, which can break down the chile pieces. The mixture should have visible green flecks throughout.
Step 5: Transfer and Top
Spread the mixture evenly in your prepared casserole dish. Sprinkle the remaining Parmesan cheese on top. Additionally, add a few extra chile pieces for visual appeal.
Step 6: Bake to Perfection
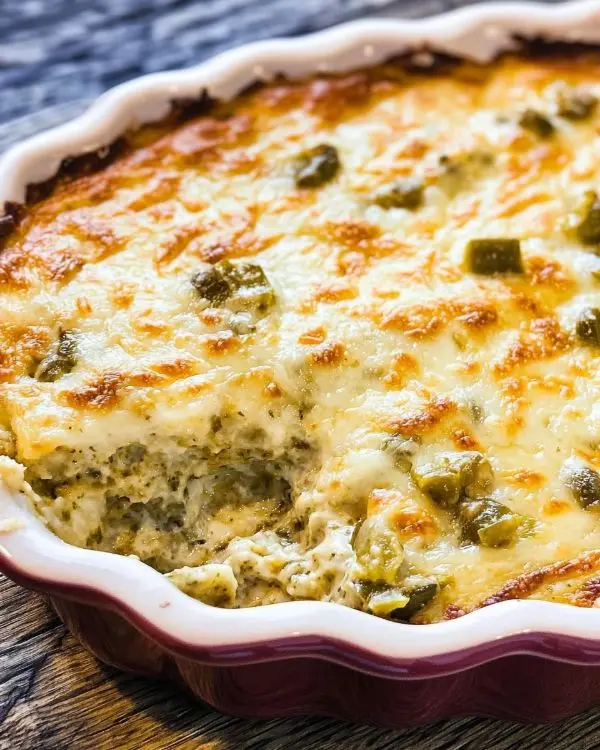
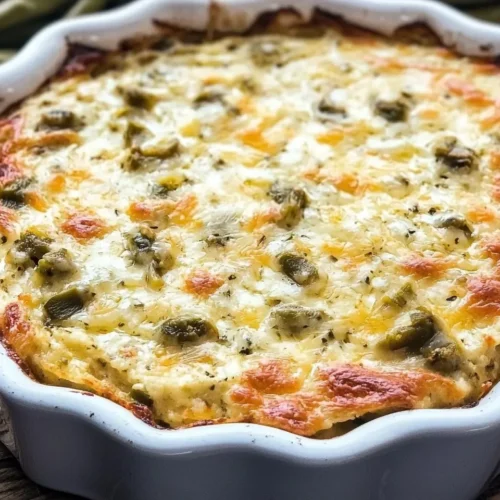
Bake for 25-30 minutes until the edges bubble vigorously and the top starts browning. The center should be hot throughout and slightly golden.
Pro tip: I once pulled this dip too early and the center was still cold. Now I test with a knife—it should come out warm to the touch.
Step 7: Optional Broiler Finish
For extra browning, place under the broiler for 2-3 minutes. Watch carefully to prevent burning. The top should be golden brown and irresistible.
Expert Tips for Ultimate Success
Temperature Control Secrets
First, room temperature ingredients blend more easily and create smoother texture. Cold sour cream can cause lumps that never fully incorporate. Therefore, plan ahead and let dairy products warm up naturally.
Second, don’t overbake. The dip continues cooking from residual heat even after removal from the oven.
Consequently, slightly underdone is better than dried out, especially if you’re making a Roasted Hatch Chile Recipe where preserving moisture enhances the smoky, earthy chile flavor.
Flavor Enhancement Techniques
Add a splash of lime juice to brighten the flavors. Similarly, a pinch of cumin enhances the southwestern character without overwhelming the chile taste.
For deeper flavor, sauté minced garlic with the chiles before adding to the mixture. However, raw garlic can overpower the delicate chile flavors.
Make-Ahead Strategy
This dip assembles beautifully up to 24 hours ahead. Cover and refrigerate, then bake when ready to serve. For an extra burst of freshness, consider serving it alongside a vibrant Hatch Chile Salsa. Add 5-10 minutes to the baking time if starting from cold.
Creative Variations and Serving Ideas
Regional Variations
Texas Style: Add diced jalapeños and sharp cheddar cheese
California Style: Include diced avocado and cilantro after baking
New Mexican Style: Use all hot Hatch chiles for serious heat lovers
Holiday Version: Add diced red bell peppers for festive color
Dietary Adaptations
Keto-Friendly: Already perfect as-is
Vegetarian: Naturally meat-free
Gluten-Free: Serve with corn tortilla chips or vegetables
Lighter Version: Use Greek yogurt for half the mayonnaise
Perfect Pairings for Cheesy Hatch Green Chile Dip
This dip pairs beautifully with green chile chicken stew for a complete southwestern feast. Additionally, serve alongside cheddar and bacon turkey melt on sourdough for game day spreads.
For beverages, ice-cold beer or margaritas complement the chile heat perfectly. Furthermore, sparkling water with lime provides a refreshing contrast.
Storage and Reheating Guide
| Storage Method | Time Frame | Notes |
|---|---|---|
| Refrigerator | 3-4 days | Cover tightly |
| Freezer | 2-3 months | May separate slightly |
| Room temperature | 2 hours max | Food safety concern |
Reheating Instructions for Roasted Hatch Chile Recipe
Reheat in 350°F oven for 10-15 minutes until bubbly. Alternatively, microwave in 30-second intervals, stirring between each. The texture stays creamiest with oven reheating.
Cheesy Hatch Green Chile Dip FAQs
What’s so special about Hatch green chiles?
Hatch green chiles grow exclusively in New Mexico’s Hatch Valley, where unique soil conditions and climate create chiles with distinctive earthy sweetness and complex heat. Moreover, they’re harvested only once yearly, making them a seasonal treasure that southwestern cooks eagerly anticipate.
What do you use Hatch green chili sauce for?
Hatch green chile sauce enhances everything from eggs and burgers to enchiladas and stews. Furthermore, it makes an excellent base for marry me chicken soup recipe when you want southwestern flair.
How long is Hatch Chile good for?
Fresh roasted Hatch chiles last 5-7 days refrigerated or up to one year frozen. Additionally, properly stored frozen chiles maintain their flavor and texture remarkably well, making them perfect for year-round cooking.
What does Hatch Chile taste like?
Hatch chiles offer a unique combination of earthy sweetness with varying heat levels. The mild varieties provide subtle warmth with rich, complex flavor, while hot varieties deliver serious heat without overwhelming bitterness.
What does green chili taste like?
Green chiles generally taste fresh and bright with grassy, vegetal notes. However, roasted green chiles develop deeper, smokier flavors with concentrated sweetness that balances their natural heat.
Final Thoughts and Serving Suggestions
This cheesy Hatch green chile dip transforms any gathering into a memorable experience.
The combination of creamy cheese and authentic southwestern chiles creates comfort food that feels both familiar and exciting – especially when transformed into a Cheesy Hatch Green Chile Dip for your next gathering.
Serve it warm with thick tortilla chips, crusty bread, or fresh vegetables. Additionally, consider offering it alongside mini pumpkin bread with cinnamon swirl for an unexpected sweet-and-savory combination.
The beauty of this recipe lies in its simplicity and bold flavors. Whether you’re hosting game day parties or intimate family dinners, this dip delivers restaurant-quality results with minimal effort.
Try pairing it with pumpkin s’mores cookies for a complete southwestern-inspired dessert experience that your guests will remember long after the last bite.
Circle back to that dusty Santa Fe farmers market where this journey began—sometimes the best recipes come from embracing authentic ingredients and letting their natural flavors shine through melted cheese and shared memories.
Cheesy Hatch Green Chile Dip
Equipment
- Large mixing bowl
- Casserole dish
- measuring cups
- Cheese grater
- wooden spoon
Ingredients
Main Ingredients
- 1 cup mild roasted Hatch chiles, chopped fresh or frozen work equally well
- ½ cup hot roasted Hatch chiles, chopped adjust to taste preference
- 1 cup mayonnaise full-fat for best texture
- 1 cup sour cream room temperature preferred
- 2 cups Monterey Jack cheese, shredded freshly grated melts better
- 1 cup mozzarella cheese, shredded low-moisture variety
- ½ cup Parmesan cheese freshly grated recommended
- 2 tsp Worcestershire sauce adds umami depth
- ¾ tsp salt kosher salt preferred
- ¾ tsp fresh cracked black pepper freshly ground
- tortilla chips for serving, thick-cut hold up better
Instructions
- Set your oven to 350°F and lightly grease a 2-quart casserole dish. Meanwhile, let your sour cream come to room temperature for easier mixing.
- In a large mixing bowl, combine mayonnaise and sour cream first. Next, add Worcestershire sauce, salt, and pepper. Mix until completely smooth and well combined.
- Gradually fold in the Monterey Jack and mozzarella cheeses. Then, add half the Parmesan cheese, reserving the rest for topping. The mixture should look thick and creamy.
- Gently fold in both mild and hot Hatch chiles. Be careful not to overmix, which can break down the chile pieces. The mixture should have visible green flecks throughout.
- Spread the mixture evenly in your prepared casserole dish. Sprinkle the remaining Parmesan cheese on top. Additionally, add a few extra chile pieces for visual appeal.
- Bake for 25-30 minutes until the edges bubble vigorously and the top starts browning. The center should be hot throughout and slightly golden.
- For extra browning, place under the broiler for 2-3 minutes. Watch carefully to prevent burning. The top should be golden brown and serve immediately with tortilla chips.

