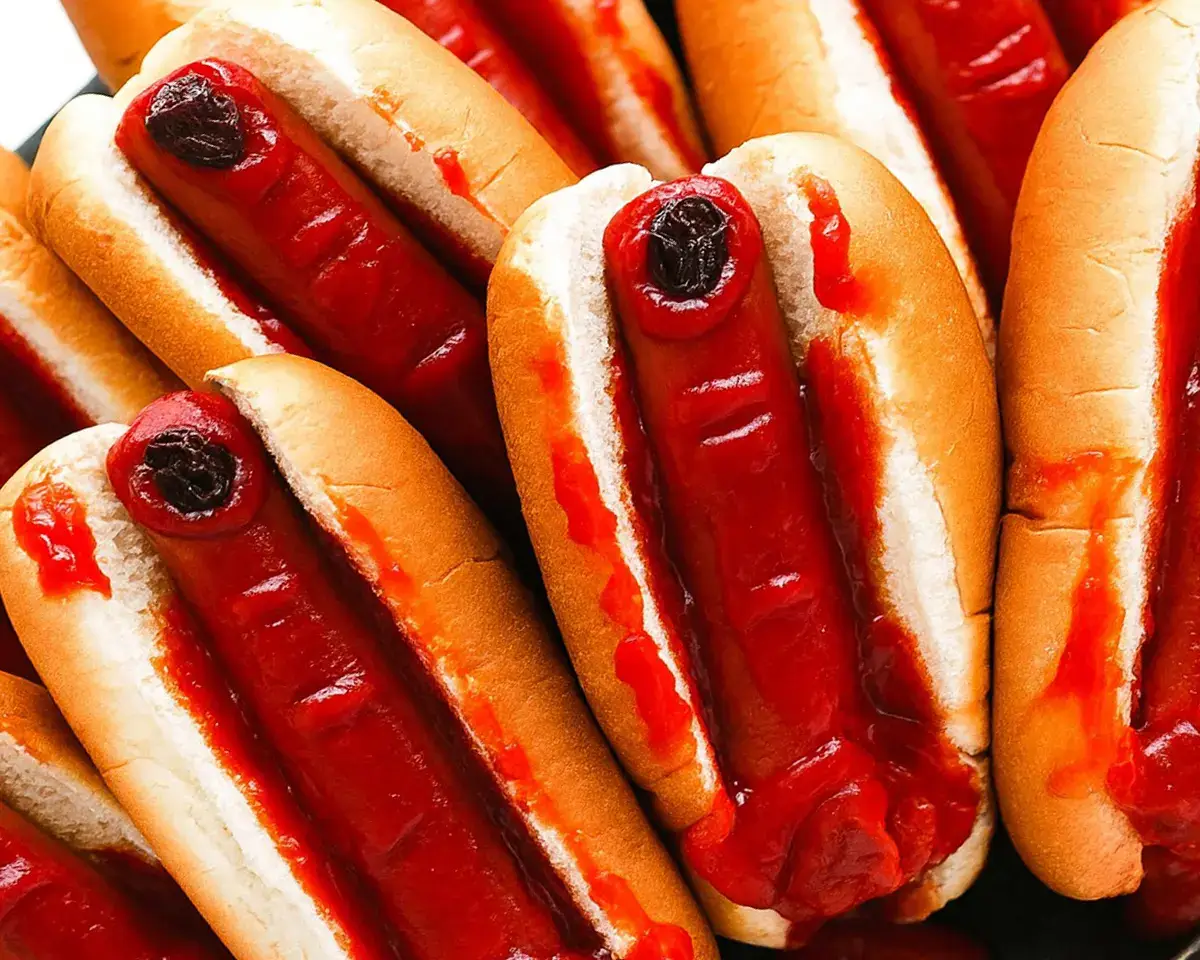
Bloody finger hot dogs create spine-chilling Halloween snacks. Learn expert techniques to craft realistic finger hot dogs that’ll terrify and delight your guests.
Hi, I’m Linda, and welcome to Tasty at Home—a cozy corner where bold flavors meet everyday kitchens. Last October, my neighbor’s Halloween party turned into pure chaos when I walked through the door carrying a platter of what looked like severed fingers dripping with blood. Well… let me tell you, the screams weren’t from any haunted house soundtrack!
These bloody finger hot dogs transformed an ordinary weeknight dinner into something straight out of a horror movie. Moreover, I’ve perfected this recipe through countless trials—believe me, I’ve made some hilariously gruesome mistakes along the way. However, after testing different cutting techniques and ketchup applications, I’ve cracked the code to creating the most realistic finger hot dogs that’ll make your Halloween party legendary.
You know what? Whether you’re hosting a spooky gathering or just want to surprise your kids with something wickedly fun, this recipe delivers maximum impact with minimal effort. Furthermore, these creepy creations require only basic ingredients you probably already have in your kitchen.
Table of Contents
About the Bloody Finger Hot Dogs Recipe & Ingredients
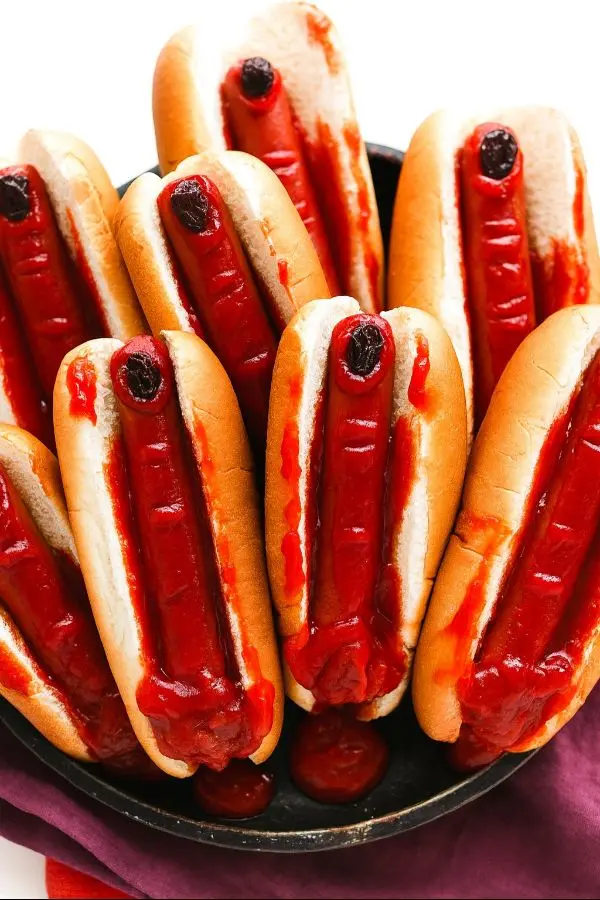
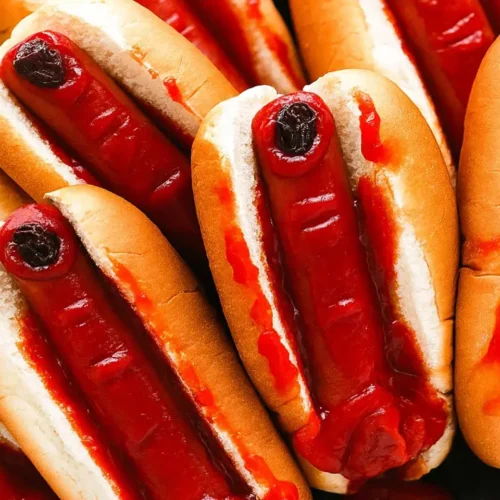
What makes these bloody finger hot dogs absolutely terrifying? The secret lies in precise cutting techniques that transform ordinary hot dogs into disturbingly realistic fingers. Additionally, the strategic use of ketchup creates that spine-chilling “bloody” effect that makes guests do double-takes.
This recipe delivers authentic horror movie vibes while remaining completely family-friendly. Moreover, the preparation takes less than 30 minutes from start to finish. Consequently, you’ll have more time to focus on other spooky party preparations.
Essential Ingredients
| Ingredient | US Measurement | Metric | Notes |
|---|---|---|---|
| Hot dogs | 8 pieces | 450g | Choose plump, standard-sized hot dogs |
| Hot dog buns | 8 buns | 8 buns | Fresh buns work best for presentation |
| Ketchup | 1/2 cup | 120ml | Use thick ketchup for realistic blood effect |
| Water | 4 cups | 950ml | For boiling |
| White onion (optional) | 1 medium | 1 medium | Thinly sliced for “fingernails” |
Shopping Tips for US Grocery Stores
When shopping for hot dogs, choose brands with natural casings that hold their shape during cutting. Additionally, avoid turkey or chicken hot dogs since they tend to crumble when scored. Furthermore, select buns that are slightly larger than your hot dogs to accommodate the “finger” shape.
Look for thick, restaurant-style ketchup rather than thin varieties. Moreover, Heinz or Hunt’s brands provide the perfect consistency for creating realistic blood effects. Oops! I learned this the hard way when watery ketchup made my first batch look more like pink soup than gore.
Ingredient Substitutions
For international readers: If hot dogs aren’t available, substitute with bratwurst or breakfast sausages. Similarly, hamburger buns work perfectly when hot dog buns aren’t accessible.
Dietary alternatives: Turkey dogs work fine with gentler cutting techniques. Moreover, plant-based hot dogs create equally horrifying results for vegetarian guests.
Quality Indicators
Select hot dogs with even coloring and firm texture. Additionally, avoid packages with excessive liquid or slimy surfaces. Furthermore, fresh buns should feel soft but not squishy when gently pressed.
Equipment & Preparation Steps
Essential Equipment
You’ll need these basic kitchen tools to create your bloody finger hot dogs masterpiece:
- Large pot for boiling water
- Sharp paring knife (crucial for precise cuts)
- Cutting board
- Tongs for handling hot dogs safely
- Small spoon for ketchup application
DIY Alternative: No paring knife? Use a sharp steak knife, though cuts won’t be as precise. Similarly, kitchen shears work for basic scoring in a pinch.
Step-by-Step Finger Creation
Creating the Fingernails
Start by examining each hot dog to determine the “fingertip” end. Next, position your knife about 1/4 inch from the tip. Then, make two angled cuts on either side of the fingernail area, creating a triangular shape.
Moreover, slice straight across the top of the triangle. Additionally, create a slight curved cut along the bottom to mimic a natural nail bed. Finally, carefully remove the small triangular piece to reveal your “fingernail” indentation.
Pro tip: Thomas Keller always emphasized precision in knife work, and this technique requires similar attention to detail for realistic results.
Carving the Knuckles
Locate the middle of each hot dog and make one horizontal slit about 1/8 inch deep. Then, create two crescent-shaped cuts directly above and below this center line.
Furthermore, measure halfway between your new knuckle and the fingernail. Next, add two more crescent slits at this location. Finally, create two additional crescent cuts near the “wrist” end of the hot dog.
Common mistake alert: I once cut too deeply and my hot dogs split completely during boiling! Keep cuts shallow—just deep enough to create visible indentations.
Boiling Process
Fill your large pot with water and bring to a rolling boil. Meanwhile, prepare your workspace with ketchup and buns ready for assembly.
Carefully add your carved hot dogs to the boiling water using tongs. Additionally, boil for 4-5 minutes until heated through. Moreover, the cuts will open slightly during cooking, enhancing the finger-like appearance.
Expert insight: Julia Child taught us that proper timing prevents overcooking, which could cause your carefully crafted fingers to lose their shape.
Assembly Technique
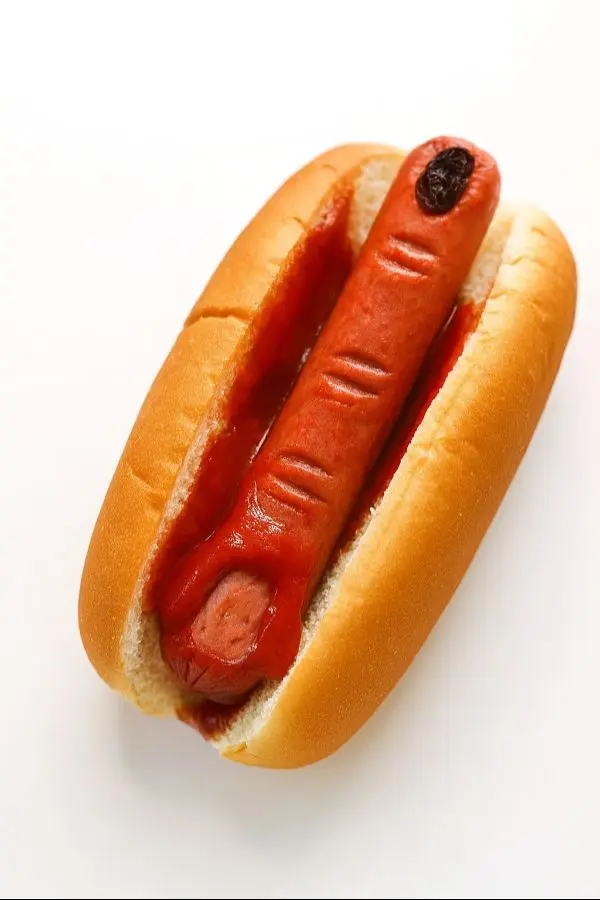
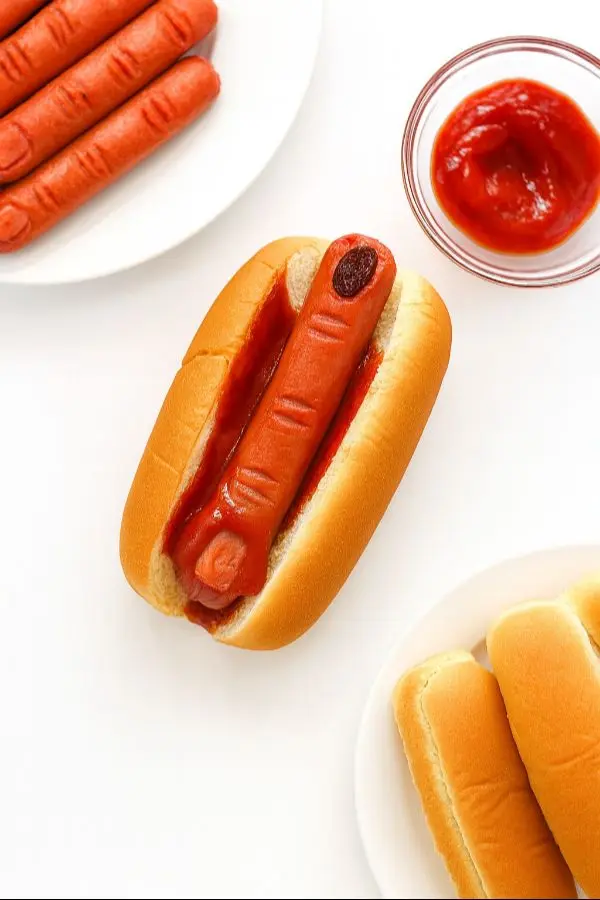
Remove hot dogs from water using tongs. Then, place each “finger” into a hot dog bun. Next, generously apply ketchup along the bottom of each bun.
Moreover, smear additional ketchup at the base of each finger to simulate fresh “blood” from the severed appendage. Furthermore, add drops of ketchup around the plate for extra gruesome effect.
Optional enhancement: Place a thin square of white onion in the fingernail indentation for ultra-realistic nails. However, this step requires additional prep time that many find unnecessary.
Tips, Variations, and Serving Suggestions
Expert Tips for Maximum Horror
Temperature control proves crucial for realistic bloody finger hot dogs. Additionally, serve them while still warm to maintain the fresh “blood” appearance of the ketchup. Moreover, dim lighting enhances the spooky presentation dramatically.
Create varying finger sizes by using different hot dog brands. Furthermore, mix regular and cocktail-sized hot dogs for adult and child fingers. Consequently, your platter will look like a collection from different victims!
Creative Variations
Regional Halloween Style: Add regional barbecue sauce instead of ketchup for a Southern “bloody” twist. Similarly, use salsa verde for a Southwestern horror approach.
Dietary Adaptations: Turkey dogs work excellently with slightly gentler cutting techniques. Moreover, plant-based alternatives create equally convincing results for vegetarian guests.
Holiday Variations:
- Christmas: Use cranberry sauce for “blood” and call them “Krampus fingers”
- Fourth of July: Alternate between ketchup and blue cheese for patriotic gore
- Valentine’s Day: Use strawberry jam for romantic “love bites”
International Twist: Try these salami mozzarella eyeballs alongside your finger hot dogs for a complete horror appetizer spread.
Bloody Finger Hot Dogs Storage and Make-Ahead Tips
| Storage Method | Duration | Instructions |
|---|---|---|
| Refrigerated (uncooked) | 2 days | Store carved hot dogs in airtight container |
| Refrigerated (cooked) | 3 days | Reheat gently in microwave |
| Frozen | 1 month | Freeze before carving for best results |
| Party prep | 4 hours | Carve fingers morning of party |
Make-ahead strategy: Carve your hot dogs the morning of your party. Additionally, store them covered in the refrigerator until cooking time. Moreover, this approach actually improves the appearance since cuts settle into more realistic shapes.
Bloody Finger Hot Dogs Serving Suggestions and Pairings
Serve bloody finger hot dogs alongside other spine-chilling treats. Furthermore, consider pairing with these Halloween pumpkin spice cookies for a complete spooky menu.
Beverage pairings: Blood orange punch complements the horror theme perfectly. Similarly, apple cider provides a seasonal balance to the savory fingers.
Presentation ideas: Arrange fingers on a dark platter surrounded by dry ice for theatrical effect. Moreover, scatter plastic spiders around the plate for additional creepy factor.
Bloody Finger Hot Dogs FAQs
How do you make bloody finger hot dogs?
Start by carving fingernail indentations and knuckle lines into hot dogs using a sharp knife. Then boil the carved hot dogs for 4-5 minutes. Finally, place in buns with generous ketchup to create the bloody effect.
What causes hot dog fingers?
This refers to swollen fingers that resemble hot dogs, typically caused by injury or inflammation. However, our recipe creates the opposite effect—transforming hot dogs into realistic finger shapes through strategic cutting techniques.
What makes Filipino hot dogs red?
Filipino hot dogs get their distinctive red color from food coloring added during processing. Similarly, some American brands use natural casings that create reddish hues, perfect for our bloody finger hot dogs recipe.
What do the hot dog fingers mean in everything everywhere?
The movie uses hot dog fingers as a surreal visual metaphor for alternate realities. Likewise, our Halloween version creates an alternate reality where ordinary hot dogs become horrifying appendages.
What is the liquid in hot dogs?
Hot dogs contain water and natural juices from the meat processing. Additionally, this moisture helps maintain texture during cooking and contributes to the realistic “flesh” appearance in our finger hot dogs.
Conclusion
Man, oh man, these bloody finger hot dogs never fail to deliver spine-tingling reactions at Halloween gatherings! Moreover, the combination of simple ingredients and clever techniques creates restaurant-quality horror effects right in your own kitchen.
Your guests will be talking about these creepy creations long after Halloween ends. Furthermore, the recipe’s simplicity means you can focus on perfecting other spooky party elements. Additionally, kids absolutely love both making and eating these frightfully fun finger foods.
Consider serving these alongside a warm slice of old-fashioned apple crisp to balance the savory horror with comforting sweetness. Similarly, ending the meal with something familiar helps guests recover from the initial shock!
Ready to haunt your kitchen with these terrifyingly delicious creations? Share your bloody finger hot dog photos on social media and tag us—we love seeing how our recipes bring families together for frightfully fun moments. After all, the best Halloween memories are made when good food meets great company, even when that food looks absolutely horrifying!
Bloody Finger Hot Dogs
Equipment
- Large pot
- Sharp paring knife
- Cutting board
- tongs
- Small spoon
Ingredients
Main Ingredients
- 8 pieces hot dogs Choose plump, standard-sized hot dogs
- 8 buns hot dog buns Fresh buns work best for presentation
- ½ cup ketchup Use thick ketchup for realistic blood effect
- 4 cups water For boiling
Optional
- 1 medium white onion Thinly sliced for fingernails
Instructions
- Start a large pot of water boiling on the stove.
- To make the fingernails, slice the two sides of the fingernail, then straight across the top. Then make a slight curved slice for the bottom nail bed. Next, take your knife and carefully slice the fingernail piece off the top.
- Next, to make the knuckles, make one slit along the middle with two crescent slits directly above and below it. Then halfway between the new knuckle and the nail, make two crescent slits. And add two more crescent-shaped slits at the very bottom.
- Boil the hot dogs for 4-5 minutes.
- Then place each finger into a hot dog bun loaded with ketchup – be sure to smear some ketchup on the bottom of each severed finger and a bit at the top of the bun.
- If you want, you can add a thinly sliced square piece of white onion for the nail, but it’s a bit of extra work that I didn’t think was needed.

