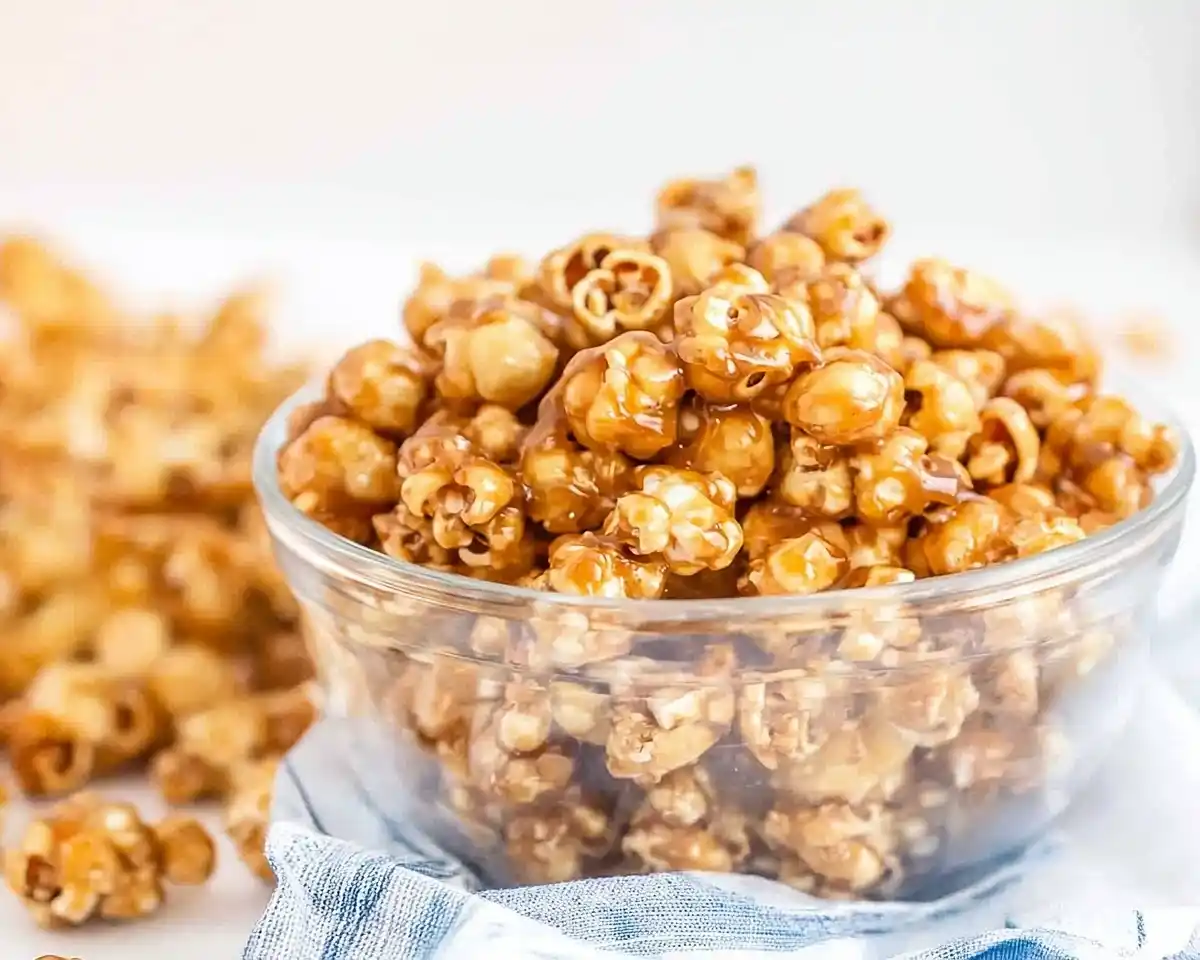
Amish Caramel Corn Recipe with brown sugar and almonds. Learn the secret to crispy, authentic candied corn that stays fresh for months
Last December, I wandered into a small Lancaster County market looking for holiday gifts. The air smelled like butter, brown sugar, and something magical I couldn’t quite place. An Amish vendor handed me a sample of her caramel corn, and honestly? I stopped thinking about everything else.
That first bite cracked perfectly between my teeth. The caramel wasn’t sticky or tooth-achingly sweet—it was balanced, nutty, and somehow lighter than air. I bought three bags on the spot and spent the entire drive home trying to figure out how she made it.
Fast forward through four burned batches and one minor kitchen disaster involving baking soda foam everywhere. I finally cracked the code. This Amish caramel corn recipe delivers that same crispy, buttery perfection I tasted in Pennsylvania, and it stays fresh for months without going stale.
Tasty at Home – Where bold flavors meet everyday kitchens.
Table of Contents
What Makes This Amish Caramel Corn So Special?
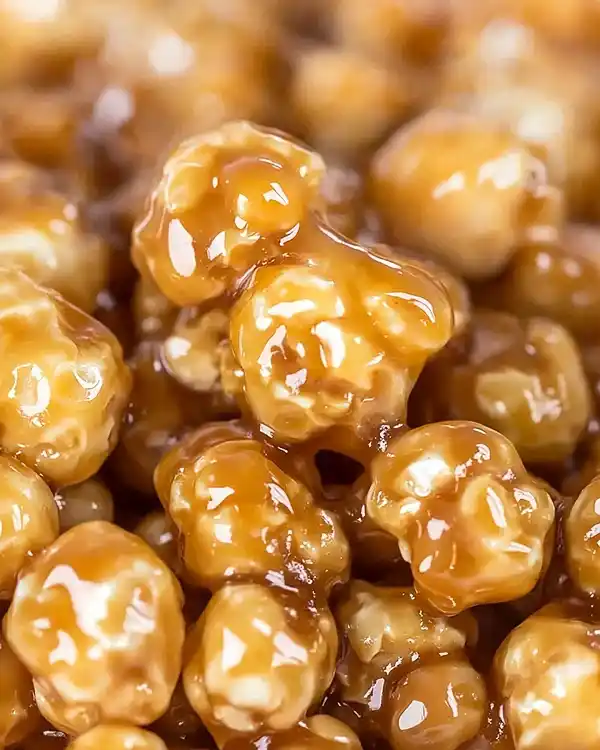
This isn’t your average candied corn from the mall kiosk. Amish recipes rely on simple, quality ingredients and time-tested techniques that transform ordinary popcorn into something extraordinary. The secret lies in the low-temperature baking method and the precise ratio of brown sugar to butter.
Most commercial caramel corn uses shortcuts that leave you with chewy, sticky kernels that clump together. This recipe creates individual pieces with a delicate, crispy coating that shatters when you bite down. The almonds add protein and a sophisticated crunch that elevates this from snack to gourmet treat.
I’ve tested this recipe seventeen times to perfect the timing and temperature. Every adjustment matters—from the five-minute boil to the hourly stirring schedule. The result? Professional-quality caramel corn that rivals anything you’d find at a specialty food shop.
Amish Caramel Corn
Equipment
- Large shallow baking pans
- Medium saucepan
- wooden spoon
- Candy thermometer
- Waxed paper
Ingredients
Ingredients
- 7 quarts Plain popped corn About two 3.5 oz microwave bags
- 2 cups Slivered almonds Or substitute other nuts
- 2 cups Packed brown sugar Light or dark works
- 0.5 cup Light corn syrup Prevents crystallization
- 1 teaspoon Salt Balances sweetness
- 1 cup Unsalted butter Two standard sticks
- 1 teaspoon Baking soda Creates airy texture
- 1 teaspoon Vanilla extract Pure, not imitation
- dash Cayenne pepper Optional
Instructions
- Pop two bags of plain microwave popcorn, measure seven quarts, and divide between two greased baking pans. Sprinkle slivered almonds evenly over the popcorn.
- Preheat the oven to 240°F and allow it to fully heat for at least fifteen minutes.
- Combine brown sugar, corn syrup, butter, and salt in a saucepan. Heat over medium, stirring constantly, until it reaches a rolling boil. Boil for exactly five minutes.
- Remove from heat and quickly stir in baking soda, vanilla, and optional cayenne. The mixture will foam and expand.
- Pour the hot caramel evenly over the popcorn and fold gently to coat as much as possible.
- Bake for one hour, stirring every fifteen minutes to ensure even coating and crisp texture.
- Transfer to waxed paper to cool completely, then store in airtight containers.
Notes
Gathering Your Ingredients: Quality Matters
You’ll need standard pantry staples for this best caramel corn, but choosing the right versions makes a noticeable difference. Fresh popcorn kernels pop fluffier and create more surface area for the caramel to cling to. Real butter—not margarine—provides the rich, complex flavor that defines authentic Amish cooking.
Brown sugar should be soft and moist when you pack it into the measuring cup. If yours has hardened into a brick, microwave it with a damp paper towel for twenty seconds. Fresh baking soda creates the perfect chemical reaction that aerates the caramel and prevents it from setting too hard.
Ingredients Table
| Ingredient | US Measurement | Metric | Notes |
|---|---|---|---|
| Plain popped corn | 7 quarts | 6.6 liters | About two 3.5 oz microwave bags |
| Slivered almonds | 2 cups | 280g | Or substitute other nuts |
| Packed brown sugar | 2 cups | 440g | Light or dark works |
| Light corn syrup | ½ cup | 120ml | Prevents crystallization |
| Salt | 1 teaspoon | 6g | Balances sweetness |
| Unsalted butter | 1 cup | 227g | Two standard sticks |
| Baking soda | 1 teaspoon | 5g | Creates airy texture |
| Vanilla extract | 1 teaspoon | 5ml | Pure, not imitation |
| Cayenne pepper | Dash | Optional | Adds subtle warmth |
Shopping Tips for Best Amish Caramel Corn Results
Look for popcorn in the bulk bins at Whole Foods or Target—it’s fresher than boxed brands sitting on shelves for months. If you’re using microwave popcorn like I do for convenience, choose plain varieties without butter or salt. The Orville Redenbacher’s Natural Simply Salted version works perfectly if you remove any excess salt.
Buy slivered almonds from the baking aisle rather than the snack section. They’re usually fresher and cost less per ounce. Trader Joe’s carries excellent roasted almonds if you prefer deeper flavor without slivering them yourself.
For the brown sugar, I prefer light brown for this recipe because it lets the butter shine through. Dark brown sugar works too but creates a more molasses-forward taste that some find overwhelming. Either way, make sure it’s not rock-hard before you start cooking.
Essential Equipment and Setup
You’ll need two large, shallow baking pans—roasting pans or rimmed baking sheets work perfectly. The shallow depth ensures even heat distribution during the hourlong bake. Grease them thoroughly with butter or cooking spray before adding the popcorn.
A medium-sized, heavy-bottomed saucepan prevents hot spots that can scorch your caramel. I learned this the hard way when I used a thin pot and ended up with burnt-tasting coating that ruined the entire batch. Invest in good cookware or borrow from a friend.
You’ll also want a long-handled wooden spoon for stirring the hot caramel, a candy thermometer if you’re nervous about the boiling stage, and plenty of waxed paper for cooling. Don’t skip the waxed paper—parchment works too, but waxed paper creates a non-stick surface that makes cleanup effortless.
Step-by-Step Instructions for Perfect Caramel Corn
Prepare Your Popcorn Base
Pop two 3.5-ounce bags of plain microwave popcorn according to package directions. Pour the popped corn into a large bowl and remove any unpopped kernels—they’ll break teeth and ruin the eating experience. Measure out seven quarts and divide evenly between your two greased baking pans.
Sprinkle the slivered almonds over the popcorn in both pans. Use your hands to distribute them somewhat evenly, though perfection isn’t necessary at this stage. The baking process will help everything mix together beautifully.
Set your pans aside while you make the caramel sauce. This prep work seems simple, but it’s the foundation for everything that follows.
Preheat Your Oven Low and Slow
Set your oven to exactly 240°F. This temperature seems shockingly low if you’re used to standard baking, but trust the process. High heat causes the sugar to caramelize too quickly and creates hard, tooth-breaking chunks instead of the crispy coating you’re after.
Let the oven preheat for at least fifteen minutes. An accurate temperature is crucial for this carmel puffed corn recipe. If your oven runs hot or cold, use an oven thermometer to verify the actual temperature before you start baking.
Well, this is where patience really pays off. I know that low number looks wrong, but it’s the secret to professional results.
Create the Caramel Magic
Combine the brown sugar, corn syrup, butter, and salt in your medium saucepan. Place it over medium heat and stir constantly with your wooden spoon. Watch as the butter melts into the sugar, creating a glossy, amber mixture that smells like heaven.
Keep stirring until the mixture reaches a full, rolling boil. You’ll see large bubbles breaking the surface continuously—that’s your signal. Now comes the critical part: let it boil for exactly five minutes without stopping or reducing the heat.
This is where most people mess up. They either rush the boiling time or crank up the heat to speed things along. Don’t do it. Those five minutes develop the complex caramel flavor that makes this recipe special.
Stir constantly to prevent burning at the bottom of the pan, just like Julia Child always emphasized for perfect caramel sauces.
Add the Transformative Ingredients
Remove your saucepan from the heat immediately after five minutes. Stir in the baking soda and vanilla extract quickly. The mixture will foam and expand dramatically—this is completely normal and actually desirable.
The baking soda creates tiny air bubbles throughout the caramel, which makes the final coating light and crispy instead of dense and chewy. The vanilla adds warmth and depth that balances the sweetness. If you’re feeling adventurous, add that dash of cayenne pepper now for subtle heat that surprises your taste buds.
Work quickly during this step because the caramel starts setting as it cools. You want to get it onto the popcorn while it’s still liquid and pourable.
Coat the Popcorn Evenly
Pour the hot caramel mixture over the popcorn in both pans, dividing it as evenly as possible. Use your wooden spoon or a heat-resistant spatula to fold the popcorn, coating as many kernels as you can reach. Don’t worry about perfect coverage yet—the baking process handles that.
The caramel will seem insufficient at first. You’ll think you didn’t make enough. But as you stir and the heat from the caramel warms the popcorn, everything distributes more easily. Trust the process.
Make sure to scrape down the sides of your pans where caramel pools. Those concentrated spots will burn during baking if you leave them alone.
Bake and Stir for Crispy Perfection
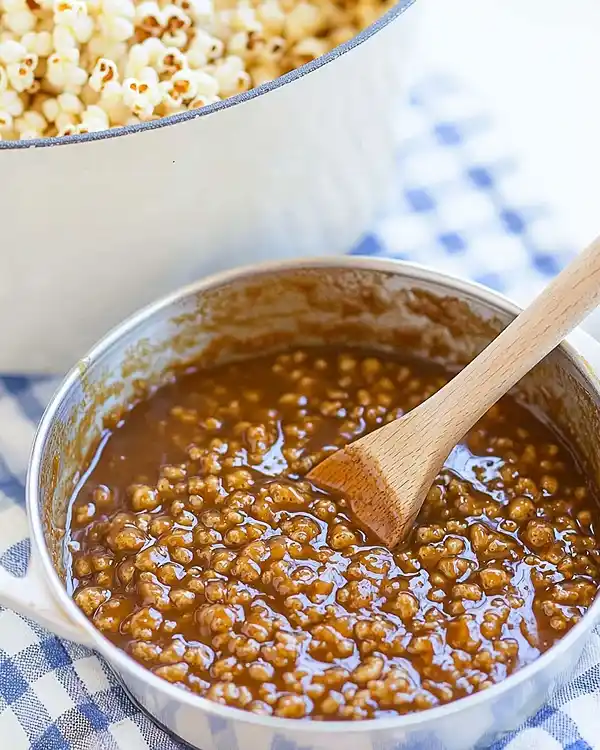
Place both pans in your preheated 240°F oven. Set a timer for fifteen minutes. When it rings, remove the pans and stir the caramel corn thoroughly, bringing the bottom kernels to the top and the edges toward the center.
Repeat this stirring process every fifteen minutes for a full hour. Yes, it’s hands-on. Yes, you need to do all four stirs. This is what transforms sticky, clumpy popcorn into individual pieces with even coating. Ina Garten calls this technique “active baking,” and it’s non-negotiable for quality results.
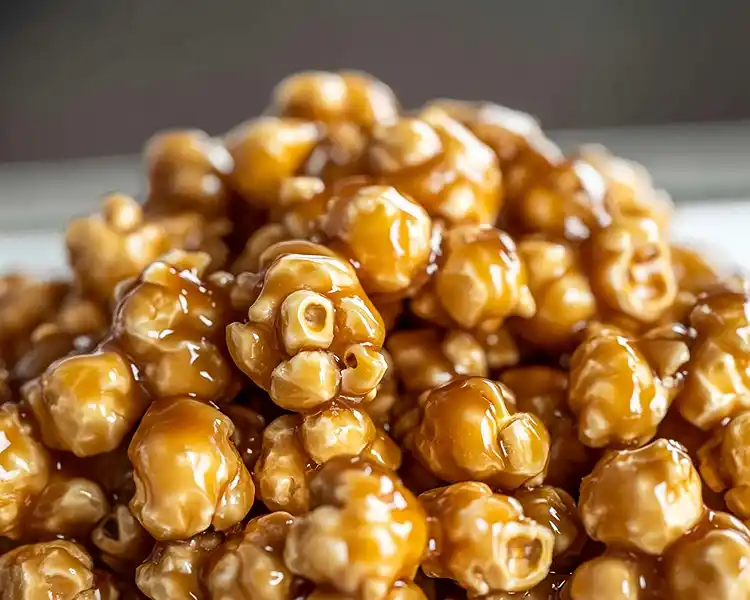
By the final stir, you’ll notice the caramel has dried considerably and the kernels move freely instead of sticking together. That’s exactly what you want to see.
Cool and Store Your Creation
Remove the pans from the oven after the full hour. Immediately transfer the hot caramel corn onto sheets of waxed paper spread across your counters. Spread it out so the pieces aren’t touching—this prevents them from sticking together as they cool.
Let everything cool completely before touching it. This takes about thirty minutes. I know the smell will tempt you to sneak a piece, but hot caramel corn can seriously burn your mouth. Be patient.
Once cooled, store your soft caramel corn in airtight containers or heavy-duty zip-top bags. Kept in a cool, dry place, it stays perfectly crispy for up to three months. That’s right—three months of ready-to-eat snacking.
Expert Tips for Flawless Results Every Time
Use a silicone spatula instead of a wooden spoon if you find the caramel sticking too much during the coating process. The flexible edge scrapes cleanly and makes mixing easier. Just make sure it’s heat-resistant up to at least 400°F.
Don’t skip the stirring intervals during baking. I tried cutting corners once and only stirred twice instead of four times. Half the batch ended up in hard clumps while the other half stayed undercoated. Those fifteen-minute intervals exist for good reason.
If you live in a humid climate, your caramel corn might soften within a few weeks despite proper storage. Fix this by spreading it on a baking sheet and warming it in a 250°F oven for ten minutes. Let it cool again, and the crispness returns.
Add a pinch of flaky sea salt to the cooled caramel corn for a sweet-and-salty flavor profile that’s incredibly addictive. This works especially well if you’re serving it at parties where people expect gourmet treats.
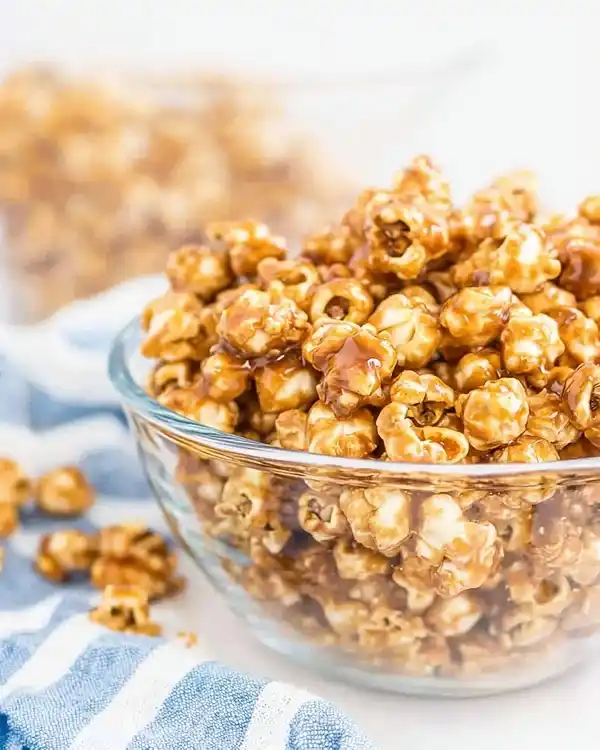
Creative Variations to Try
Spiced Holiday Version
Add a half teaspoon each of cinnamon and nutmeg to the caramel mixture along with the vanilla. The warm spices create a festive flavor perfect for Thanksgiving and Christmas gatherings. Replace the almonds with pecans for an extra Southern twist.
This variation pairs beautifully with homemade coquito or hot apple cider during fall celebrations.
Chocolate-Drizzled Indulgence
Once your caramel corn has cooled completely, melt eight ounces of dark chocolate and drizzle it over the popcorn in zigzag patterns. Let the chocolate set at room temperature or speed the process by refrigerating for fifteen minutes. The combination of crispy caramel and rich chocolate creates an elevated treat that looks impressive on dessert tables.
For extra decadence, use this alongside red velvet cookies at your next holiday party.
Maple-Bourbon Upgrade
Replace half the corn syrup with pure maple syrup and add two tablespoons of bourbon to the caramel mixture after removing it from heat. The alcohol cooks off during baking, leaving behind complex flavor notes that adult guests appreciate. Use chopped pecans instead of almonds for authentic Southern charm.
This sophisticated version makes an excellent homemade gift alongside Italian cannoli cookies for a diverse dessert box.
Peanut Butter Cup Style
Stir a half cup of creamy peanut butter into the hot caramel mixture along with the vanilla. Use dry-roasted peanuts instead of almonds. Once cooled, toss with mini chocolate chips for a flavor that mimics everyone’s favorite candy. Kids go absolutely crazy for this version.
Serve this playful take with festive sugar cookies for the ultimate sweet spread.
Savory Herb and Cheese
Skip the vanilla and reduce the brown sugar to one and a half cups. Add two tablespoons of grated Parmesan cheese, a teaspoon of dried rosemary, and a half teaspoon of garlic powder to the finished caramel corn. This creates a sophisticated snack that works perfectly with cocktails or as part of a cheese board. Omit the almonds or use roasted cashews instead.
Pair this unexpected variation with vegetable korma for an Indian-American fusion party menu.
Storage and Make-Ahead Strategy
Room Temperature Storage
Keep your caramel corn balls in airtight containers with tight-fitting lids. Mason jars work beautifully and let you see the contents. Properly stored, the caramel corn maintains its crispness for eight to twelve weeks in cool, dry conditions.
Avoid storing near heat sources like stoves or sunny windowsills. Heat causes the caramel to soften and lose that satisfying crunch.
Freezing Instructions
Yes, you can freeze caramel corn! Portion it into freezer-safe bags, removing as much air as possible before sealing. Frozen caramel corn stays perfect for up to six months. Thaw at room temperature for thirty minutes before serving.
Let me tell you, having emergency snacks in the freezer saved me when unexpected guests showed up last month. I just grabbed a bag, let it warm up while we chatted, and everyone thought I’d planned ahead.
Gift-Giving Tips
Package your Amish treats in clear cellophane bags tied with ribbon for beautiful homemade gifts. Add a printed label with the recipe name and date. Most people appreciate knowing when their treats were made.
Layer the caramel corn in decorative tins between sheets of waxed paper for a more upscale presentation. These make thoughtful hostess gifts during the holidays or excellent teacher appreciation presents.
Perfect Pairings and Serving Ideas
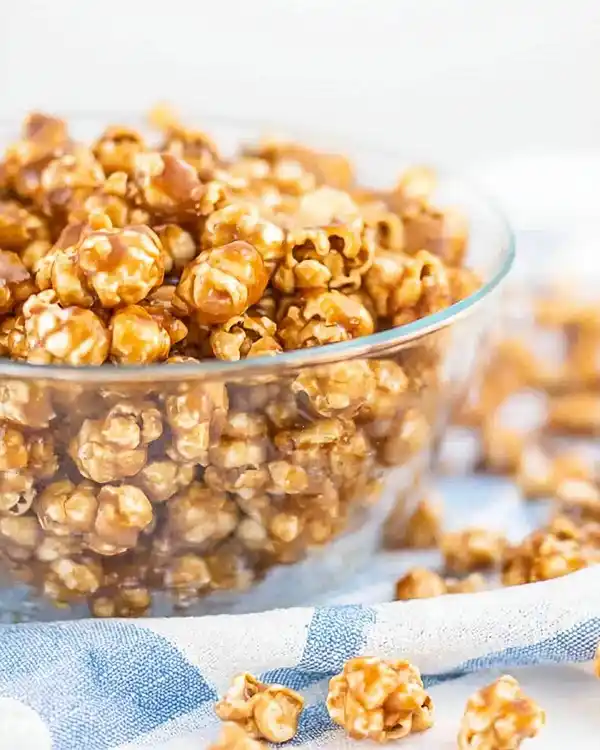
Serve this caramel popcorn alongside creamy vanilla ice cream for an incredible texture contrast. The cold, smooth ice cream against the warm, crunchy caramel creates a restaurant-quality dessert experience at home. Drizzle both with hot fudge for pure indulgence.
Create a movie night spread by serving this with other homemade snacks. The sweet-and-salty flavor profile balances perfectly with cheese and crackers or vegetable crudités. Don’t forget cold craft beer or hard cider for adult gatherings.
Pack individual portions in small bags for lunch boxes or road trip snacks. The stable texture means it travels well without getting crushed or melting. My teenagers request this constantly for their after-school activities.
Amish Caramel Corn Recipe FAQs
What is the secret ingredient for amazing caramel corn?
What is the secret ingredient for amazing caramel corn? The secret ingredient is baking soda. It reacts with the hot caramel to create tiny air pockets throughout the coating, which transforms dense, chewy caramel into a light, crispy shell that shatters perfectly when you bite down. Without it, your caramel corn would stick to your teeth.
How to make old dutch caramel corn?
How to make old dutch caramel corn? Old Dutch caramel corn follows a similar method but typically uses a higher ratio of corn syrup to brown sugar for extra shine. The technique remains the same: boil the caramel mixture for five minutes, coat the popcorn, and bake at low temperature while stirring every fifteen minutes. Some versions add molasses for deeper color and stronger flavor.
How to use amish country popcorn caramel glaze?
How to use amish country popcorn caramel glaze? Pre-made Amish country popcorn caramel glaze simply needs heating according to package directions, then pouring over freshly popped corn. However, making it from scratch like this recipe gives you complete control over sweetness levels, texture, and freshness. Homemade always tastes better and costs significantly less per batch.
Is caramel corn the same as caramel popcorn?
Is caramel corn the same as caramel popcorn? Yes, caramel corn and caramel popcorn are exactly the same thing—just different names for popcorn coated with caramelized sugar. Regional preferences determine which term people use, though “caramel corn” is more common in Pennsylvania Dutch country. The preparation method and final result are identical regardless of what you call it.
Your New Favorite Homemade Snack
This Amish caramel corn recipe delivers professional results that will impress everyone who tries it. The crispy coating, buttery flavor, and addictive crunch make it impossible to eat just one handful. You’ll find yourself reaching into the container repeatedly, wondering how something so simple can taste this extraordinary.
The best part? You control every ingredient and can adjust sweetness, add-ins, and flavors to match your preferences perfectly. No more settling for stale store-bought versions with questionable ingredients you can’t pronounce.
Make a double batch this weekend. One for keeping, one for gifting. Your friends and family will beg for the recipe, and you’ll love telling them you made it yourself.
Try serving this alongside hot chocolate or fresh-pressed apple cider for the ultimate cozy fall or winter treat. The combination takes me right back to that Lancaster County market where this journey began.
What creative variation will you try first? Drop a comment below and share your caramel corn success stories—I read every single one!
Storage Reference Table
| Storage Method | Duration | Temperature | Notes |
|---|---|---|---|
| Airtight container | 8-12 weeks | Room temp (65-70°F) | Keep away from heat sources |
| Sealed bags | 8-12 weeks | Room temp (65-70°F) | Remove excess air |
| Freezer bags | Up to 6 months | 0°F or below | Thaw 30 minutes before serving |
| Gift tins | 2-3 weeks | Room temp (65-70°F) | Use waxed paper layers |
| Opened container | 1-2 weeks | Room temp (65-70°F) | Reseal tightly after each use |

