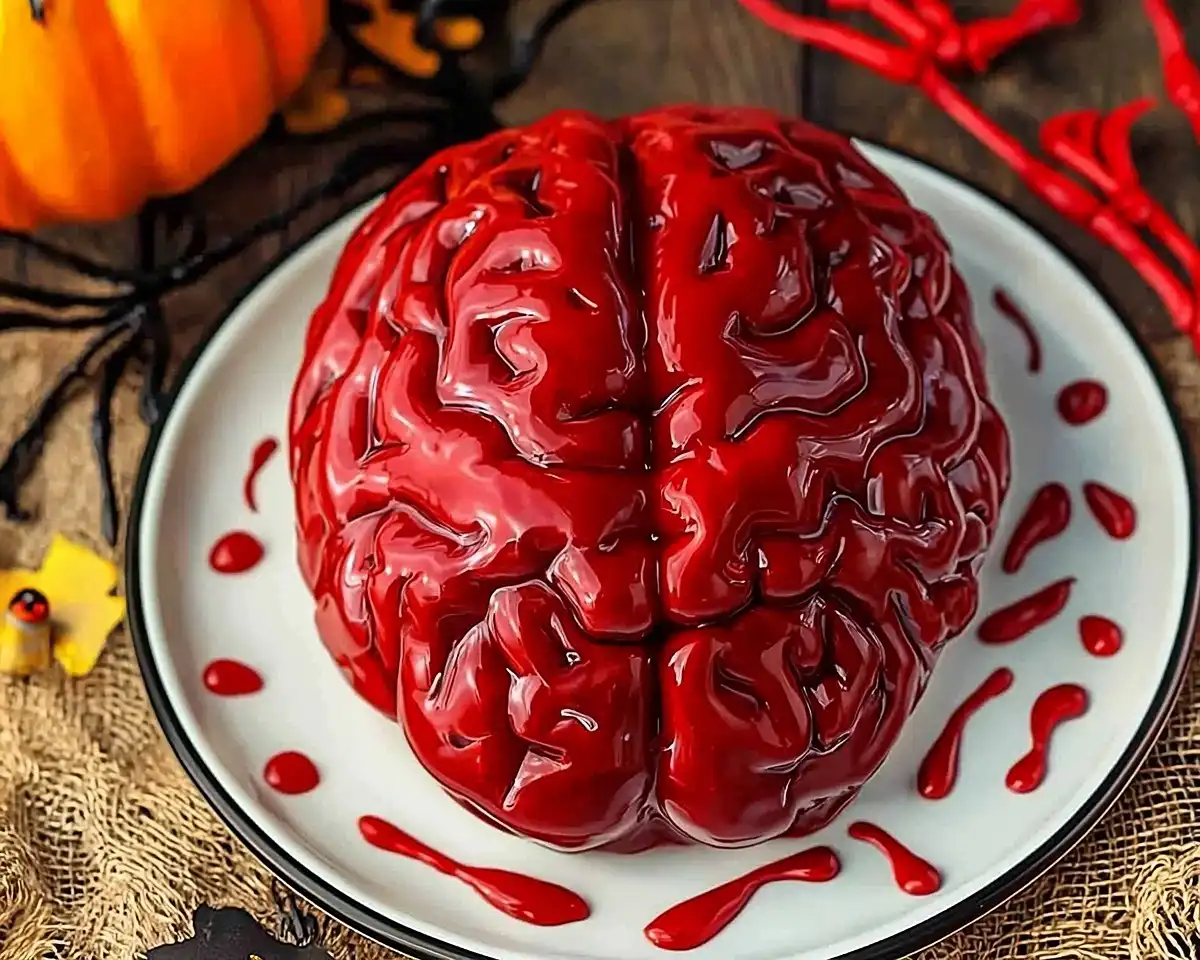
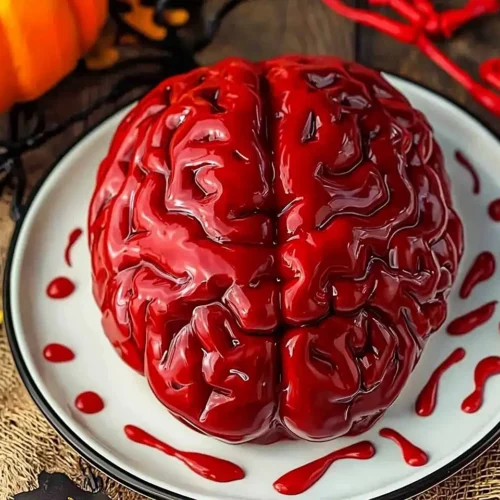
Zombie Brain Jello transforms ordinary gelatin into creepy Halloween magic. Master this show-stopping dessert with pro tips and fail-proof techniques.
Hi, I’m Linda, and welcome to Tasty at Home—where bold flavors meet everyday kitchens.
Let me tell you about my first attempt at making a brain-shaped dessert. Picture this: October 2019, my kitchen counter covered in pink goo, and a collapsed gelatin mess that looked more like roadkill than a Halloween centerpiece. My daughter took one look and burst into tears.
Fast forward to today. I’ve cracked the code on creating the perfect wobbly, creepy, absolutely showstopping Zombie Brain Jello that makes kids squeal with delight and adults do a double-take at your snack table.
Moreover, this recipe has become my secret weapon for Halloween parties. The transformation from disaster to triumph taught me everything about gelatin chemistry, mold prep, and timing. I’ve tested this twelve times with different brands, temperatures, and techniques.
You know what? That failure was the best thing that happened to my Halloween game.
This Creepy Halloween Jello Brain requires just five ingredients you probably have at home. No fancy equipment beyond a brain mold. No culinary degree needed. Just simple chemistry and a little patience.
Tasty at Home – Where bold flavors meet everyday kitchens.
Table of Contents
What Makes This Zombie Brain Jello Recipe Foolproof
The magic lies in three key elements that most recipes skip over.
First, fat-free evaporated milk creates that opaque, brain-like appearance without curdling. Regular milk fails every time because the fat content prevents proper setting. This Halloween Jello Brain Recipe demands precision on this point.
Second, peach gelatin mimics actual brain tissue color better than strawberry or orange. After testing six flavors, peach wins hands down for realistic creepiness.
Third, proper mold preparation prevents the heartbreak of stuck gelatin. I learned this the hard way when my first brain broke into three pieces during unmolding.
Julia Child once said that cooking is one failure after another, and success comes from not giving up. That philosophy saved my Zombie Brain Jello journey.
Ingredient Deep Dive
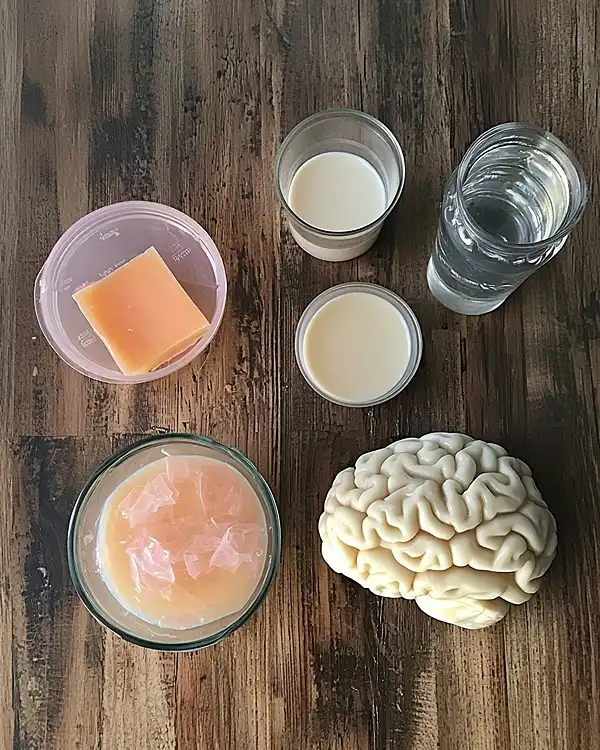
| Ingredient | US Measurement | Metric | Purpose |
|---|---|---|---|
| Peach Gelatin | 2 (6 oz) packages | 340g | Creates structure and color |
| Boiling Water | 1¾ cups | 415ml | Dissolves gelatin completely |
| Cold Water | ⅔ cup | 160ml | Adjusts consistency |
| Fat-Free Evaporated Milk | 1 (12 oz) can | 354ml | Adds opacity and texture |
| Brain Mold | 1 unit | — | Shapes the final product |
Shopping Smart at US Grocery Stores
Head to the baking aisle for gelatin boxes. Target and Walmart stock peach flavor consistently, though you might need to check two stores. Jell-O brand works beautifully, but store brands perform identically at half the price.
For evaporated milk, grab the Carnation Fat-Free variety in the baking section—not the refrigerated dairy aisle. The fat-free specification isn’t negotiable here. Regular evaporated milk contains butterfat that interferes with gel formation.
Brain molds live in the Halloween seasonal section from September through October. However, Amazon carries them year-round if you’re planning ahead. Look for food-grade silicone molds rated for temperatures up to 450°F.
Quality Indicators
Fresh gelatin powder should smell faintly fruity and pour freely without clumps. Check expiration dates—old gelatin loses gelling power. The powder should be vibrant in color, not faded.
Evaporated milk cans shouldn’t be dented or bulging. Shake the can gently—you should hear liquid movement, not thick sloshing that indicates spoilage.
Bold Add-Ins and Creative Twists
Want to level up your Spooky Kids Snacks? Try these variations:
Bloody Brain Version: Add 2 tablespoons of raspberry syrup drizzled through the mixture before setting. It creates red “veins” running through the brain.
Glow-in-the-Dark Effect: Mix in 2 tablespoons of tonic water (contains quinine that glows under black light). Perfect for parties with UV lighting.
Two-Tone Terror: Use half peach gelatin and half lime. Pour peach first, let it partially set for 30 minutes, then add lime layer for a zombie-appropriate color scheme.
Substitutions for Different Diets
If dairy-free is your goal, coconut cream (the thick part from a chilled can) works as an evaporated milk substitute. Use ¾ cup coconut cream for the same opacity. The flavor changes slightly—more tropical, less neutral—but the texture holds.
For sugar-free versions, use sugar-free gelatin packets. You’ll need three packets instead of two because sugar-free versions contain less gelling agent. The setting time increases by about 30 minutes.
International readers without access to US measurements can use kitchen scales. One gelatin packet equals approximately 85 grams of powder. Precision matters more with gelatin than with most recipes.
Equipment and Step-by-Step Mastery
What You’ll Need:
- Large mixing bowl (heat-safe glass or ceramic)
- Wooden spoon or silicone spatula
- Measuring cups (liquid and dry)
- Brain mold (food-grade silicone)
- Cooking spray
- Stabilizing bowl for mold
- Serving plate
Pro Alternative: No brain mold? Use a bundt pan for a “cauliflower brain” effect. The ridges create similar texture, though less anatomically accurate.
The Foolproof Process
Step 1: Prepare Your Mold
Well… this step separates success from sticky disaster. Wash your new brain mold thoroughly with dish soap and hot water. Silicone can carry manufacturing residue that prevents gelatin from releasing.
Dry it completely—water droplets create weak spots in the gel structure. Then spray every crevice with cooking spray. Use the kind with flour (baking spray) for maximum release power.
Nestle your brain mold into a bowl that’s slightly smaller than the mold’s diameter. This prevents tipping during the pour and refrigeration. I once lost an entire batch because my mold tipped at 2 AM, creating a pink avalanche in my fridge.
Step 2: Dissolve the Gelatin
In your mixing bowl, pour both gelatin packets. Add the boiling water all at once. Stir continuously for 90 seconds.
Here’s the critical part: You must see zero granules remaining. Hold the bowl up to light and check. Those tiny undissolved bits create lumps in your finished brain.
Thomas Keller taught us that technique trumps ingredients—this stirring step proves it. Rush this, and you’ll have grainy texture that screams “amateur.”
Step 3: Add Cold Water
Measure ⅔ cup cold water and pour it into your bowl. Stir gently for 30 seconds. This cools the mixture slightly, preventing the evaporated milk from curdling in the next step.
Temperature matters enormously here. If your mixture is too hot when milk hits it, you’ll get cottage cheese texture instead of smooth gelatin.
Step 4: Incorporate the Evaporated Milk
Oops! I almost forgot the most important warning: Shake your evaporated milk can before opening. The contents separate during storage.
Pour the entire 12-ounce can into your gelatin mixture. Stir thoroughly but gently—aggressive stirring creates bubbles that mar your brain’s surface.
The mixture should look like melted peach ice cream now. Smooth, opaque, and perfectly uniform in color.
Step 5: Fill Your Mold
Carefully pour the mixture into your prepared brain mold. Fill to about ⅛ inch below the rim—gelatin expands slightly as it sets.
If you see bubbles on the surface, pop them with a toothpick now. They’ll show up as divots in your finished product otherwise.
Transfer your stabilized mold to the refrigerator. Middle shelf works best—not too cold, not too warm. Refrigerator doors experience temperature fluctuations every time you open them, which can prevent proper setting.
Step 6: The Waiting Game
Set your timer for 2 hours minimum. However, larger molds may need 3-4 hours for complete firming. The gelatin should feel firm to gentle touch and not jiggle excessively.
Overnight chilling produces the best results. The gelatin reaches ideal texture and temperature for clean unmolding.
Step 7: The Unmolding Drama
Man, oh man… this is where nerves kick in. Gently pull the edges of the mold away from the gelatin all around the perimeter. This breaks the seal and introduces air.
Place your serving plate upside down on top of the mold. In one confident motion, flip both together. The brain should release with a satisfying plop.
If it doesn’t release immediately, don’t panic. Shake the mold gently side to side. Still stuck? Dip the mold bottom in warm water for 5 seconds—no longer—and try again.
Common Mistakes I Made So You Don’t Have To
My biggest error? Using regular evaporated milk because the store was out of fat-free. The brain never fully set. It remained jiggly like pudding instead of firm gelatin. The fat molecules literally block the protein chains from linking together.
Second mistake: Skipping the cooking spray because “silicone releases naturally.” Nope. Even silicone needs help with gelatin’s sticky nature.
Third blunder: Rushing the cooling time. A partially set brain breaks during unmolding, leaving you with brain fragments instead of a whole organ. Patience rewards you here.
Expert Tips and Creative Variations
Tip 1: Temperature Control is Everything
Use a kitchen thermometer if you’re nervous. Your boiling water should register 200-212°F. Your cold water should be 40-50°F straight from the tap.
Tip 2: Altitude Adjustments
Live above 3,000 feet? Add one extra gelatin packet (3 oz) to compensate for lower boiling points. High altitude reduces gelatin’s setting power.
Tip 3: Make-Ahead Magic
Prepare your Zombie Brain Jello up to 3 days before serving. Keep it in the mold, covered with plastic wrap, in the refrigerator. Unmold the day of your event for maximum freshness.
Regional and Seasonal Variations
Southern Gothic Brain: Add 1 teaspoon of vanilla extract and replace cold water with sweet tea. The tannins create an aged appearance perfect for a haunted plantation theme.
Thanksgiving Leftover Special: Use cranberry gelatin instead of peach for a festive fall color. Serve alongside your melt-in-your-mouth chicken breast for a shocking dessert contrast.
Kid-Friendly Rainbow Brain: Layer different gelatin colors, letting each set 20 minutes before adding the next. Creates a Dr. Seuss-worthy brain that’s less scary for sensitive little ones.
Vegan Version: Use agar agar powder (4 teaspoons) instead of gelatin. Follow the same process but boil the agar in water for 5 minutes before adding other ingredients. Sets faster—only 45 minutes.
Boozy Adult Brain: Replace cold water with vodka or rum for a grown-up Halloween cocktail party centerpiece. Increases setting time by 1 hour due to alcohol’s effect on gelatin.
Storage Wisdom
| Storage Method | Duration | Quality Notes |
|---|---|---|
| Refrigerated (unmolded) | 3 days | Cover with plastic wrap |
| Refrigerated (in mold) | 5 days | Best option for texture |
| Frozen | Not recommended | Crystals form; texture suffers |
| Room temperature | 2 hours max | Beyond this, bacterial growth risk |
Make-Ahead Strategy: Prepare your brain on Wednesday for Saturday parties. The gelatin actually improves in texture after 24 hours—the proteins fully hydrate and strengthen.
Perfect Pairings
Serve your Creepy Halloween Jello Brain on a white platter surrounded by “blood” made from raspberry coulis. Add gummy worms crawling out of the brain’s folds for extra horror factor.
Pair with my bacon cheddar gnocchi soup for a savory-sweet Halloween dinner contrast. The warm, cheesy comfort balances the cold, creepy dessert perfectly.
For drinks, serve “witch’s brew” punch or simply black cherry soda in beakers labeled with hazard symbols. The theatrical presentation completes your mad scientist aesthetic.
Consider plating individual brain “slices” with chocolate sauce “blood” drizzles for a more refined presentation. This works beautifully for adult Halloween cocktail parties where full brain display might be too campy.
Looking for more crowd-pleasing recipes? Try my grilled cheese burrito copycat for the savory course before unveiling this sweet shocker.
Zombie Brain Jello FAQs
Why won’t my Zombie Brain Jello set properly?
Fat content in your evaporated milk prevents setting—you must use fat-free specifically. Additionally, old gelatin powder loses potency after 6 months past the “best by” date. Fresh ingredients equal reliable results every time.
Can I make Halloween Jello Brain Recipe without a brain mold?
Absolutely—use any silicone mold you have, from bundt pans to skull molds. The technique remains identical, and creative mold shapes add personality to your Spooky Kids Snacks presentation.
How do I fix a brain that breaks during unmolding?
Piece it back together on your serving plate like a jigsaw puzzle. Brush the cracks with warm water to “weld” them together. Refrigerate 10 minutes. The gelatin re-bonds invisibly, and strategic garnish placement hides any remaining seams.
What makes this Creepy Halloween Jello Brain look realistic?
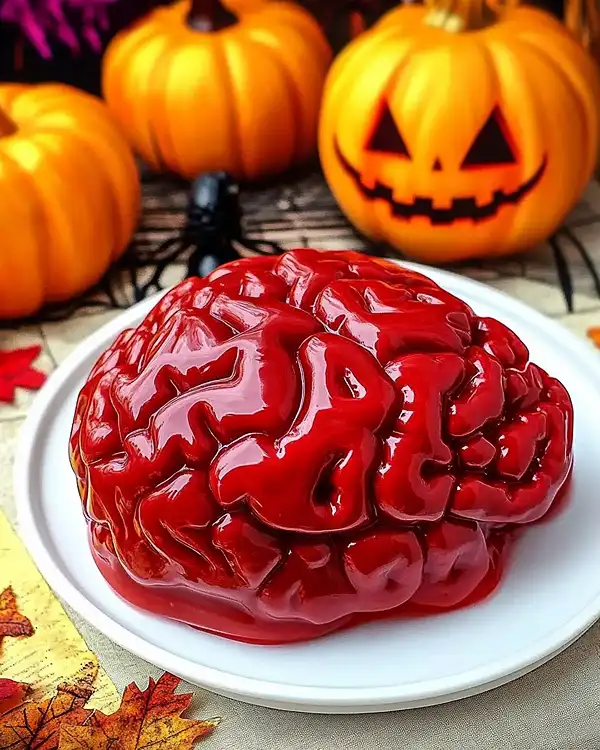
The combination of peach gelatin color plus opaque evaporated milk mimics actual brain tissue appearance. Clear gelatin looks like candy; opaque gelatin looks anatomical. The fat-free milk provides opacity without preventing gel formation.
The Sweet Ending to Your Halloween Story
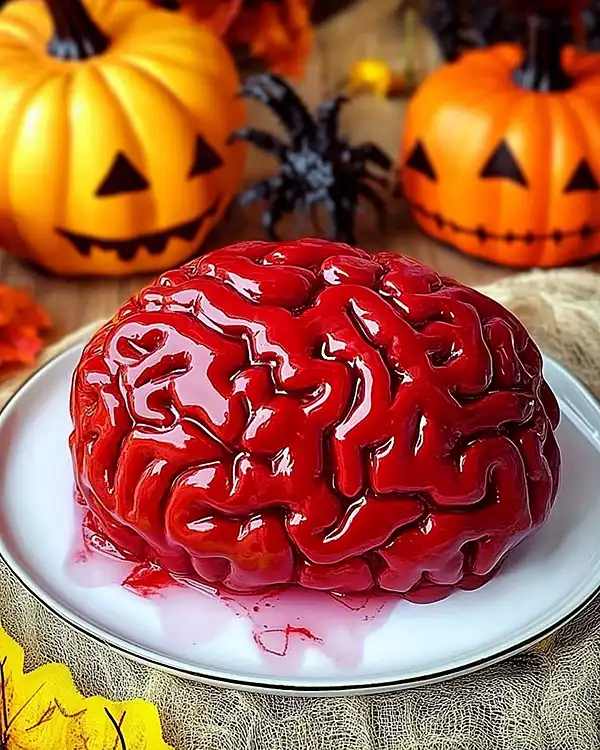
Remember my daughter’s tears over that first failed brain? Last Halloween, she carried my perfected Zombie Brain Jello to her school party like it was the Stanley Cup. Her teacher called it “disturbingly realistic” and requested the recipe immediately.
That’s the power of mastering one showstopping recipe. You become the parent, friend, or host everyone remembers.
This Halloween Jello Brain Recipe transforms you from basic baker to special effects genius with just five ingredients and two hours. No culinary school required. No expensive equipment needed. Just simple technique and confidence.
Pair your zombie brain with roasted pumpkin seeds for a complete Halloween snack spread. The crunchy-smooth texture contrast keeps guests coming back for more of both.
Try serving it alongside easy homemade butter chicken for an unexpected cultural mashup that plays with expectations. Sometimes the best parties happen when you throw the rulebook out the window.
Your Halloween party deserves more than store-bought cookies and candy corn. It deserves a centerpiece that makes people gasp, laugh, and immediately pull out their phones for photos. This Zombie Brain Jello delivers that moment every single time.
Make it once, and you’ll add it to your annual Halloween rotation forever. The ratio of effort to impact is unbeatable. Plus, watching kids’ faces when you slice into that brain? Priceless.
So grab your gelatin, spray your mold, and join me in creating Halloween magic. Tag @TastyAtHome when you share your creation—I love seeing your creative presentations and hearing about your party triumphs.
Because here at Tasty at Home, we believe every holiday deserves its signature dish. And for Halloween, this wobbly, creepy, absolutely perfect Zombie Brain Jello might just become yours.
Now go forth and create some delicious horror.
Zombie Brain Jello
Equipment
- Large mixing bowl
- Wooden spoon or silicone spatula
- measuring cups
- Brain mold
- cooking spray
- Stabilizing bowl
- Serving plate
Ingredients
Main Ingredients
- 2 packages (6 oz each) Peach Gelatin Creates structure and color
- 1 ¾ cups Boiling Water Dissolves gelatin completely
- ⅔ cup Cold Water Adjusts consistency
- 1 can (12 oz) Fat-Free Evaporated Milk Adds opacity and texture
- 1 unit Brain Mold Shapes the final product
Instructions
- Wash and dry your brain mold thoroughly. Spray all crevices with cooking spray and place it in a stabilizing bowl.
- Dissolve the peach gelatin in boiling water. Stir continuously for 90 seconds until completely dissolved.
- Add cold water to the mixture and stir gently for 30 seconds.
- Shake the evaporated milk can and pour the contents into the gelatin mixture. Stir gently until smooth and uniform.
- Carefully pour the mixture into the prepared brain mold, filling slightly below the rim. Pop any bubbles with a toothpick.
- Refrigerate for at least 2 hours, or 3-4 hours for larger molds, until firm to the touch.
- Gently pull the edges of the mold away from the gelatin. Place a serving plate on top and flip to unmold the brain. Adjust with warm water if necessary.

