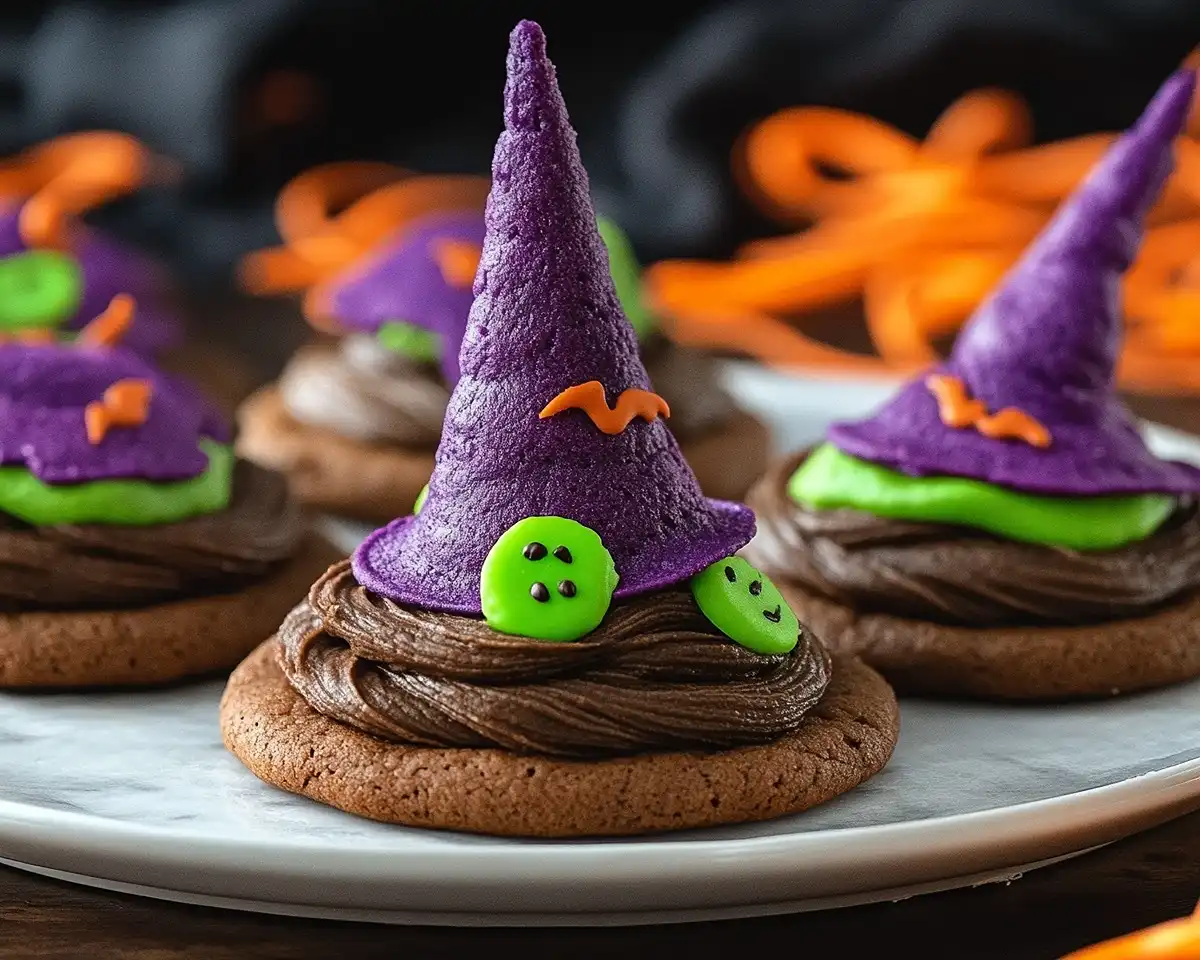
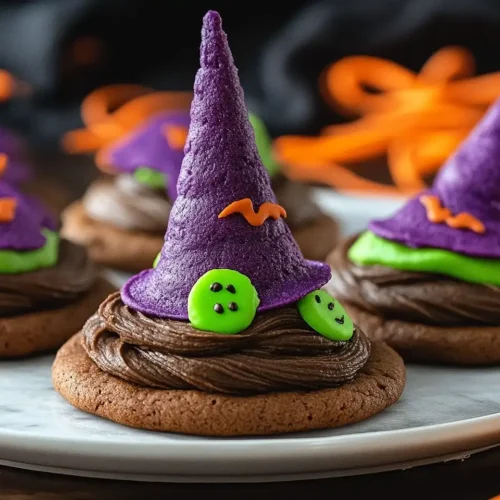
Witch Hat Cookies transform chocolate cookies into spooky magic with colorful frosting and Hershey’s Kisses. Perfect Halloween ideas snacks ready in 30 minutes!
Hi, I’m Linda, and welcome to Tasty at Home—where bold flavors meet everyday kitchens. Last October, my niece asked me to make “the coolest Halloween snacks ever” for her classroom party.
Well… I panicked at first. Then I remembered these chocolate cookies topped with chocolate Kisses that looked like tiny witch hats. One batch later, I became the hero of second grade. I’ve made these a dozen times since, tweaking the frosting colors and testing different sprinkle combinations until they were absolutely perfect.
Whether you’re planning a spooky party or just want festive treats, these witch hat cookies will cast a delicious spell on everyone who tries them. Let’s dive in and make some edible magic happen.
Table of Contents
Why These Witch Hat Cookies Work Every Time
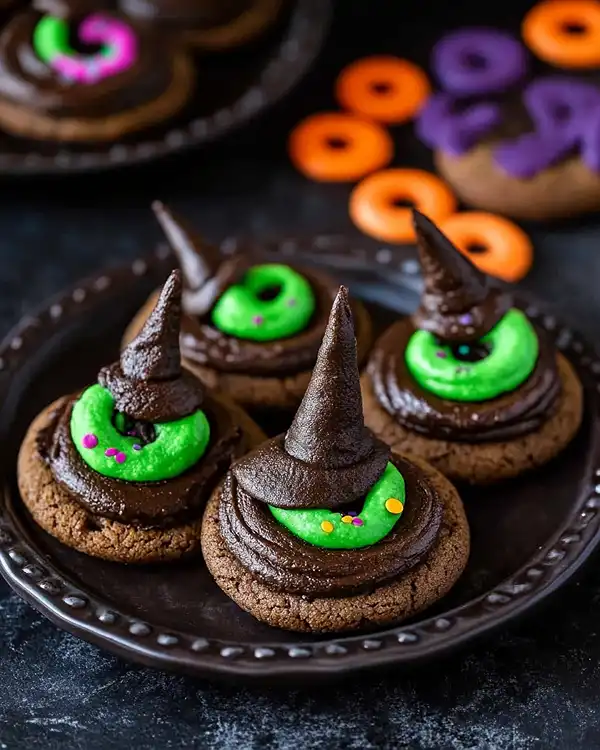
These cookies succeed because they combine three winning elements: rich chocolate cookies, creamy buttercream frosting, and that iconic Hershey’s Kiss cone shape. The cookie base stays soft for days thanks to the perfect butter-to-sugar ratio. Meanwhile, the frosting acts as edible glue while adding a pop of Halloween color.
I tested this recipe eight times last year alone. The secret? Rolling the dough balls in granulated sugar creates a slight crackle on top, giving you that professional bakery look. Plus, the cocoa powder deepens the chocolate flavor without making the cookies taste bitter.
These Halloween ideas snacks come together in roughly 30 minutes from start to finish. You know what’s better? Kids can help with almost every step, from rolling dough balls to pressing on those chocolate Kisses.
Ingredients: What You’ll Need
The Cookie Base
| Ingredient | US Measurement | Metric | Notes |
|---|---|---|---|
| All-purpose flour | 1½ cups | 180g | Spoon and level for accuracy |
| Natural unsweetened cocoa powder | ¼ cup | 21g | Dutch-process works too |
| Baking soda | ½ tsp | 2.5g | Fresh for best rise |
| Salt | ½ tsp | 3g | Balances sweetness |
| Unsalted butter | ½ cup (1 stick) | 113g | Room temperature |
| Granulated sugar | ½ cup | 99g | For creaming |
| Brown sugar | ½ cup | 107g | Adds chewiness |
| Large egg | 1 | 50g | Room temperature |
| Vanilla extract | 1 tsp | 5ml | Pure, not imitation |
| Granulated sugar for rolling | ⅓ cup | 66g | Creates sparkle |
The Frosting & Toppings
| Ingredient | US Measurement | Metric | Purpose |
|---|---|---|---|
| Unsalted butter | ½ cup (1 stick) | 113g | Room temperature |
| Powdered sugar | 1 cup | 113g | Sifted preferred |
| Vanilla extract | 1 tsp | 5ml | Enhances flavor |
| Gel food coloring | Various | — | Your choice of spooky colors |
| Hershey’s Kisses | 24-30 | — | The “hat” |
| Halloween sprinkles | ¼ cup | 40g | Optional decoration |
Shopping Smart at US Grocery Stores
Head to the baking aisle for Hershey’s Kisses first—they sell out fast in October. Grab gel food coloring instead of liquid drops because it won’t thin your frosting. Most stores stock Halloween sprinkles near the seasonal displays starting in late September. Otherwise, check Walmart, Target, or craft stores like Michaels.
For cocoa powder, natural unsweetened works perfectly. Brands like Hershey’s or Ghirardelli are reliable choices. If you can only find Dutch-process, that’s fine—your cookies will just be slightly darker.
Bold Add-ins & Substitutions
Want to shake things up? Try these creative twists:
- Orange extract instead of vanilla for a citrusy Halloween vibe
- Mini peanut butter cups instead of Kisses for extra richness
- Cinnamon (¼ teaspoon) in the dough for warmth
- Gluten-free flour blend (cup-for-cup) for dietary needs
- Vegan butter and flax eggs for plant-based versions
International readers can substitute caster sugar for granulated and use European butter (slightly higher fat content means richer flavor).
Equipment You’ll Need
You don’t need fancy gear for these spooky kids snacks. Here’s what works:
- Two mixing bowls – One for dry, one for wet ingredients
- Electric mixer – Stand or handheld both work (I use my trusty KitchenAid)
- Silicone baking mat or parchment paper – Prevents sticking better than greased pans
- Small cookie scoop – Makes uniform 1-tablespoon portions (Julia Child always said consistency matters)
- Cooling rack – Essential for proper cooling
- Piping bags or sandwich bags – For frosting application
Don’t have a cookie scoop? Use a regular tablespoon and eyeball it. Thomas Keller might cringe, but honestly, slight size variations add homemade charm.
Step-by-Step Instructions
Prepare Your Dry Mix
Preheat your oven to 350°F. While it heats, grab a medium mixing bowl and whisk together the flour, cocoa powder, baking soda, and salt. Oops! I once forgot the salt and my cookies tasted flat. Don’t skip it—salt amplifies chocolate flavor dramatically.
Set this bowl aside. You’ll add it later.
Cream the Butter and Sugars
In a separate large bowl, combine softened butter, granulated sugar, and brown sugar. Beat with your mixer on low speed for about two minutes. The mixture should look pale and fluffy, almost like wet sand at the beach.
This creaming process incorporates air, which helps your cookies spread properly. If your butter is too cold, the mixture won’t blend smoothly. Room temperature means you can press a finger into the butter and leave an indent.
Add Wet Ingredients
Crack in your egg and pour in the vanilla extract. Mix again on low speed until everything combines, roughly 30 seconds. The mixture might look slightly curdled—that’s normal.
Now gradually add your dry ingredient mixture. Mix on low or stir by hand just until you see no more flour streaks. Overmixing creates tough cookies because it develops gluten. Stop as soon as the dough comes together.
Shape and Roll the Dough
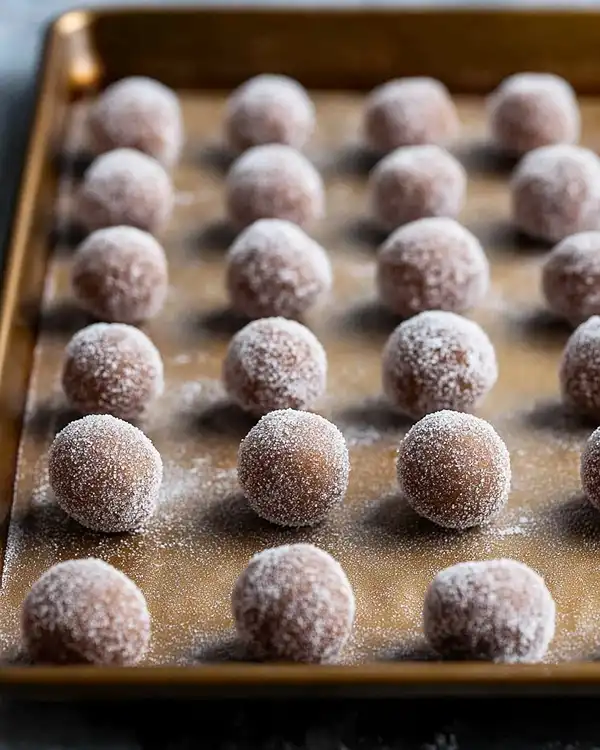
Here’s where the magic happens. Use your small cookie scoop to portion out tablespoon-sized pieces of dough. Roll each piece between your palms to form a smooth ball. Then roll each ball in that ⅓ cup of granulated sugar you set aside.
The sugar coating does two things: it adds sweetness and creates a beautiful crackled texture as the cookies bake. Place your sugar-coated balls on a silicone-lined baking sheet, spacing them 2-3 inches apart. They’ll spread, so give them room.
Bake to Perfection
Slide your baking sheet into the preheated oven. Set a timer for 8 minutes. At the 8-minute mark, check your cookies. They should look set around the edges but slightly soft in the center. Bake for up to 11 minutes total if needed, but watch carefully—overbaked cookies turn hard.
Let me tell you something crucial: cookies continue baking on the hot pan after you remove them from the oven. Therefore, pull them out when they look barely done. Allow them to rest on the baking sheet for 10 minutes before transferring to a cooling rack.
Bake one sheet at a time for even results. Let cookies cool completely before frosting—warm cookies melt buttercream instantly.
Make the Buttercream Frosting
While your cookies cool, make the frosting. Beat room-temperature butter in a clean bowl until smooth and creamy, about one minute. Add powdered sugar and vanilla extract. Beat on medium speed until the mixture turns fluffy and light, roughly two minutes.
Divide your frosting into separate small bowls—one for each color you want. Add tiny amounts of gel food coloring (start with a toothpick’s worth) and stir until you reach your desired shade. I love bright purple, orange, and green for classic Halloween vibes.
Assemble Your Witch Hats
Transfer each colored frosting to a piping bag or sandwich bag with the corner snipped off. Pipe a generous dollop of frosting onto the center of each cooled cookie. Don’t be shy—use about a tablespoon per cookie.
Immediately press an unwrapped Hershey’s Kiss into the frosting, pointed end up. Press gently until the frosting smooshes out around the base of the Kiss, creating that witch hat brim effect. Add Halloween sprinkles while the frosting is still wet. Repeat until all cookies wear their festive hats.
Let the assembled cookies sit for 15 minutes so the frosting sets slightly. Then they’re ready to serve or store.
Expert Tips for Success
Butter temperature matters immensely. Too cold, and it won’t cream properly. Too warm, and your cookies will spread too much. Test it by pressing—it should indent easily without being greasy.
Don’t skip the cooling time. I learned this the hard way when frosting melted into a puddle on warm cookies. Patience pays off here.
Uniform size equals even baking. That cookie scoop isn’t just convenient—it ensures every cookie bakes at the same rate.
Fresh baking soda makes a difference. If yours has been sitting in the pantry for over six months, grab a new box. Old baking soda loses its leavening power.
Freeze the dough for later. Roll the balls, skip the sugar coating, and freeze them on a baking sheet. Once solid, transfer to a freezer bag. Bake from frozen, adding two extra minutes to the time.
Creative Variations to Try
Regional Halloween Twists
Southern Pecan Witch Hats: Press a candied pecan into the frosting alongside the Kiss for extra crunch and a nod to Southern pralines.
New England Maple: Replace half the granulated sugar with maple sugar for an autumn twist perfect for harvest gatherings.
Southwest Spice: Add ¼ teaspoon cayenne pepper to the dough for a subtle heat that surprises grown-ups at Halloween parties.
Dietary Modifications
Gluten-Free: Swap all-purpose flour for a 1:1 gluten-free baking blend like Bob’s Red Mill. The texture stays remarkably similar.
Dairy-Free: Use vegan butter sticks (Earth Balance works great) and dairy-free chocolate Kisses. Make sure your cocoa powder is pure.
Lower Sugar: Reduce granulated sugar in the dough to ⅓ cup. The cookies will be slightly less sweet but still delicious.
Holiday Adaptations
Transform these beyond October. Use red and green frosting with red and green Hershey’s Kisses for Christmas trees. Try pastel colors and mini eggs for Easter bonnets. Pink frosting and heart sprinkles work for Valentine’s Day.
Storage and Make-Ahead Strategy
| Storage Method | Duration | Instructions |
|---|---|---|
| Room temperature | 4-5 days | Store in airtight container, layers separated by parchment |
| Refrigerator | 1 week | Same container method, bring to room temp before serving |
| Freezer (assembled) | 1 month | Freeze in single layer, then stack with parchment between |
| Freezer (dough only) | 3 months | Roll into balls, freeze on sheet, transfer to freezer bag |
These Halloween ideas snacks actually taste better on day two because the flavors meld together. The cookies soften slightly, making them even more enjoyable.
For parties, assemble these the morning of your event. The frosting stays fresh and the cookies maintain their texture. If you’re making them for a classroom party like I did, transport them in a flat container with a secure lid.
Perfect Pairings
Serve these witch hat cookies alongside eyeball deviled eggs for a complete spooky spread. The savory eggs balance the sweet cookies beautifully.
For drinks, offer cold milk or warm apple cider. Adults might enjoy them with coffee or even a pumpkin spice latte. The chocolate flavor pairs wonderfully with anything caramel or cinnamon-based.
Create a full Halloween dessert table by adding zombie brain jello and maybe some caramel apples. Your guests will remember this spread for years.
Looking for a comforting dinner before the trick-or-treating starts? Try our bacon cheddar gnocchi soup or grilled cheese burrito for satisfying, quick meals.
Witch Hat Cookies FAQs
Can I make witch hat cookies without gel food coloring?
Absolutely, liquid food coloring works but may thin your frosting slightly. Add extra powdered sugar (2-3 tablespoons) to compensate for the added liquid and maintain a pipeable consistency.
Why did my cookies spread too much?
Your butter was likely too warm or you didn’t chill the dough. Next time, refrigerate the shaped balls for 15 minutes before baking, and ensure your butter is just softened, not melted or greasy to the touch.
How do I prevent the Hershey’s Kisses from sliding off?
Press them into the frosting while it’s still fresh and soft. Use enough frosting (about 1 tablespoon) to create a stable base, and let the assembled cookies sit undisturbed for 15 minutes so the frosting can set properly.
Can I use different chocolate candies instead of Kisses?
Yes, mini peanut butter cups, chocolate truffles, or even Rolos work perfectly. Choose candies with a cone or pyramid shape to maintain the witch hat look, or get creative with other Halloween-themed chocolates.
Bring the Halloween Magic Home
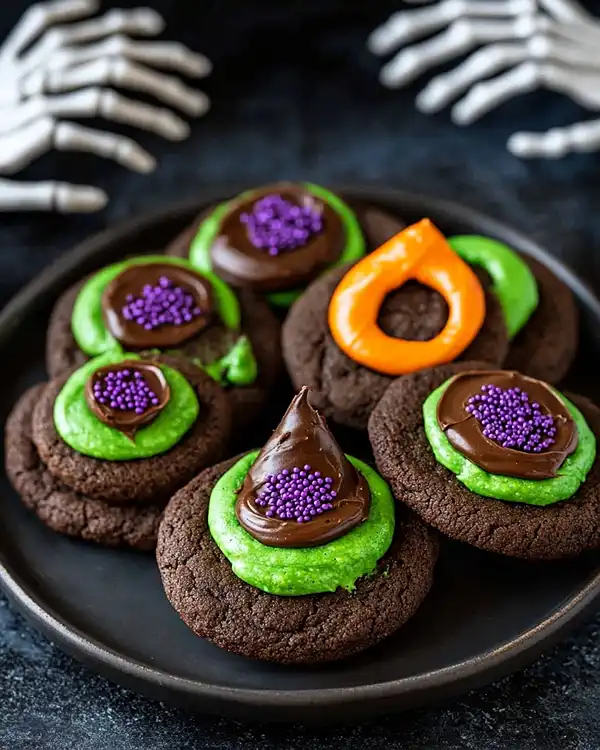
These witch hat cookies transported me back to that October afternoon when I became a classroom hero. Now it’s your turn to create that magic. The beauty of these spooky kids snacks lies in their simplicity—you don’t need professional skills or fancy equipment, just a willingness to have fun in the kitchen.
Mix up a batch this weekend. Let your kids help roll the dough balls or choose frosting colors. Take photos of your creations and share them on social media—tag us so we can see your witch hat masterpieces. Man, oh man, there’s something special about homemade Halloween treats that store-bought versions just can’t match.
Pour yourself some apple cider, put on a Halloween playlist, and get baking. These cookies prove that the most memorable treats come from your own kitchen, made with your own hands.
Tasty at Home – Where bold flavors meet everyday kitchens.
Witch Hat Cookies
Equipment
- mixing bowls
- Electric mixer
- Silicone baking mat or parchment paper
- Small cookie scoop
- Cooling rack
- Piping bags or sandwich bags
Ingredients
The Cookie Base
- 1½ cups All-purpose flour 180g, spoon and level for accuracy
- ¼ cup Natural unsweetened cocoa powder 21g, Dutch-process works too
- ½ tsp Baking soda Fresh for best rise
- ½ tsp Salt 3g, balances sweetness
- ½ cup Unsalted butter 113g, room temperature
- ½ cup Granulated sugar 99g, for creaming
- ½ cup Brown sugar 107g, adds chewiness
- 1 large Egg Room temperature
- 1 tsp Vanilla extract Pure, not imitation
- ⅓ cup Granulated sugar for rolling 66g, creates sparkle
The Frosting & Toppings
- ½ cup Unsalted butter 113g, room temperature
- 1 cup Powdered sugar 113g, sifted preferred
- 1 tsp Vanilla extract Enhances flavor
- Gel food coloring Various spooky colors
- 24-30 Hershey’s Kisses The hat
- ¼ cup Halloween sprinkles 40g, optional decoration
Instructions
- Preheat oven to 350°F (175°C). In a medium mixing bowl, whisk together flour, cocoa powder, baking soda, and salt. Set aside.
- In a separate large bowl, cream together butter, granulated sugar, and brown sugar with an electric mixer on low speed for 2 minutes until light and fluffy.
- Add egg and vanilla extract. Mix until combined. Gradually mix in dry ingredients just until no flour streaks remain.
- Shape dough into tablespoon-sized balls, roll in sugar, and place on a lined baking sheet. Bake for 8–11 minutes until set on edges but soft in the center. Cool completely on a rack.
- While cookies cool, beat butter for frosting until creamy. Add powdered sugar and vanilla. Beat until fluffy. Tint with gel food coloring.
- Pipe frosting onto cooled cookies. Press an unwrapped Hershey’s Kiss in the center, creating the witch hat shape. Add sprinkles. Let set for 15 minutes.

