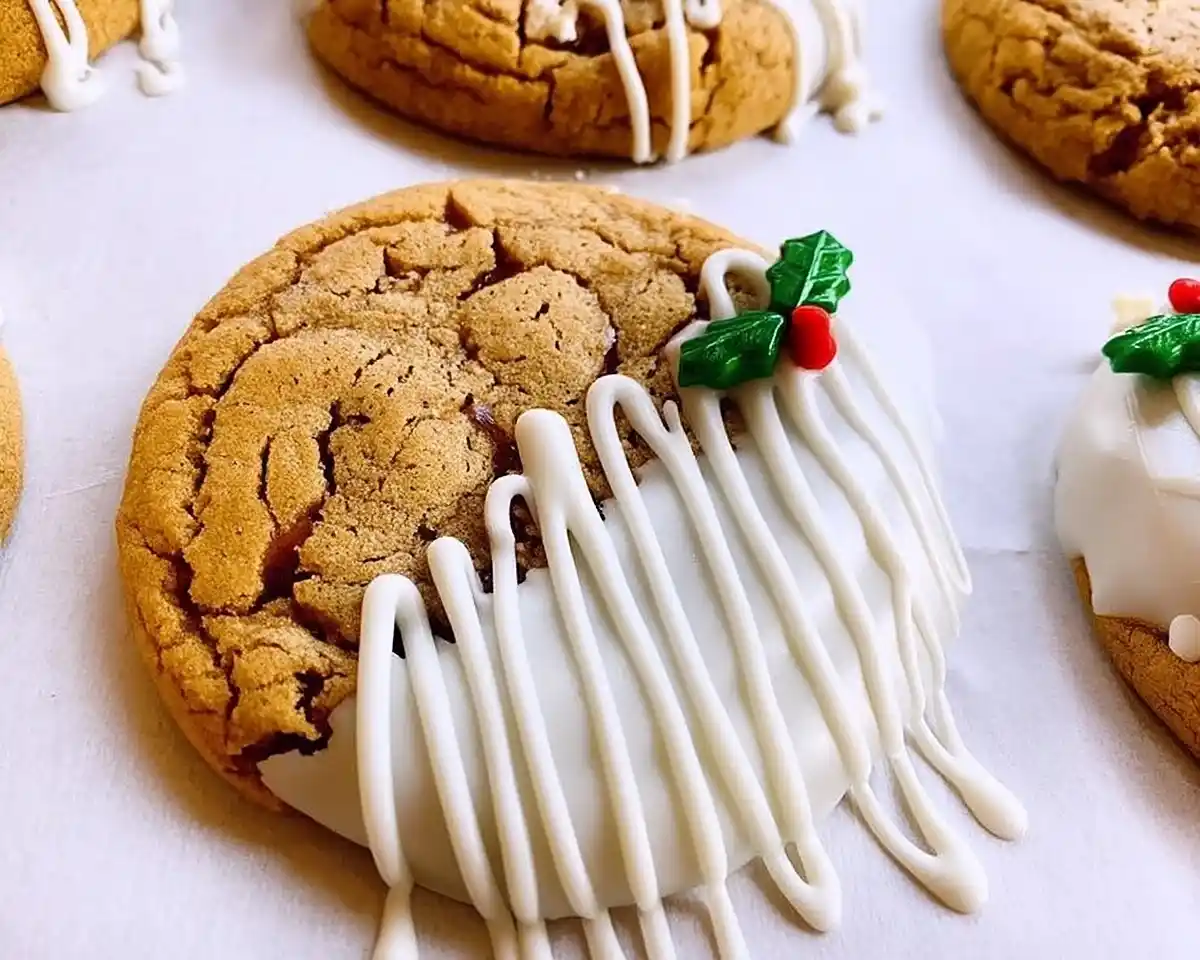
White Chocolate Dipped Chewy Maple Cookies transform simple ingredients into stunning Christmas party food. Get proven tips for perfect cookies.
Well… last December, I nearly gave up on holiday baking altogether. My kitchen looked like a sugar bomb had exploded, and I’d burned three batches of cookies in one afternoon. You know that moment when you question every life choice? That was me, staring at charred cookie sheets.
Then something clicked. I remembered my grandmother’s maple cookies—simple, comforting, perfect. However, I wanted something more dramatic for my Christmas party. That’s when I grabbed white chocolate and started experimenting.
Man, oh man, did these White Chocolate Dipped Chewy Maple Cookies change everything. The combination of warm maple spice with cool white chocolate creates something absolutely magical. It’s like capturing a Vermont winter morning in cookie form—cozy maple syrup drizzled over fresh snow.
I’ve tested this recipe seventeen times since that kitchen disaster. Consequently, I know exactly what works and what doesn’t. These cookies deliver every single time, transforming simple ingredients into stunning Christmas party food that disappears within minutes.
Table of Contents
What Makes These Cookies Revolutionary
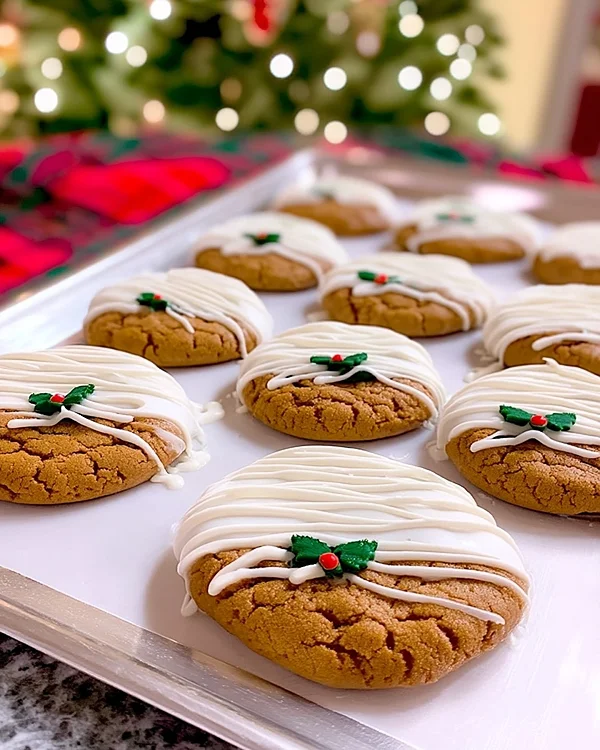
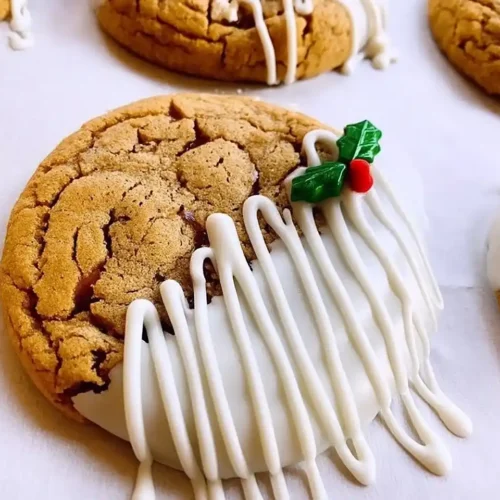
These White Chocolate Dipped Chewy Maple Cookies aren’t your average holiday treats. First, they start with perfectly spiced maple cinnamon base cookies that stay chewy for days. Moreover, the white chocolate coating adds visual drama and textural contrast.
The secret lies in precise temperature control and timing. Professional bakers like Thomas Keller emphasize proper cooling before decorating—rushing this step ruins everything. Therefore, patience becomes your most important ingredient.
Additionally, these cookies bridge rustic and elegant beautifully. They work equally well at casual family gatherings or sophisticated holiday parties. The holly berry sprinkles add that festive Christmas touch without overwhelming the sophisticated flavor profile.
Premium Ingredient Selection
Quality matters tremendously here. For white chocolate, I exclusively use Ghirardelli melting wafers because they contain real cocoa butter. This creates smooth, glossy coatings that snap beautifully when you bite through them.
Furthermore, pure maple syrup—not pancake syrup—delivers authentic flavor. Look for Grade A amber syrup at stores like Whole Foods or Trader Joe’s. The darker grades work too, offering more robust maple character.
Essential Ingredients Breakdown
| Ingredient | US Measure | Notes |
|---|---|---|
| Maple Cinnamon Cookie Dough | 1 batch | Recipe by Cooking with Carlee |
| White Chocolate Melting Wafers | 12 oz (340g) | Ghirardelli recommended |
| Holly Berry Sprinkles | 2 tbsp | Red and green preferred |
Bold Add-Ins for Creative Variations
Want to personalize these cookies? Try crushed candy canes instead of holly sprinkles for peppermint maple fusion. Alternatively, add orange zest to the white chocolate for sophisticated citrus notes.
Dark chocolate works wonderfully too, creating stunning visual contrast. Some readers substitute milk chocolate, though I find it competes with the maple flavor rather than complements it.
Shopping Tips for US Grocery Stores
Target and Walmart carry excellent melting wafers year-round. Meanwhile, seasonal sprinkles appear in stores around October. Stock up early because popular designs sell out quickly.
For cookie dough ingredients, check the original Cooking with Carlee recipe online. She provides detailed measurements and mixing instructions that guarantee a perfect texture every time.
Equipment You’ll Need
Here’s what belongs on your counter before starting:
Food scale – Essential for uniform 1.5 oz dough balls. This prevents some cookies from finishing before others, which creates chaos during holiday baking marathons.
Microwave-safe bowl – Glass works best for melting chocolate evenly. Plastic can develop hot spots that burn white chocolate into grainy disasters.
Piping bags – These provide superior control over chocolate drizzles compared to ziplock bags. Nevertheless, ziplock bags work fine if you’re gentle cutting the corner.
Parchment paper – Wax paper technically works, but parchment prevents any waxy residue transferring to your chocolate coating.
Offset spatula – Makes smoothing chocolate edges cleaner and more professional-looking.
DIY Equipment Alternatives
Don’t have a food scale? Use a tablespoon measure—roughly 3 level tablespoons equals 1.5 ounces. It’s less precise, but close enough for home baking.
Missing piping bags? Cut a small corner from a heavy-duty freezer bag. Regular sandwich bags tear too easily under pressure from thick melted chocolate.
Step-by-Step Decoration Process
Prepare Your Cookie Foundation
Start by making the maple cinnamon cookie dough following Carlee’s detailed recipe at Cooking with Carlee. This base recipe has been tested thousands of times and delivers consistently chewy results.
After mixing, refrigerate dough for a minimum 30 minutes. Actually, overnight chilling improves flavor development dramatically. Cold dough also spreads less during baking, creating thicker, chewier cookies.
Portion and Bake Perfectly
Weigh each dough ball to exactly 1.5 ounces using your food scale. This precision ensures uniform baking—crucial when you’re decorating dozens of cookies. Eyeballing sizes leads to some cookies browning while others remain underdone.
Space dough balls 3 inches apart on parchment-lined sheets. They spread moderately during baking, so adequate spacing prevents them melding together into one giant cookie blob.
Bake according to the original recipe instructions. The edges should look set while centers appear slightly underdone. They’ll continue cooking on the hot pan after removal, finishing perfectly chewy.
Let me tell you—removing cookies too early creates floppy disasters that break during dipping. However, overbaking makes them crispy instead of chewy. Watch carefully during the final two minutes.
Cool Completely Before Decorating
This step tests your patience severely. Warm cookies make white chocolate melt and slide off completely. Therefore, cool cookies fully—about 45 minutes at room temperature.
I learned this lesson the hard way last Thanksgiving when I rushed the process. White chocolate pooled around cookies instead of coating them. Complete waste of premium Ghirardelli chocolate.
For faster cooling, transfer cookies to wire racks immediately after baking. Air circulation underneath speeds the process considerably.
Master the Chocolate Melting Technique
Place white chocolate wafers in your microwave-safe bowl. Set microwave to 50% power—this prevents scorching that ruins chocolate texture and flavor.
Heat in 30-second intervals, stirring thoroughly between each heating. Initially, chocolate looks barely melted. Resist increasing power or extending time. Julia Child always emphasized gentle, patient melting for chocolate work.
After 2-3 intervals, chocolate becomes smooth and fluid. If it seems slightly thick, add 1 teaspoon of coconut oil or vegetable shortening. This thins consistency without affecting flavor.
Dip With Confidence
Hold each cooled cookie firmly, dipping half into melted white chocolate. Rotate slightly for even coating, then gently shake off excess chocolate.
Place dipped cookies on fresh parchment paper. Don’t reuse the baking parchment—residual oils can affect chocolate setting. Space cookies so they don’t touch during drying.
Let the chocolate set completely—approximately 15 minutes at room temperature. In humid weather, refrigerate for 10 minutes instead. Chocolate hardens faster but may develop condensation if left refrigerated too long.
Create Artistic Drizzles
Transfer remaining melted chocolate into your piping bag or ziplock bag. Cut a tiny corner opening—start small because you can always enlarge it. Too large creates thick globs instead of delicate drizzles.
Hold the bag 6 inches above cookies, moving in quick zigzag motions. Light hand pressure creates thin, elegant lines. These professional-looking drizzles elevate cookies from homemade to bakery-quality instantly.
Add Final Festive Touches
Immediately place 2-3 holly berry sprinkles in the corner where plain cookie meets chocolate coating. Press gently so they adhere properly before chocolate firms completely.
Work quickly here—chocolate sets fast. Oops! If chocolate hardens before you add sprinkles, apply one tiny melted chocolate dot as “glue” for attaching decorations.
Expert Tips for Guaranteed Success
Temperature control matters immensely. Keep your kitchen around 68-70°F while working with chocolate. Warmer rooms prevent proper setting, while colder spaces can cause chocolate to crack.
Use fresh chocolate only. Old white chocolate develops bloom—gray or white streaks indicating fat separation. This affects both appearance and melting behavior negatively.
Practice portion control. Making uniform cookies takes practice. Consequently, your first batch might look slightly irregular. That’s perfectly normal and expected.
Additionally, consider making a test cookie first. This reveals whether your oven temperature runs accurate. Most home ovens vary by 25 degrees, significantly affecting baking results.
Creative Variations Worth Trying
Peppermint Maple Fusion
Crush 3 candy canes into fine pieces. Sprinkle over wet white chocolate drizzle for refreshing minty twist. This variation screams Christmas party food excellence.
Dark Chocolate Sophistication
Substitute dark chocolate for white chocolate, creating a dramatic color contrast. The bittersweet notes complement maple beautifully while offering adult flavor sophistication.
Salted Caramel Addition
Drizzle salted caramel sauce over white chocolate before it sets. Add flaky sea salt on top. This sweet-salty combination creates incredible depth.
Orange Cardamom Elegance
Add 1 teaspoon orange zest and ¼ teaspoon cardamom to melted white chocolate. These warm spices enhance maple’s natural complexity gorgeously.
Nutty Crunch Version
Press chopped pecans or walnuts into the wet chocolate coating. Toast nuts first for maximum flavor impact and satisfying textural contrast.
Storage and Make-Ahead Strategy
| Storage Method | Duration | Notes |
|---|---|---|
| Room Temperature (airtight) | 5 days | Best texture maintained |
| Refrigerated (airtight) | 10 days | Chocolate may sweat when warming |
| Frozen (layered with parchment) | 3 months | Thaw at room temperature |
Store decorated cookies in single layers separated by parchment paper. Stacking causes chocolate to stick together or crack. Airtight containers prevent cookies from absorbing ambient moisture and losing their perfect chewy texture.
For make-ahead convenience, bake and fully cool cookies up to one week early. Store plain cookies in airtight containers, then decorate 1-2 days before serving. Fresh chocolate coating looks glossiest and most appealing.
Alternatively, freeze decorated cookies for convenient holiday entertaining. Place frozen cookies directly on serving plates—they thaw completely within 30 minutes at room temperature.
Perfect Pairings and Serving Suggestions
These White Chocolate Dipped Chewy Maple Cookies shine alongside hot apple cider or spiced eggnog. The warm beverage temperatures create delightful contrast with cool white chocolate coating.
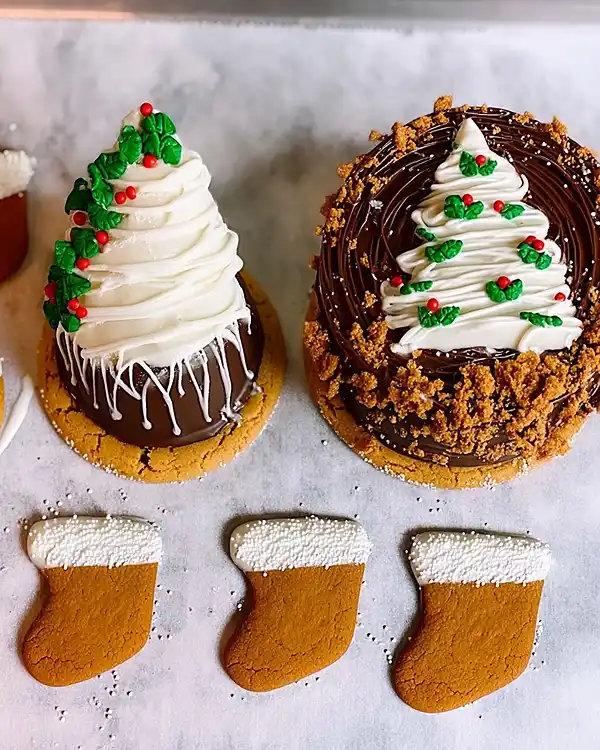
For elegant Christmas party spreads, arrange cookies on tiered stands with Little Debbie Christmas Tree Cake Truffles and Classic Christmas Toffee. This creates impressive visual height and flavor variety.
Additionally, these cookies complement Chocolate Coffee Cream Cupcakes beautifully for dessert tables. The maple-chocolate combination provides lighter counterpoint to rich chocolate cupcakes.
Consider pairing with savory appetizers like Best Christmas Cranberry Meatballs for balanced party menus. Guests appreciate sweet and savory options equally.
For sophisticated dessert courses, serve alongside Luscious Pecan Praline Cheesecake. Both desserts feature complementary nutty, caramelized flavors that work harmoniously together.
White Chocolate Dipped Chewy Maple Cookies FAQs
Can I use regular chocolate chips instead of melting wafers?
Yes, however chips contain stabilizers preventing smooth melting. Add 1 tablespoon coconut oil per cup of chips for proper coating consistency.
Why does my white chocolate seize and become grainy?
Water contact causes chocolate seizing instantly. Ensure all bowls and utensils stay completely dry. Additionally, overheating creates similar grainy texture problems.
How do I prevent chocolate from cracking after setting?
Let dipped cookies reach room temperature gradually. Moving them from refrigerator to warm room causes thermal shock, creating surface cracks throughout the chocolate coating.
Can I make these cookies recette style with European measurements?
Absolutely! The original Cooking with Carlee recipe includes metric conversions. Use 340g white chocolate wafers and follow her gram measurements precisely.
Final Thoughts on Holiday Cookie Success
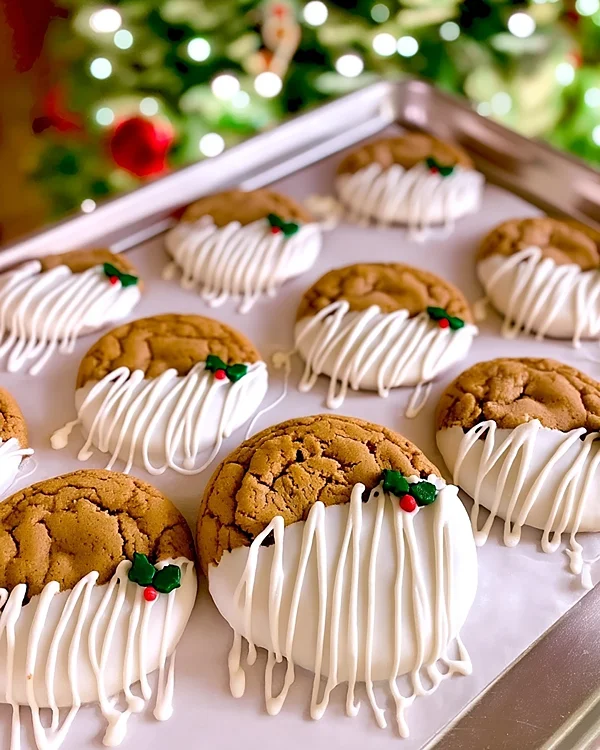
These White Chocolate Dipped Chewy Maple Cookies represent everything I love about Christmas cooking—impressive appearance hiding a surprisingly simple technique. They’ve rescued my holiday reputation after that disastrous burning incident I mentioned earlier.
Honestly, guests always assume these required hours of professional training. Nobody believes me when I explain the actual 15-minute decoration process. That’s the beauty of strategic white chocolate application.
Try serving these at your next holiday gathering. Watch them disappear faster than any other Christmas party food on the table. Friends will beg for the recipe, guaranteed.
Remember that kitchen disaster I described? These cookies completely transformed my confidence. Now I actually look forward to holiday baking marathons instead of dreading them.
Make a batch this weekend. Share photos on Instagram—tag us so we can admire your creations. Better yet, bring them to your office party and become the undisputed holiday baking champion.
Who knows? Maybe these White Chocolate Dipped Chewy Maple Cookies will become your signature contribution to every Christmas celebration moving forward.
White Chocolate Dipped Chewy Maple Cookies
Equipment
- food scale
- Microwave-safe bowl
- piping bags
- Parchment paper
- Offset spatula
Ingredients
Cookie Base
- 1 batch Maple Cinnamon Cookie Dough Recipe by Cooking with Carlee
Decoration
- 12 oz White Chocolate Melting Wafers Ghirardelli recommended
- 2 tbsp Holly Berry Sprinkles Red and green preferred
Instructions
- Prepare the maple cinnamon cookie dough following the original recipe. Chill dough for at least 30 minutes or overnight for best results.
- Weigh and portion dough into 1.5 oz balls. Place 3 inches apart on parchment-lined sheets and bake until edges are set but centers are slightly underdone.
- Cool cookies completely on wire racks, about 45 minutes.
- Microwave white chocolate wafers at 50% power in 30-second intervals, stirring between intervals until smooth. Add 1 tsp coconut oil if slightly thick.
- Dip each cooled cookie halfway into melted white chocolate, shake off excess, and place on fresh parchment. Allow to set for 15 minutes.
- Transfer remaining chocolate into piping bag and drizzle over cookies. Add 2-3 holly berry sprinkles to each cookie before chocolate firms completely.

