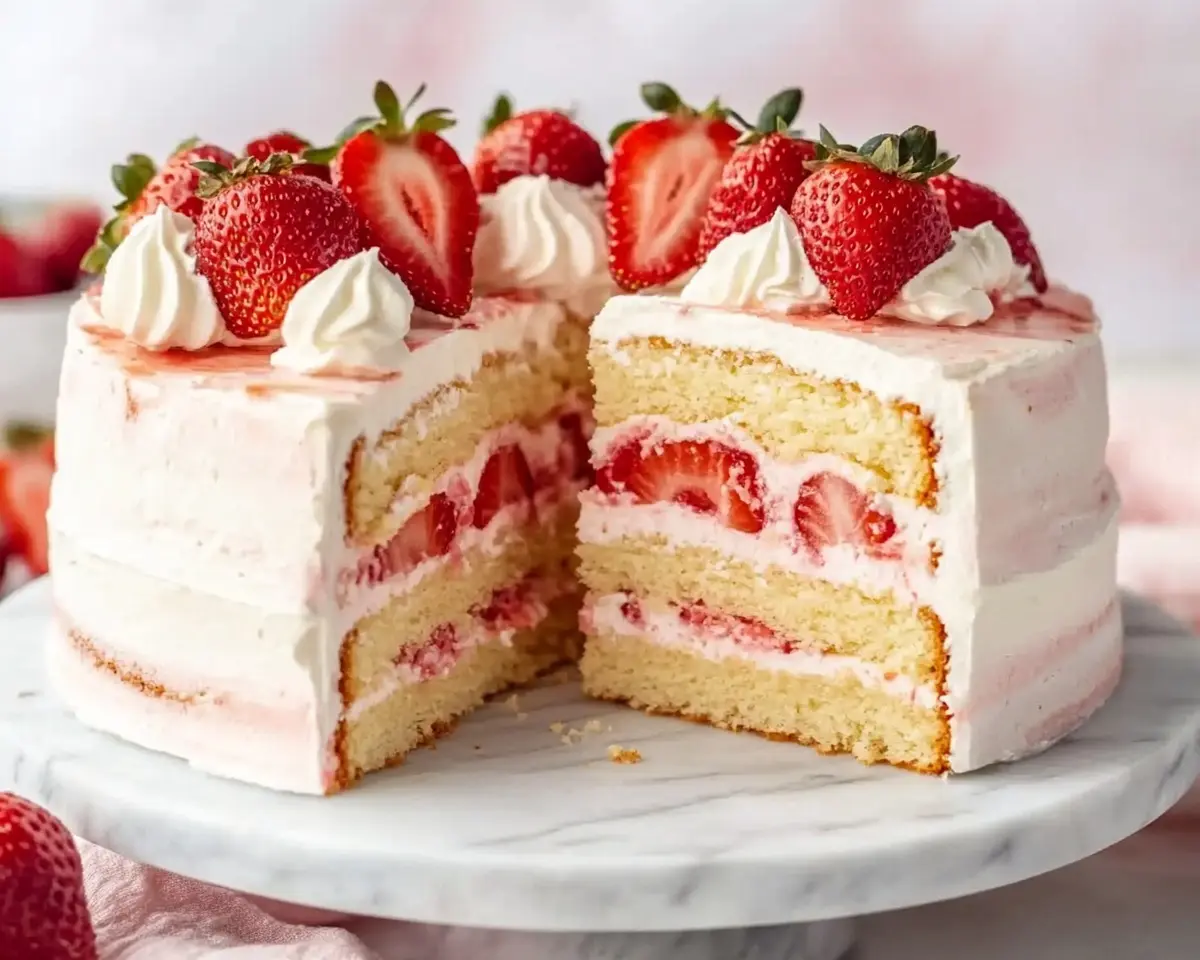
Ultimate Strawberry Shortcake Layer Cake with fluffy sponge, fresh berries & whipped cream. Easy 3-layer recipe perfect for celebrations.
Hi, I’m Linda, and welcome to Tasty at Home—where bold flavors meet everyday kitchens. Last spring, I watched my grandmother’s face light up when I surprised her with this towering Strawberry Shortcake Layer Cake for her 85th birthday. However, my first attempt was a disaster—soggy layers and deflated cream that looked more like soup than frosting.
After countless kitchen experiments and six failed attempts, I finally cracked the code. Therefore, this recipe combines the nostalgic charm of classic strawberry shortcake with the elegance of a proper layer cake. Moreover, every bite delivers that perfect balance of fluffy sponge, juicy strawberries, and billowy whipped cream.
Whether you’re celebrating a special occasion or simply craving something extraordinary, this Strawberry Shortcake Layer Cake will become your new showstopper. Furthermore, I’ve included all my hard-learned secrets so you can nail it on the first try.
Tasty at Home – Where bold flavors meet everyday kitchens.
Table of Contents
What Makes This Strawberry Shortcake Cake Special
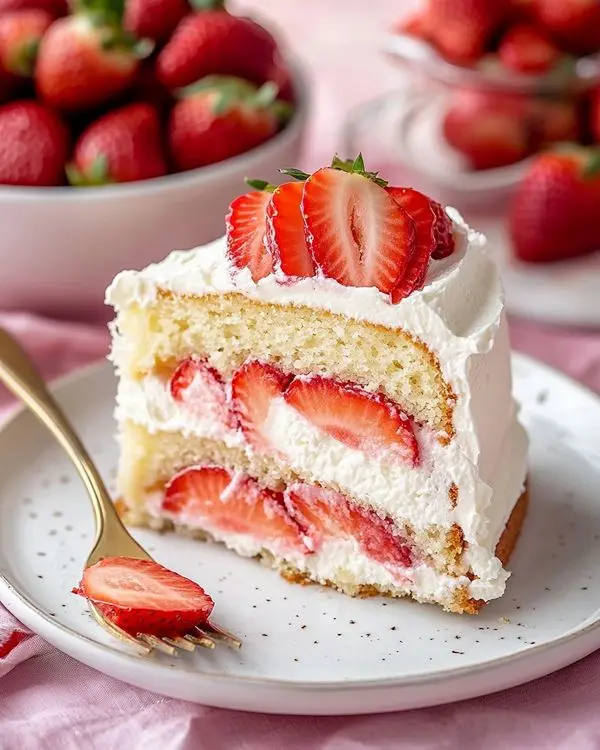
This isn’t just any strawberry cake recipe. Instead, it’s a sophisticated take on America’s beloved dessert that transforms humble ingredients into something spectacular. Additionally, the secret lies in three key components working in perfect harmony.
First, the sponge cake uses a unique technique that creates an incredibly light, airy texture. Meanwhile, the strawberry simple syrup infuses each layer with intense berry flavor. Finally, the stabilized whipped cream frosting holds its shape beautifully without becoming heavy.
Why This Strawberry Shortcake Layer Cake Recipe Works:
- Foolproof sponge cake technique prevents dense, heavy layers
- Strawberry simple syrup adds moisture and concentrated flavor
- Stabilized whipped cream stays fluffy for days
- Fresh strawberries in every bite create textural contrast
Essential Ingredients for Success
| Sponge Cake Components | US Measurement | Metric |
|---|---|---|
| All-purpose flour | 1⅔ cups | 210g |
| Baking powder | 1 teaspoon | 4g |
| Kosher salt | ¼ teaspoon | 1g |
| Large eggs (separated) | 4 | 4 |
| Granulated sugar | 1 cup | 200g |
| Vegetable oil | ¼ cup | 60ml |
| Vanilla paste | 1 teaspoon | 5ml |
| Strawberry Components | US Measurement | Metric |
|---|---|---|
| Fresh strawberries (filling) | 1 lb | 450g |
| Strawberries (syrup) | ½ cup sliced | 75g |
| Granulated sugar (syrup) | ¾ cup | 150g |
| Water | ¾ cup | 180ml |
| Whipped Cream Frosting | US Measurement | Metric |
|---|---|---|
| Cream cheese (room temp) | 4 oz | 115g |
| Powdered sugar | ¾ cup | 90g |
| Heavy whipping cream | 4 cups | 960ml |
| Vanilla paste | 1 teaspoon | 5ml |
Shopping Tips for Perfect Results
When selecting strawberries, look for bright red berries with green, leafy tops. Additionally, they should feel firm and smell fragrant at the stem end. Avoid berries with white or green patches, as they won’t ripen further.
For the best flavor, buy strawberries at peak season (late spring through early summer). However, if fresh berries aren’t available, frozen strawberries work well for the syrup component.
Ingredient Substitutions:
- Vanilla paste → vanilla extract (same amount)
- Cream cheese → mascarpone cheese for richer flavor
- Heavy cream → whipping cream (35% fat minimum)
- Fresh strawberries → frozen (thaw and drain first)
Essential Equipment and Preparation
Required Equipment
You’ll need these tools for success, though I’ll share budget-friendly alternatives too:
Essential Tools:
- 9-inch cake pan or springform pan
- Stand mixer with whisk attachment (or hand mixer)
- Large mixing bowls (3 minimum)
- Fine mesh sieve for sifting
- Rubber spatula for folding
- Serrated knife for slicing layers
- Pastry brush for syrup application
Pro Tip: Don’t have a stand mixer? A hand mixer works perfectly fine, though you’ll need to whip the cream in smaller batches. Similarly, if you lack a pastry brush, a large spoon works for applying syrup.
Step-by-Step Instructions
Creating the Perfect Sponge Cake
Step 1: Prepare Your Pan Preheat your oven to 350°F and line your 9-inch pan with parchment paper. Additionally, lightly grease the sides to prevent sticking. This preparation step is crucial for easy cake removal later.
Step 2: Mix Dry Ingredients Whisk together flour, baking powder, and salt in a medium bowl. Then, set this mixture aside while you work on the wet components. Proper sifting creates a lighter final texture.
Step 3: Create the Meringue Separate your eggs while they’re cold, but let them come to room temperature before beating. Moreover, add egg whites and lemon juice to your mixer bowl. Beat on medium speed until foamy, then gradually add half the sugar. Continue beating until stiff, glossy peaks form—this takes about 5-7 minutes.
Common Mistake Alert: I once rushed this step and ended up with flat, lifeless cake layers. Therefore, be patient and let the meringue reach proper stiffness.
Step 4: Work the Egg Yolks Transfer the meringue to a separate bowl, then add egg yolks and remaining sugar to your mixer. Beat until pale, fluffy, and doubled in volume. Furthermore, the mixture should form ribbons when lifted.
Step 5: Combine Wet Ingredients With the mixer running, slowly drizzle in oil, then water and vanilla. However, don’t overmix—just until combined. The batter should look smooth and glossy.
Step 6: Fold Everything Together This step requires gentle technique. First, sift one-third of the flour mixture over the yolk mixture and fold gently. Next, add one-third of the meringue and fold until no streaks remain. Repeat this process twice more, being careful not to deflate the batter.
Step 7: Bake to Perfection Pour batter into your prepared pan and bake for 25-30 minutes. The cake is done when it springs back from gentle pressure and a toothpick comes out clean. Cool for 5 minutes, then turn out onto a wire rack.
Crafting the Strawberry Simple Syrup
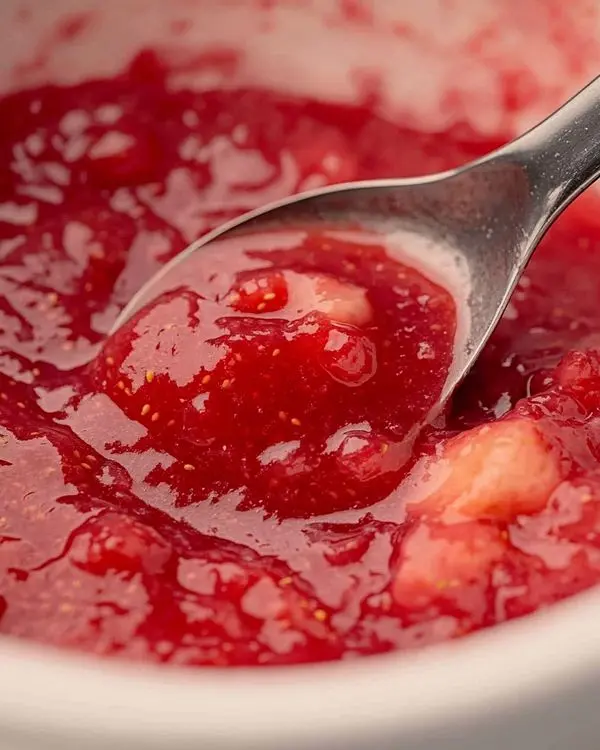
While your cake cools, combine water, sugar, and sliced strawberries in a saucepan. Heat over medium heat, stirring until sugar dissolves completely. Moreover, let this mixture cool to room temperature—it will continue developing flavor as it sits.
This syrup serves multiple purposes: it adds moisture, intensifies strawberry flavor, and helps bind the layers together. Furthermore, you can make this component up to three days in advance.
Making Stabilized Whipped Cream
Pro Secret: Chill your mixer bowl and whisk attachment for 15 minutes before starting. This simple step ensures your cream whips properly every time.
Beat cream cheese, powdered sugar, and vanilla until smooth. Then, with the mixer on medium-low speed, slowly drizzle in the heavy cream. Once combined, increase to high speed and whip until stiff peaks form.
Storage tip: This frosting holds its shape for up to three days in the refrigerator, making it perfect for advance preparation.
Assembly: Building Your Masterpiece
Layer Construction Technique
Using a sharp serrated knife, carefully slice your cooled cake into three even horizontal layers. Additionally, place the bottom layer on your serving plate and tuck parchment strips underneath to keep the plate clean during frosting.
Assembly Process:
- Brush first layer generously with strawberry syrup
- Spread whipped cream evenly to edges
- Arrange half the sliced strawberries over cream
- Add another layer of whipped cream to cover berries
- Repeat with middle layer
- For top layer, brush syrup on bottom (crumb side) before placing
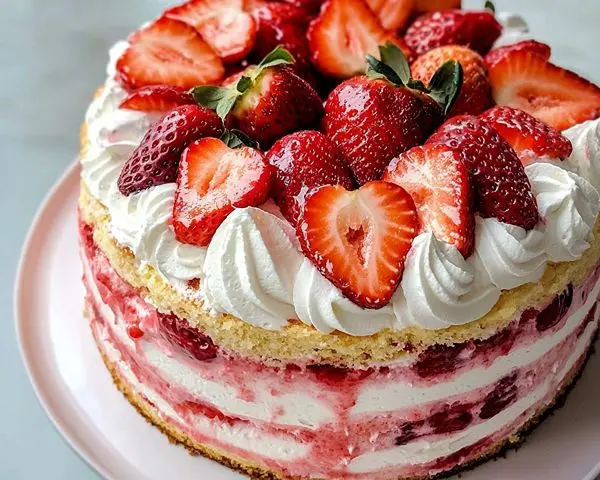
Visual Cue: Each layer should look like a perfect strawberry shortcake when viewed from the side. Therefore, don’t skimp on the strawberries—they create the signature appearance.
Expert Tips for Bakery-Quality Results
Temperature Matters
Room temperature ingredients mix more easily and create better texture. However, your heavy cream should be cold for proper whipping. Therefore, plan ahead and remove eggs and cream cheese from the refrigerator 2 hours before baking.
The Folding Technique
When combining meringue with batter, use a “cut and fold” motion rather than stirring. Start at the center, cut down through the mixture, sweep across the bottom, and fold up and over. This technique preserves the air bubbles that make your cake light.
Strawberry Selection Strategy
Choose berries of similar size for uniform slicing. Additionally, pat them dry after washing to prevent excess moisture in your cake layers. For best results, slice strawberries no more than 2 hours before assembly.
Creative Variations to Try
Seasonal Adaptations
Summer Berry Medley: Replace strawberries with mixed berries—blueberries, raspberries, and blackberries create a patriotic presentation perfect for Fourth of July celebrations.
Fall Harvest Version: Substitute sliced peaches and a touch of cinnamon in the syrup for an autumn twist that pairs beautifully with pumpkin bread with chocolate chips.
Winter Holiday Special: Add a layer of cranberry compote between the strawberries and cream for a festive touch that complements fudgy football brownies at holiday gatherings.
Dietary Modifications
Lighter Version: Use light cream cheese and substitute half the heavy cream with Greek yogurt for a tangy twist that reduces calories without sacrificing flavor. This variation pairs wonderfully with healthy Greek yogurt pumpkin muffins for a balanced dessert spread.
Gluten-Free Option: Replace all-purpose flour with a 1:1 gluten-free baking flour blend. However, add an extra egg white for structure and increase baking time by 5 minutes.
Storage and Make-Ahead Tips
| Component | Storage Method | Duration |
|---|---|---|
| Unfrosted cake layers | Wrapped in plastic, room temp | 2 days |
| Strawberry syrup | Refrigerated in jar | 1 week |
| Whipped cream frosting | Covered in refrigerator | 3 days |
| Assembled cake | Covered, refrigerated | 2 days |
| Frozen cake layers | Wrapped, frozen | 3 months |
Make-Ahead Strategy: Bake cake layers and prepare syrup up to two days in advance. Then, assemble the day of serving for optimal texture and appearance. Furthermore, this approach actually improves flavor as components have time to meld together.
The assembled Strawberry Shortcake Layer Cake tastes even better the next day, as the syrup continues to flavor the cake and the strawberries release their juices. However, don’t add fresh strawberry garnishes until just before serving to maintain their vibrant appearance.
Perfect Pairings and Serving Suggestions
This elegant cake deserves equally thoughtful accompaniments. Therefore, consider serving it alongside creamy broccoli cheddar soup for a complete meal that balances sweet and savory elements.
Beverage Pairings:
- Champagne or Prosecco for celebrations
- Fresh iced tea with mint for casual gatherings
- Coffee or espresso for afternoon dessert
- Lemonade for summer picnics
Complementary Desserts: For variety, offer chocolate chip pumpkin bars or healthy pumpkin oat cookies to guests who prefer different flavors.
Strawberry Shortcake Cake FAQs
What type of cake is best for strawberry shortcake?
A light sponge cake works best for strawberry shortcake because it absorbs the strawberry syrup without becoming soggy while maintaining a tender, airy texture that complements the fresh berries and cream.
What do they put between layers of cake?
Traditional strawberry shortcake layers feature whipped cream frosting and fresh sliced strawberries, often enhanced with strawberry simple syrup that adds moisture and concentrated berry flavor throughout each layer.
Is angel food cake or pound cake better for strawberry shortcake?
Angel food cake is better for strawberry shortcake because its light, airy texture absorbs flavors beautifully without competing with the delicate strawberries, while pound cake can be too dense and rich.
What is the difference between a layer cake and a sheet cake?
A layer cake consists of multiple thin rounds stacked with filling between each layer, creating height and visual drama, while a sheet cake is baked as one thick layer in a rectangular pan.
What makes shortcake different from regular cake?
Shortcake traditionally has a biscuit-like texture that’s designed to absorb fruit juices, while this layer cake version uses a light sponge that performs the same function with more elegant presentation.
Troubleshooting Common Issues
Dense, Heavy Layers: This usually happens when the meringue is overmixed or deflated during folding. Moreover, make sure your eggs are at room temperature for proper volume development.
Soggy Bottom Layer: Apply syrup gradually and ensure your cake layers are completely cool before assembly. Additionally, don’t oversaturate with syrup—the cake should be moist but not soggy.
Deflated Whipped Cream: Overwhipping causes the cream to separate and become grainy. Therefore, stop beating as soon as stiff peaks form. Furthermore, cold equipment and cream are essential for stability.
The Sweet Finale
This Ultimate Strawberry Shortcake Layer Cake transforms a beloved American classic into something truly spectacular. Moreover, every element works together to create a dessert that’s both nostalgic and sophisticated—perfect for celebrations or whenever you want to create lasting memories.
The combination of light sponge cake, fresh strawberries, and billowy whipped cream creates textural harmony that makes each bite irresistible. Furthermore, the strawberry simple syrup ties everything together with concentrated berry flavor that intensifies overnight.
Whether you’re serving this at a summer gathering or a special birthday celebration, your guests will be impressed by both the presentation and the incredible flavor. Additionally, the make-ahead components mean you can enjoy the party instead of stressing in the kitchen.
Try pairing this showstopper with Italian grinder sliders for a complete meal that balances sweet and savory perfectly. Moreover, don’t forget to snap a photo of your beautiful creation—this cake is definitely social media worthy!
I’d love to see your version of this recipe! Therefore, share your photos and tag us on social media. Moreover, let me know what creative variations you try—I’m always looking for new inspiration.
Remember, baking is about creating joy and bringing people together. Furthermore, even if your first attempt isn’t perfect, the love and effort you put into it will shine through. After all, that’s what makes homemade desserts so special.
Tasty at Home – Where bold flavors meet everyday kitchens.
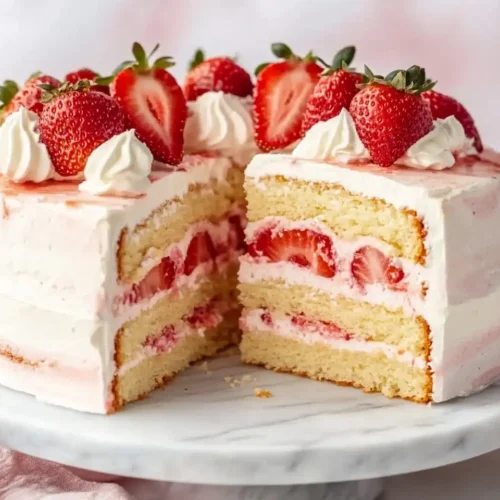
Ultimate Strawberry Shortcake Layer Cake
Equipment
- 9-inch cake pan
- Stand mixer
- mixing bowls
- Fine-Mesh Sieve
- Rubber spatula
- Serrated knife
- Pastry brush
Ingredients
Sponge Cake
- 1⅔ cups all-purpose flour
- 1 teaspoon baking powder
- ¼ teaspoon kosher salt
- 4 large eggs separated, at room temperature
- ½ teaspoon lemon juice or white vinegar
- 1 cup granulated sugar divided
- ¼ cup vegetable oil
- ¼ cup water warm
- 1 teaspoon vanilla paste or extract
Strawberry Simple Syrup
- ¾ cup water
- ¾ cup granulated sugar
- ½ cup sliced strawberries
Strawberry Puree (optional)
- ½ lb strawberries
- 3 tablespoons sugar
- ½ tablespoon cornstarch
- 1 tablespoon water
Whipped Cream Frosting
- 4 oz cream cheese
- ¾ cup powdered sugar
- 1 teaspoon vanilla paste or extract
- 4 cups heavy whipping cream cold
Assembly
- 1 lb fresh strawberries sliced
Instructions
- Preheat the oven to 350℉/180℃ and line the bottom of 9″ cake or springform pan with parchment paper.
- In a bowl, whisk together the flour, baking powder, and salt and set aside.
- In the bowl of a stand mixer fitted with the whisk attachment, add the egg whites and lemon juice (or vinegar) and whisk on medium speed until foamy.
- With the mixer running, slowly pour in half of the sugar (½ cup, 100g) and increase the speed to medium high speed until stiff, glossy peaks form. The meringue will stand up as a stiff peak on the tip of the whisk.
- Use a rubber spatula to scrape out the meringue into a separate bowl.
- Add the egg yolks and remaining sugar (½ cup, 100g) to the bowl of the stand mixer and mix on medium speed with the whisk attachment until pale in color, fluffy and doubled in volume, and ribbons form.
- With the mixer running on medium speed, slowly pour in oil then scrape down the sides. Turn the mixer back on to medium and slowly pour in the water and vanilla. Mix for another minute.
- Use a fine mesh sieve to sift ⅓ of the flour mixture into the egg yolk mixture and fold it in with a rubber spatula. Then, add ⅓ of the egg whites and fold it in until no streaks remain.
- Repeat the process with the remaining flour mixture and egg whites, taking care to get the spatula to the very bottom of the bowl (the flour will sink to the bottom and get stuck). Take care not to over mix, but very gently fold.
- Pour the batter into the prepared pan, and bake for 25-30 minutes until golden and a toothpick inserted into the center comes out clean. Cool on a wire rack for 5 minutes, then run an offset spatula or knife around the sides and remove the cake from the pan to finish cooling.
- While the cake is cooling, combine the water, sugar and strawberries in a saucepan over medium heat. Stir until hot and the sugar has dissolved. Pour into a bowl or glass jar and let cool. This can also be done a day in advance and stored in the fridge.
- Before mixing, place the bowl of stand mixer and the whisk attachment in the freezer or fridge for 15 minutes. This helps the cream whip up best.
- Add the cream cheese, powdered sugar, and vanilla and beat on low speed until combined and smooth.
- With the mixer on medium low speed, drizzle in the heavy cream. Whip for about one minute, then turn to high and whip until stiff peaks form.
- Using a serrated knife, cut the cake into three horizontal even disc layers. Place the first layer onto a cake stand and slide parchment paper under the cake to keep your stand clean.
- Using a pastry brush (or a spoon), fully coat the top of the first cake layer with the simple syrup.
- Add a dollop of whipped cream to the top and spread evenly over the cake layer, reaching the whole way to the sides. Layer half of the sliced strawberries evenly over the whipped cream, then add another dollop of whipped cream and spread it evenly to cover the strawberries.
- Add the middle layer of cake and gently push down so you remove any gaps in the strawberries and whipped cream. Complete the same process with the simple syrup, whipped cream, strawberries, whipped cream.
- Before adding the final layer, add the simple syrup to the underside of the cake (the crumb side, not the browned side) then place the layer crumb-side down and lightly press down.
- Add the remaining whipped cream to the top and sides of the cake so it is fully covered. If using the strawberry puree, use a spatula to add small swipes of the puree to the tops and sides of the cake, then smooth it out to the desired texture.

