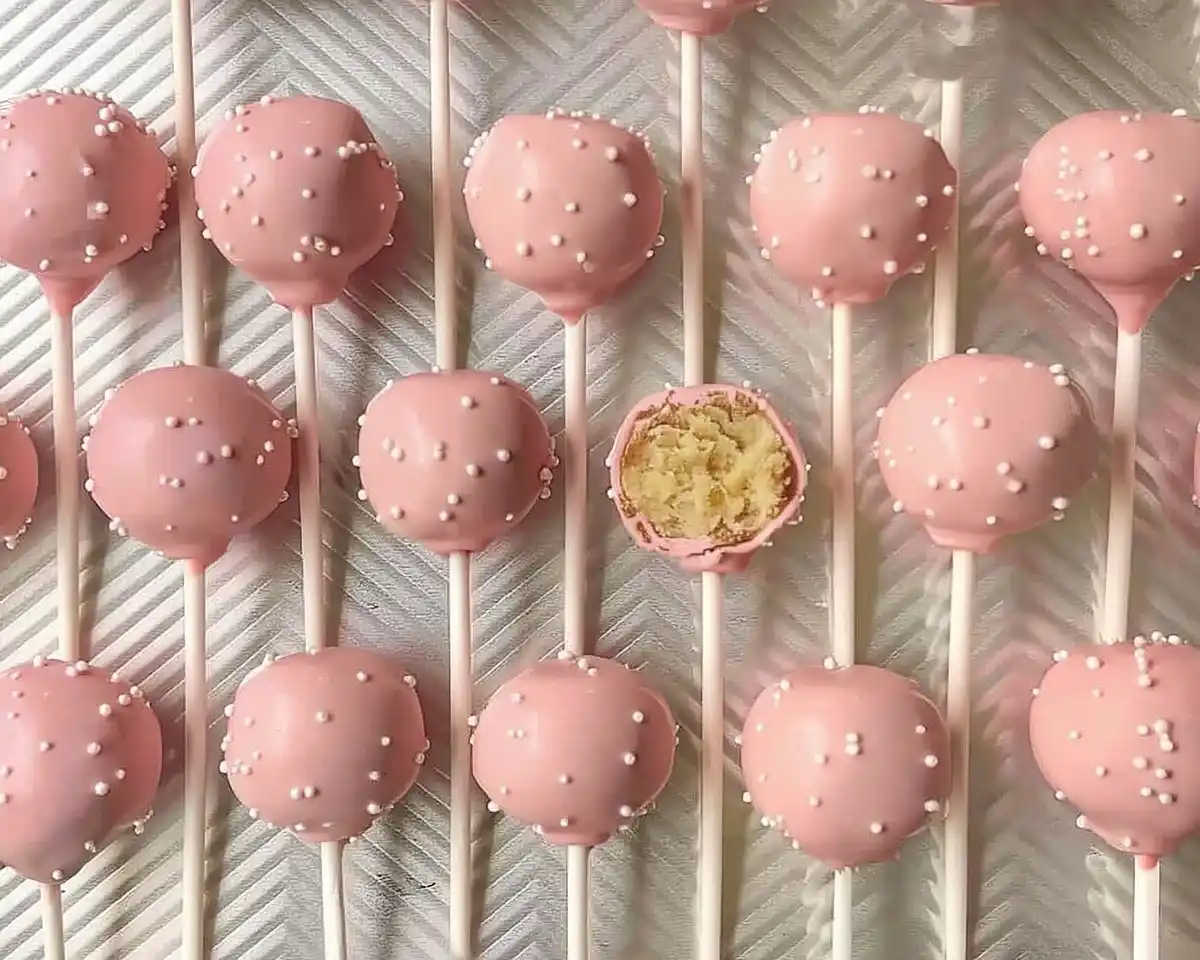
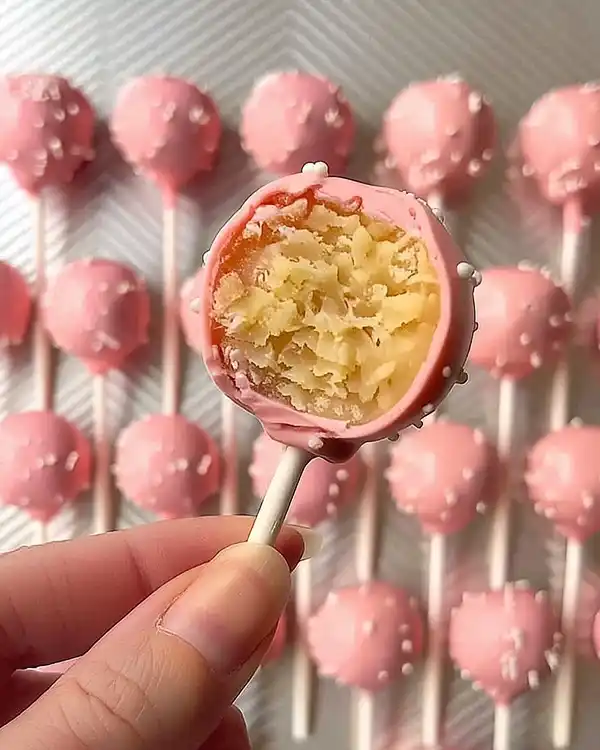
Starbucks Copycat Birthday Cake Pops made easy at home! Master pop cakes recipe with foolproof tips, pink candy coating, and festive sprinkles in under an hour.
Last spring, my daughter begged for Starbucks cake pops for her eighth birthday party. Well… twelve kids times five bucks each? That wasn’t happening.
I grabbed a vanilla cake mix and crossed my fingers. What came out of my kitchen that afternoon shocked everyone—especially me. These copycat birthday cake pops tasted better than the original, cost a fraction of the price, and turned me into the hero mom of the neighborhood.
Now I make them for every celebration. Birthdays, baby showers, random Tuesdays when we need something fun. The pink candy coating catches light like tiny disco balls, and that first bite? Pure vanilla heaven with a satisfying crunch.
Tasty at Home – Where bold flavors meet everyday kitchens.
Table of Contents
About the Pop Cakes Recipe & Ingredients
This Starbucks copycat nails the signature sweet vanilla flavor and smooth candy shell that made the original famous. The secret lies in mixing buttercream directly into hot crumbled cake—this creates moisture without turning your pops into mushy disasters.
Most pop cakes recipes online skip the crucial temperature steps. I tested twenty batches to crack the code. You’ll get professional results using grocery store ingredients and basic kitchen tools.
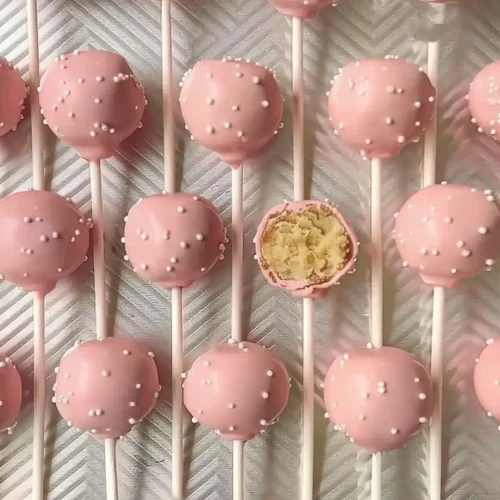
Starbucks Copycat Birthday Cake Pops
Equipment
- 9×13 inch baking pan
- Mixing bowl
- Electric mixer
- Cookie scoop
- lollipop sticks
- styrofoam block
- Microwave-safe bowl
Ingredients
Cake and Buttercream
- 13.25 oz box Vanilla cake mix Any brand works
- ⅓ cup Neutral oil Vegetable, canola, or avocado
- 1 cup Milk or water Whole milk adds richness
- 4 Large eggs Room temperature preferred
- ¼ cup Unsalted butter Softened, not melted
- 1 cup Powdered sugar No sifting needed
- 1 tsp Vanilla extract Pure, not imitation
- Pinch Salt Balances sweetness
- 1 tsp Additional milk For buttercream consistency
Coating & Decoration
- 12 oz Pink candy melts Plus extra for stick dipping
- As needed White nonpareils Or sprinkles of choice
Instructions
- Preheat oven to 325–350°F according to box directions. Mix cake ingredients until just combined and bake in a greased 9×13 inch pan until a toothpick comes out with moist crumbs.
- Transfer hot cake to a mixing bowl and crumble completely using a mixer on low speed.
- Prepare buttercream by mixing butter, powdered sugar, vanilla, salt, and milk until smooth. Add to cake crumbs and mix until the texture holds together when squeezed.
- Roll mixture into 1¼-inch balls (about 30g each). Place on parchment-lined sheet and freeze for 15 minutes.
- Melt a small amount of candy melts. Dip stick ends into melted candy and insert halfway into each ball. Freeze again for 15 minutes.
- Melt remaining candy melts until smooth. Dip each pop fully, letting excess drip off by gently tapping. Avoid double-dipping.
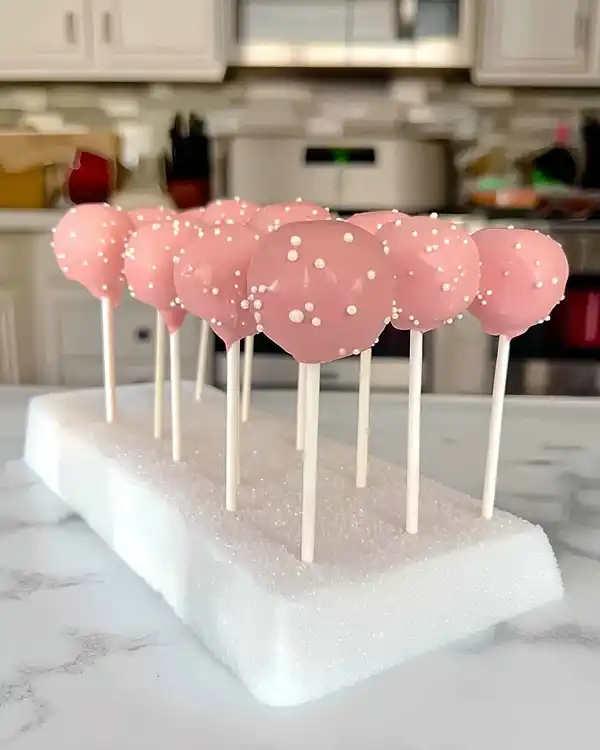
- Decorate immediately with white nonpareils and place sticks into styrofoam block to dry upright.
Notes
Quality Ingredient Selection
For the cake base, any vanilla box mix works perfectly—Duncan Hines and Betty Crocker both deliver excellent texture. Choose real butter for your buttercream, not margarine. The butter creates a silkier binding that holds each pop together during dipping.
For coating, grab Ghirardelli or Wilton candy melts from the baking aisle. White nonpareils give you that authentic Starbucks look, though any festive sprinkles work beautifully for birthday ideas girl celebrations.
Ingredients Table
| Ingredient | Amount (US) | Amount (Metric) | Notes |
|---|---|---|---|
| Vanilla cake mix | 13.25 oz box | 375g | Any brand works |
| Neutral oil | ⅓ cup | 80ml | Vegetable, canola, or avocado |
| Milk or water | 1 cup | 240ml | Whole milk adds richness |
| Large eggs | 4 | 4 | Room temperature preferred |
| Unsalted butter | ¼ cup | 57g | Softened, not melted |
| Powdered sugar | 1 cup | 120g | No sifting needed |
| Vanilla extract | 1 tsp | 5ml | Pure, not imitation |
| Salt | Pinch | Pinch | Balances sweetness |
| Additional milk | 1 tsp | 5ml | For buttercream consistency |
| Pink candy melts | 12 oz | 340g | Plus extra for stick dipping |
| White nonpareils | As needed | As needed | Or sprinkles of choice |
Shopping Tips for US Grocery Stores
Hit your local Walmart, Target, or Kroger for everything. Cake mixes live in the baking aisle—grab the 13.25 oz size, not the smaller “pudding in the mix” versions. Candy melts hide near cake decorating supplies or seasonal sections.
Lollipop sticks come in packs of 50-100 near the candy melts. You’ll need a styrofoam block for drying—craft stores sell them cheap, or use a cardboard box with holes poked through.
Bold Add-ins and Substitutions
Creative Variations: Swap pink candy melts for white, blue, or yellow to match any party theme. Add ¼ teaspoon almond extract to your buttercream for a subtle twist. Mix mini chocolate chips into the cake crumble for texture.
International Substitutions: European readers can use 375g self-raising flour, 250g sugar, and extra baking powder instead of box mix. Replace candy melts with tempered white chocolate tinted with food coloring.
Equipment & Preparation Steps
Essential Equipment
You’ll need a 9×13 inch baking pan, large mixing bowl, electric mixer (stand or handheld), and a small microwave-safe bowl. Grab a cookie scoop for uniform sizing—this prevents lopsided pops.
Lollipop sticks, styrofoam block, and a tall cup or mug for dipping make the coating process smooth. No styrofoam? A colander turned upside down works as a brilliant drying rack alternative.
Step 1: Bake the Perfect Cake Base
Preheat your oven to 325-350°F following the box instructions for your pan size. Mix cake ingredients in a large bowl until just combined—don’t overmix or you’ll develop tough gluten strands.
Pour batter into your greased pan and bake. Here’s my biggest mistake admission: I overbaked my first three batches. Check for doneness 2-4 minutes BEFORE the box time using a toothpick. You want moist crumbs, not dry cake, as Thomas Keller emphasizes in his perfectionist approach to baking fundamentals.
Step 2: Create the Cake Crumble
Transfer your hot cake immediately into a stand mixer bowl. Crumble on low speed with the paddle attachment until no chunks remain. The heat helps the cake break down smoothly.
No stand mixer? A handheld mixer works great. Let the cake cool slightly first if working by hand—hot cake burns fingers fast.
Step 3: Master the Buttercream Binding
Combine softened butter, powdered sugar, vanilla, salt, and milk in a small bowl. Stir vigorously until fairly smooth. Small lumps disappear during mixing, so don’t stress perfection here.
Add all buttercream to your crumbled cake. Mix on low until fully incorporated—the mixture should hold together when squeezed but not feel wet or sticky.
Step 4: Roll Uniform Cake Balls
Scoop 1¼-inch portions (about 30g each) using your cookie scoop. Roll gently between your palms to create smooth spheres. Rough surfaces show through the candy coating, so take your time here.
Arrange balls on a parchment-lined baking sheet. Freeze for exactly 15 minutes—this firms them up for stick insertion without making them rock-hard.
Step 5: Insert the Sticks Like a Pro
Remove cake balls from freezer and let them sit at room temperature for 10 minutes. Meanwhile, melt a small amount of pink candy melts in 15-30 second microwave bursts, stirring between each interval.
Dip each lollipop stick tip about ½ inch into melted candy. Insert the dipped end halfway into each cake ball with a gentle push. The candy acts as glue. Return to freezer for another 15 minutes.
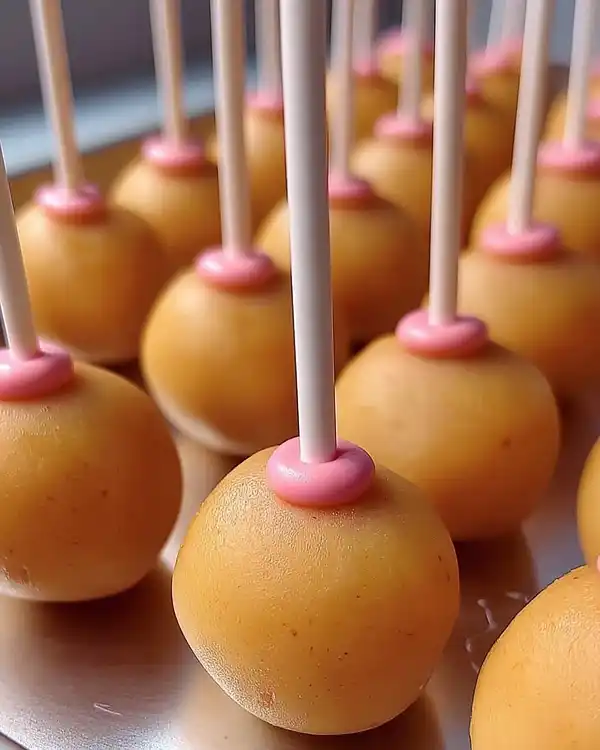
Step 6: Achieve the Perfect Candy Coating
Bring pops back to room temperature for 10 minutes before final dipping. This prevents cracking from temperature shock. Melt remaining candy melts until thin and smooth—add a teaspoon of vegetable oil if the coating seems thick.
Hold the stick and submerge each pop completely into the melted candy, coating all the way to the stick. This full coverage prevents the dreaded pop-falling-off-stick disaster.
Step 7: The Critical Tapping Technique
Here’s where most home bakers fail. Hold your coated pop over the bowl and gently tap the stick against your hand or the bowl edge. Let excess candy drip off completely.
You want one thin, even coating. Never double-dip—that extra weight will cause your pop to slide right off the stick. Trust me, I learned this lesson after losing six pops in one batch.
Step 8: Decorate and Dry
Working quickly while the coating stays wet, roll or sprinkle your pop with white nonpareils. The candy sets fast, so don’t hesitate. Immediately insert the finished stick into your styrofoam block to dry upright.
Repeat the dipping and decorating process until all pops are complete. The entire coating process feels frantic at first but becomes rhythmic after your third or fourth pop.
Tips, Variations, and Serving Suggestions
Expert Tips for Bakery-Quality Results
Temperature control makes or breaks cake pops easy success. Always bring frozen pops back to room temperature before coating—cold pops crack the candy shell instantly.
Thin your candy melts with coconut oil instead of regular oil for a glossier finish. Add it one teaspoon at a time until you achieve honey-like consistency. Too thin ruins coverage; too thick creates lumpy coatings.
Use a deep, narrow container for dipping rather than a wide bowl. This lets you fully submerge pops without melting excessive amounts of candy. A tall coffee mug works perfectly.
Creative Variations
Chocolate Lover’s Version: Substitute chocolate cake mix and use dark chocolate candy melts. Add mini chocolate chips to the crumble for extra texture and richness.
Red Velvet Elegance: Use red velvet cake mix with cream cheese frosting instead of buttercream. Coat with white candy melts and dust with edible gold shimmer for wedding showers.
Holiday Magic: Make peppermint pops by adding crushed candy canes to the cake crumble and coating with white candy melts. Perfect for Christmas cookie exchanges.
Lemon Sunshine: Add 2 tablespoons lemon zest to vanilla cake and use lemon extract in buttercream. Coat with yellow candy melts for bright spring celebrations.
Birthday Funfetti: Mix rainbow sprinkles directly into the cake batter before baking. The bursts of color inside create surprise factor that kids absolutely love.
Storage and Make-Ahead Strategy
Store finished cake pops in an airtight container at room temperature for up to 5 days. Layer them between parchment paper sheets to prevent sticking. Never refrigerate—condensation ruins the candy coating.
Freeze uncoated cake balls for up to 3 months. Let them thaw at room temperature for 30 minutes before inserting sticks and coating. This makes party prep incredibly flexible.
Freeze fully decorated pops for up to 6 weeks. Thaw them still in the container to prevent condensation damage. The candy coating might lose some shine but taste remains perfect.
Storage Times Reference
| Storage Method | Duration | Quality Notes |
|---|---|---|
| Room temperature (finished) | 5 days | Best texture and appearance |
| Refrigerated (not recommended) | 3 days | Coating may sweat |
| Frozen (cake balls only) | 3 months | Coat after thawing |
| Frozen (finished pops) | 6 weeks | Slight shine loss |
Perfect Pairings
Serve these birthday cake pops alongside vanilla ice cream for an over-the-top dessert bar. The temperature contrast creates memorable texture. Pair them with fresh berry platters to cut through the sweetness.
For beverages, cold milk remains the classic choice. Hot coffee or espresso works surprisingly well for adult gatherings—the bitter notes balance the candy coating beautifully.
Create a complete celebration spread by adding homemade sugar cookies with royal icing and classic vanilla cupcakes with buttercream swirls. The variety keeps guests coming back.
Starbucks Copycat Birthday Cake Pops FAQs
How To Make Cakepops Without Them Falling Apart?
How to make cakepops that stay intact starts with proper buttercream ratio. Add frosting gradually—too much creates mushy pops that won’t hold their shape. Freeze cake balls for exactly 15 minutes before inserting sticks, then freeze again after stick insertion to create solid structure.
How To Make A Cake Pop With Perfect Round Shapes?
How to make a cake pop with bakery-smooth surfaces requires gentle rolling technique. Warm your hands slightly under hot water, dry them, then roll each portion between your palms using light pressure. Refrigerate rolled balls before coating to set their shape permanently.
How To Make Cake Pops Step By Step For Beginners?
How to make cake pops step by step breaks down simply: bake and crumble cake while hot, mix in buttercream until moldable, roll into uniform balls, freeze briefly, insert candy-dipped sticks, freeze again, then coat completely in melted candy melts. The key is controlling temperature at every stage to prevent cracking or falling.
How To Make Starbucks Cake Pops At Home Successfully?
How to make Starbucks cake pops that rival the coffee shop version demands attention to coating thickness. Use one smooth layer of candy melts applied with the tapping method to remove excess. The Starbucks signature comes from that thin, crisp shell over moist cake interior—never double-dip your pops.
Conclusion
These Starbucks copycat birthday cake pops transformed my daughter’s party from budget stress into pure celebration magic. Watching kids’ faces light up when they bite through that pink candy shell? That’s the real reward here.
You’ve got everything you need to create professional pop cakes recipe results in your own kitchen. The process takes practice, but even “imperfect” pops taste incredible. What’s stopping you from making these this weekend?
Grab your cake mix and candy melts today. Your next celebration deserves homemade treats that spark joy and save serious money. Mix up a batch, snap a photo, and share your creation in the comments below—I love seeing your colorful variations!
Expand Your Dessert Repertoire
Looking to build an impressive dessert table for your next gathering? These birthday cake pops pair beautifully with other bite-sized treats that wow guests without overwhelming your schedule.
Try these Black Forest Cookies for a sophisticated chocolate-cherry combination that appeals to adult palates. The rich cocoa and tart fruit create the perfect flavor contrast against the sweet vanilla pops.
For elegant entertaining, serve these alongside cranberry and brie tartlets as a sweet-savory pairing option. The combination surprises guests and shows your culinary range beyond traditional party spreads.
During the holiday season, round out your cookie exchange offerings with gingerbread crackle cookies. The warm spices and dramatic appearance complement the cheerful pink coating of these festive pops perfectly.

