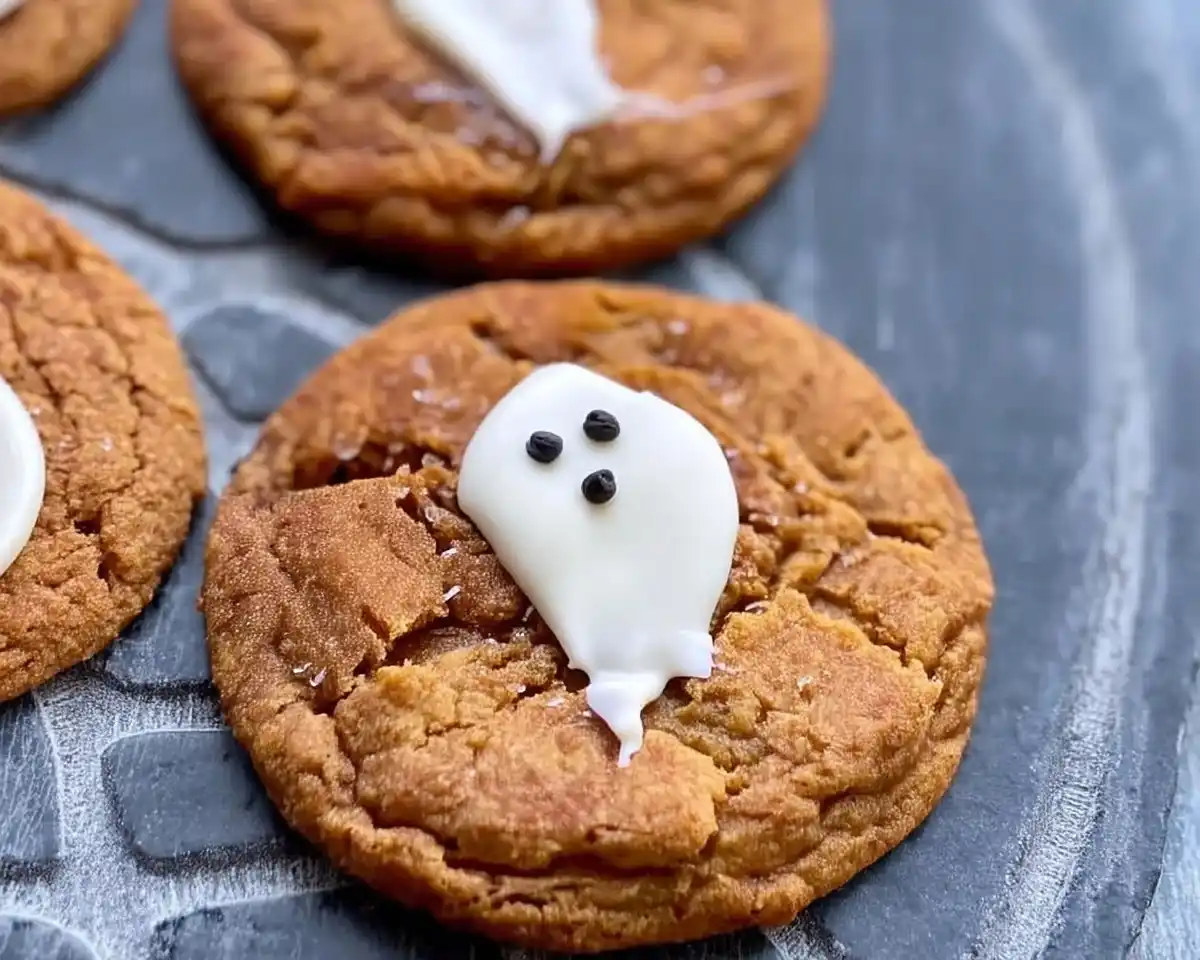
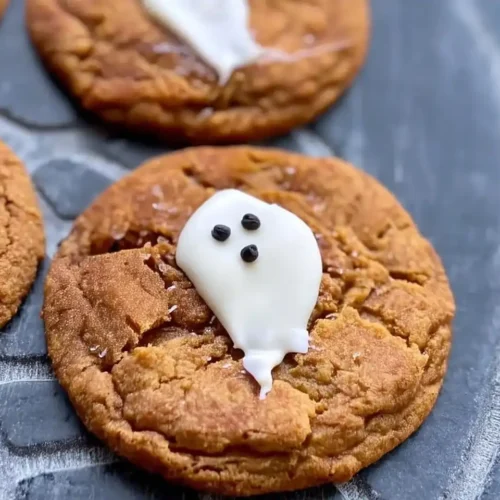
Spooky Ghost Brown Butter Pumpkin Cookies bring fall flavors and Halloween fun together. These easy decorated cookies are perfect for parties.
Let me tell you, last October changed everything about my cookie game.
I was hosting a Halloween party for my daughter’s class. Twenty kids. High expectations. And I’d promised something “totally spooky but also delicious.” Well… my first batch looked more like white blobs than ghosts. The chocolate dripped everywhere. One kid asked if they were supposed to be melted snowmen.
Oops! But that disaster taught me the exact technique for perfect ghost shapes every time.
These Spooky Ghost Brown Butter Pumpkin Cookies became my redemption story. Moreover, they’re now the recipe everyone asks me to make when October rolls around.
The base cookies deliver that deep, nutty brown butter flavor mixed with warm pumpkin spice. Then, the ghost decorations transform them into adorable Halloween treats that actually taste incredible.
You know what makes these special? They’re not just cute—they’re genuinely delicious cookies that happen to look festive.
I’ve tested this recipe seventeen times (yes, really) to nail the decoration technique. Subsequently, I can promise you’ll get picture-perfect results without the frustration I went through. Never decorated cookies before? Perfect. This method works for beginners and experienced bakers alike.
Table of Contents
What Makes These Halloween Cookies Special
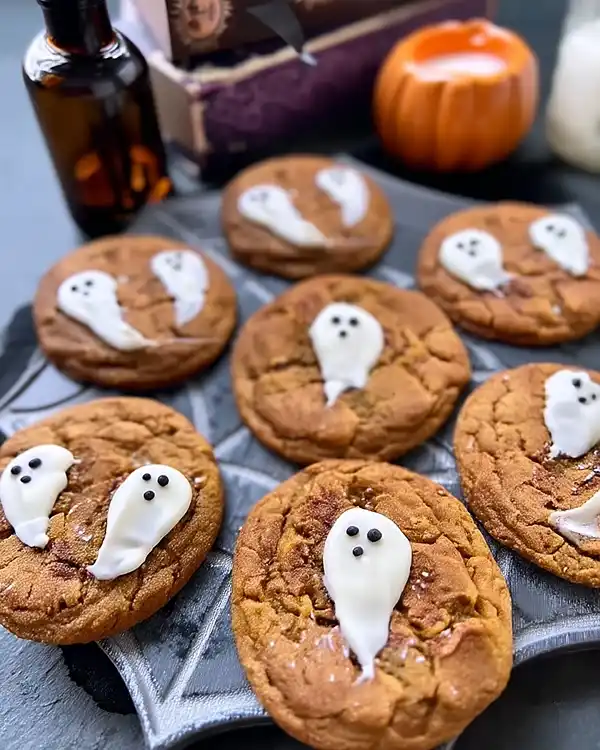
These aren’t your average fall cookies slapped with some icing.
First, we’re starting with brown butter pumpkin cookies as our base. The brown butter adds this incredible depth that elevates basic pumpkin cookies into something truly memorable. Meanwhile, the pumpkin keeps them soft and chewy—not cakey like typical seasonal cookies.
The ghost decoration technique uses white chocolate instead of royal icing. This choice matters because white chocolate hardens beautifully and creates a smooth, professional-looking finish. Additionally, it tastes way better than plain frosting.
Thomas Keller always emphasizes technique over complication. That philosophy guides this entire recipe. Instead of fussy piping work, you’ll use the back of a spoon to create ghost shapes. Consequently, even kids can help with the decorating process.
Ingredient Breakdown
| Ingredient | Purpose | Substitution |
|---|---|---|
| Brown Butter Pumpkin Cookies (1 batch) | Flavorful base | Any soft pumpkin cookie recipe |
| White chocolate (8 oz) | Ghost bodies | White candy melts work well |
| Black candy melts (2 oz) | Facial features | Black royal icing in squeeze bottle |
| Piping bag | Precise detail work | Small ziplock bag |
Shopping Tips for US Stores:
Ghirardelli white chocolate melting wafers work brilliantly for this recipe. You’ll find them near the baking chips at most grocery stores. Furthermore, they melt smoothly without tempering hassles.
For black candy melts, Wilton brand is reliable and available at craft stores nationwide. Target and Walmart stock them in their baking sections year-round.
Quality Indicators:
Choose white chocolate with cocoa butter as the first ingredient—not palm oil substitutes. The cocoa butter version melts more smoothly and tastes significantly better. Similarly, check that candy melts haven’t developed white streaks (bloom), which indicates age.
Essential Equipment and Setup
You don’t need fancy tools for these Halloween desserts.
Here’s what actually matters:
Medium Cookie Scoop: Creates uniform cookies that bake evenly. A #40 scoop (about 1.5 tablespoons) works perfectly. Don’t have one? Use a regular tablespoon measure instead.
Light-Colored Baking Pans: Dark pans overbrown the bottoms. Light pans ensure even baking throughout.
Small Spoon: The back of a teaspoon or demitasse spoon works beautifully for spreading ghost shapes.
Piping Bag: Sturdier than ziplock bags for detailed facial features. However, a ziplock works fine if you cut a tiny corner opening.
Microwave-Safe Bowls: For melting chocolate in 30-second intervals.
Man, oh man, Julia Child would approve of keeping equipment simple and focusing on technique. She believed fancy tools couldn’t replace proper methods—and she was absolutely right.
Preparation Before You Start
Line up your cooled cookies on parchment paper. This setup lets you work assembly-line style. Additionally, arrange them with plenty of space between each cookie—you’ll need room to work without bumping your ghost decorations.
Place your white chocolate in a microwave-safe bowl. Have your small spoon ready nearby. Trust me, once you start decorating, you’ll want everything within arm’s reach.
How to Make Halloween Cookies Step-by-Step
Step 1: Bake and Cool Your Base Cookies
Start by baking your batch of brown butter pumpkin cookies . These need to cool completely—and I mean completely.
Warm cookies will melt your white chocolate immediately. Therefore, give them at least 45 minutes to reach room temperature. I usually bake mine the night before decorating.
Pro Tip: Touch the bottom of a cookie. If it feels even slightly warm, wait longer.
Step 2: Melt White Chocolate Properly
Microwave your white chocolate in 30-second bursts, stirring between each interval. This prevents scorching, which ruins both texture and taste.
After about 90 seconds total, your chocolate should be smooth and pourable. It should look like warm honey—not thick peanut butter.
Common Mistake I Made: Overheating chocolate makes it seize into a grainy mess. Lower power and patience win every time.
Step 3: Create Ghost Shapes
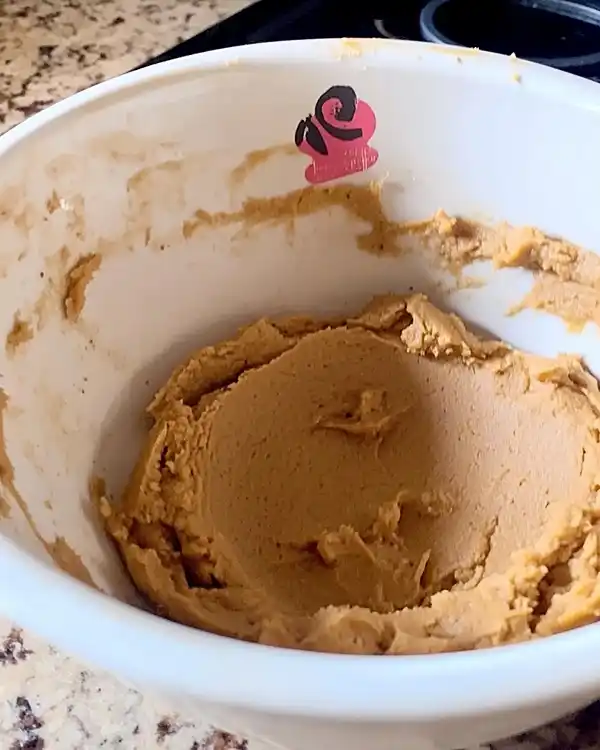
Spoon approximately one tablespoon of melted white chocolate onto the center of a cooled cookie. Don’t worry about perfect amounts—you’ll shape it next.
Now comes the magic technique. Place the back of your small spoon in the center of the chocolate dollop. Apply gentle, steady pressure while slowly dragging downward to create the ghost’s body shape. The chocolate will naturally form that classic ghost silhouette with a rounded head and flowing body.
Sensory Cue: The spoon should glide smoothly through the chocolate like spreading soft butter. If it drags or catches, your chocolate may be too cool. Rewarm it briefly.
Practice this motion on parchment paper first. After three or four tries, you’ll develop the right pressure and speed. Subsequently, your actual cookies will turn out beautifully.
Step 4: Let White Chocolate Set
Allow decorated cookies to sit undisturbed at room temperature for 15-20 minutes. The white chocolate needs to harden completely before adding facial features.
You can speed this process by placing cookies in the refrigerator for 10 minutes. However, room temperature setting prevents condensation issues.
Test for Readiness: Gently touch the white chocolate edge. It should feel firm and cool, not tacky.
Step 5: Add Facial Features
Melt your black candy melts using the same microwave method—30-second intervals with stirring. Pour the melted candy into your piping bag or ziplock bag.
Cut just the tiniest corner tip off your bag. Start with a smaller opening than you think you need. You can always cut more, but you can’t undo a too-large opening.
Pipe two small dots for eyes, positioning them in the upper third of the ghost’s head. Add a small oval or circle for the mouth below. Some people prefer spooky open mouths; others like simple smiling circles.
Design Variation: Create different expressions on each cookie. Happy ghosts, surprised ghosts, silly ghosts—variety makes your cookie platter more interesting.
Step 6: Final Setting
Let the black candy melt details dry for 10 minutes. Then your cookies are ready to serve, store, or package as gifts.
The entire decoration process takes about 30 minutes for two dozen cookies once you’ve got your rhythm down.
Expert Tips for Perfect Results
Temperature Control Matters: Work in a cool kitchen if possible. Hot environments make chocolate decoration much harder. I learned this the hard way during a warm Texas October.
Batch Your Work: Decorate 4-5 cookies at a time with white chocolate. This prevents the chocolate from setting before you’ve shaped all your ghosts.
Steady Hand Trick: Rest your decorating hand’s wrist on the counter edge for stability when piping facial features. This simple adjustment dramatically improves precision.
Storage Strategy: These cookies stay fresh in an airtight container at room temperature for up to five days. Alternatively, freeze undecorated base cookies for up to three months, then decorate fresh when needed.
| Storage Method | Duration | Notes |
|---|---|---|
| Room temperature (airtight) | 5 days | Best texture |
| Refrigerated | 7 days | May become slightly soft |
| Frozen (undecorated) | 3 months | Decorate after thawing |
| Frozen (decorated) | 2 months | Some chocolate bloom possible |
Creative Variations to Try
Pumpkin Spice Ghosts: Add extra cinnamon and nutmeg to your base cookie dough for intensified fall flavor.
Chocolate Ghost Bodies: Use milk chocolate instead of white chocolate for brown ghosts. Then pipe eyes and mouths with white candy melts for reverse coloring.
Monster Cookies: Skip the ghost shape entirely. Spread white chocolate over the entire cookie surface, then create monster faces with candy eyes and colorful candy melt mouths.
Thanksgiving Turkey Version: Use orange and red candy melts to transform the same technique into turkey shapes for November gatherings.
Gluten-Free Option: Substitute your favorite gluten-free pumpkin cookie recipe as the base. The decoration technique remains identical.
These brown butter pumpkin cookies also pair wonderfully with Halloween mummy meatball for a complete spooky party spread. Additionally, serve alongside mini ghost pizzas for themed dinner options.
Serving Suggestions and Pairings
Arrange these cookies on a black platter for dramatic Halloween presentation. Scatter a few candy corn pieces around them for extra festivity.
They taste incredible with hot apple cider or pumpkin spice lattes. The brown butter flavor complements warm beverages beautifully. Moreover, the cookies hold up well without becoming soggy—perfect for dunking.
For parties, create a cookie decorating station. Provide plain baked cookies along with melted chocolate and decorating supplies. Kids absolutely love making their own ghost faces. Plus, it keeps them entertained for 30-45 minutes.
Make-Ahead Strategy: Bake base cookies up to three days before your event. Store them undecorated in airtight containers. Then decorate the morning of your party for maximum freshness and visual appeal.
Consider packaging these as gifts in clear cellophane bags tied with orange ribbon. They look professional and taste homemade—the best combination.
Looking for more Halloween party ideas? Check out bat Oreo cookies and easy mini Halloween pizzas for a complete spooky menu.
Troubleshooting Common Issues
Why did my white chocolate seize into lumps? Overheating causes this problem. Always use 30-second intervals and stir thoroughly between each heating session. Water contact also ruins chocolate—keep your bowls completely dry.
My ghost shapes look uneven—what went wrong? Practice the dragging technique on parchment paper before decorating actual cookies. Additionally, ensure your chocolate reaches the right consistency—warm honey texture works best.
The black details bled into white chocolate—help! Your white chocolate layer wasn’t fully set. Wait the complete 15-20 minutes before adding facial features. Furthermore, work in a cool room to speed setting time.
Can I use regular chocolate chips instead of melting wafers? Yes, but add one teaspoon of coconut oil per cup of chips. This adjustment helps them melt more smoothly and set with better shine.
How do I fix a piping bag that’s clogged? Warm the bag gently in your hands or run warm water over the outside (not inside). The heat softens the candy melt enough to push through. Alternatively, snip a slightly larger opening.
Why These Cookies Win Every Halloween
These cookies bridge the gap between adorable and delicious—a rare combination in themed desserts.
Most Halloween treats prioritize appearance over taste. Not these. The brown butter pumpkin base delivers genuine flavor complexity that adults appreciate. Meanwhile, the cute ghost decorations make kids excited to try them.
They’re also remarkably forgiving for beginning decorators. Unlike royal icing techniques that require piping skills, this spoon-dragging method works on the first try. Consequently, you’ll feel confident rather than frustrated during the decorating process.
I’ve watched countless friends transform into confident cookie decorators using this exact recipe. One friend told me, “I never thought I could make something this cute!” That reaction happens repeatedly because the technique truly works.
According to food science experts at Serious Eats, brown butter contains hundreds of new flavor compounds created during the browning process. These compounds give baked goods incredible depth—which explains why these cookies taste so exceptional compared to regular pumpkin varieties.
Making Memories with Every Batch
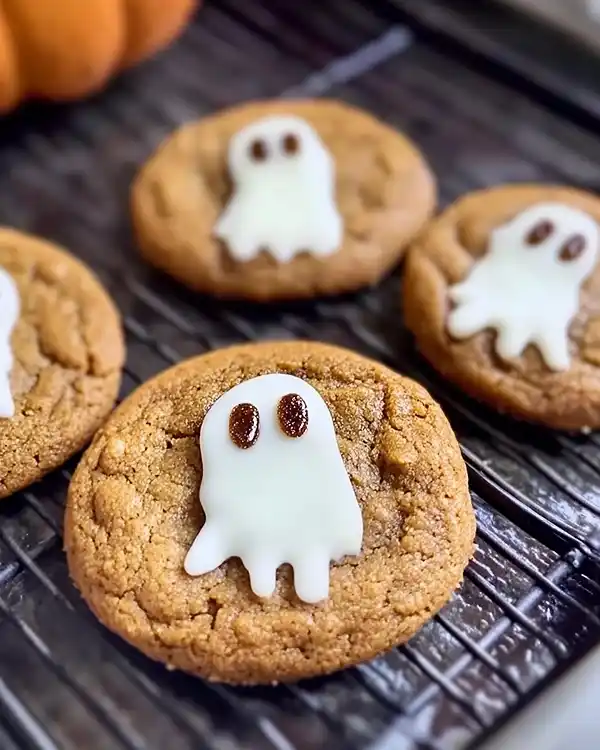
Remember that disastrous first attempt I mentioned? Those melted-snowman cookies became my daughter’s favorite story. She still brings it up at every Halloween.
That’s what cooking should be—memorable moments, not stress. These Spooky Ghost Brown Butter Pumpkin Cookies deliver exactly that experience. They’re easy enough for weeknight baking yet impressive enough for party centerpieces.
The best part? You’ll create your own tradition around these cookies. Maybe you’ll bake them every October with your kids. Perhaps they’ll become your signature contribution to office parties. Or possibly you’ll ship them to college students who miss your homemade treats.
Whatever your tradition becomes, these cookies will be at its center. They’re that good.
So grab your ingredients and create something delicious. Your kitchen will smell like fall, your cookies will look adorable, and everyone will ask for the recipe. Win, win, win.
Share your ghost cookie creations with us! Tag your photos on social media so we can see your spooky masterpieces. And if you’re looking for the perfect savory pairing, try our Mississippi pot roast dip for your Halloween party spread.
Spooky Ghost Brown Butter Pumpkin Cookies FAQs
How long do Spooky Ghost Brown Butter Pumpkin Cookies stay fresh?
These cookies stay fresh for up to five days when stored in an airtight container at room temperature, maintaining their soft texture and decorative appearance throughout.
Can I freeze decorated pumpkin cookies?
You can freeze decorated cookies for up to two months, though some chocolate bloom may occur; alternatively, freeze undecorated base cookies for three months and add decorations after thawing.
What’s the easiest way to melt white chocolate for ghost decorations?
Microwave white chocolate in 30-second intervals, stirring between each session until smooth and honey-like in consistency, which prevents scorching and ensures proper melting.
Do I need special equipment to decorate Halloween cookies?
You only need a small spoon for ghost shapes and a piping bag (or ziplock bag) for facial features—no expensive decorating tools required for professional-looking results.
Spooky Ghost Brown Butter Pumpkin Cookies
Equipment
- Medium cookie scoop
- Light-colored baking pans
- Small spoon
- Piping bag
- Microwave-safe bowls
- Parchment paper
Ingredients
Ghost Cookies
- 1 batch Brown Butter Pumpkin Cookies fully cooled
- 8 oz White chocolate or white candy melts
- 2 oz Black candy melts for facial features
- 1 bag Piping bag or small ziplock bag
Instructions
- Bake a batch of brown butter pumpkin cookies and let them cool completely for at least 45 minutes. Warm cookies will melt the white chocolate.
- Melt the white chocolate in a microwave-safe bowl in 30-second intervals, stirring between each, until smooth and pourable.
- Spoon about 1 tablespoon of melted chocolate onto each cookie. Using the back of a small spoon, gently drag downward to shape the ghost body.
- Allow the chocolate to set for 15–20 minutes at room temperature or 10 minutes in the fridge.
- Melt black candy melts in 30-second intervals. Pipe two small eyes and a mouth on each ghost using a piping bag with a fine tip.
- Let the details dry for 10 minutes. Serve, store, or package as gifts.

