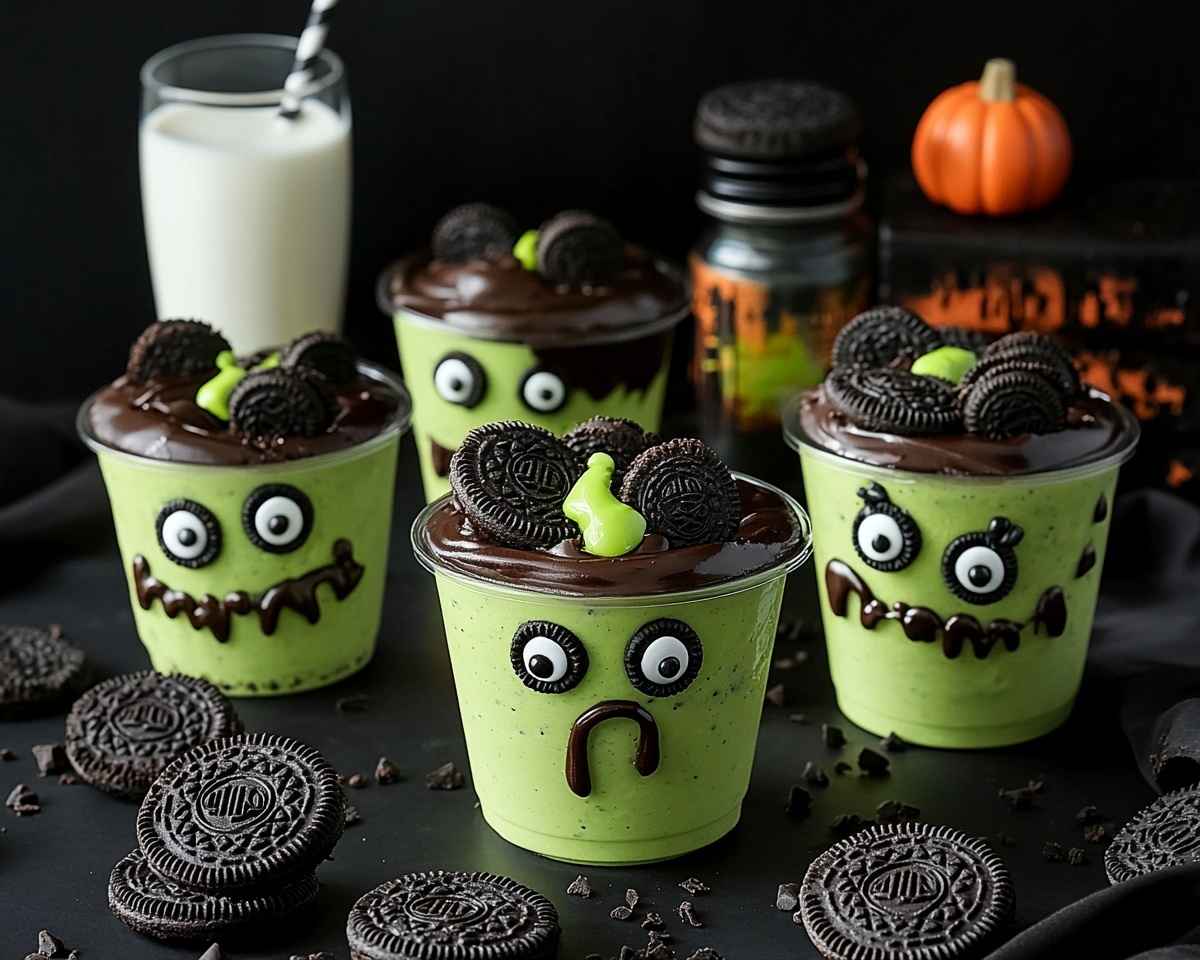
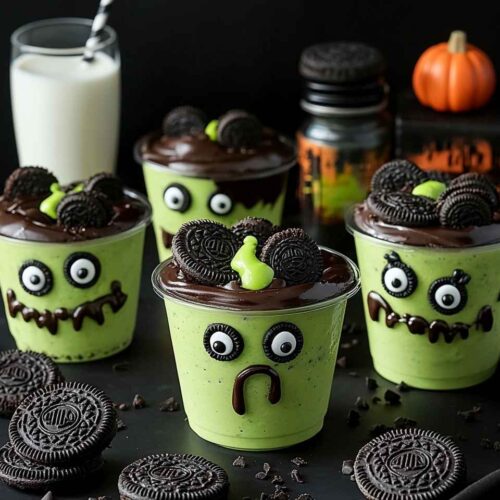
Spooky Frankenstein Pudding Cups transform vanilla pudding into ghoulish Halloween desserts. Quick 15-minute recipe with simple ingredients kids adore.
Hi, I’m Linda, and welcome to Tasty at Home—where bold flavors meet everyday kitchens. Last October, my nephew Jake took one look at these Spooky Frankenstein Pudding Cups and declared me the “coolest aunt ever.” Well, let me tell you, that moment made every green food coloring experiment worth it. I’ve perfected this recipe through three Halloween seasons, learning that the secret lies in getting just the right shade of monster green without overwhelming the vanilla base.
These Halloween pudding cups capture all the spooky fun without the stress. Whether you’re planning a classroom party or need last-minute Halloween treats, this recipe delivers maximum impact with minimal effort. Man, oh man, the joy on kids’ faces when they see Frankenstein staring back at them from dessert is absolutely priceless.
Tasty at Home – Where bold flavors meet everyday kitchens.
Table of Contents
What Makes These Frankenstein Pudding Cups Special
These aren’t your average Halloween cup desserts. Each pudding cup transforms into a miniature masterpiece that combines classic comfort with theatrical flair. The vanilla pudding base provides familiar sweetness, while the green coloring and creative toppings create an authentic monster appearance.
Furthermore, this recipe succeeds because it uses readily available ingredients from any American grocery store. You won’t need specialty molds or expensive decorating tools. Instead, clear plastic cups become your canvas, and basic pantry staples transform into monster features.
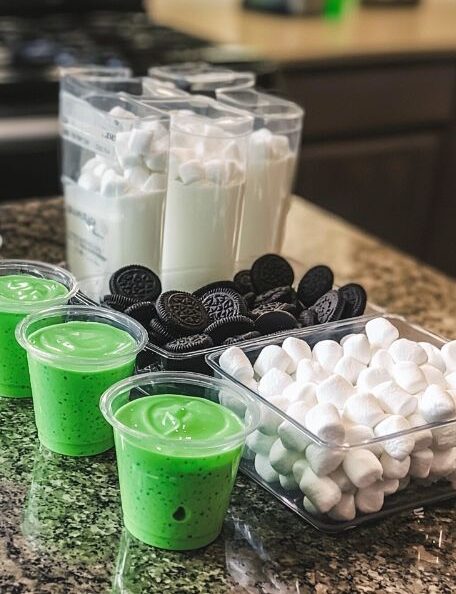
Essential Ingredients
| Ingredient | US Measurement | Metric | Purpose |
|---|---|---|---|
| Instant vanilla pudding mix | 1 package (3.4 oz) | 96g | Creamy base |
| Cold milk | 2 cups | 480ml | Pudding liquid |
| Green food coloring | Few drops | As needed | Monster color |
| Oreo cookies, crushed | 1 cup | 115g | “Dirt” texture |
| Mini chocolate chips | 1/4 cup | 45g | Monster “hair” |
| Black decorating gel | 1 tube | As needed | Facial features |
| Clear plastic cups | 6-8 cups | 6-8 cups | Serving vessels |
| Large marshmallows | 6-8 pieces | 6-8 pieces | Neck “bolts” |
Shopping Tips for Best Results
Visit the baking aisle for decorating gel and food coloring. Most supermarkets stock these items year-round, though Halloween season offers expanded selections. Choose gel food coloring over liquid for more vibrant colors without thinning the pudding.
Additionally, select clear cups that showcase your creation. Disposable plastic works perfectly for parties, while glass cups create elegant presentations for family dinners. The cup size should hold approximately 6-8 ounces to accommodate pudding and toppings.
Bold Add-ins for Creative Variations:
- Mint extract (1/4 teaspoon) for subtle flavor complexity
- Vanilla wafer crumbs instead of Oreos for lighter “dirt”
- Gummy worms peeking through the “soil”
- Whipped cream “clouds” for dramatic height
Equipment and Preparation Mastery
Essential Equipment
You’ll need basic kitchen tools that most home cooks already own. A large mixing bowl accommodates pudding preparation, while a wire whisk ensures smooth consistency. Measuring cups and spoons guarantee accurate proportions, and small spoons help with precise decorating.
Oops! I learned the hard way that using a fork instead of a proper whisk creates lumpy pudding. The fork doesn’t incorporate air effectively, resulting in dense, uneven texture. Always use a wire whisk for professional results.
Step-by-Step Monster Creation
Step 1: Create the Perfect Pudding Base
In a large bowl, whisk together the instant vanilla pudding and cold milk vigorously for two minutes. The mixture should thicken noticeably and become completely smooth. This foundation determines your entire dessert’s success, so don’t rush this crucial step.
Temperature matters significantly here. Cold milk activates the pudding mix properly, while room temperature milk creates thin, watery results. Keep your milk refrigerated until the moment you need it.
Step 2: Achieve Monster-Perfect Green
Add green food coloring drop by drop while whisking continuously. Start with just two drops, then gradually increase until you reach your desired Frankenstein shade. The color should be vibrant but not neon—think classic monster green rather than lime green.
Consequently, this gradual approach prevents over-coloring mishaps. You can always add more, but removing excess color proves impossible. Julia Child always emphasized patience in cooking, and this principle applies perfectly to achieving the right hue.
Step 3: Layer Your Pudding Foundation
Spoon the green pudding into clear plastic cups, filling each approximately two-thirds full. This proportion leaves perfect space for toppings while ensuring generous pudding portions. Use a large spoon to minimize air bubbles and create smooth surfaces.
Moreover, tap each cup gently on the counter to release trapped air. This professional technique, often used by Thomas Keller in his pastry preparations, ensures flawless presentation.
Step 4: Add the “Dirt” Layer
Cover the pudding surface completely with crushed Oreo cookies. These crumbs represent soil or graveyard dirt, adding textural contrast to the smooth pudding below. Crush cookies in a food processor for uniform pieces, or place them in a sealed bag and crush with a rolling pin.
The cookie layer serves both aesthetic and practical purposes. It hides any pudding imperfections while providing delightful crunch in every spoonful.
Step 5: Create Monster Hair
Sprinkle mini chocolate chips toward the back portion of each cup to simulate Frankenstein’s iconic hair. Concentrate the chips in one area rather than distributing them evenly—this creates a more realistic hairline effect.
Alternatively, you can use crushed chocolate cookies or even cocoa powder dusted lightly over the back area. Each method produces slightly different textures and visual effects.
Step 6: Design the Iconic Face
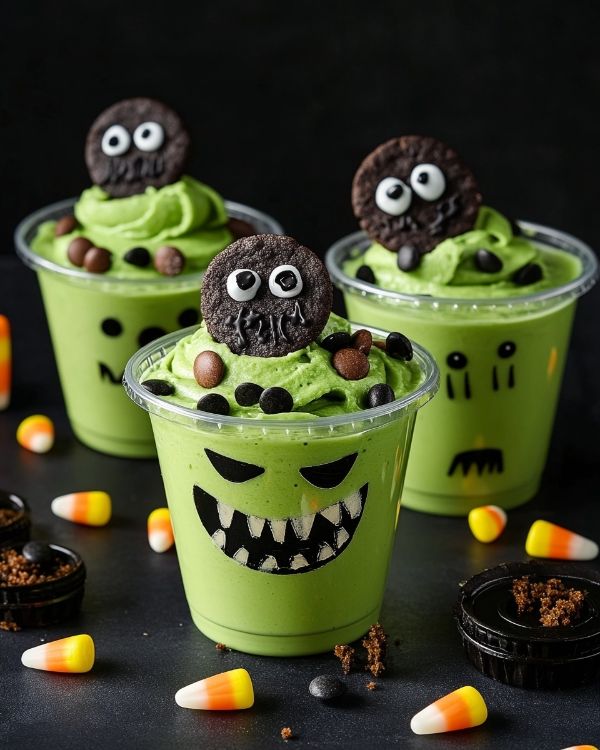
Using black decorating gel, carefully draw Frankenstein’s distinctive features on each cup’s front surface. Start with simple dot eyes, then add a small mouth. The beauty lies in imperfection—slightly crooked features add character and charm.
Finally, press one marshmallow firmly against each side of the cup to create the famous neck bolts. These finishing touches complete the transformation from simple pudding to spooky Halloween sensation.
Expert Tips and Creative Variations
Professional Success Secrets
Temperature control ensures optimal results throughout preparation. Keep pudding chilled during assembly to maintain proper consistency. Warm environments cause pudding to soften and lose its structure.
Additionally, prepare components separately before assembly. Crush cookies, wash marshmallows, and organize decorating supplies in advance. This mise en place approach, championed by professional chefs, streamlines the process significantly.
Pro Tip: Make facial features slightly asymmetrical for more authentic monster appearance. Perfect symmetry looks artificial, while slight variations create character.
Holiday and Dietary Variations
Christmas Grinch Version: Use the same base recipe but create a Grinch theme with red heart decorations and different facial expressions.
Birthday Monster Adaptation: Replace Halloween colors with birthday-themed decorations and add edible glitter for celebration sparkle.
Dairy-Free Alternative: Substitute plant-based milk and dairy-free pudding mix for guests with dietary restrictions. The method remains identical.
Sugar-Free Option: Use sugar-free pudding mix and sugar-free cookies for health-conscious celebrations without sacrificing fun.
Adult Party Version: Add a splash of vanilla extract or even a tablespoon of coffee liqueur to the pudding for sophisticated Halloween entertaining.
Storage and Make-Ahead Strategy
| Storage Method | Duration | Quality Notes |
|---|---|---|
| Refrigerator (assembled) | 2-3 days | Best within 24 hours |
| Refrigerator (pudding only) | 5 days | Add toppings before serving |
| Freezer | Not recommended | Texture degrades significantly |
Prepare pudding up to three days in advance, but add toppings just before serving. This approach maintains optimal texture while allowing party prep flexibility. Store individual components separately for longest freshness.
You know what works brilliantly for parties? Set up a “build your own Frankenstein” station with prepared pudding and various toppings. Kids love customizing their creatures, and it reduces your prep stress considerably.
Perfect Pairings and Serving Suggestions
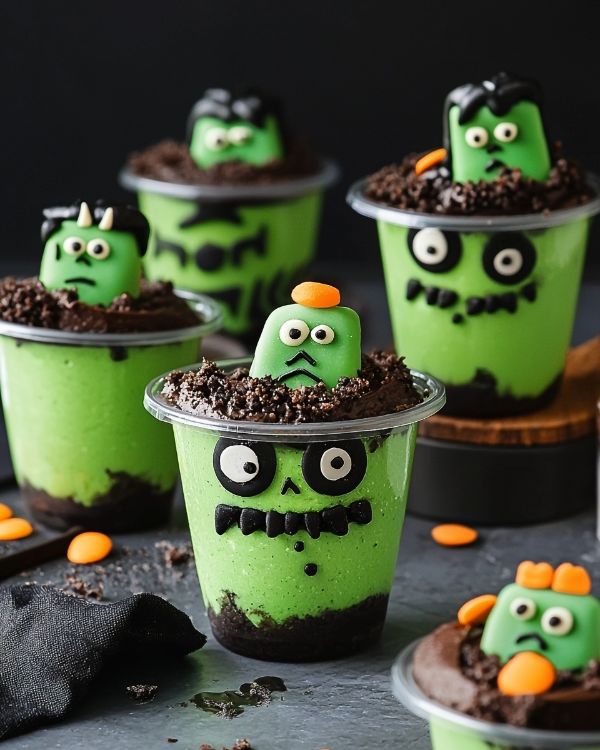
These Spooky Frankenstein Pudding Cups pair wonderfully with other Halloween-themed treats. Consider serving alongside Eyeball Spaghetti and Meatballs for a complete monster meal that delights both kids and adults.
For beverage pairings, offer Halloween punch or simple milk for children’s parties. Adults might enjoy spiced cider or coffee to balance the sweetness. The neutral vanilla flavor complements virtually any drink choice.
Furthermore, these pudding cups work perfectly as party favors. Prepare individual servings in small cups with lids, allowing guests to take their creations home. This dual-purpose approach reduces waste while extending the party experience.
Create a spooky dessert table by combining these pudding cups with Easy Homemade Marzipan shaped into Halloween figures. The contrasting textures and flavors provide variety while maintaining the Halloween theme.
For sophisticated entertaining, serve these alongside Iced Tiramisu Latte for adults who want to participate in the Halloween fun without overwhelming sweetness.
Frankenstein Pudding Cups FAQs
Why did my pudding turn out lumpy?
Lumpy pudding results from insufficient whisking or using warm milk. Always use cold milk and whisk vigorously for the full recommended time. If lumps persist, strain the mixture through a fine-mesh sieve before adding coloring.
How can I prevent the green color from being too intense?
Start with just one drop of food coloring and build gradually. Gel coloring provides more control than liquid versions. Remember, you can always add more, but removing excess color is impossible.
What if my decorating gel won’t stick to the cups?
Ensure cups are completely dry before decorating. Condensation prevents gel adhesion. Pat cups dry with paper towels if necessary, and work in a cool environment to minimize moisture issues.
Can I make these pudding cups without artificial coloring?
Absolutely! Natural alternatives include spinach powder (surprisingly flavorless) or matcha powder for green coloring. These options provide color while adding subtle nutritional benefits.
Conclusion
These Ultimate Spooky Frankenstein Pudding Cups prove that Halloween magic doesn’t require complicated techniques or exotic ingredients. Instead, creativity transforms everyday pudding into memorable experiences that bring families together during spooky season.
The recipe’s simplicity makes it perfect for involving children in kitchen activities. They can help measure ingredients, add coloring, and especially enjoy decorating their monster faces. These shared moments create lasting memories far beyond the actual dessert.
Consider pairing these treats with warm apple cider and cozy autumn activities. The combination captures everything wonderful about American Halloween traditions—family fun, creative expression, and delicious comfort food.
Why not challenge yourself to create a whole monster family? Use this same technique to make different creatures, each with unique personalities and expressions. Share your creations on social media and tag us—we love seeing your Halloween creativity come to life!
Spooky Frankenstein Pudding Cups
Equipment
- Mixing bowl
- Wire whisk
- Measuring cups and spoons
- Plastic cups
- Spoon
Ingredients
Pudding Base
- 1 package (3.4 oz) Instant vanilla pudding mix 96g
- 2 cups Cold milk 480ml
- Few drops Green food coloring As needed
Toppings
- 1 cup Oreo cookies, crushed 115g
- ¼ cup Mini chocolate chips 45g
- 1 tube Black decorating gel As needed
- 6-8 pieces Large marshmallows For neck bolts
- 6-8 cups Clear plastic cups Serving vessels
Instructions
- Whisk together instant vanilla pudding and cold milk for 2 minutes until smooth and thickened.
- Add green food coloring drop by drop, whisking until the desired Frankenstein shade is achieved.
- Spoon pudding into clear plastic cups, filling two-thirds full. Tap cups gently to release air bubbles.
- Cover pudding with a layer of crushed Oreo cookies to create the “dirt.”
- Sprinkle mini chocolate chips toward the back of each cup to form Frankenstein’s hair.
- Draw facial features on the cups with black decorating gel and press marshmallows into the sides for neck bolts.

