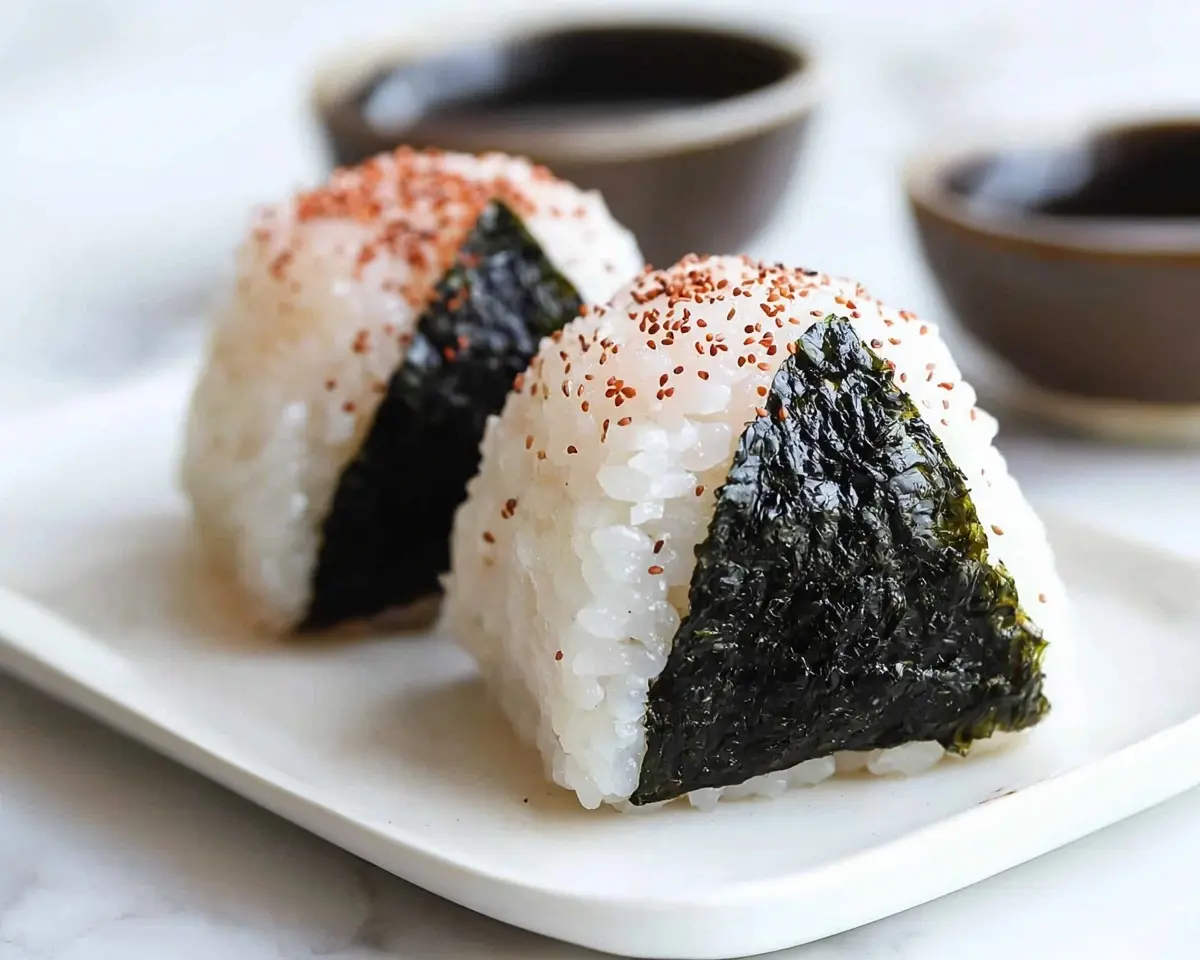
Spicy Tuna Onigiri recipe with easy 4 ingredients. Learn authentic Japanese sushi cooking tips for perfect homemade rice balls every time.
Hi, I’m Linda, and welcome to Tasty at Home—where bold flavors meet everyday kitchens. One rainy Tuesday, I stumbled into a tiny Japanese market in San Francisco’s Japantown, desperately craving comfort food. There, nestled in the deli case, sat perfect triangular rice balls that looked like edible origami. One bite of that spicy tuna onigiri transported me straight to food heaven—creamy, spicy, satisfying, and surprisingly simple.
Well, that discovery sent me on a three-week mission to recreate those magical rice balls at home. Let me tell you, I burned through more canned tuna than I care to admit! After countless kitchen experiments and a few spectacular fails, I finally cracked the code. These spicy tuna onigiri deliver that perfect balance of comfort and kick that makes Japanese food so irresistible.
Whether you’re new to Japanese sushi ingredients or already obsessed with homemade sushi, this recipe will become your new obsession. We’re making restaurant-quality rice balls with just four simple ingredients. No fancy equipment required—just your hands and a little love.
Tasty at Home – Where bold flavors meet everyday kitchens.
Table of Contents
What Makes This Spicy Tuna Onigiri Recipe Special
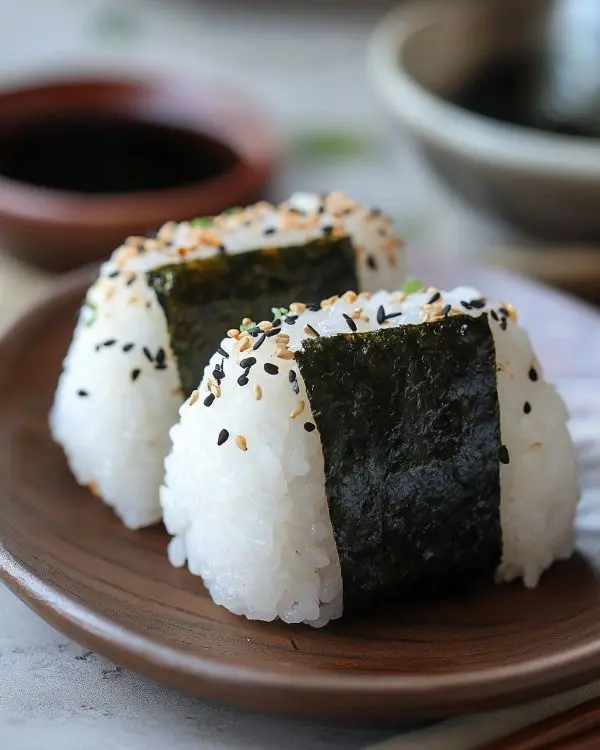
This isn’t your average rice ball recipe. After testing dozens of variations, I discovered that the secret lies in three crucial elements. First, we use perfectly seasoned short-grain rice that holds together without becoming mushy. Second, our spicy tuna filling strikes that magical balance between creamy mayo and fiery sriracha. Finally, the plastic wrap technique ensures perfectly shaped triangles every single time.
My Japanese neighbor, Mrs. Tanaka, taught me that authentic onigiri should feel substantial in your hand yet remain tender when you bite into it. This recipe achieves exactly that texture through precise rice-to-filling ratios and proper shaping techniques.
Moreover, these rice balls represent the perfect fusion of traditional Japanese comfort food with American pantry staples. You’ll find everything you need at your local grocery store, making this an incredibly accessible introduction to Japanese cuisine.
Ingredients Table
| Essential Ingredients | US Measurement | Metric | Notes |
|---|---|---|---|
| Cooked short-grain rice | 3 cups | 600g | Day-old rice works perfectly |
| Canned tuna in oil | 5.29 oz | 150g | Strain thoroughly |
| Mayonnaise | 2 tablespoons | 30ml | Japanese mayo preferred |
| Sriracha sauce | 1 tablespoon | 15ml | Adjust to taste |
| Nori sheets | ½ sheet | – | Cut into strips |
| Salt | ½ teaspoon | 3g | For seasoning rice |
| Black sesame seeds | ½ teaspoon | 2g | Optional garnish |
Shopping Tips for US Grocery Stores
Finding authentic Japanese sushi ingredients has become surprisingly easy in American supermarkets. Most major chains now carry short-grain rice in their international aisles. Look for brands like Nishiki or Botan, which consistently deliver that perfect sticky texture essential for onigiri.
For the best results, choose canned tuna packed in oil rather than water. The oil adds richness that complements the spicy mayo mixture beautifully. However, you can absolutely use tuna in water if that’s what you have on hand—just add an extra tablespoon of mayo to compensate.
Nori sheets are typically found in the Asian foods section, often near the sushi supplies. Don’t worry if you can only find full sheets; we’ll cut them down to size. Quality nori should feel crisp and have a deep, oceanic aroma when you open the package.
Equipment and Preparation Steps
Essential Equipment
You don’t need specialized sushi equipment for perfect onigiri. A large mixing bowl, fine mesh strainer, and clean kitchen scissors will handle most tasks. Additionally, plastic wrap becomes your best friend for shaping these rice balls without sticky fingers.
Keep a small bowl of water nearby for moistening your hands and utensils. This prevents rice from sticking everywhere and makes the entire process much more manageable.
Home-made Sushi Step-by-Step Instructions
Step 1: Prepare Your Seasoned Rice Base
Transfer your freshly cooked or reheated rice to a large bowl and season with salt. Mix gently but thoroughly, ensuring every grain gets seasoned. Cover with a lid and keep warm while you prepare the filling.
Pro tip: If using day-old rice, microwave it covered for 1-3 minutes until hot. Warm rice shapes more easily and holds together better than cold rice.
Step 2: Create the Perfect Spicy Tuna Filling
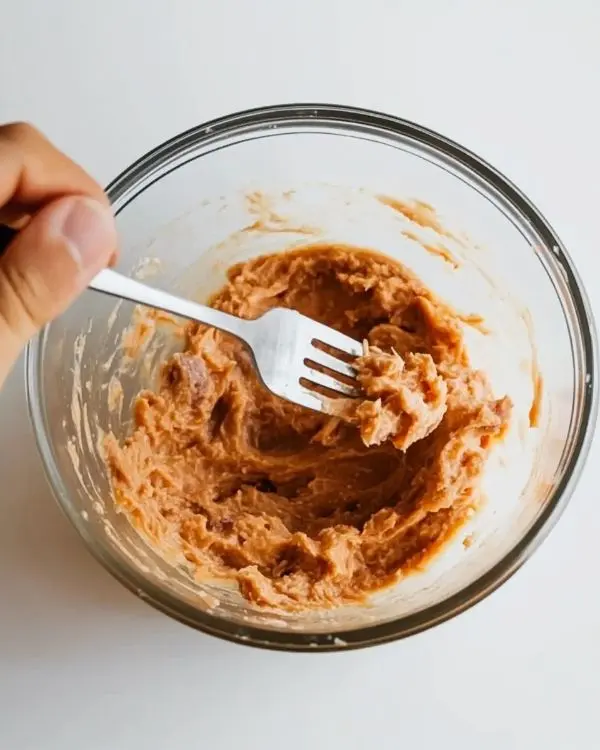
Open your canned tuna and strain it thoroughly using a fine sieve. Press the tuna firmly with a fork to remove as much liquid as possible—this step prevents soggy rice balls.
In a small bowl, combine the drained tuna, mayonnaise, and sriracha sauce. Mix until you achieve a creamy, cohesive filling. Taste and adjust the sriracha level to your heat preference. The mixture should hold together when scooped but remain spreadable.
Man, oh man, getting this balance right took me way too many attempts! My first batch was so wet it turned the rice into mush. Learn from my mistakes and drain that tuna like your onigiri depends on it—because it does.
Step 3: Master the Plastic Wrap Shaping Technique
Spread a large sheet of plastic wrap (about 15 x 15 inches) on a clean, flat surface. The plastic should lie completely flat without wrinkles. Moisten your rice paddle or spatula with water to prevent sticking.
Divide your seasoned rice into four equal portions, roughly ¾ cup each. Scoop one portion into the center of the plastic wrap and spread it into a circle about ½-inch thick.
Step 4: Add Filling and Shape Your Triangle
Divide your spicy tuna mixture into four equal portions. Place one portion directly in the center of your flattened rice circle. Don’t overfill—less is definitely more when it comes to onigiri filling.
Lift the corners of the plastic wrap and twist them together, forming a pouch around the rice and filling. Gently squeeze and shape the bundle into a ball, then flatten it until it’s about 1.75 inches thick.
Now comes the fun part—creating that iconic triangular shape! Use the L-shape formed by your thumb and pointer finger to gently press and mold the rice ball into a triangle. Work slowly and patiently; rushing this step leads to lopsided onigiri.
Step 5: Add the Nori Wrapper
Remove one nori sheet from its package and fold it horizontally in half. Cut along the fold line with clean scissors, then fold the half-sheet again to create a square. Cut at the fold lines to make four vertical strips.
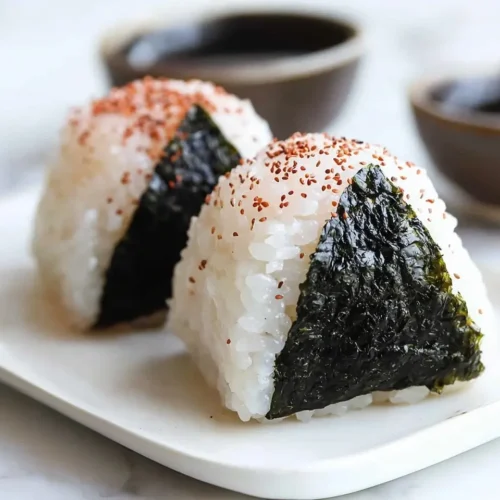
Carefully unwrap your triangle from the plastic and place it on a clean surface. Position a nori strip vertically along the base of the triangle, with the rough side touching the rice. The seaweed should wrap around the bottom like a little belt, making it easy to hold without getting rice on your fingers.
Sprinkle with black sesame seeds for that professional finishing touch. You know what? Those little seeds aren’t just for looks—they add a nutty crunch that perfectly complements the creamy filling.
Japanese Sushi Cooking Tips and Creative Variations
Professional Tips for Spicy Tuna Onigiri Perfect Results
Temperature control makes all the difference in onigiri success. According to Thomas Keller’s precision cooking principles, working with warm (not hot) rice ensures proper binding without burning your fingers. The rice should feel comfortably warm to the touch—think baby bath water temperature.
Moisture management is equally crucial. Keep your hands slightly damp but not dripping wet. Too much water creates mushy rice balls, while dry hands lead to cracked, falling-apart triangles.
Here’s a mistake I made early on—over-mixing the rice after adding salt. Gentle folding preserves the individual grains while still distributing seasoning evenly. Aggressive mixing turns your rice into paste, which nobody wants.
Creative Variations to Try
Regional American Twist: Substitute the sriracha with your favorite regional hot sauce. Buffalo sauce creates a tangy, vinegary kick that’s perfect for game day gatherings. Similarly, chipotle mayo adds smoky depth that pairs beautifully with the rice.
Dietary Modifications: For our vegetarian friends, replace tuna with mashed avocado mixed with lime juice and a pinch of garlic powder. The creamy texture works perfectly, and the flavor profile remains satisfying.
Holiday Variations: During Thanksgiving season, try a filling made with leftover turkey, cranberry sauce, and a touch of sage. It sounds unconventional, but trust me—it’s incredible.
Make-Ahead Strategy: These rice balls actually improve after sitting for 30 minutes at room temperature. The flavors meld together, and the texture becomes more cohesive. However, don’t add the nori until just before serving to maintain its crispiness.
Storage and Serving Information
| Storage Method | Duration | Quality Notes |
|---|---|---|
| Room temperature | 4-6 hours | Best texture and flavor |
| Refrigerated | 2-3 days | Wrap individually in plastic |
| Frozen | 1 month | Thaw overnight before eating |
| Without nori | Add 1 day | Store nori separately |
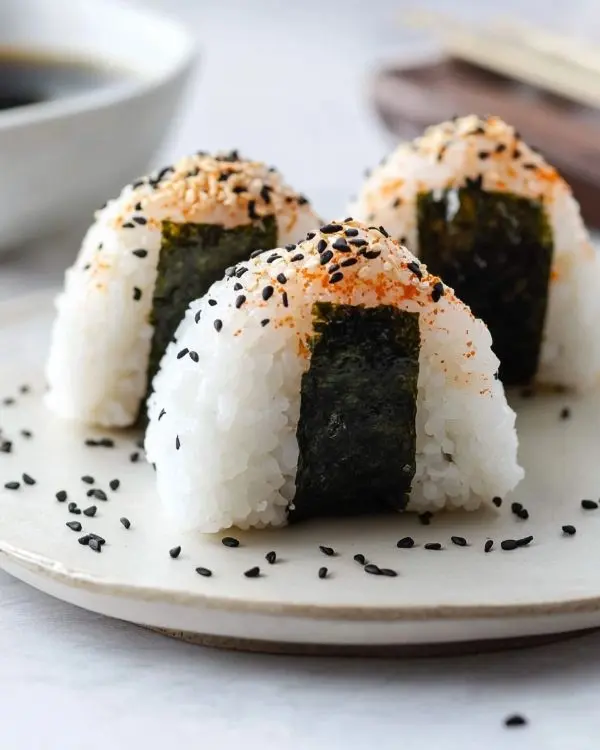
Fresh onigiri tastes best within the first few hours of making. The rice maintains its perfect texture, and all flavors remain bright and distinct. When refrigerating, wrap each rice ball individually in plastic wrap to prevent them from drying out.
For freezing, skip the nori wrapper initially. Freeze the shaped rice balls on a baking sheet, then transfer to freezer bags. Add fresh nori strips after thawing for the best texture and appearance.
Pairing Suggestions and Serving Ideas
These spicy tuna onigiri pair beautifully with simple Japanese sides. Consider serving them alongside a bowl of miso soup and some pickled vegetables for an authentic experience. The clean, salty flavors complement the rich, spicy rice balls perfectly.
For beverages, green tea provides a traditional pairing, but don’t overlook how well these work with cold beer on a hot summer day. The combination reminds me of perfect picnic food—portable, satisfying, and surprisingly refreshing.
Want to create an impressive Japanese-inspired lunch spread? Add some edamame with sea salt, cucumber salad, and maybe some homemade gyoza for a feast that’ll make your friends think you’re a culinary genius.
Spicy Tuna Onigiri FAQs
What to put in tuna for onigiri?
The classic combination includes mayonnaise for creaminess and sriracha for heat, but you can customize with any sauce you love. Some popular additions include sesame oil, rice vinegar, or even a touch of soy sauce for extra umami depth.
Is onigiri tuna healthy?
Absolutely! These rice balls provide complex carbohydrates from the rice, high-quality protein from the tuna, and healthy fats from the mayonnaise. Each onigiri contains approximately 250 calories and makes an excellent portable meal or substantial snack.
Can I use tuna in water for onigiri?
Yes, though you’ll need to adjust the recipe slightly. Add an extra tablespoon of mayonnaise to compensate for the reduced richness, and make sure to drain the tuna extremely thoroughly to prevent soggy rice balls.
How long does spicy tuna onigiri last?
Fresh onigiri keeps at room temperature for 4-6 hours and refrigerated for 2-3 days when properly wrapped. The rice texture changes slightly when cold but remains delicious. Never leave rice-based foods at room temperature for more than 6 hours for food safety reasons.
Conclusion
Creating perfect spicy tuna onigiri at home isn’t just about following a recipe—it’s about embracing a beautiful culinary tradition that transforms simple ingredients into something magical. These triangular treasures prove that the best comfort food doesn’t need complicated techniques or expensive equipment.
From that first discovery in San Francisco’s Japantown to countless kitchen experiments, this recipe represents everything I love about cooking. Simple ingredients, mindful preparation, and that moment when everything comes together perfectly in your hands.
Next time you’re craving something different for lunch or need an impressive snack for guests, remember these humble rice balls. They’re conversation starters, hunger satisfiers, and little packages of joy all wrapped up in seaweed.
Why not pair them with a refreshing autumn gin sour for your next dinner party? The bright citrus notes complement the spicy tuna beautifully, creating an unexpectedly sophisticated flavor combination.
Try making a batch this weekend and tag us on social media with your creations. I’d love to see your personal variations and hear about any family members you’ve converted to the onigiri obsession!
Remember, every great cook started with curiosity and wasn’t afraid to get their hands a little sticky. These spicy tuna onigiri are waiting to become your next signature dish.
Spicy Tuna Onigiri
Equipment
- Mixing bowl
- Fine-mesh strainer
- Kitchen scissors
- Plastic wrap
Ingredients
Essential Ingredients
- 3 cups Cooked short-grain rice Day-old rice works perfectly
- 150 g Canned tuna in oil Strain thoroughly
- 2 tablespoons Mayonnaise Japanese mayo preferred
- 1 tablespoon Sriracha sauce Adjust to taste
- ½ sheet Nori sheets Cut into strips
- ½ teaspoon Salt For seasoning rice
- ½ teaspoon Black sesame seeds Optional garnish
Instructions
- Transfer freshly cooked or reheated rice to a bowl, season with salt, and keep warm.
- Drain tuna thoroughly, then mix with mayonnaise and sriracha until creamy.
- Spread plastic wrap flat, place a portion of rice in the center, and flatten into a circle.
- Add a spoonful of spicy tuna filling in the center, then lift the wrap and shape into a ball.
- Shape gently into a triangle using your hands through the wrap.
- Wrap the base with a strip of nori and sprinkle with sesame seeds before serving.

