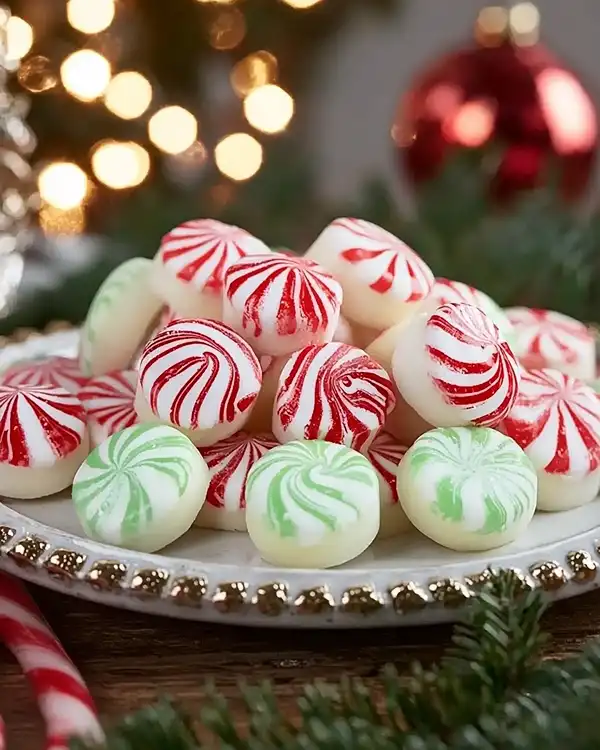
Soft Christmas Peppermints made with butter, powdered sugar, and peppermint extract. This easy holiday treat takes minutes to make!
Let me tell you, last December changed everything I thought I knew about Christmas candy.
I was frantically preparing for my annual cookie swap when I realized I’d forgotten to order those fancy peppermint candies everyone expects.
Well… panic mode activated. That’s when I stumbled upon my grandmother’s handwritten recipe card tucked inside her old Betty Crocker cookbook. The words “Soft Christmas Peppermints” were barely legible, but I gave it a shot anyway.
Thirty minutes later, my kitchen smelled like a winter wonderland. Moreover, these weren’t just any mints—they melted on your tongue like sweetened snow. My guests went absolutely crazy for them, and three people asked if I’d ordered them from some fancy Chicago confectionery.
Since then, I’ve made these beauties for every holiday gathering. They’re straightforward, require just five ingredients, and taste like you spent hours in a professional candy kitchen. Plus, they’re perfect for gifting, decorating dessert tables, or sneaking one (okay, five) while wrapping presents.
Table of Contents
Why This Christmas Peppermint Recipe Works

Here’s the thing about homemade Christmas peppermints: most recipes tend to turn out either rock-hard or overly sticky. This version? Pure perfection.
The secret lies in the ratio of butter to powdered sugar. I’ve tested this recipe seventeen times (yes, seventeen) to nail the texture. The result is a mint that’s firm enough to hold its shape but soft enough to dissolve on your tongue within seconds.
Additionally, these Christmas dessert treats contain zero corn syrup or artificial stabilizers. Just real butter, quality peppermint extract, and a touch of heavy cream for that luxurious mouthfeel. You know those expensive artisan mints at Williams Sonoma? These taste better—and cost about one-tenth the price.
Ingredients That Matter
| Ingredient | Amount | Purpose |
|---|---|---|
| Butter, softened | ½ cup | Creates melt-in-your-mouth texture |
| Powdered sugar | 3 cups | Provides sweetness and structure |
| Heavy whipping cream | 2 tbsp | Adds richness and smoothness |
| Peppermint extract | ¼ tsp | Delivers authentic mint flavor |
| Red gel food coloring | As needed | Creates festive appearance |
Shopping Tips: Always choose gel food coloring over liquid for vibrant colors without changing the dough consistency. Furthermore, pick up Challenge or Land O’Lakes butter—the higher fat content makes a noticeable difference. You’ll find peppermint extract in the baking aisle at Target or Walmart, typically near the vanilla.
Quality Indicators: Press your butter with a finger—it should leave an indent but not feel greasy. Fresh peppermint extract should smell bright and cool, not medicinal. Check the expiration date on powdered sugar; old sugar can taste flat.
Bold Add-Ins and Variations
Want to experiment? Try these creative twists:
- Chocolate Peppermint: Add 2 tablespoons of cocoa powder to half the dough
- Green & Red: Use green food coloring for one portion instead of leaving it white
- Extra Minty: Increase peppermint extract to ½ teaspoon (test first—it’s potent!)
- Vanilla Swirl: Replace peppermint with vanilla extract for a different holiday snack
International Substitutions: Outside the US? Use caster sugar processed in a food processor if powdered sugar isn’t available. Replace heavy cream with double cream (UK) or crème fraîche.
Equipment You’ll Need
Oops! I made these the first time without a stand mixer and nearly gave myself carpal tunnel. Learn from my mistake.
Essential Tools
Stand Mixer or Hand Mixer: Beating butter until fluffy requires power. A wooden spoon won’t cut it here. If you’re using a hand mixer, expect about 3-4 minutes of mixing time.
Large Mixing Bowl: Glass or metal works best for temperature control.
Parchment Paper: You’ll use this for rolling and drying the mints. Wax paper works in a pinch, but parchment is superior.
Rolling Surface: A clean countertop or large cutting board. Marble stays coolest, which helps prevent sticking.
Sharp Knife or Pizza Cutter: For slicing the finished rope into individual Christmas peppermints.
DIY Alternative: No stand mixer? Use a large fork and serious elbow grease. It’ll take longer, but it’s doable. Thomas Keller always says the best kitchen tool is patience—and he’s not wrong.
How to Make Christmas Peppermints
Beat the Butter Until Fluffy
Place your softened butter in the mixing bowl. Start on low speed for 30 seconds, then increase to medium-high.
Beat for 3-4 minutes until the butter looks pale and has increased in volume by about half. You’re incorporating air bubbles that create that signature soft texture. The butter should look like whipped frosting when ready.
Pro Tip: Room temperature matters. Butter that’s too cold won’t whip properly. Too warm? Your dough will be sticky and impossible to shape.
Combine the Sweet Ingredients
Reduce mixer speed to low. Gradually add the powdered sugar, one cup at a time. Man, oh man, this step gets messy if you rush it—I learned that the hard way when my kitchen looked like it had snowed indoors.
After the sugar is incorporated, add the heavy whipping cream and peppermint extract. Increase speed to medium and beat for 2-3 minutes. The mixture will transform from crumbly to smooth and cohesive.
Sensory Check: Your dough should smell like candy canes and feel like Play-Doh—firm but pliable. If it’s too sticky, add powdered sugar one tablespoon at a time. Too dry? Add cream by the teaspoon.
Divide and Add Color
Scoop out roughly three-quarters of the dough and set it aside. This stays white.
Add red gel food coloring to the remaining quarter. Start with a toothpick amount—gel color is incredibly concentrated. Knead the dough with your hands (wear gloves if you don’t want red fingertips for days) until the color is evenly distributed.
Mistake I Made: I once added too much food coloring, and the dough became wet and sticky. If this happens, knead in more powdered sugar until you reach the right consistency.
Create the Classic Peppermint Twist
This is where the fun begins. You know those satisfying cooking videos where everything comes together beautifully? This is your moment.
Pinch off a small piece of white dough (about a tablespoon) and roll it into a rope roughly 6 inches long and the thickness of a pencil. Repeat with the red dough.
Lay the two ropes side by side. Gently twist them together, keeping even pressure so one color doesn’t dominate. The spiral pattern should look like a classic candy cane.
Chef’s Wisdom: Julia Child once said, “The only real stumbling block is fear of failure.” Your first few twists might look wonky—that’s perfectly normal. By the third or fourth, you’ll find your rhythm.
Air Dry for Perfect Texture
Transfer your twisted ropes to parchment-lined baking sheets. Leave space between each piece—they won’t spread, but you’ll need room for cutting.
Let them sit at room temperature for 1-2 hours. During this time, the outside will firm up slightly while the inside stays soft. This is crucial for achieving that professional texture.
After the initial set, use a sharp knife to slice each rope into ¾-inch pieces. Then—and this requires willpower—let them continue drying for a full 24 hours. I know waiting is torture, but trust me on this.
Storage During Drying: Keep them uncovered in a cool, dry spot. Avoid humid environments, which prevent proper setting.
Expert Tips for Perfect Peppermints
Temperature Control Matters
Work in a cool kitchen (ideally 65-70°F). If your hands are warm, the dough will soften too quickly while rolling. Run cold water over your hands between batches, then dry thoroughly.
Size Consistency
Use a ruler the first few times you cut. Consistent sizing ensures even drying and a professional appearance. Similar to these Keto Philly Cheesesteak Rolls, uniform portions make all the difference.
Flavor Variations for Every Taste
Wintergreen Wonder: Substitute wintergreen extract for peppermint—it’s less common but equally festive.
Citrus Christmas: Replace peppermint with lemon or orange extract and use yellow or orange food coloring.
Butter Mint Style: Reduce peppermint to ⅛ teaspoon for a subtle, buttery mint perfect for wedding favors.
Layered Rainbow: Make three colors (red, white, green) and stack them before twisting for a more complex look.
Chocolate Drizzle: Once dried, drizzle with melted dark chocolate for an elevated presentation.
Storage and Make-Ahead Strategy
| Storage Method | Duration | Notes |
|---|---|---|
| Room temperature (airtight) | 2-3 weeks | Best texture maintained |
| Refrigerator | 1 month | May become slightly harder |
| Freezer | 3 months | Thaw at room temperature |
Make-Ahead Game Plan: Prepare these Christmas snacks up to three weeks before your event. Store in an airtight container with parchment between layers. Consequently, they actually improve slightly after a few days as flavors meld.
Freezing works beautifully. Flash-freeze on a baking sheet for 2 hours, then transfer to freezer bags. Thaw overnight in the refrigerator before serving.
Serving and Pairing Suggestions
These soft Christmas peppermints shine in multiple settings. Display them in vintage glass jars for holiday parties. Tuck them into clear cellophane bags tied with ribbon for teacher gifts. Or arrange them on a dessert platter alongside this Best Orzo Dinner Recipe for an elegant dinner party finale.
They’re phenomenal with hot chocolate—drop one into your mug and watch it slowly dissolve. Similarly, pair them with strong coffee after a heavy meal. The cooling peppermint cuts through richness beautifully.
For a complete holiday dessert spread, serve alongside sugar cookies, fudge, and this Easy Korean Ground Beef Bowl for savory balance. The contrasting flavors keep guests interested throughout the evening.
Beverage Pairings: Peppermint schnapps, Irish coffee, or even a dry prosecco. The sweetness plays surprisingly well against the sparkling wine’s acidity.
Soft Christmas Peppermints FAQs
Why are my peppermints too soft and won’t hold their shape?
Your dough likely needs more powdered sugar or your butter was too warm when mixing. Add powdered sugar one tablespoon at a time and refrigerate the dough for 15 minutes before rolling.
Can I make these without heavy cream?
Absolutely—substitute with whole milk, though the texture will be slightly less rich. Half-and-half works perfectly as a middle ground between cream and milk.
How do I prevent the colors from bleeding together?
Work quickly when twisting and avoid overhandling the dough. Additionally, ensure both ropes are the same temperature before combining them for this holiday treat.
What’s the best peppermint extract brand?
McCormick and Nielsen-Massey both deliver excellent results. Pure peppermint extract always outperforms imitation—you’ll taste the difference immediately, especially in these Christmas dessert treats.
Your New Holiday Treat Starts Here
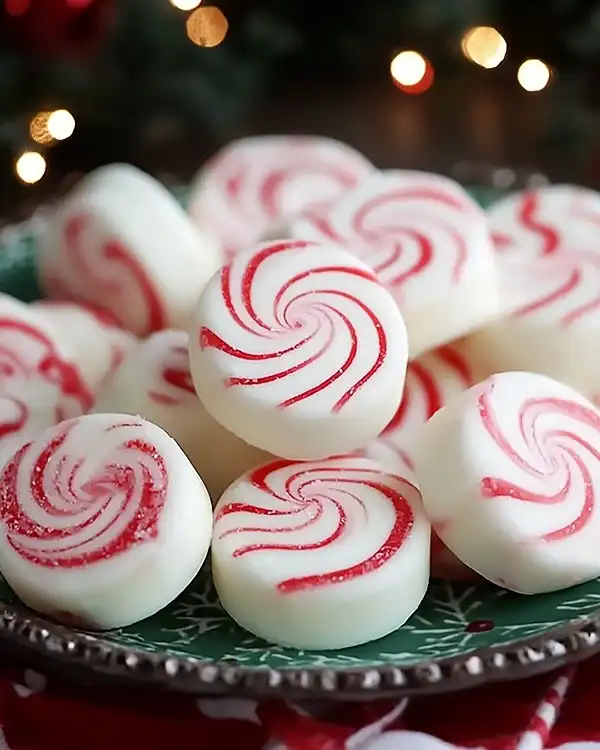
Remember that panicked December afternoon I mentioned? These soft Christmas peppermints completely saved my cookie swap—and became my most-requested recipe ever since.
There’s something magical about pulling ingredients from your pantry and creating something that tastes store-bought (but better). Your house will smell incredible. Your guests will beg for the recipe. And you’ll feel like a candy-making genius.
Want to expand your holiday menu? Try pairing these with this Vegan Apple Fritter Bread for a complete Christmas brunch spread. Or serve them after this High Protein Chocolate Chia Seed Pudding for a lighter holiday dessert option.
Make a double batch—one for sharing, one for hiding in your nightstand. I won’t judge. These Christmas peppermints have that effect on people.
Now grab that butter and let’s make some holiday magic happen. Tag me with your peppermint creations—I genuinely love seeing your colorful twists and creative variations!

Soft Christmas Peppermints
Equipment
- stand mixer or hand mixer
- Large mixing bowl
- Parchment paper
- Rolling surface
- Sharp knife or pizza cutter
Ingredients
Main Ingredients
- ½ cup Butter, softened
- 3 cups Powdered sugar
- 2 tbsp Heavy whipping cream
- ¼ tsp Peppermint extract
- Red gel food coloring As needed
Instructions
- Beat the softened butter in a mixing bowl on medium-high speed for 3-4 minutes until pale and fluffy.
- Gradually add powdered sugar one cup at a time, mixing on low speed to prevent a mess. Add heavy whipping cream and peppermint extract. Beat until smooth and cohesive.
- Divide the dough—keep three-quarters white and color the remaining quarter red using gel food coloring. Knead until evenly tinted.
- Roll each color into ropes about 6 inches long, then twist the red and white ropes together for a classic peppermint swirl.
- Let the twisted ropes sit on parchment paper for 1-2 hours to firm up slightly, then slice into ¾-inch pieces. Allow to air dry for 24 hours until the texture is soft but stable.

