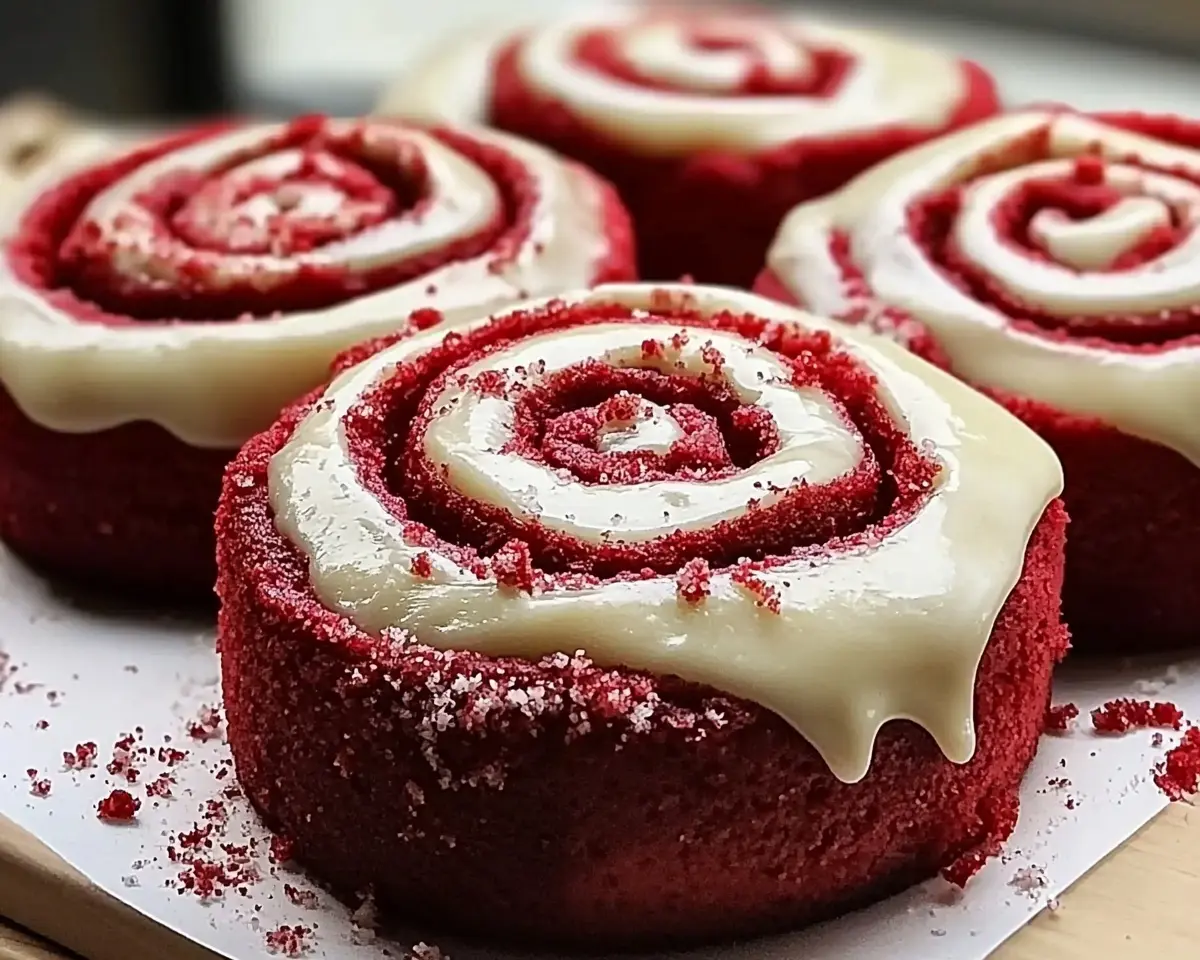
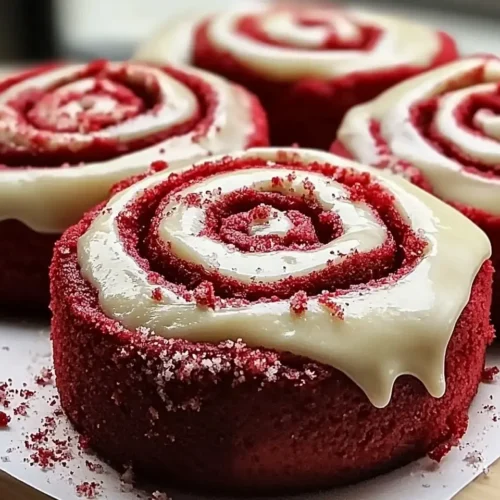
Red velvet cinnamon rolls with cream cheese frosting deliver gooey cinnamon swirls in every bite. Perfect weekend breakfast recipe! (148 characters)
Well, let me tell you about the morning that changed my weekend breakfast game forever. Picture this: a rainy Saturday in Portland, Oregon, where the smell of fresh rain mingles with something magical happening in my kitchen. I’m Linda, and welcome to Tasty at Home—where bold flavors meet everyday kitchens.
One bite of these red velvet cinnamon rolls transported me straight back to my grandmother’s Christmas mornings. However, this wasn’t her traditional recipe. Instead, I’d accidentally grabbed cocoa powder instead of flour during a particularly hectic morning. Oops! But that happy mistake led to the most incredible discovery.
The result? Consequently, these stunning crimson beauties became my signature weekend treat. After testing this recipe fifteen times—yes, I burned three batches learning the perfect timing—I finally nailed the ideal balance of tangy cream cheese frosting and gooey cinnamon swirls.
Whether you’re planning a special Valentine’s Day breakfast or simply craving something extraordinary, these rolls deliver pure magic. Therefore, let’s dive into creating these show-stopping treats that’ll have your kitchen smelling like a cozy bakery.
Table of Contents
What Makes These Red Velvet Cinnamon Rolls Special
These aren’t your ordinary cinnamon rolls. Moreover, the addition of cocoa powder and red food coloring creates a stunning visual impact while adding subtle chocolate notes. The result is a tender, slightly tangy dough that perfectly complements the sweet cinnamon filling.
Furthermore, the secret lies in the technique I learned from studying Julia Child’s approach to enriched doughs. She emphasized the importance of proper gluten development, which creates those gorgeous, pull-apart layers we all crave.
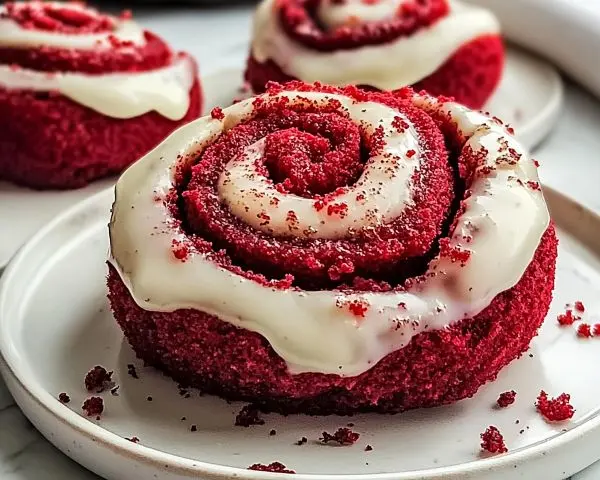
Essential Ingredients for Red Velvet Cinnamon Rolls Success
| Ingredient | US Measurement | Metric | Purpose |
|---|---|---|---|
| All-purpose flour | 4 cups | 480g | Structure base |
| Granulated sugar | 1/4 cup | 50g | Yeast activation |
| Active dry yeast | 1 packet (2 1/4 tsp) | 7g | Leavening agent |
| Salt | 1/2 tsp | 3g | Flavor enhancement |
| Whole milk, warm | 1/2 cup | 120ml | Richness |
| Water, warm | 1/2 cup | 120ml | Hydration |
| Unsalted butter, softened | 1/4 cup | 57g | Tenderness |
| Large eggs | 2 | 2 | Binding |
| Unsweetened cocoa powder | 2 tbsp | 15g | Color and flavor |
| Red food coloring | 1 tbsp | 15ml | Signature color |
| Vanilla extract | 1 tsp | 5ml | Flavor depth |
For the Cinnamon Filling
| Ingredient | Amount | Metric | Notes |
|---|---|---|---|
| Unsalted butter, softened | 1/2 cup | 113g | Room temperature |
| Brown sugar, packed | 1 cup | 220g | Light or dark |
| Ground cinnamon | 2 tbsp | 15g | Fresh preferred |
| Salt | 1/2 tsp | 3g | Balances sweetness |
For the Cream Cheese Frosting
| Ingredient | Amount | Metric | Temperature |
|---|---|---|---|
| Cream cheese | 8 oz | 225g | Room temperature |
| Unsalted butter | 1/4 cup | 57g | Softened |
| Powdered sugar | 1 1/2 cups | 190g | Sifted |
| Vanilla extract | 1 tsp | 5ml | Pure preferred |
| Salt | Pinch | Pinch | Flavor enhancer |
Shopping Tips for Best Results
When shopping at your local grocery store, choose Philadelphia cream cheese for the smoothest frosting. Additionally, look for gel food coloring rather than liquid—it provides more vibrant color without thinning the dough.
For the cocoa powder, Hershey’s unsweetened works perfectly. Similarly, King Arthur flour creates the ideal texture, though any quality all-purpose flour will succeed.
Quality Indicators:
- Fresh yeast should foam vigorously within 5-10 minutes
- Butter should be soft enough to leave fingerprints
- Eggs should be at room temperature for best incorporation
Ingredient Substitutions
International Adaptations:
- Replace all-purpose flour with bread flour for chewier texture
- Substitute buttermilk for regular milk for extra tang
- Use natural food coloring for a more subtle hue
Dietary Modifications:
- Dairy-free: Use plant-based butter and milk alternatives
- Egg-free: Replace with flax eggs (2 tbsp ground flaxseed + 6 tbsp water)
Equipment and Step-by-Step Instructions
Essential Equipment
You’ll need a large mixing bowl, measuring cups, and a stand mixer (though hand mixing works too). Also, grab a rolling pin, 9×13-inch baking dish, and kitchen scale if available.
DIY Alternatives:
- No stand mixer? A wooden spoon and some elbow grease work perfectly
- Missing a rolling pin? A wine bottle does the trick
- No kitchen scale? Level measurements work fine
Step 1: Activate the Yeast Foundation
First, combine warm milk, water, and sugar in a small bowl. The temperature should feel like a warm bath—too hot kills the yeast. Next, sprinkle the yeast on top and let it sit undisturbed.
Within 5-10 minutes, you’ll see a foamy, bubbly mixture. This indicates healthy, active yeast that’s ready to work its magic. If nothing happens, your yeast might be expired or the liquid too hot.
Pro Tip: I learned this from studying Thomas Keller’s bread techniques—always test your yeast first. This simple step prevents disappointment later.
Step 2: Create the Signature Dough
Meanwhile, whisk together flour, salt, and cocoa powder in your large bowl. This ensures even distribution of the dry ingredients. Subsequently, add the yeast mixture, eggs, butter, food coloring, and vanilla.
Mix everything until a shaggy dough forms. Don’t worry if it looks messy initially—this is normal. The magic happens during kneading.
Step 3: Master the Kneading Technique
Turn the dough onto a lightly floured surface. Now comes the therapeutic part—kneading for 6-8 minutes until smooth and elastic. The dough should feel soft and slightly tacky but not sticky.
Common Mistake Alert: Last Christmas, I over-floured my surface and created tough rolls. Use just enough flour to prevent sticking. The dough should remain soft and pliable.
You know it’s ready when you can stretch a small piece thin enough to see light through it without tearing.
Step 4: The First Rise Magic
Place the kneaded dough in a greased bowl, turning once to coat all sides. Cover with a damp towel or plastic wrap. Let it rise in a warm, draft-free spot for about 1 hour.
The dough should double in size. A perfect spot is your oven with just the light on—it creates ideal temperature and humidity.
Step 5: Prepare the Irresistible Filling
While the dough rises, mix the softened butter, brown sugar, cinnamon, and salt until combined. The mixture should be spreadable but not runny. Taste it—you know, for quality control purposes!
This filling creates those gooey cinnamon swirls that make these rolls absolutely irresistible.
Step 6: Shape Those Beautiful Rolls
Once doubled, gently punch down the risen dough. Roll it into a 12×18-inch rectangle on a lightly floured surface. Aim for even thickness throughout.
Spread the cinnamon filling evenly, leaving a small border along one long edge. Then, starting from the opposite long edge, roll the dough tightly into a log.
Shaping Secret: Roll firmly but don’t stretch the dough. This prevents gaps in your finished rolls.
Step 7: The Perfect Slice
Using a sharp knife or dental floss, slice the log into 12 equal pieces. Dental floss works better—it cuts cleanly without squishing the rolls.
Arrange them cut-side up in your greased 9×13-inch baking dish. They should just touch each other. Cover and let rise for another 30 minutes.
Step 8: Bake to Golden Perfection
Preheat your oven to 350°F (175°C). Once the rolls have completed their second rise, they’ll look puffy and almost doubled again.
Bake for 20-25 minutes until the tops are golden brown and spring back lightly when touched. The kitchen will smell absolutely divine—like a professional bakery.
Timing Tip: Set a timer for 20 minutes and check. Every oven bakes differently, so watch for that perfect golden color.
Step 9: Create the Dreamy Frosting
While the rolls bake, prepare the cream cheese frosting. Beat together the softened cream cheese and butter until fluffy. Gradually add powdered sugar, vanilla, and salt.
The frosting should be smooth and spreadable. If it’s too thick, add milk one teaspoon at a time.
Step 10: The Grand Finale
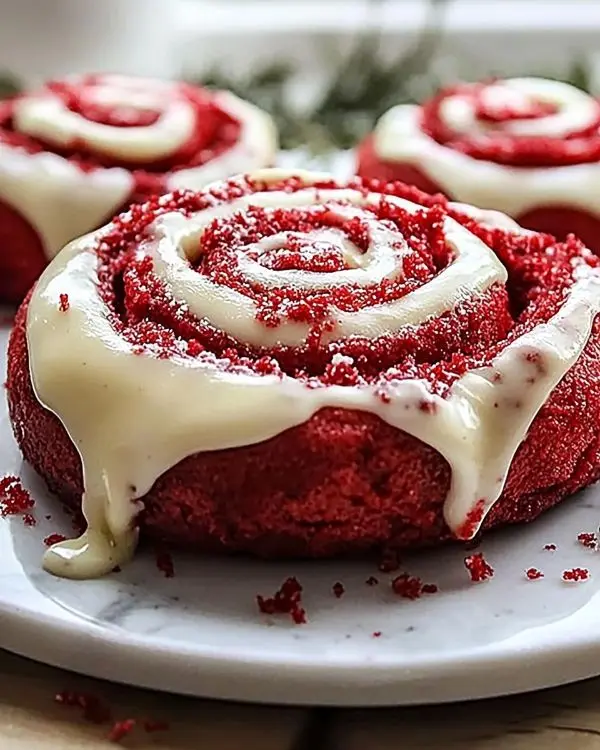
Remove the rolls from the oven and let them cool for exactly 5 minutes. Then, generously spread the cream cheese frosting over the warm rolls. The slight warmth helps the frosting melt slightly into all those delicious crevices.
Expert Tips for Perfect Red Velvet Cinnamon Rolls Results
Temperature Control: Room temperature ingredients mix more easily and create better texture. Plan ahead by removing eggs and dairy from the refrigerator 30 minutes before baking.
Dough Texture: The dough should feel soft and slightly tacky. If it’s too dry, add warm water one tablespoon at a time. Too wet? Add flour gradually.
Rising Environment: Create a proofing box by placing a pan of hot water on your oven’s bottom rack with the light on. This maintains consistent warmth and humidity.
Creative Variations to Try
Holiday Red Velvet Rolls: Add 1/2 cup mini chocolate chips to the filling for extra indulgence during Christmas morning.
Southern Comfort Style: Replace half the milk with buttermilk and add 1 teaspoon of bourbon extract to the frosting.
Healthier Version: Substitute whole wheat pastry flour for half the all-purpose flour. Also, reduce sugar by 1/4 cup in the filling.
Autumn Spice Twist: Add 1/4 teaspoon each of nutmeg and cardamom to the cinnamon filling. Perfect for Thanksgiving morning alongside your small batch pumpkin pie bars.
Individual Portions: Use a muffin tin to create personal-sized portions. Reduce baking time to 15-18 minutes.
Storage and Make-Ahead Magic
| Storage Method | Duration | Instructions |
|---|---|---|
| Room temperature | 2-3 days | Cover tightly with plastic wrap |
| Refrigerator | 1 week | Wrap individually, reheat before serving |
| Freezer (unfrosted) | 3 months | Wrap tightly, thaw overnight |
| Freezer (frosted) | 1 month | Individual containers prevent sticking |
Make-Ahead Strategy: Prepare through Step 7 the night before. Cover and refrigerate overnight. In the morning, let them come to room temperature (about 30 minutes) before the second rise.
Reheating Tips: Microwave individual rolls for 20-30 seconds or warm in a 300°F oven for 5 minutes.
Perfect Pairings and Serving Ideas
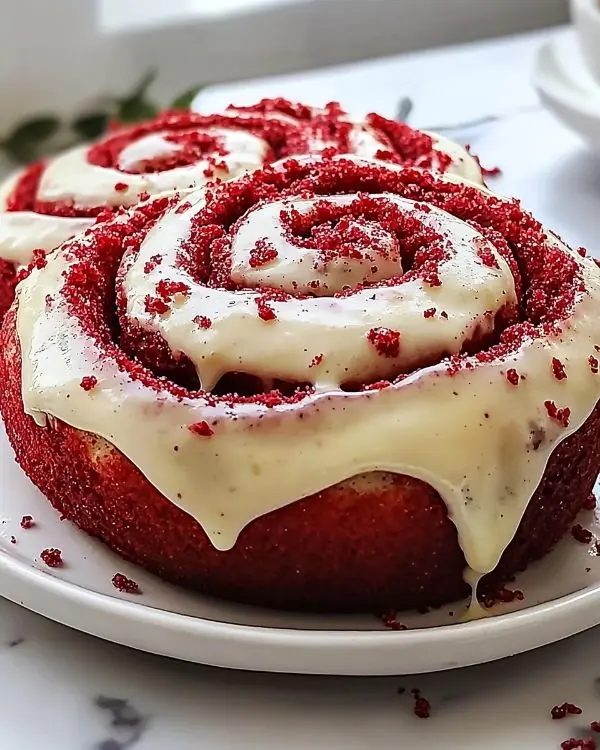
These red velvet cinnamon rolls pair beautifully with strong coffee or hot chocolate. For a complete weekend brunch, serve alongside slow-cooker honey garlic chicken thighs for a sweet and savory combination.
Additionally, they make stunning Valentine’s Day breakfast treats or Mother’s Day surprises. The dramatic red color creates Instagram-worthy presentations that’ll impress any crowd.
Consider serving with fresh strawberries and whipped cream for an elegant touch. The berry acidity balances the rich sweetness perfectly.
For fall gatherings, pair with apple cider or pumpkin spice lattes. They also complement butternut squash pasta sauce for unique brunch menus.
Troubleshooting Common Issues
Dense Rolls: Usually caused by old yeast or over-flouring during kneading. Always test yeast activity first and measure flour properly.
Filling Leakage: This happens when the dough is rolled too loosely or sliced too soon after rolling. Let the shaped log rest 5 minutes before slicing.
Uneven Rising: Check for drafts in your rising location. Consistent temperature produces even results.
Dry Texture: Often results from overbaking or insufficient moisture. Cover rolls with foil if browning too quickly.
Red Velvet Cinnamon Rolls FAQs
Can I make these without a stand mixer?
Absolutely! Hand mixing works perfectly. Mix ingredients with a wooden spoon, then knead by hand for 8-10 minutes until smooth and elastic.
Why do my rolls turn out dense instead of fluffy?
Dense rolls typically result from expired yeast, too much flour, or insufficient kneading. Test your yeast first and measure ingredients accurately for best results.
How do I know when the dough has risen enough?
The dough should double in size and feel light and airy. Press two fingers into the center—if the indentation remains, it’s ready.
Can I prepare these the night before baking?
Yes! Assemble through the shaping step, cover tightly, and refrigerate overnight. Allow 30 minutes at room temperature before the final rise and baking.
What’s the secret to getting that perfect red color?
Use gel food coloring rather than liquid for vibrant color without affecting dough consistency. Start with less—you can always add more during mixing.
The Sweet Red Velvet Cinnamon Rolls Conclusion
Man, oh man, these red velvet cinnamon rolls transform any ordinary morning into something truly special. The combination of tender, cocoa-kissed dough and gooey cinnamon swirls creates pure breakfast bliss.
Just like that rainy Portland morning when I first discovered this recipe, these rolls have become my go-to for creating memorable moments. Whether it’s surprising your family on a lazy Sunday or impressing guests during the holidays, they never fail to deliver smiles.
The beauty lies not just in their stunning appearance but in the way they bring people together. Similarly to how my grandmother’s Christmas mornings created lasting memories, these rolls have that same magical power.
Try serving them with fresh orange juice and strong coffee for the ultimate weekend brunch experience. Furthermore, don’t forget to snap a photo before diving in—they’re almost too pretty to eat! For more creative breakfast ideas, check out our marshmallow rice krispies Halloween brains for fun seasonal treats.
Share your red velvet cinnamon roll creations by tagging us on social media. We love seeing how these recipes become part of your family traditions. After all, that’s what Tasty at Home is all about—where bold flavors meet everyday kitchens, and every dish tells a story.
What story will your red velvet cinnamon rolls tell?
Red Velvet Cinnamon Rolls
Equipment
- Mixing bowl
- Stand mixer
- Rolling Pin
- 9×13 inch baking dish
- measuring cups
- Kitchen scale
Ingredients
Dough
- 4 cups All-purpose flour 480g
- ¼ cup Granulated sugar 50g
- 1 packet Active dry yeast 7g (2 1/4 tsp)
- ½ tsp Salt 3g
- ½ cup Whole milk, warm 120ml
- ½ cup Water, warm 120ml
- ¼ cup Unsalted butter, softened 57g
- 2 Large eggs
- 2 tbsp Unsweetened cocoa powder 15g
- 1 tbsp Red food coloring 15ml
- 1 tsp Vanilla extract 5ml
Cinnamon Filling
- ½ cup Unsalted butter, softened 113g
- 1 cup Brown sugar, packed 220g
- 2 tbsp Ground cinnamon 15g
- ½ tsp Salt 3g
Cream Cheese Frosting
- 8 oz Cream cheese 225g, room temperature
- ¼ cup Unsalted butter 57g, softened
- 1 ½ cups Powdered sugar 190g, sifted
- 1 tsp Vanilla extract 5ml
- Pinch Salt Flavor enhancer
Instructions
- Combine warm milk, water, and sugar, then sprinkle yeast on top and let it foam for 5-10 minutes.
- Whisk together flour, salt, and cocoa powder. Add yeast mixture, eggs, butter, food coloring, and vanilla. Mix until shaggy dough forms.
- Knead dough 6-8 minutes until smooth and elastic. Place in greased bowl, cover, and let rise 1 hour until doubled.
- Mix softened butter, brown sugar, cinnamon, and salt for the filling.
- Roll dough into 12×18-inch rectangle, spread filling, and roll tightly into a log. Slice into 12 rolls.
- Place rolls in greased 9×13-inch dish. Cover and let rise 30 minutes.
- Bake at 350°F (175°C) for 20-25 minutes until golden brown.
- Beat cream cheese and butter until fluffy. Add powdered sugar, vanilla, and salt for frosting.
- Spread frosting over warm rolls and serve immediately.

