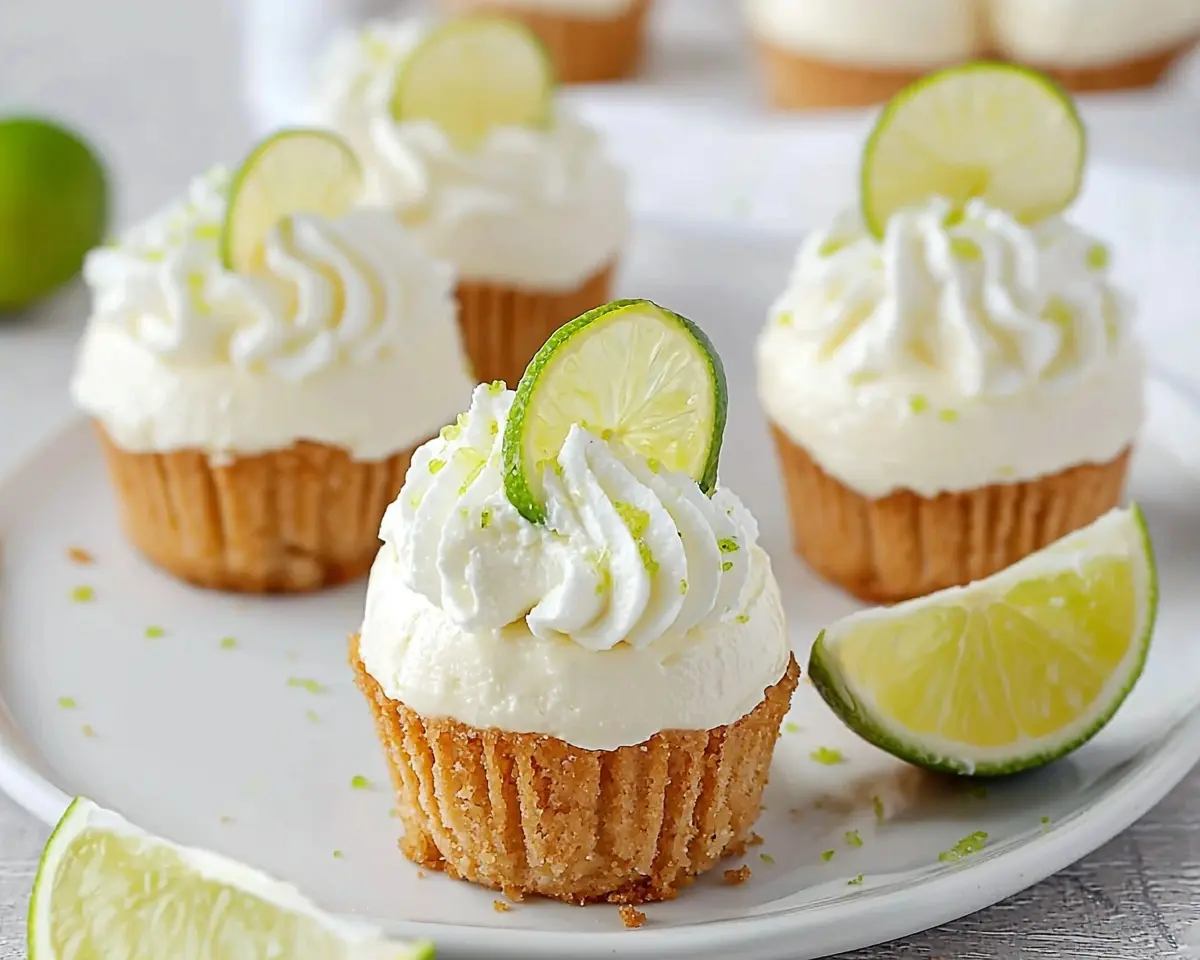
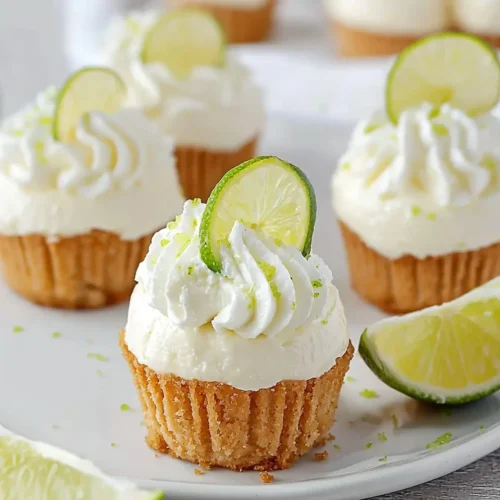
No Bake Key Lime Cheesecakes deliver tangy, creamy perfection in individual portions. Quick mini key lime cheesecakes ready in 4 hours—no oven required.
Hi, I’m Linda, and welcome to Tasty at Home—where bold flavors meet everyday kitchens.
Last summer in Miami, I tasted a key lime dessert so electric it made my teeth tingle. The tartness hit first, then melted into sweet cream that tasted like sunshine in a bite. I knew instantly I had to recreate that magic at home.
Well… my first attempt was a disaster. The filling refused to set, the crust turned to mush, and I nearly gave up on these no bake key lime cheesecakes altogether. But after testing twelve different versions—adjusting ratios, switching techniques, and yes, starting from scratch more than once—I finally cracked the code.
Now, these mini cheesecakes are my go-to dessert whenever I need something impressive but effortless. They’re tangy, creamy, and ridiculously easy to make. No oven, no water bath, no stress.
Whether you’re hosting a backyard barbecue or just craving something bright and refreshing, these individual portions deliver restaurant-quality flavor without the fuss. Let me tell you, once you master this recipe, you’ll never buy store-bought cheesecake again.
Tasty at Home – Where bold flavors meet everyday kitchens.
Table of Contents
Why These Mini Key Lime Cheesecakes Stand Out
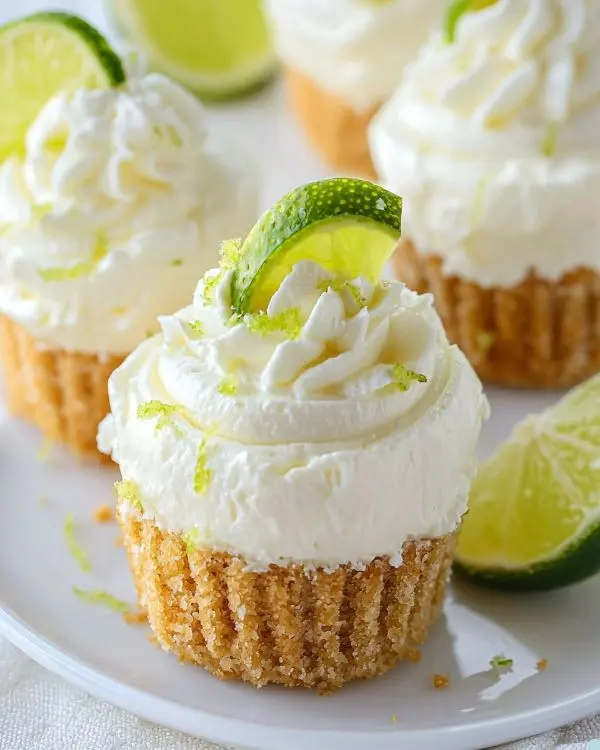
These no bake key lime cheesecakes hit differently than traditional versions. The absence of eggs means you skip the temperamental baking process entirely. Instead, the cream cheese and whipped topping create a mousse-like texture that’s impossibly light yet deeply satisfying.
The individual portions make portion control automatic. Each mini cheesecake sits perfectly in a cupcake liner, creating built-in serving sizes that look gorgeous on any dessert table. Plus, they’re ridiculously portable for potlucks and parties.
Key lime juice provides that signature Florida tang without overwhelming sweetness. The graham cracker crust adds buttery crunch that balances the creamy filling beautifully. Together, they create a flavor profile that screams summer—even in February.
I’ve tested this recipe with professional bakers, home cooks, and skeptical teenagers. Every single person asked for seconds. That’s the magic of a well-executed creamy cheesecake recipe that anyone can master.
Ingredients: Building Your Flavor Foundation
Graham Cracker Crust
| Ingredient | US Measurement | Metric | Purpose |
|---|---|---|---|
| Graham cracker crumbs | 1½ cups | 150g | Base structure |
| Granulated sugar | ⅓ cup | 67g | Sweetness and binding |
| Melted unsalted butter | 6 tablespoons | 85g | Richness and cohesion |
Creamy Filling
| Ingredient | US Measurement | Metric | Notes |
|---|---|---|---|
| Cream cheese (full-fat) | 16 ounces (2 packages) | 454g | Must be room temperature |
| Powdered sugar | ½ cup | 56g | Smooth sweetness |
| Key lime juice | ¼ cup | 60ml | Fresh or bottled |
| Key lime zest | 1 tablespoon | ~7g | Aromatic oils |
| Vanilla extract | ½ teaspoon | 2.5ml | Depth enhancer |
| Whipped topping | 2 cups + extra | ~140g | Lightness factor |
Shopping Tips for American Grocery Stores
Find graham cracker crumbs in the baking aisle near pie crusts. Nabisco Honey Maid works perfectly, or pulse whole crackers in a food processor for fresher flavor. Target and Walmart stock key lime juice year-round in the bottled juice section—Nellie & Joe’s is the gold standard brand.
Oops! Don’t grab reduced-fat cream cheese. The full-fat version provides the structure and richness these mini key lime cheesecakes need to set properly. I learned this the hard way when my first batch stayed runny overnight.
For whipped topping, Cool Whip is the classic choice. However, you can substitute freshly whipped heavy cream sweetened with two tablespoons of powdered sugar if you prefer a more natural ingredient list.
Bold Add-ins and Creative Variations
Tropical Twist: Add ¼ cup crushed pineapple (drained) and ¼ teaspoon coconut extract to the filling.
Berry Burst: Swirl two tablespoons of raspberry puree through the filling before chilling.
Ginger Kick: Replace half the graham crackers with gingersnap crumbs for spicy contrast.
International Substitutions
UK/Australia: Use digestive biscuits instead of graham crackers. Swap Cool Whip for double cream whipped to soft peaks.
Europe: Regular lime juice works fine if key limes aren’t available—just add an extra teaspoon of zest for intensity.
Essential Equipment and Smart Alternatives
You’ll need a standard 12-cup muffin tin and paper cupcake liners. Silicone liners work too, but paper peels away cleaner for presentation.
A stand mixer makes quick work of the cream cheese, but a hand mixer absolutely gets the job done. Thomas Keller once said that patience matters more than equipment—beat that cream cheese until it’s completely smooth, even if it takes an extra minute.
For pressing the crust, the back of a metal tablespoon works perfectly. Some bakers use a small drinking glass, but I find fingers give better control for achieving even thickness across all twelve mini cheesecakes.
You know what’s secretly important? A good rubber spatula. Folding whipped topping into cream cheese requires a gentle touch, and nothing beats a flexible spatula for preserving that airy texture while ensuring thorough incorporation.
Step-by-Step Instructions: The Foolproof Method
Preparing Your Workspace
Line your muffin tin with cupcake liners before starting. This simple prep saves time and prevents the filling from sitting too long before portioning. Room temperature cream cheese is non-negotiable—cold cream cheese creates lumps no amount of mixing can fix.
Creating the Perfect Crust Base
Mix graham cracker crumbs with sugar and melted butter in a medium bowl. The mixture should resemble wet sand—it’ll clump when squeezed but fall apart when released. Add two tablespoons to each liner, then press firmly with the back of a spoon.
Man, oh man, this pressing step matters more than you’d think. A loose crust falls apart when you bite into it. Press until the surface looks smooth and feels compact. The butter needs to bind those crumbs into a cohesive foundation that can support the creamy filling above.
Whipping the Cream Cheese Foundation
Beat the cream cheese on high speed for two full minutes. This aerates it and eliminates any lumps hiding in the package. Scrape down the bowl sides—cream cheese loves to cling to the edges—then add powdered sugar.
Mix on low speed initially to prevent a sugar cloud in your kitchen. Once combined, increase to high speed for one minute. The mixture should look fluffy and pale, with a smooth, spreadable consistency similar to frosting.
Julia Child always emphasized the importance of proper mixing. Under-mixed cream cheese yields dense, heavy results. Over-mixed cream cheese breaks down and becomes soupy. You’re aiming for that sweet spot where it’s light, smooth, and holds its shape on the spatula.
Adding the Key Lime Magic
Add vanilla extract, key lime juice, and key lime zest to the cream cheese mixture. Mix well until the bright yellow-green color distributes evenly throughout. The acidity from the lime juice will slightly thicken the cream cheese—that’s exactly what you want for structure.
Taste the mixture at this point. It should be intensely tangy with noticeable sweetness. Remember, folding in whipped topping will mellow the flavors, so this base needs to be bold.
Folding in Lightness
Here’s where technique truly matters. Add whipped topping to the cream cheese mixture, then use a rubber spatula to fold gently. Cut down through the center, sweep across the bottom, and bring the spatula up the side. Rotate the bowl and repeat.
Stop folding once you see no more white streaks. Over-folding deflates the whipped cream and creates a dense filling. Under-folding leaves obvious white patches that affect both texture and appearance. Aim for a uniform pale green color with a mousse-like consistency.
Portioning and Chilling
Fill each muffin cup with the cheesecake filling, using about three tablespoons per cup. A small ice cream scoop makes this process faster and more consistent. Smooth the tops with an offset spatula or the back of a spoon.
Refrigerate for at least four hours, though overnight is better. These mini key lime cheesecakes need time for the cream cheese to firm up and the flavors to meld. The crust will also hydrate slightly from the filling, creating better texture contrast.
Final Presentation Touches
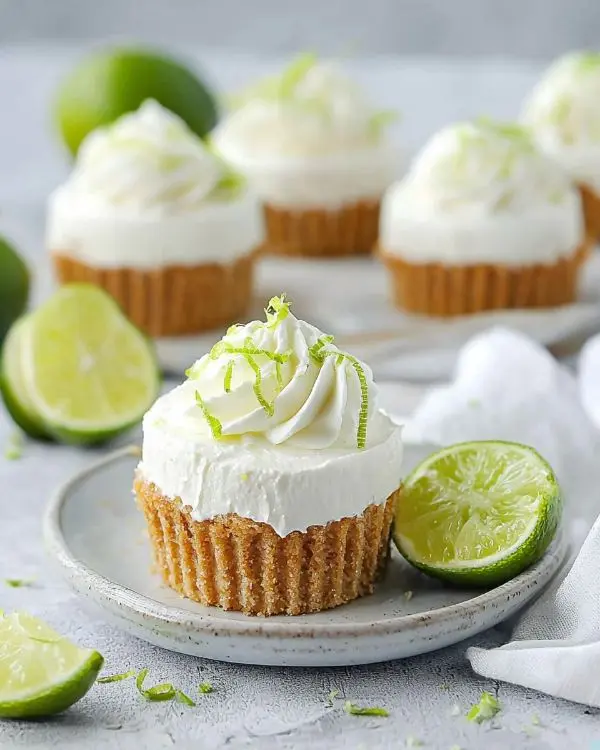
Before serving, top each mini cheesecake with a dollop of whipped topping. For special occasions, use a large star tip and piping bag to create elegant swirls. Garnish with additional key lime zest—the bright green color pops beautifully against white cream.
Serve these creamy cheesecakes chilled for the best texture and flavor. The contrast between cold filling and crisp crust delivers maximum satisfaction in every bite.
Expert Tips for Perfect Results Every Time
Temperature Matters: Room temperature cream cheese blends smoothly without lumps. Leave packages on the counter for 60-90 minutes before starting.
Fresh vs. Bottled Lime Juice: Bottled key lime juice maintains consistent acidity and flavor year-round. Fresh key limes provide brighter, more complex flavor but require effort to juice—you’ll need about 12-15 limes for ¼ cup of juice.
Crust Thickness: Too thick and it dominates the bite. Too thin and it crumbles. Two tablespoons pressed firmly creates the ideal ratio of crust to filling.
Folding Technique: Use broad, confident strokes rather than timid stirring. Aggressive folding deflates the whipped cream, but hesitant folding takes forever and still deflates it through extended handling.
Setting Time: While four hours is the minimum, overnight chilling allows flavors to develop fully. The cream cheese firms up better, and the crust absorbs just enough moisture to soften slightly without getting soggy.
Creative Variations to Try
Raspberry Key Lime Swirl
Add three tablespoons of seedless raspberry jam to the filling. Don’t fully incorporate it—leave beautiful pink streaks throughout for visual interest and flavor bursts. This variation pairs beautifully with apple cheesecake crumble concepts.
Chocolate Graham Base
Swap regular graham crackers for chocolate graham crackers. The cocoa flavor creates an unexpected contrast with tart lime that tastes incredibly sophisticated. Add a square of dark chocolate on top for a fancy finish.
Coconut Tropical Version
Replace ½ cup of graham cracker crumbs with sweetened shredded coconut. Toast the coconut first for deeper flavor. Add ¼ teaspoon coconut extract to the filling for full tropical impact.
Meyer Lemon Alternative
Can’t find key limes? Meyer lemons provide similar sweetness with slightly less acidity. Use the same measurements and add an extra ½ teaspoon of zest for brightness. These work wonderfully alongside lemon brioche donuts for a citrus-themed brunch.
Holiday Cranberry Orange
During Thanksgiving and Christmas, fold ¼ cup of dried cranberries (chopped fine) into the filling. Replace key lime juice with fresh orange juice and add orange zest instead of lime. Garnish with sugared cranberries for festive presentation.
Storage and Make-Ahead Strategy
Refrigerator Storage
| Storage Method | Duration | Notes |
|---|---|---|
| Covered container | 5-7 days | Best texture days 2-3 |
| Individual plastic wrap | 4-5 days | Prevents cross-contamination |
| Airtight tin | 5 days | Maintains crust crispness |
Store these no bake key lime cheesecakes in their muffin tin covered with plastic wrap, or transfer to an airtight container with parchment between layers. The filling stays fresh for up to seven days, though the crust gradually softens over time.
Freezing Instructions
These mini cheesecakes freeze beautifully for up to two months. Place the filled muffin tin in the freezer uncovered for two hours until solid, then transfer individual cheesecakes to a freezer bag. Thaw overnight in the refrigerator before serving.
Add the whipped topping garnish after thawing—frozen whipped cream becomes watery and separated when defrosted. The filling itself freezes and thaws perfectly, maintaining its creamy texture and tangy flavor.
Make-Ahead Timeline
Two days before: Make the cheesecakes completely, refrigerate without garnish.
One day before: Prepare extra whipped topping, store separately.
Day of serving: Add final garnish and zest just before presenting.
This timeline works perfectly for holiday gatherings and dinner parties. You’ll have gorgeous desserts ready with minimal last-minute effort.
Perfect Pairings and Serving Suggestions
These mini key lime cheesecakes shine at summer barbecues alongside grilled seafood. The citrus cuts through rich, smoky flavors beautifully. Serve them after pulled pork, grilled shrimp, or blackened fish for balanced satisfaction.
For beverages, iced tea or sparkling water with mint complements the tangy lime without competing. Coffee works surprisingly well—the bitterness contrasts nicely with the sweet filling. During adult gatherings, a crisp Sauvignon Blanc or Prosecco elevates these mini cheesecakes to elegant territory.
Create a citrus dessert spread by pairing these with sweet apple cinnamon rolls and dark chocolate chess pie. The variety gives guests options while maintaining a cohesive flavor theme.
For formal dinner parties, serve these mini key lime cheesecakes on individual dessert plates with a mint leaf garnish and a few fresh berries scattered around. The presentation looks restaurant-quality with minimal effort.
No Bake Key Lime Cheesecakes FAQs
Can I make these no bake key lime cheesecakes without a muffin tin?
Absolutely—use a 9-inch springform pan instead. Press the crust into the bottom, spread the filling evenly, and chill as directed. Slice into wedges for serving, though you’ll lose the convenient individual portions.
Why did my filling turn out runny instead of firm?
The cream cheese wasn’t at room temperature before mixing, or you over-folded the whipped topping. Cold cream cheese doesn’t incorporate properly, creating a loose mixture. Over-folding deflates the whipped cream, eliminating the structure it provides.
Can I use regular limes instead of key limes?
Regular Persian limes work fine, though they’re slightly more acidic and less sweet. Use three tablespoons of regular lime juice instead of ¼ cup, and add an extra tablespoon of powdered sugar to balance the tartness.
How do I prevent the crust from sticking to the cupcake liners?
Use high-quality paper liners—cheap ones stick terribly. Alternatively, lightly spray the liners with cooking spray before adding the crust. Silicone liners release more easily but don’t look as polished for presentation.
Final Thoughts: Your New Go-To Dessert
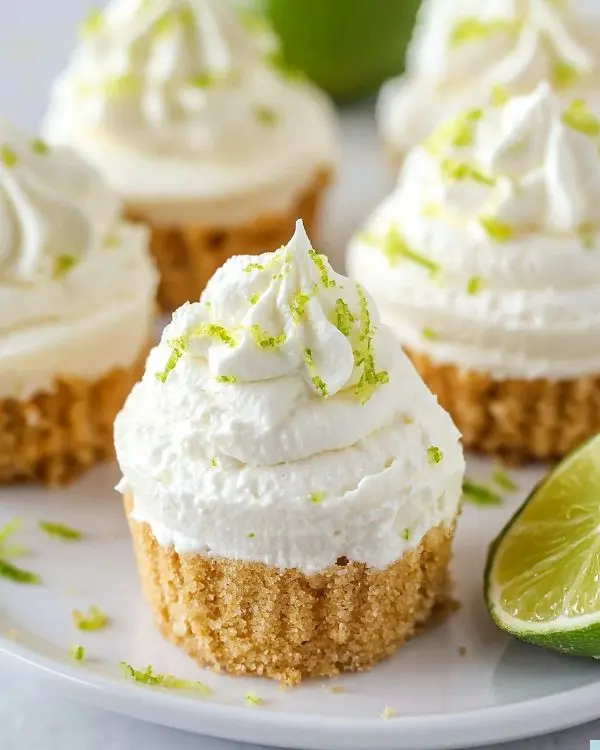
These no bake key lime cheesecakes transformed my dessert game completely. They’re now my secret weapon for impressing guests without spending hours in the kitchen. The combination of tangy lime, creamy filling, and buttery crust creates magic in every bite.
Remember that humid Miami afternoon where this journey started? These mini cheesecakes captured that exact feeling—sunshine, brightness, and pure refreshment. They’re proof that the best recipes don’t require complicated techniques or expensive equipment.
Make these for your next gathering and watch them disappear. Seriously, people will ask for the recipe, take photos, and probably eat more than one. The individual portions make that second helping guilt-free.
Try serving these mini key lime cheesecakes alongside apple pie tacos for a fun dessert bar, or keep them simple as the star attraction. Either way, you’re guaranteed compliments.
Have you tried making these yet? I’d love to see your creations—tag @TastyAtHome on social media with your photos. Let’s spread the joy of easy, impressive desserts that anyone can master.
Now grab those ingredients and get mixing. Your future self will thank you when these gorgeous mini cheesecakes come out of the refrigerator, ready to wow everyone at your table.
No Bake Key Lime Cheesecakes
Equipment
- Muffin tin
- cupcake liners
- mixing bowls
- Hand mixer or stand mixer
- Rubber spatula
- spoon or tablespoon
Ingredients
Graham Cracker Crust
- 1 ½ cups graham cracker crumbs about 150g
- ⅓ cup granulated sugar about 67g
- 6 tablespoons unsalted butter melted, about 85g
Creamy Filling
- 16 ounces cream cheese full-fat, room temperature (454g)
- ½ cup powdered sugar about 56g
- ¼ cup key lime juice fresh or bottled (60ml)
- 1 tablespoon key lime zest about 7g
- ½ teaspoon vanilla extract about 2.5ml
- 2 cups whipped topping plus extra for garnish (~140g)
Instructions
- Line a 12-cup muffin tin with cupcake liners. Ensure cream cheese is at room temperature before starting.
- Combine graham cracker crumbs, sugar, and melted butter in a bowl until mixture resembles wet sand. Add 2 tablespoons to each liner and press firmly to form crusts.
- Beat cream cheese on high for 2 minutes until fluffy and smooth. Add powdered sugar and mix on low, then high until incorporated.
- Mix in vanilla, key lime juice, and zest until evenly combined and slightly thickened.
- Fold in whipped topping gently with a rubber spatula until no white streaks remain. Do not overmix.
- Spoon or pipe filling into each crust, smoothing tops. Refrigerate for at least 4 hours or overnight until set.
- Before serving, top with whipped topping and sprinkle with additional lime zest for garnish.

