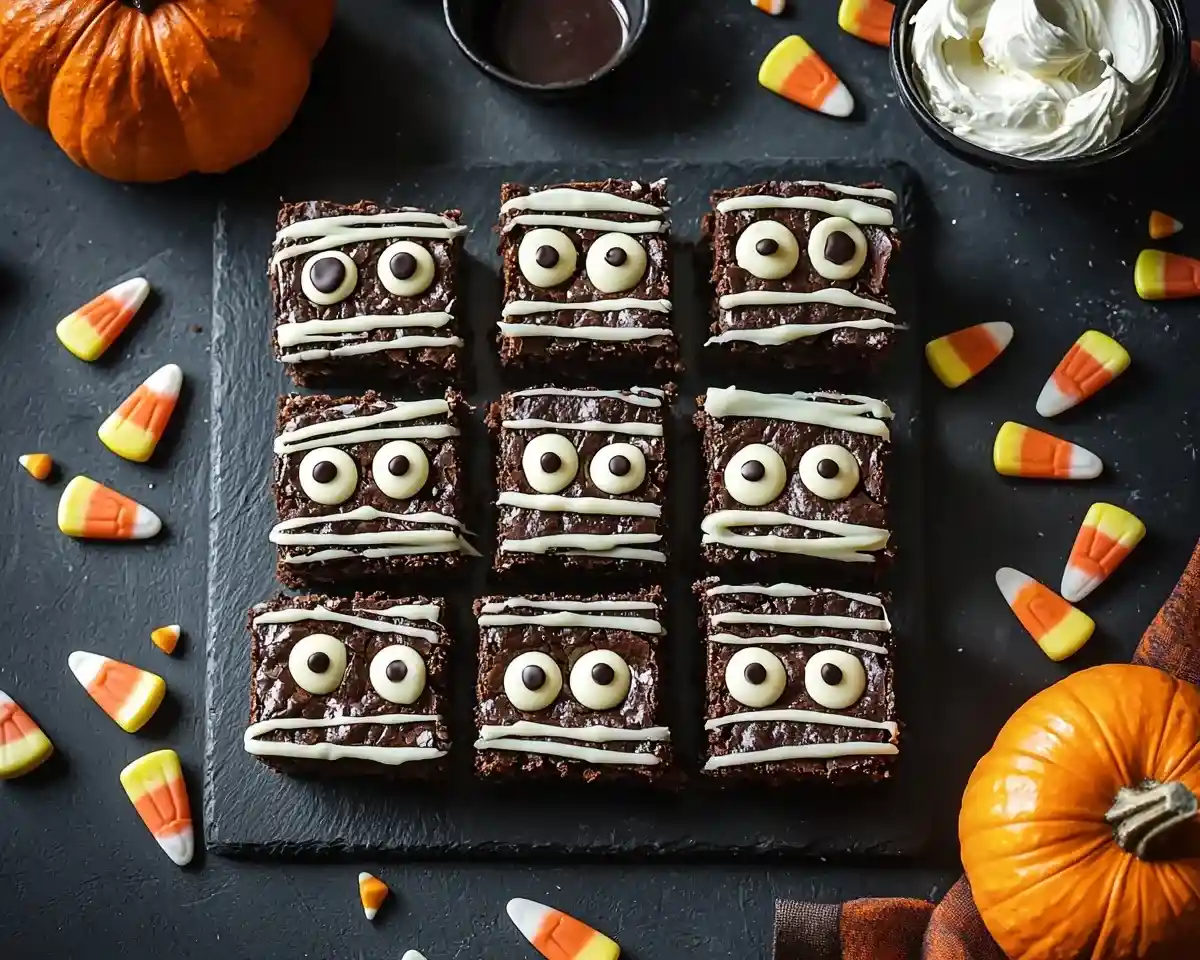
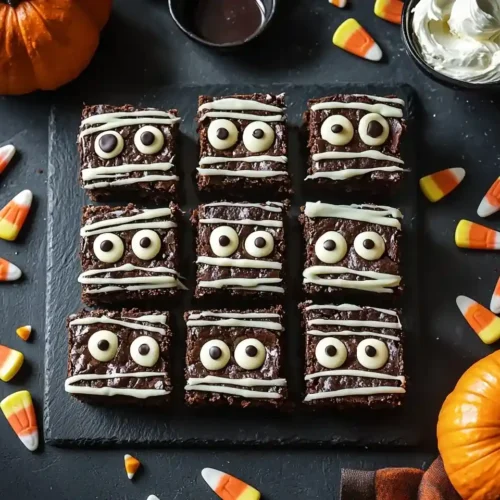
Spooky Mummy Brownies transform ordinary brownies into Halloween magic. Easy decorating tips for cute brownies ideas that wow trick-or-treaters every time.
Hi, I’m Linda, and welcome to Tasty at Home—a cozy corner where bold flavors meet everyday kitchens. Last October, my nephew Tyler burst through my kitchen door, costume half-falling off, demanding “scary brownies” for his school party. Well, let me tell you, that moment sparked the most delightfully chaotic baking session of my life.
These Spooky Mummy Brownies became our instant Halloween tradition. Moreover, they’ve rescued countless last-minute party emergencies since then. The sweet aroma of chocolate mingles with the excitement of Halloween decorating, creating memories that stick like melted candy to your fingers.
I’ve tested this recipe through three Halloween seasons—burned white chocolate twice and learned the hard way about timing—so you don’t have to. Whether you’re planning Halloween brownie decorations for a school event or surprising trick-or-treaters, this recipe delivers every time.
Table of Contents
What Makes These Mummy Brownies Special
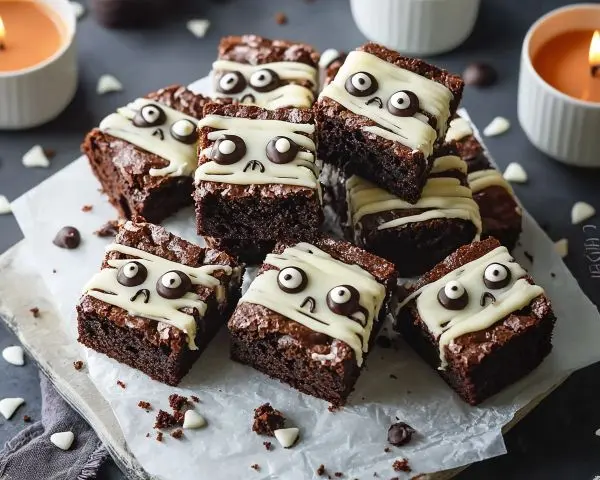
These aren’t just ordinary brownies for Halloween—they’re conversation starters wrapped in white chocolate bandages. The genius lies in their simplicity, yet the visual impact rivals professional bakery treats.
First, we start with a reliable brownie mix foundation. This approach ensures consistent results while leaving room for creative decorating fun. Next, white chocolate creates those authentic mummy bandages that make people do double-takes.
The secret ingredient? Mini candy eyes that bring personality to each brownie square. Additionally, black gel icing adds those final spooky details that transform simple squares into Halloween characters.
Essential Ingredients
| Ingredient | Amount | Purpose |
|---|---|---|
| Brownie mix box | 1 box | Foundation base |
| Eggs, oil, water | Per box instructions | Brownie preparation |
| White chocolate chips | 1 cup | Mummy bandages |
| Mini candy eyes | 24-36 pieces | Character features |
| Black gel icing | 1 tube | Final spooky details |
Shopping Tips for Success
Navigate your local grocery store like a Halloween pro with these insider tips. Head to the baking aisle first for brownie mix—Duncan Hines and Betty Crocker both work beautifully for this recipe.
The candy section holds your decorating treasures. Look for mini candy eyes near the cake decorating supplies. If your store stocks seasonal Halloween candy, you’ll find them there too.
However, don’t panic if candy eyes play hide-and-seek. White chocolate chips and black gel icing create the main visual impact anyway. You can always substitute mini marshmallows cut in half for eyes.
Bold Add-ins for Creative Variations
Transform basic mummy brownies into spectacular Halloween brownie decorations with these additions:
- Peanut butter chips: Mix into batter for extra richness
- Halloween sprinkles: Press into wet white chocolate
- Orange food coloring: Tint some white chocolate for accent bandages
- Crushed Oreos: Sprinkle on top for “dirt” effect
Equipment and Preparation Steps
Essential Equipment
You probably own everything needed for these cute brownies ideas already. A standard 9×13 inch baking pan works perfectly, though an 8×8 inch pan creates thicker squares.
Microwave-safe bowl becomes your white chocolate melting station. Furthermore, a piping bag or ziplock bag with corner snipped off gives you bandage-decorating control.
Don’t have a piping bag? No problem—a spoon drizzles white chocolate just as effectively, creating delightfully imperfect mummy wrappings.
How to Make Mummy Brownies
Preparing Your Halloween Canvas
Step 1: Perfect Brownie Foundation
Preheat your oven according to brownie mix package directions—usually 350°F. Well, this temperature ensures even baking without burnt edges that ruin your mummy base.
Make brownie batter following box instructions precisely. Most mixes require 2-3 eggs, 1/2 cup oil, and 1/4 cup water. Mix until just combined—overmixing creates tough brownies.
Step 2: Baking for Success
Pour batter into your greased 9×13 inch pan, spreading evenly with a spatula. The key lies in consistent thickness for uniform mummy squares later.
Bake according to package timing, typically 28-35 minutes. Test doneness with a toothpick inserted 2 inches from the edge—it should come out with just a few moist crumbs.
Let brownies cool completely before cutting. This patience prevents crumbling and creates clean edges for your spooky masterpieces.
Creating Mummy Magic
Step 3: Cutting Perfect Squares
Once cooled, cut brownies into equal rectangles. I prefer 12 large squares for dramatic mummies, but 24 smaller ones work for parties.
Use a sharp knife, cleaning it between cuts. This technique prevents chocolate buildup that creates ragged edges.
Step 4: Melting White Chocolate Perfection
Place white chocolate chips in a microwave-safe bowl. Heat in 20-second intervals, stirring between each heating. This prevents burning—my biggest early mistake with this recipe.
The chocolate should flow smoothly off your spoon when ready. If it seems thick, add 1 teaspoon coconut oil to achieve perfect drizzling consistency.
Man, oh man, this is where the magic happens! The transformation from plain brownies to Halloween characters begins here.
Step 5: Bandage Application Technique
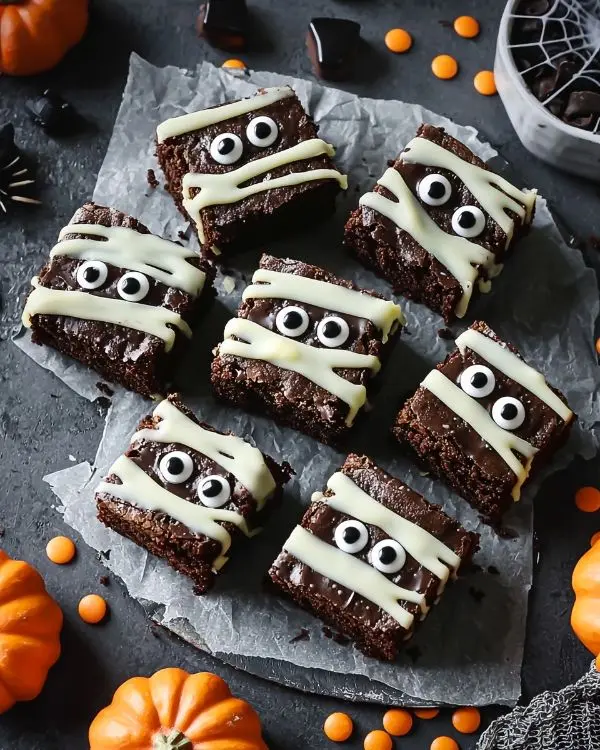
Working quickly while chocolate stays warm, pipe or drizzle white chocolate across each brownie square. Create random crisscross patterns that mimic mummy bandages wrapped loosely.
Leave strategic gaps for character—perfect bandages look artificial. Instead, aim for authentically weathered wrapping effects that suggest ancient mysteries.
Step 6: Adding Life to Your Mummies
While white chocolate remains soft, press two candy eyes onto each brownie. Position them asymmetrically for more personality—perfect symmetry looks robotic.
Add tiny black gel icing dots for pupils if desired. However, many store-bought candy eyes already include pupils, making this step optional.
Allow chocolate to set completely before serving—usually 15-20 minutes at room temperature.
Expert Tips for Halloween Success
Professional Decorating Secrets
Julia Child always emphasized mise en place, and Halloween brownie decorating demands the same preparation. Set up your decorating station before melting chocolate—once it’s ready, you’re racing against setting time.
Thomas Keller’s precision mindset applies here too. Measure ingredients exactly and follow timing guidelines for consistent results every batch.
Creative Variations for Every Celebration
Regional Halloween Twists:
- Southern Style: Add chopped pecans to brownie batter
- New England Approach: Drizzle maple syrup into chocolate
- West Coast Version: Include dried cranberries for tartness
Dietary Accommodations:
- Gluten-Free: Use certified gluten-free brownie mix
- Vegan Option: Substitute plant-based brownie mix and dairy-free white chocolate
- Nut-Free: Ensure all ingredients avoid cross-contamination
Storage and Make-Ahead Strategy
| Storage Method | Duration | Best Practices |
|---|---|---|
| Room temperature | 3-4 days | Airtight container |
| Refrigerator | 1 week | Prevent moisture buildup |
| Freezer | 3 months | Wrap individually |
Store decorated brownies in single layers to prevent white chocolate bandages from smearing. Additionally, place parchment paper between stacked layers for protection.
Make-ahead tip: Bake brownies up to 2 days early, storing undecorated. Decorate on serving day for freshest appearance.
Troubleshooting Common Issues
White Chocolate Seizing Prevention: Avoid water contact completely—even steam can cause chocolate to seize into unusable lumps. Keep utensils completely dry throughout the process.
Bandage Application Problems: If chocolate sets too quickly, rewarm in 10-second microwave intervals. Work in small batches rather than decorating all brownies simultaneously.
You know, last Halloween I learned this lesson the hard way when my first batch turned into chocolate-coated disasters instead of neat mummy bandages!
Serving Suggestions and Pairings
Perfect Halloween Presentation
Arrange these spooky treats on a dark platter for maximum visual impact. Black serving dishes make white chocolate bandages pop dramatically.
Surround brownies with plastic spiders or artificial spider webs for enhanced atmosphere. Moreover, dim lighting with battery-operated candles creates mysterious ambiance without fire hazards.
Consider pairing with our fluffy cottage cheese blueberry cloud bread for a complete Halloween spread that includes lighter options.
Complementary Halloween Beverages
Hot chocolate amplifies the chocolate experience while warming chilled trick-or-treaters. Apple cider provides traditional autumn flavor that balances rich brownie sweetness.
For adult gatherings, coffee drinks complement chocolate beautifully. Pumpkin spice lattes echo seasonal themes while providing sophisticated flavor profiles.
Menu Integration Ideas
These mummy brownies anchor dessert tables at Halloween parties. They pair wonderfully with traditional treats like candy corn and caramel apples.
For dinner parties, serve alongside our creamy hamburger potato soup for a complete comfort food experience that satisfies all ages.
Mummy Brownies FAQs
Can I use homemade brownies instead of boxed mix?
Absolutely! Use your favorite homemade brownie recipe as the foundation. The decorating process remains identical regardless of brownie preparation method.
How long does white chocolate take to set completely?
White chocolate typically sets within 15-20 minutes at room temperature. Refrigeration speeds this process to about 10 minutes if you’re pressed for time.
What if I can’t find mini candy eyes?
Create eyes using white chocolate chips and black gel icing dots. Alternatively, cut mini marshmallows in half and add black icing centers for homemade solutions.
Do these brownies need refrigeration?
Room temperature storage works perfectly for 3-4 days. Refrigeration extends shelf life but may cause white chocolate to develop condensation spots upon returning to room temperature.
Can I freeze decorated mummy brownies?
Yes, but wrap each brownie individually in plastic wrap before freezing. Thaw at room temperature to prevent condensation from affecting white chocolate decorations.
Bringing Halloween Magic Home
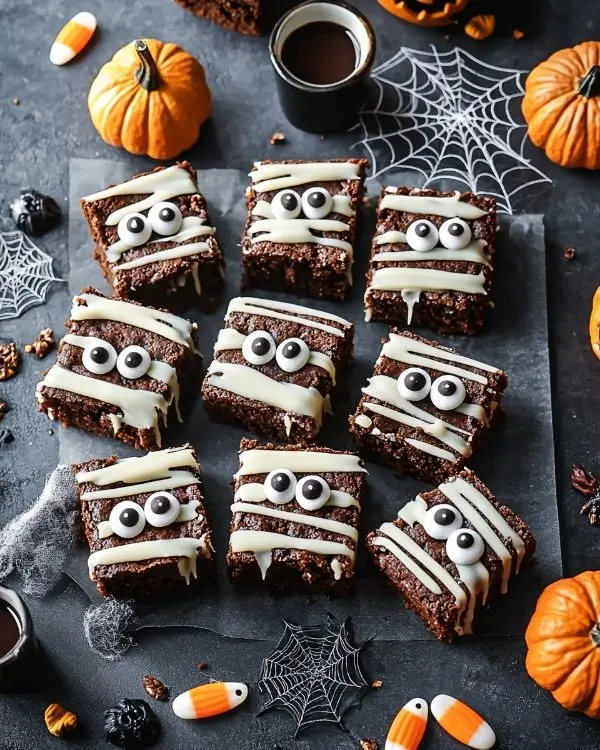
These Spooky Mummy Brownies prove that Halloween magic doesn’t require professional baking skills. Indeed, the most memorable treats often come from simple ingredients combined with creative vision.
The joy spreads beyond just eating—kids love helping with decorating, making this recipe perfect for family bonding time. Furthermore, the forgiving nature of mummy bandages means imperfections add character rather than detract from appearance.
As Halloween approaches, consider making a double batch. One disappears during decorating (quality control, you know!), while the second survives for actual serving.
Try serving these alongside our creamy chicken and rice soup for a complete Halloween dinner that satisfies before trick-or-treating adventures begin.
Share your mummy brownie creations on social media—tag us to see how these Halloween brownie decorations bring smiles to faces across America. After all, the best recipes create connections that last far beyond the final bite.
What Halloween memory will these brownies help create in your kitchen this year?
Spooky Mummy Brownies
Equipment
- 9×13 inch baking pan
- Microwave-safe bowl
- Piping bag or ziplock bag
- spatula
- Sharp knife
Ingredients
Brownies
- 1 box Brownie mix Any brand
- Per instructions Eggs, oil, water As directed on box
Decoration
- 1 cup White chocolate chips For mummy bandages
- 24-36 pieces Mini candy eyes For character features
- 1 tube Black gel icing Optional, for spooky details
Instructions
- Preheat oven to 350°F (or as directed on brownie mix). Grease a 9×13 inch pan.
- Prepare brownie batter according to package instructions. Mix until just combined to avoid toughness.
- Spread batter evenly in the pan and bake for 28–35 minutes, or until a toothpick comes out with moist crumbs. Cool completely.
- Cut cooled brownies into 12 large squares (or 24 smaller ones) using a sharp knife.
- Melt white chocolate chips in a microwave-safe bowl in 20-second intervals, stirring until smooth. Add 1 tsp coconut oil if needed for drizzling consistency.
- Drizzle or pipe white chocolate over brownies in random crisscross lines to create mummy bandages.
- Press two candy eyes onto each brownie while the chocolate is still soft. Add black gel icing details if desired.
- Let chocolate set for 15–20 minutes at room temperature before serving.

