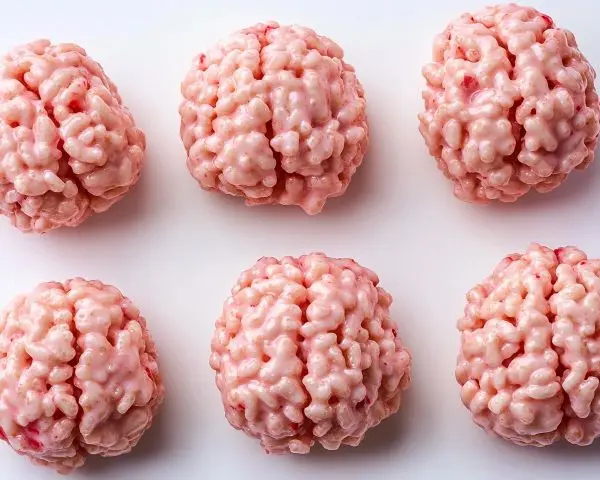
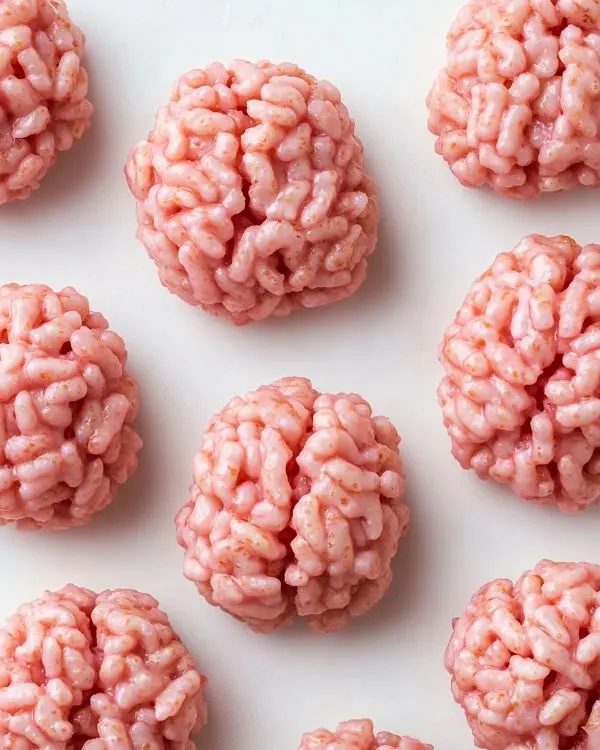
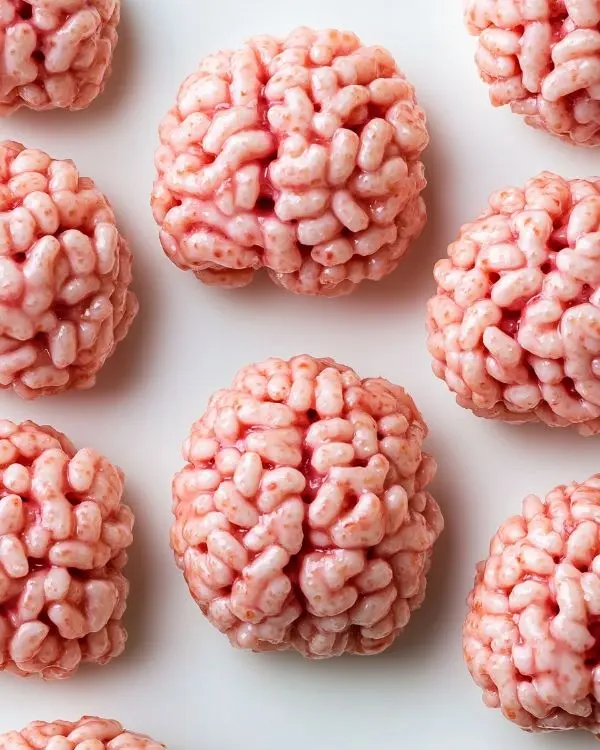
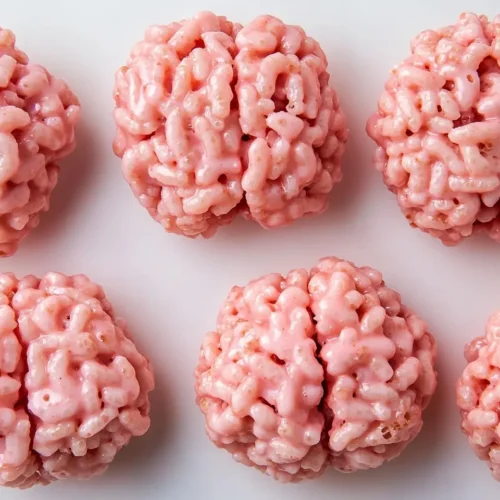
Marshmallow Rice Krispies Halloween Brains recipe creates terrifying party treats. Easy spooky Halloween food perfect for trick-or-treaters and parties.
Hi, I’m Linda, and welcome to Tasty at Home—a cozy corner where bold flavors meet everyday kitchens. Well, let me tell you about the Halloween disaster that changed everything. Three years ago, I attempted elaborate fondant zombie cakes for my daughter’s Halloween party. After six hours of frustration and one complete meltdown, I stared at what looked more like melted green blobs than terrifying treats.
Then inspiration struck. I spotted that familiar red box of Rice Krispies sitting on my pantry shelf. You know what they say about necessity being the mother of invention? Sometimes the simplest solutions create the most memorable moments. Within thirty minutes, I had crafted a batch of grotesquely realistic brain treats that had kids squealing with delight and parents asking for the recipe.
The secret lies in understanding how marshmallow transforms ordinary cereal into moldable magic. After testing this recipe dozens of times—trust me, I’ve perfected the texture and coloring technique—these Halloween brains have become my signature spooky creation. Whether you’re hosting a costume party or need last-minute trick-or-treat goodies, this recipe delivers maximum impact with minimal stress.
Tasty at Home – Where bold flavors meet everyday kitchens.
Table of Contents
What Makes These Halloween Brains Absolutely Irresistible

These marshmallow Rice Krispies Halloween brains represent the perfect marriage of nostalgia and creativity. Unlike store-bought Halloween treats loaded with artificial preservatives, this homemade version uses simple ingredients you likely already have in your pantry. The genius lies in the technique—creating that perfectly squishy brain texture that’s both disgusting and delicious.
The beauty of this recipe extends beyond its visual impact. These treats satisfy that primal craving for sweet, crunchy comfort food while delivering an Instagram-worthy presentation. Moreover, they’re naturally gluten-free when you use certified gluten-free Rice Krispies, making them inclusive for guests with dietary restrictions.
Essential Ingredients
| Ingredient | US Measurement | Metric | Purpose |
|---|---|---|---|
| Unsalted butter | 6 tablespoons | 85g | Creates smooth base |
| Regular marshmallows | 6 cups | 150g | Primary binding agent |
| Rice Krispies cereal | 4 cups | 100g | Texture foundation |
| Salt | ½ teaspoon | 2g | Enhances sweetness |
| Red food coloring | As needed | As needed | Creates brain effect |
Shopping Tips for Perfect Marshmallow Rice Krispies Halloween Brains Results
When shopping at your local grocery store, choose fresh marshmallows that feel soft and pliable. Hard, stale marshmallows won’t melt properly and will create lumpy textures. Additionally, name-brand Rice Krispies consistently deliver better results than generic versions because they maintain their crunch longer.
For food coloring, gel-based colors work superior to liquid versions. They provide more vibrant results without adding excess moisture that can make your mixture too sticky. Furthermore, always purchase unsalted butter to control the overall sodium content in your treats.
Bold Add-ins and Creative Variations
Transform these basic brains into gourmet Halloween experiences with these exciting additions:
- Chocolate chip neurons: Mini chocolate chips scattered throughout
- Peanut butter madness: Replace 2 tablespoons butter with peanut butter
- Vanilla extract boost: Add ½ teaspoon for enhanced flavor depth
- Orange brain variation: Use orange coloring for pumpkin-themed parties
Equipment and Step-by-Step Preparation
Essential Equipment
You’ll need a medium saucepan, large heatproof bowl, wooden spoon, and clean kitchen towel. Don’t worry if you lack a double boiler—a simple pot with a fitted bowl works perfectly. Also, keep a small dish of vegetable oil nearby for hand-coating during shaping.
Detailed Cooking Instructions
Step 1: Create Your Bain-Marie Setup
Fill a medium saucepan with approximately ½ cup water and bring it to a gentle boil. Place your large heatproof bowl over the pot, ensuring the bottom doesn’t touch the water directly. This gentle heating method prevents the marshmallows from scorching and creates that perfectly smooth texture we’re after.
Step 2: Melt the Marshmallow Base
Add butter and marshmallows to your heatproof bowl positioned over the simmering water. Continuously whisk the ingredients using steady, circular motions. The transformation typically takes 2-4 minutes, during which you’ll watch the marshmallows gradually dissolve into a glossy, cohesive paste. Man, oh man, this is where the magic happens!
Pro tip from Thomas Keller’s technique handbook: patience creates perfection. Rushing this process with high heat will result in a grainy, unworkable mixture that won’t hold its shape properly.
Step 3: Add Color and Seasoning
Using oven mitts, carefully remove the bowl from the heat source. Immediately whisk in the salt—this enhances the overall sweetness perception. Next, add 2-3 drops of red food coloring, starting conservatively. You can always add more, but removing excess color proves impossible.
Step 4: Combine with Rice Krispies
Pour the warm marshmallow mixture over the Rice Krispies in a large mixing bowl. Work quickly but thoroughly, ensuring every piece gets coated evenly. The mixture should hold together when pressed but not feel overly sticky. If it seems too wet, add additional cereal one handful at a time.
Step 5: Shape Your Halloween Brains
Lightly oil your hands to prevent sticking. Grab portions roughly the size of a tennis ball and shape them into oval brain forms. Using a butter knife, create the characteristic brain groove down the center. Finally, dip a toothpick in food coloring and draw realistic vein patterns across the surface.
Oops! Here’s my biggest mistake and how to avoid it: I once skipped oiling my hands and ended up with marshmallow cement permanently attached to my palms. Trust me, this small step saves significant cleanup time.

Expert Tips and Creative Variations
Professional Techniques for Success
Temperature control determines your final texture. If the mixture becomes too stiff while shaping, briefly return it to the warm bowl for 30 seconds. Conversely, if it’s too sticky, let it cool for 2-3 minutes before continuing.
Julia Child always emphasized the importance of mise en place—having everything ready before starting. Apply this principle by measuring all ingredients beforehand and arranging your workspace efficiently.
Regional and Dietary Variations
Southern Comfort Style: Add a splash of bourbon extract for adult Halloween parties.
Midwest Heartland Version: Incorporate crushed graham crackers for extra crunch and s’mores nostalgia.
West Coast Health-Conscious: Substitute half the marshmallows with sugar-free alternatives and use organic Rice Krispies.
New England Fall Twist: Add a pinch of cinnamon and nutmeg for warm autumn spicing.
International Adaptation: Replace Rice Krispies with puffed quinoa for a protein boost and different texture profile.
Storage and Make-Ahead Strategy
| Storage Method | Duration | Notes |
|---|---|---|
| Room temperature | 5-7 days | Store in airtight container |
| Refrigerated | 10-14 days | May become slightly firm |
| Frozen | 2-3 months | Thaw at room temperature |
These Halloween brain treats actually improve in flavor after 24 hours as the ingredients meld together. However, they’re best consumed within the first week for optimal texture and freshness.
For party planning, shape the brains up to three days in advance and store them in airtight containers. Add the vein details on the day of serving for the most vibrant appearance.
Perfect Pairings and Serving Suggestions

These spooky treats pair beautifully with other Halloween classics. Serve alongside bloody red velvet popcorn for a complete horror-themed snack table. Additionally, they complement warm apple cider or hot chocolate perfectly during October gatherings.
Consider creating a “mad scientist” dessert station featuring these brains alongside pumpkin cupcakes and small batch pumpkin pie bars. The variety of textures and flavors keeps guests engaged throughout the party.
For adult Halloween celebrations, serve these treats with spiked hot cider or pumpkin-flavored cocktails. The sweet, crunchy texture provides an excellent contrast to spiced beverages.
Marshmallow Rice Krispies Halloween Brains FAQs
Can I make these Halloween brains without food coloring?
Absolutely! Natural alternatives include beet juice powder or strawberry extract, though the color won’t be as vibrant as artificial options provide.
How far in advance can I prepare these Rice Krispies Halloween treats?
Shape and store these brain treats up to one week before your party, keeping them in airtight containers at room temperature for best results.
What’s the best way to transport these party Halloween food items?
Layer them carefully in rigid containers with parchment paper between levels, ensuring they don’t shift during transport to maintain their brain shape.
Can I double this recipe for larger Halloween parties?
Yes, but work in batches to maintain proper temperature control, as large quantities cool too quickly for effective shaping and molding.
Creating Lasting Halloween Memories
These marshmallow Rice Krispies Halloween brains transform ordinary ingredients into extraordinary memories. The combination of familiar flavors with shocking presentation creates that perfect balance of comfort and surprise that defines the best Halloween traditions.
Remember that Halloween treat-making isn’t just about following recipes—it’s about creating moments of joy and connection with family and friends. These brain treats work equally well for intimate family gatherings or large neighborhood parties, adapting to whatever celebration style suits your needs.
Next time you’re planning Halloween festivities, consider pairing these with butternut squash pasta sauce for dinner before the trick-or-treating begins. The savory-sweet progression creates a well-rounded Halloween dining experience.
Share your creations on social media and tag friends who appreciate creative Halloween food. Better yet, invite neighbors over for a brain-making party where everyone can craft their own grotesque masterpieces.
Let me tell you, nothing beats the satisfaction of watching guests’ faces transform from disgust to delight as they realize these realistic-looking brains taste absolutely delicious. After all, isn’t that what Halloween is all about—surprising people with the unexpected?

Marshmallow Rice Krispies Halloween Brains
Equipment
- Medium saucepan
- Large heatproof bowl
- wooden spoon
- Kitchen towel
- Butter knife
- toothpick
Ingredients
Main Ingredients
- 6 tbsp Unsalted butter Creates smooth base
- 6 cups Regular marshmallows Primary binding agent
- 4 cups Rice Krispies cereal Texture foundation
- ½ tsp Salt Enhances sweetness
- As needed Red food coloring Creates brain effect
Instructions
- Fill a medium saucepan with ½ cup water, bring to a gentle boil, and place a heatproof bowl over it to create a bain-marie.
- Add butter and marshmallows to the bowl and melt slowly, whisking until smooth and glossy.
- Remove from heat, whisk in salt and 2-3 drops of red food coloring.
- Pour the marshmallow mixture over Rice Krispies and stir quickly to coat evenly.
- Oil your hands, shape portions into oval brain forms, and carve a groove down the center with a butter knife.
- Use a toothpick dipped in food coloring to draw realistic vein patterns for a spooky effect.

