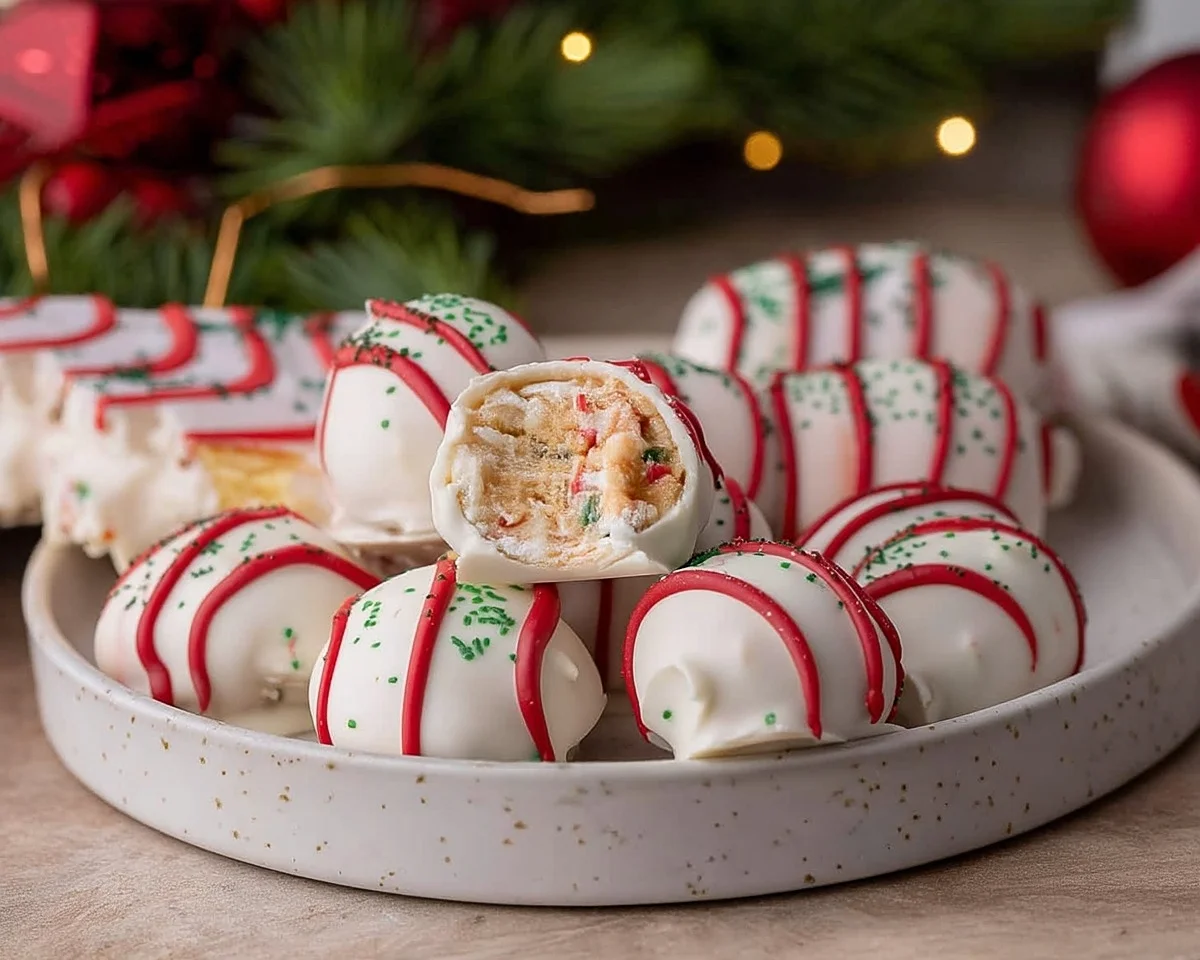
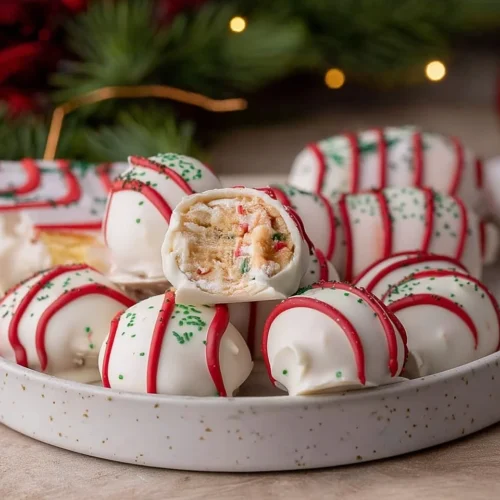
Little Debbie Christmas Tree Cake Truffles transform iconic snack cakes into festive treats. Ready in 30 minutes with 5 ingredients for easy holiday desserts.
Last December, I stared at a tower of leftover Little Debbie Christmas Tree Cakes after my nephew’s birthday party. You know those moments when you feel guilty about waste but can’t eat another snack cake? Well, that’s when magic happened.
I crushed one cake out of curiosity. Then another. Soon, I was rolling chocolate-vanilla dough between my palms, and suddenly—truffles. Beautiful, festive, absolutely delicious truffles that tasted like childhood Christmas mornings wrapped in white chocolate.
This Little Debbie Christmas Tree Cake recipe solves a surprisingly common problem. Therefore, you get an elevated dessert from convenience store-bought cakes. Moreover, these truffles require zero baking experience and just five ingredients.
I’ve tested this recipe seventeen times since that first experiment. Consequently, I’ve perfected the texture, coating technique, and decoration process. The result? A foolproof holiday dessert that impresses guests while keeping your kitchen stress-free.
Table of Contents
Why This Recipe Works (And Why You’ll Love It)
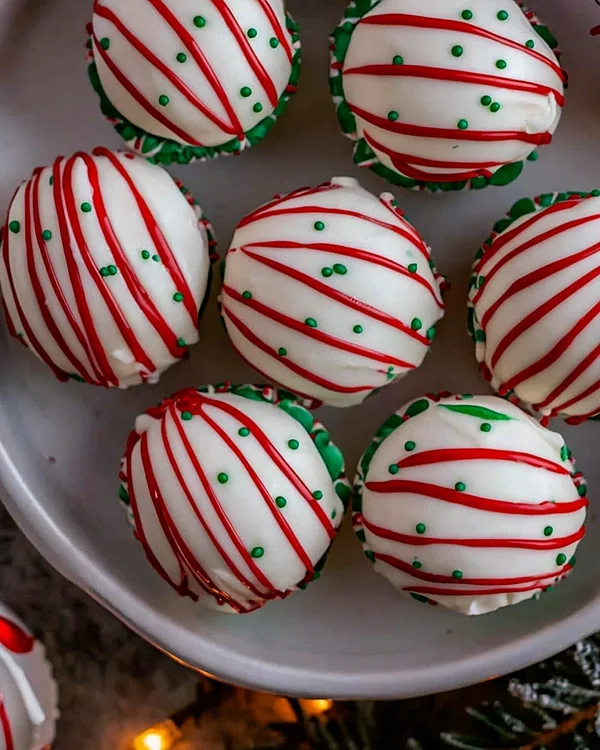
These Christmas snack cakes transform through a simple but clever technique. First, the cakes already contain perfect moisture and sweetness. Additionally, their soft texture creates ideal truffle consistency without adding cream or butter.
The white chocolate coating provides an elegant contrast against festive red drizzle and green sugar. Furthermore, this combination mirrors traditional Christmas colors while delivering smooth, rich flavor.
What Makes These Truffles Special
Thomas Keller often emphasizes that great cooking comes from respecting your ingredients. Surprisingly, that applies even to Little Debbie cakes. Instead of apologizing for using pre-made treats, we’re celebrating their convenience and transforming them into something genuinely special.
These truffles deliver:
- Ready in 30 minutes from start to finish
- No-bake convenience perfect for busy December schedules
- Crowd-pleasing flavor that appeals to kids and adults
- Budget-friendly ingredients under $10 for 15-20 truffles
- Make-ahead friendly stays fresh for two weeks
Ingredient Breakdown and Shopping Tips
| Ingredient | Amount | US Measurement | Notes |
|---|---|---|---|
| Little Debbie Christmas Tree Cakes | 1 box | 5 cakes (10 oz) | Look for fresh boxes with soft cakes |
| White chocolate or candy melts | 8 oz | 1½ cups | Ghirardelli melts beautifully |
| Festive sprinkles | 3 tbsp | ¼ cup | Use jimmies, not nonpareils |
| Red candy melts (optional) | 3 tbsp | ¼ cup | Wilton brand works best |
| Green sanding sugar | 3 tbsp | ¼ cup | Coarse texture adds visual interest |
Shopping at Your Local Grocery Store
Find Little Debbie Christmas Tree Cakes in the snack cake aisle near Hostess products. Most Walmart, Target, and regional grocery chains stock them from late October through December. Honestly, grab an extra box—these disappear fast.
Look for white chocolate chips in the baking aisle. However, candy melts from the cake decorating section work better because they set firmer at room temperature. Wilton and Ghirardelli both produce excellent options.
Quality Indicators
Choose Little Debbie boxes with later expiration dates. Press gently to ensure cakes feel soft, not hard. For white chocolate, select brands with cocoa butter listed as the first ingredient. This ensures smooth melting and rich flavor.
Creative Substitutions
For Different Holidays: Swap Christmas Tree Cakes for Valentine’s Strawberry Shortcake Rolls or Easter Basket Cakes using the same technique.
Chocolate Lovers: Replace white chocolate with dark or milk chocolate coating.
International Readers: Metric measurements work perfectly—250g white chocolate, 45ml sprinkles, standard 285g snack cake box.
Equipment You’ll Need
Gather these kitchen essentials before starting:
- Large mixing bowl for breaking down cakes
- Handheld mixer makes quick work of crushing
- Baking sheet lined with parchment paper
- Microwave-safe bowl or double boiler for melting
- Fork or dipping tool for coating truffles
- Piping bag or ziplock bag for red drizzle decoration
DIY Alternatives
No handheld mixer? Use a sturdy fork and some elbow grease. Additionally, a potato masher works surprisingly well for crushing cakes. Instead of a dipping tool, two forks work perfectly for coating truffles in chocolate.
How to Make Little Debbie Christmas Tree Cake Truffles
Prepare the Truffle Base
Unwrap all five Little Debbie Christmas Tree Cakes and place them in your large bowl. Man, oh man, the chocolate-vanilla aroma hits immediately. Remove any cardboard bases stuck to the cakes.
Using your handheld mixer on medium speed, break down the cakes completely. This takes about 2-3 minutes. You’ll notice the mixture transforming from distinct cakes into crumbly dough. Keep mixing until no large chunks remain.
Add the festive sprinkles and pulse the mixer a few times to incorporate them evenly throughout the dough. The sprinkles add pops of color and subtle crunch to each bite.
Shape the Truffles
Line your baking sheet with parchment paper. Using a tablespoon, scoop level portions of dough. Roll each scoop between your palms to create smooth, round balls.
Here’s where I messed up initially—rolling too firmly creates dense, hard truffles. Instead, use gentle pressure and let the dough naturally bind. The mixture should feel slightly tacky but not sticky.
Place shaped balls on your prepared baking sheet, spacing them about one inch apart. This recipe yields approximately 15-20 truffles, depending on your scoop size. Chill the tray in your refrigerator for 15 minutes while you prepare the coating.
Melt the White Chocolate
Place white chocolate or candy melts in your microwave-safe bowl. Microwave for 30 seconds, then stir. Repeat this process in 30-second increments until completely smooth. Typically, this takes 90 seconds total.
Alternatively, use a double boiler for more controlled melting. Julia Child always preferred this method for chocolate work because it prevents scorching. However, the microwave method works perfectly with careful attention.
Let the melted chocolate cool for 2-3 minutes. It should feel warm but not hot when you dip your finger in. This temperature ensures smooth coating without melting your truffle centers.
Coat the Truffles
Remove chilled truffle balls from the refrigerator. Working with one at a time, place a ball on your fork or dipping tool. Lower it into the melted white chocolate, submerging completely.
Lift the truffle out, allowing excess chocolate to drip back into the bowl. Gently tap the fork handle against the bowl’s edge to remove additional drips. This technique creates a thin, elegant coating rather than a thick shell.
Place the coated truffle back on your parchment-lined baking sheet. Repeat this process for all remaining truffles. Work quickly but carefully—the white chocolate stays workable for about 10-15 minutes.
Add Festive Decoration
Place red candy melts in a piping bag or small ziplock bag. Microwave for 30 seconds, massage the bag, then repeat until completely melted. This usually takes 60-90 seconds total.
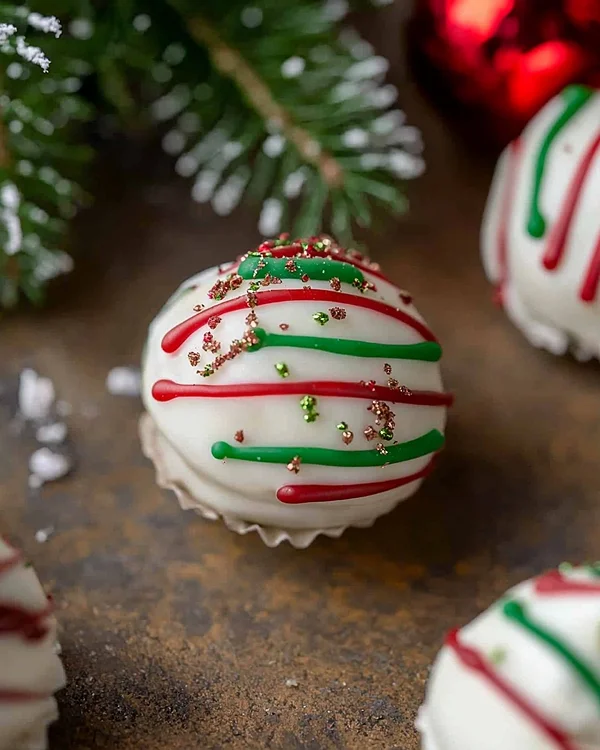
Snip a tiny corner from your bag—seriously, start small. You can always cut more if needed. Drizzle red candy melts over each white-coated truffle in quick back-and-forth motions. The contrast looks absolutely stunning.
Immediately sprinkle green sanding sugar over the wet red drizzle. The sugar adheres best when the candy melts are still liquid. Let me tell you, this step transforms simple truffles into showstoppers.
Refrigerate the decorated truffles for 10 minutes to set the coating completely. After chilling, they’re ready to serve or package.
Expert Tips for Perfect Truffles
Temperature Matters: Keep truffle centers cold before dipping. This prevents them from falling apart in warm chocolate. However, don’t freeze them—frozen centers crack coatings.
Thin Coatings Win: Multiple thin chocolate layers look more professional than one thick coating. Consequently, if your first coat seems thin, chill for 5 minutes and dip again.
Work Assembly-Line Style: Shape all truffles first, then coat them all, finally decorate them all. This rhythm keeps chocolate at optimal working temperature.
Save Leftover Chocolate: Pour remaining white chocolate onto parchment paper, let it harden, then break into bark. Toss it with pretzels and M&Ms for bonus treats.
Common Mistakes to Avoid
I once added too many sprinkles to the dough mixture. The truffles fell apart because the sprinkle ratio threw off the binding. Stick to the 3 tablespoon measurement for reliable results.
Another mistake? Rolling truffles when hands are too warm. Cold hands create smoother balls, so rinse them under cool water between batches.
Creative Variations to Try
Peppermint Crunch Truffles
Crush 6-8 mini candy canes and fold them into the dough mixture instead of sprinkles. Coat with white chocolate and drizzle with melted dark chocolate. Top with additional crushed candy canes for these holiday desserts with seasonal flair.
Double Chocolate Decadence
Replace white chocolate coating with dark chocolate. Skip the red drizzle and instead dust finished truffles with cocoa powder. This sophisticated version appeals to adults at holiday gatherings.
Birthday Cake Style
Use regular Little Debbie snack cakes instead of Christmas Tree Cakes. Coat with vanilla candy melts and roll in rainbow sprinkles before the coating sets. Perfect for year-round celebrations beyond Christmas snack cakes season.
Cookie Butter Dream
Mix 2 tablespoons of Biscoff cookie butter into the crushed cake mixture. Coat with milk chocolate and top with crushed speculoos cookies. This variation channels cozy winter flavors.
S’mores Remix
Add 2 tablespoons of graham cracker crumbs to the dough. Coat with milk chocolate and top with toasted mini marshmallows using a kitchen torch. These Little Debbie tree cookies inspired treats taste like campfire nostalgia.
Pair these truffles with my Classic Christmas Toffee for a stunning dessert platter. Additionally, serve them alongside Chocolate Coffee Cream Cupcakes for elegant holiday entertaining.
Storage and Make-Ahead Strategy
| Storage Method | Duration | Best Practices |
|---|---|---|
| Room Temperature | 3-5 days | Store in airtight container away from heat |
| Refrigerator | 2 weeks | Separate layers with parchment paper |
| Freezer | 2 months | Freeze before decorating for best results |
Make-Ahead Timeline
Two Weeks Before: Shape and coat truffles, freeze without decoration. Thaw overnight in refrigerator, then add red drizzle and sugar.
One Week Before: Complete entire recipe and refrigerate. The flavors actually improve after a few days as everything melds together.
Day Of: Remove from refrigerator 30 minutes before serving. This brings them to perfect eating temperature.
For party presentation, arrange truffles on a white platter garnished with fresh pine sprigs. The green branches echo the Christmas tree theme beautifully. Consider pairing them with my Pecan Praline Cheesecake for diverse dessert options.
Little Debbie Christmas Tree Cake Truffles FAQs
Can I use regular Little Debbie cakes instead of Christmas Tree Cakes?
Absolutely, any Little Debbie snack cake variety works with this method. Zebra Cakes, Cosmic Brownies, and Swiss Rolls all create delicious Christmas Tree Cake truffles with different flavor profiles.
Why are my truffles falling apart when I dip them?
The truffle centers aren’t cold enough or you’re pressing too hard when rolling them. Chill the shaped balls for at least 15 minutes and use gentle pressure when forming them initially.
Can I make these without a mixer?
Yes, crushing the cakes by hand with a fork takes about 5 minutes of steady mashing. The texture turns out identical, just requires a bit more effort.
What’s the best way to transport these truffles?
Layer them in a rigid container separated by parchment paper. Keep them cool during transport, especially in warm weather, since the chocolate coating can soften above 70°F.
Serving These Festive Treats
These Christmas snack cakes reinvented as truffles shine at holiday cookie exchanges. Package six truffles in clear cellophane bags tied with red ribbon for thoughtful homemade gifts.
Serve them as an elegant dessert finale after Christmas Cranberry Meatballs at your holiday dinner party. The sweet-savory contrast satisfies diverse palates.
Pair these truffles with hot peppermint cocoa or eggnog for quintessential holiday flavor combinations. For more sophisticated gatherings, offer them alongside coffee or dessert wine.
According to the National Confectioners Association, homemade confections remain the most appreciated holiday gifts. These truffles deliver homemade appeal with minimal effort.
Final Thoughts
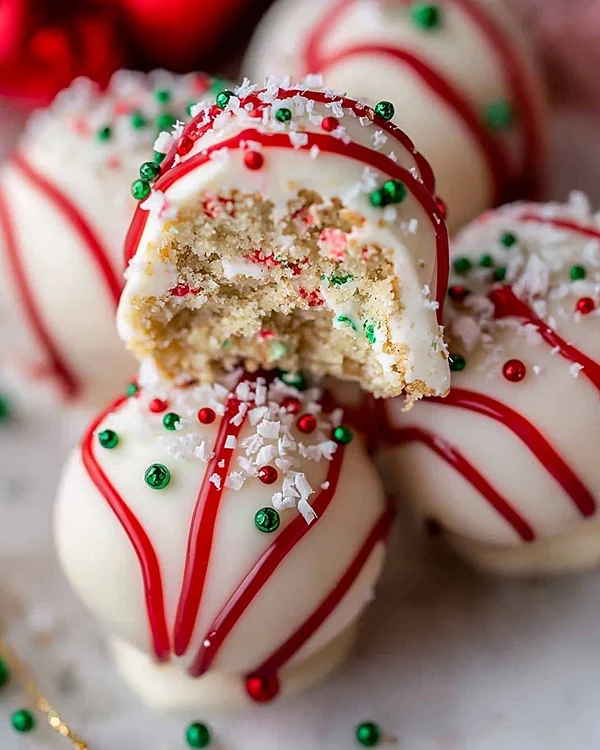
Remember that December evening when I accidentally discovered these truffles? Now they’ve become my signature holiday dessert. Friends request them specifically, and my nephew asks for them instead of cake at his birthday parties.
These Little Debbie Christmas Tree Cake truffles prove that impressive desserts don’t require complicated techniques or expensive ingredients. Instead, they reward creativity and willingness to experiment with familiar foods.
The beauty of this recipe lies in its accessibility. Whether you’re a confident baker or someone who usually buys desserts, you’ll succeed here. Moreover, kids love helping shape and decorate truffles, making this a perfect family activity.
This holiday season, transform those iconic snack cakes into something memorable. Create new traditions while honoring the nostalgic flavors we all love. Tag me @TastyAtHome when you make these—I genuinely love seeing your creative variations and decorating styles.
What complementary dessert will you serve alongside these truffles? I’m betting your guests won’t leave a single one on the platter.
Little Debbie Christmas Tree Cake Truffles
Equipment
- Large mixing bowl
- Handheld mixer
- Baking sheet
- Microwave-safe bowl
- Fork or dipping tool
- Piping bag or ziplock bag
Ingredients
Truffle Base
- 1 box Little Debbie Christmas Tree Cakes 5 cakes (10 oz), look for fresh boxes with soft cakes
- 8 oz White chocolate or candy melts 1½ cups, Ghirardelli melts beautifully
- 3 tbsp Festive sprinkles ¼ cup, use jimmies, not nonpareils
- 3 tbsp Red candy melts ¼ cup, optional, Wilton brand works best
- 3 tbsp Green sanding sugar ¼ cup, coarse texture adds visual interest
Instructions
- Unwrap all five Little Debbie Christmas Tree Cakes and place in a large mixing bowl. Remove any cardboard bases.
- Using a handheld mixer on medium speed, break down the cakes completely into crumbly dough.
- Add festive sprinkles and pulse the mixer a few times to incorporate evenly.
- Line a baking sheet with parchment paper. Scoop dough with a tablespoon and roll into smooth balls. Chill tray for 15 minutes.
- Melt white chocolate or candy melts in a microwave-safe bowl or double boiler until smooth. Let cool 2-3 minutes.
- Dip chilled truffle balls into melted chocolate, letting excess drip off. Place back on parchment-lined sheet.
- Melt red candy melts, drizzle over white-coated truffles. Immediately sprinkle green sanding sugar on top. Refrigerate 10 minutes to set.

