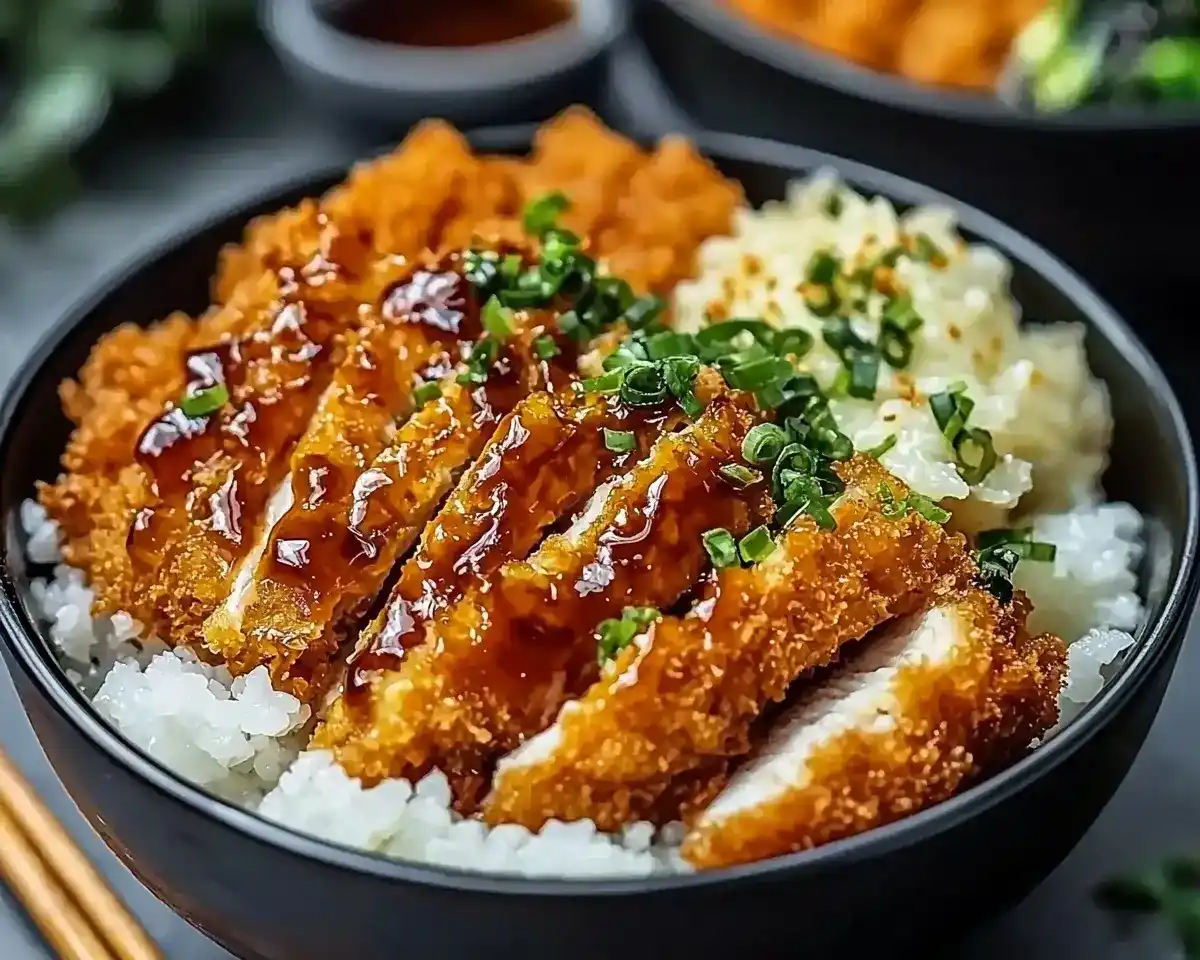
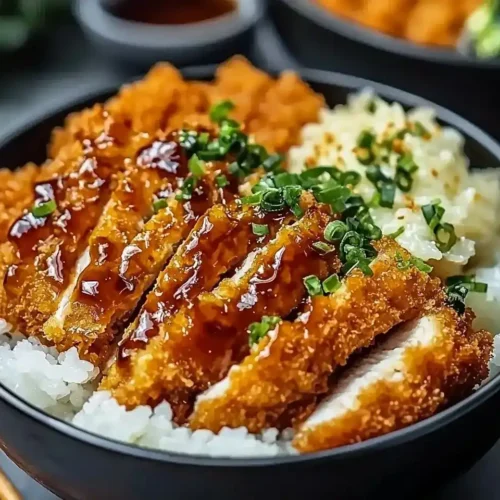
Crispy Japanese Katsu Bowls with golden panko coating, perfect sushi rice, and authentic tonkatsu sauce. Easy healthy lunch meal prep recipe ready in 30 minutes.
Well, let me spill the beans about my first encounter with authentic Japanese katsu bowls. Picture this: a bustling ramen shop in Portland, Oregon, where the sizzle of hot oil mingles with the sweet aroma of sushi rice. One bite of that impossibly crispy chicken katsu transported me straight to flavor heaven.
However, my first attempt at recreating this magic at home? Let me tell you, it was a complete disaster. The coating fell off, the rice turned mushy, and my kitchen looked like a flour bomb exploded. But you know what? That failure sparked an obsession.
After countless experiments and three months of testing, I’ve cracked the code to perfect crispy Japanese katsu bowls. Moreover, I discovered that homemade versions can actually surpass restaurant quality when you know the secrets.
Welcome to Tasty at Home – where bold flavors meet everyday kitchens. Today, I’m sharing everything I learned about crafting these golden, crunchy masterpieces that’ll make your taste buds dance.
Table of Contents
What Makes These Katsu Bowls Absolutely Irresistible
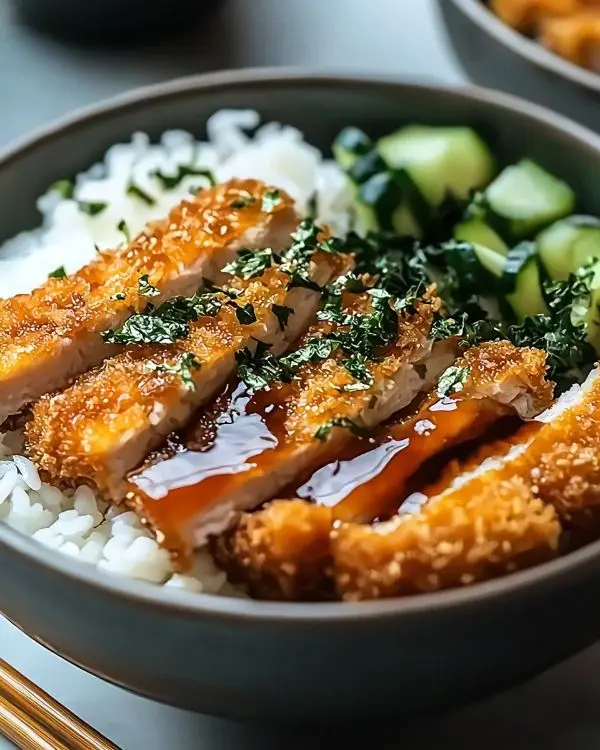
These crispy Japanese katsu bowls represent the perfect marriage of textures and flavors. Furthermore, they offer incredible versatility for meal prep enthusiasts and busy families alike.
The magic lies in the contrast: ultra-crispy panko coating surrounding tender, juicy protein, nestled atop perfectly seasoned sushi rice. Additionally, the tangy-sweet tonkatsu sauce ties everything together with umami-rich goodness.
Premium Ingredients That Make the Difference
| Essential Components | US Measurements | Metric Equivalents |
|---|---|---|
| Boneless chicken breasts | 2 pieces (1 lb) | 450g |
| All-purpose flour | 1 cup | 125g |
| Large eggs | 2 | 2 |
| Panko breadcrumbs | 1 cup | 100g |
| Japanese short-grain rice | 2 cups | 400g |
| Water for rice | 2½ cups | 600ml |
| Rice vinegar | 1 tablespoon | 15ml |
| Vegetable oil | For frying | As needed |
| Bold Add-ins | Amount | Purpose |
|---|---|---|
| Tonkatsu sauce | ¼ cup | Authentic flavor |
| Soy sauce | 1 tablespoon | Umami depth |
| Worcestershire sauce | 1 teaspoon | Complexity |
| Fresh cabbage (shredded) | 1 cup | Crispy texture |
| Green onions | 2 stalks | Fresh bite |
| Sesame seeds | For garnish | Nutty finish |
Shopping Smart at American Grocery Stores
When shopping for these Japanese katsu bowls ingredients, head to the international aisle first. Most major US supermarkets now stock panko breadcrumbs and short-grain rice. Nevertheless, Asian markets offer superior quality and better prices.
Look for chicken breasts with even thickness and pale pink color. Furthermore, choose panko with larger, flakier crumbs for maximum crispiness. Fresh cabbage should feel heavy and have tightly packed leaves.
Pro Shopping Tip: Buy tonkatsu sauce if available, but don’t worry if you can’t find it. My homemade version using common American condiments tastes remarkably authentic.
Essential Equipment for Perfect Katsu Success
Creating restaurant-quality crispy Japanese katsu bowls requires minimal equipment. However, having the right tools makes the difference between soggy disappointment and crispy perfection.
Must-Have Kitchen Tools
Heavy-bottomed skillet or cast-iron pan: This ensures even heat distribution for consistent browning. Additionally, cast iron retains heat better, maintaining oil temperature when you add the katsu.
Meat mallet or rolling pin: Pounding chicken to even thickness prevents overcooking. Moreover, uniform thickness ensures consistent cooking throughout.
Three shallow dishes: Set up your breading station efficiently. Furthermore, having dedicated dishes prevents cross-contamination between flour, eggs, and panko.
Fine-mesh strainer: Essential for rinsing rice until water runs clear. Additionally, proper rinsing removes excess starch for perfect texture.
Paper towels and wire rack: Proper draining keeps your katsu crispy. Moreover, wire racks allow air circulation, preventing soggy bottoms.
DIY Alternatives for Budget-Conscious Cooks
Can’t find a meat mallet? Use a heavy rolling pin wrapped in plastic wrap. Furthermore, a sturdy can wrapped in a towel works surprisingly well.
No wire rack? Layer paper towels on a large plate, then prop one end up slightly. This creates drainage while maintaining crispiness.
Step-by-Step Katsu Bowl Mastery
Preparing Perfect Sushi Rice Foundation
Step 1: Rinse Until Crystal Clear Measure two cups of short-grain rice into a fine-mesh strainer. Rinse under cold running water, gently stirring with your fingers. Continue rinsing until the water runs completely clear, typically 3-4 minutes. This crucial step removes surface starch that causes gumminess.
Step 2: The Soaking Secret Transfer rinsed rice to a heavy-bottomed saucepan and add 2½ cups cold water. Let the rice soak for exactly 30 minutes. Furthermore, this soaking allows even moisture absorption for uniform cooking.
Step 3: Perfect Cooking Technique Bring rice to a rolling boil over high heat, then immediately reduce to low. Cover tightly and simmer for exactly 15 minutes without lifting the lid. Additionally, resist the temptation to peek – trapped steam cooks the rice perfectly.
Step 4: Resting and Seasoning Remove from heat and let stand, covered, for 10 minutes. Meanwhile, dissolve rice vinegar, sugar, and salt in a small bowl. Gently fold this mixture into the rice using a wooden spoon. The result should taste subtly sweet and tangy.
Creating Impossibly Crispy Katsu
Step 5: Preparing the Protein Place chicken breasts between plastic wrap and pound to ½-inch thickness. This technique, popularized by Julia Child, ensures even cooking and tender results. Season both sides generously with salt and pepper.
Step 6: Setting Up Your Breading Station Arrange three shallow dishes: flour in the first, beaten eggs in the second, and panko in the third. Furthermore, position them in order for smooth workflow. This assembly-line approach prevents messy mix-ups.
Step 7: The Three-Step Coating Process First, dredge each chicken piece in flour, shaking off excess. Next, dip in beaten eggs, allowing excess to drip off. Finally, press firmly into panko breadcrumbs, ensuring complete coverage. Additionally, gently pressing helps the coating adhere better.
Step 8: Achieving Golden Perfection Heat vegetable oil in a heavy skillet to 350°F. Carefully add breaded chicken and fry for 4-5 minutes per side. The coating should turn deep golden brown while the internal temperature reaches 165°F. Moreover, avoid overcrowding the pan to maintain oil temperature.
My Biggest Katsu Mistake: Initially, I used regular breadcrumbs instead of panko. The result was dense, heavy coating that absorbed too much oil. Panko’s larger flakes create air pockets that stay incredibly crispy. Trust me, this single change transformed my katsu from mediocre to magnificent.
Crafting Authentic Tonkatsu Sauce
Step 9: Homemade Sauce Magic Combine ¼ cup ketchup, 1 tablespoon soy sauce, 1 teaspoon Worcestershire sauce, and a pinch of sugar. This DIY version rivals expensive store-bought varieties. Furthermore, you can adjust sweetness and tanginess to your preference.
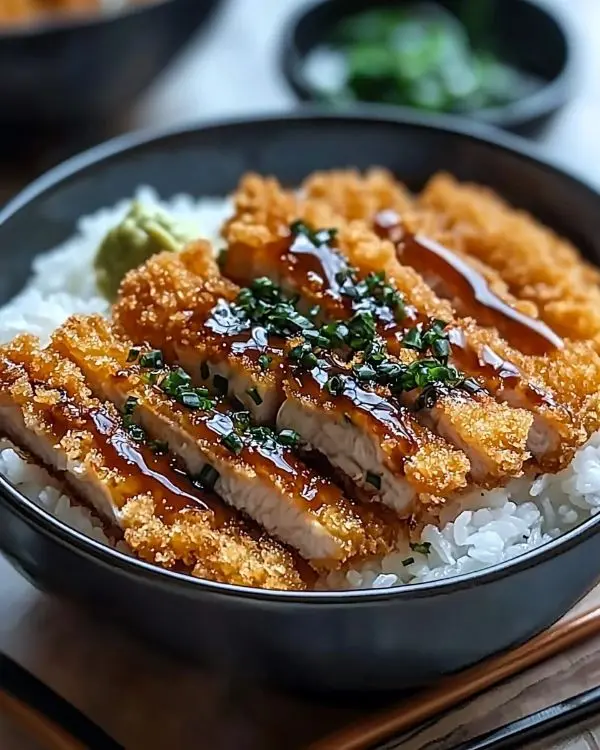
Expert Tips for Restaurant-Quality Katsu Bowl Results
Temperature Control Mastery
Maintaining proper oil temperature separates amateur from professional results. Use a candy thermometer if available, or test with a small piece of panko. It should sizzle vigorously but not burn immediately.
Thomas Keller’s Wisdom: The renowned chef emphasizes that consistent temperature creates consistent results. Therefore, adjust heat throughout cooking to maintain 350°F.
Timing and Texture Secrets
Cook katsu immediately after breading for maximum crispiness. Furthermore, letting breaded proteins sit causes coating to become soggy. However, you can bread chicken up to 2 hours ahead if refrigerated.
Rest finished katsu on a wire rack for 3-5 minutes before slicing. This allows juices to redistribute while maintaining crispiness. Additionally, slice against the grain for tender bites.
Creative Variations for Every Palate
Regional American Twists:
- Southern Style: Add cayenne and paprika to panko for spicy kick
- California Fresh: Top with avocado and sprouts
- Midwest Comfort: Serve over mashed potatoes instead of rice
- East Coast Classic: Use cod or haddock for seafood version
Dietary Adaptations:
- Gluten-Free: Substitute almond flour and gluten-free panko
- Keto-Friendly: Serve over cauliflower rice
- Vegetarian: Use thick portobello mushroom caps or firm tofu
Make-Ahead and Storage Solutions
| Component | Refrigerator | Freezer | Reheating Method |
|---|---|---|---|
| Cooked rice | 3-4 days | 1 month | Microwave with damp paper towel |
| Breaded raw katsu | 2 days | 1 month | Fry from frozen, add 2 minutes |
| Cooked katsu | 2-3 days | 2 weeks | Oven at 350°F for 10 minutes |
| Tonkatsu sauce | 1 week | 3 months | Room temperature |
Meal Prep Magic: Prepare components separately for best results. Rice keeps beautifully, while katsu reheats perfectly in a toaster oven. Moreover, this approach maintains textures better than assembled bowls.
Perfect Pairings and Serving Suggestions
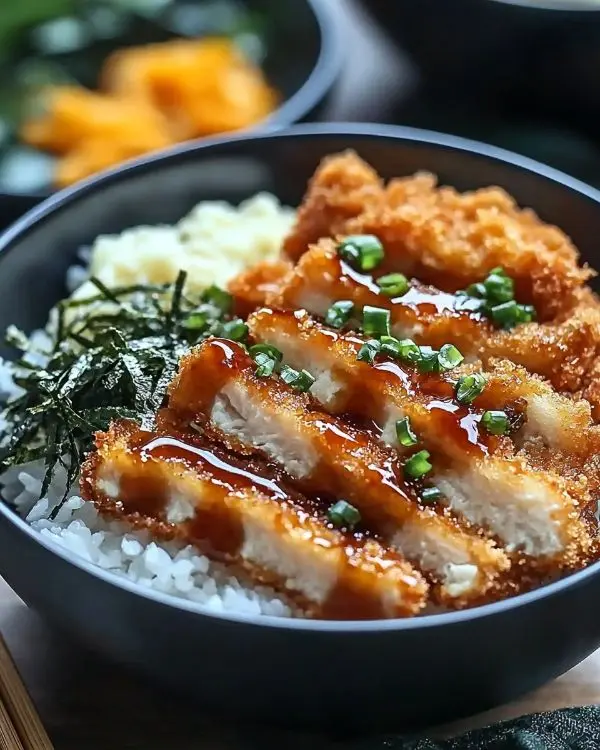
These crispy Japanese katsu bowls pair beautifully with traditional Japanese sides. Consider adding spicy tuna onigiri as an appetizer for authentic experience. Furthermore, the combination creates a complete Japanese meal.
For beverages, green tea complements the rich, fried elements perfectly. Additionally, Japanese beer like Asahi or Sapporo cuts through the oil beautifully. However, sparkling water with lemon offers a refreshing non-alcoholic option.
Holiday Adaptation: During Thanksgiving, I love serving katsu alongside traditional sides. The crispy coating and umami flavors provide interesting contrast to typical holiday flavors. Moreover, guests always ask for the recipe!
For dessert, consider pistachio paste served with fresh fruit. The nutty sweetness balances the savory katsu perfectly.
Advanced Techniques from Japanese Masters
Double-Frying Method: Some Japanese restaurants fry katsu twice for extra crispiness. First fry at 325°F for 3 minutes, rest for 2 minutes, then fry again at 350°F for 2 minutes. This technique creates incredibly crunchy exterior while keeping interior moist.
Panko Preparation: Toast panko lightly in a dry pan before using. This pre-browning creates deeper color and enhanced crunch. Furthermore, it prevents soggy coating from absorbing too much oil.
Japanese Katsu Bowls FAQs
What goes in a katsu bowl?
A traditional katsu bowl contains crispy breaded protein (usually pork or chicken), steamed rice, shredded cabbage, and tonkatsu sauce. Additionally, common garnishes include green onions, sesame seeds, and pickled ginger for authentic flavor balance.
What are Japanese food bowls called?
Japanese food bowls are called “donburi” or simply “don.” This term refers to rice bowls topped with various ingredients like katsu, teriyaki, or tempura. Moreover, the bowl itself is also called donburi, referring to the ceramic vessel used for serving.
What is Japanese katsu made of?
Japanese katsu consists of meat (typically pork or chicken) that’s been pounded thin, coated in flour, egg, and panko breadcrumbs, then deep-fried until golden. Furthermore, authentic versions use specific Japanese panko for superior texture and crispiness.
How to make simple katsudon?
Simple katsudon combines fried katsu with beaten eggs and onions simmered in dashi broth, served over rice. Heat broth, add sliced onions, then beaten eggs, and finally place katsu on top until eggs are just set. Additionally, this comfort food classic takes only minutes once katsu is prepared.
Your Katsu Bowl Journey Starts Now
Man, oh man, there’s nothing quite like the satisfaction of creating perfect crispy Japanese katsu bowls in your own kitchen. The golden crunch, the tender interior, the perfectly seasoned rice – every element working in harmony to create pure comfort food magic.
These bowls represent more than just a meal; they’re a bridge between cultures and a testament to how simple techniques can create extraordinary results. Furthermore, once you master this basic recipe, countless variations await your creativity.
Whether you’re meal prepping for busy weekdays or impressing dinner guests, these katsu bowls deliver restaurant-quality satisfaction. Moreover, the skills you’ll learn transfer beautifully to other Japanese dishes.
Remember that cooking is a journey, not a destination. Your first katsu might not be perfect, but each attempt teaches valuable lessons. Additionally, the joy comes from the process as much as the final result.
I’d love to hear about your katsu adventures! Share your variations on social media and tag us @TastyAtHome. Furthermore, let me know which tips made the biggest difference in your cooking.
For the perfect finishing touch to your Japanese feast, try pairing with autumn gin sour for adults or refreshing green tea for everyone. The combination creates an unforgettable dining experience that brings restaurant quality to your home table.
Now grab that apron, heat up that oil, and let’s create some crispy magic together. Your taste buds will thank you, and your family will declare you a kitchen hero. Because at Tasty at Home, every dish tells a story – and this one is about to become yours.
Crispy Japanese Katsu Bowls
Equipment
- Heavy-bottomed skillet or cast-iron pan
- Meat mallet or rolling pin
- Three shallow dishes
- Fine-mesh strainer
- Paper towels and wire rack
Ingredients
Essential Components
- 2 pieces (1 lb / 450g) Boneless chicken breasts
- 1 cup (125g) All-purpose flour
- 2 Large eggs
- 1 cup (100g) Panko breadcrumbs
- 2 cups (400g) Japanese short-grain rice
- 2½ cups (600ml) Water for rice
- 1 tbsp (15ml) Rice vinegar
- Vegetable oil For frying
Bold Add-ins
- ¼ cup Tonkatsu sauce Authentic flavor
- 1 tbsp Soy sauce Umami depth
- 1 tsp Worcestershire sauce Complexity
- 1 cup Fresh cabbage (shredded) Crispy texture
- 2 stalks Green onions Fresh bite
- Sesame seeds For garnish
Instructions
- Rinse rice in a fine-mesh strainer until water runs clear, 3–4 minutes.
- Soak rinsed rice in 2½ cups water for 30 minutes, then cook covered for 15 minutes on low heat. Rest 10 minutes.
- Season cooked rice with rice vinegar, sugar, and salt, folding gently.
- Pound chicken breasts to ½-inch thickness, season with salt and pepper.
- Set up breading station with flour, beaten eggs, and panko.
- Dredge chicken in flour, dip in egg, then coat with panko, pressing firmly.
- Heat oil to 350°F (175°C) and fry chicken 4–5 minutes per side until golden and internal temp reaches 165°F.
- Drain katsu on a wire rack for 3–5 minutes, then slice against the grain.
- Mix ketchup, soy sauce, Worcestershire sauce, and sugar to make tonkatsu sauce.
- Assemble bowls: sushi rice base, sliced katsu, shredded cabbage, tonkatsu sauce, green onions, and sesame seeds.

