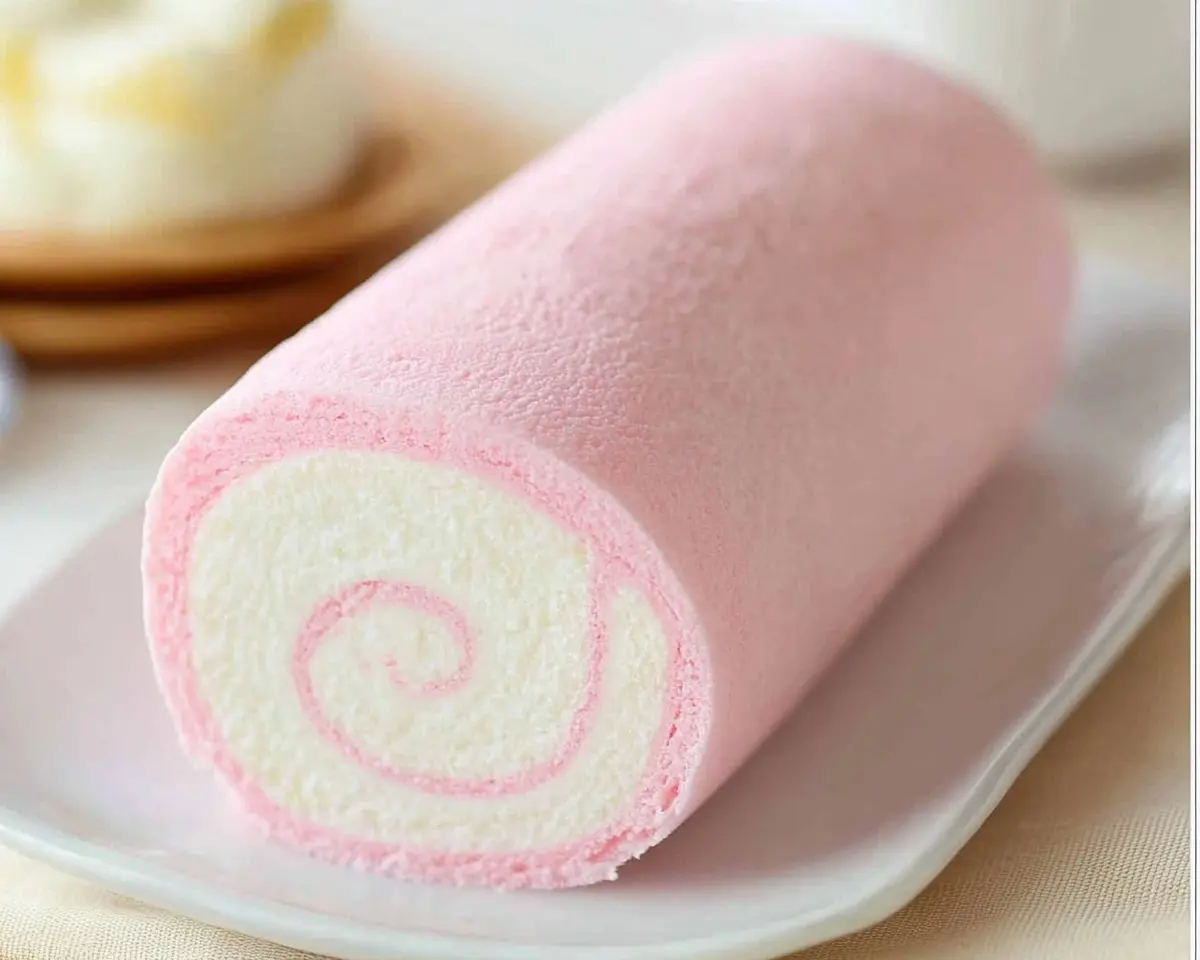
Japanese Cotton Candy Swiss Cake Roll recipe with stabilized cream. Learn authentic techniques for perfect fluffy Swiss cake with cotton candy flavor.
Hi, I’m Linda, and welcome to Tasty at Home—where bold flavors meet everyday kitchens. Let me tell you about the first time I encountered a Japanese cotton candy Swiss cake roll at a tiny bakery in San Francisco’s Japantown.
One bite transported me straight into a carnival dream, where childhood memories of county fairs collided with sophisticated Japanese pastry artistry.
You know what makes this Japanese cake roll different from traditional Swiss rolls? The secret lies in the stabilized whipped cream and that impossibly light sponge cake that practically floats off your fork. Furthermore, the cotton candy extract creates an ethereal sweetness that’s both nostalgic and surprisingly sophisticated.
Whether you’re planning a birthday celebration or simply craving something extraordinary, this recipe transforms your kitchen into a Japanese patisserie. Additionally, I’ve included foolproof tips that guarantee success, even if you’ve never tackled a roll cake before.
Table of Contents
What Makes This Japanese Cotton Candy Swiss Cake Roll Special
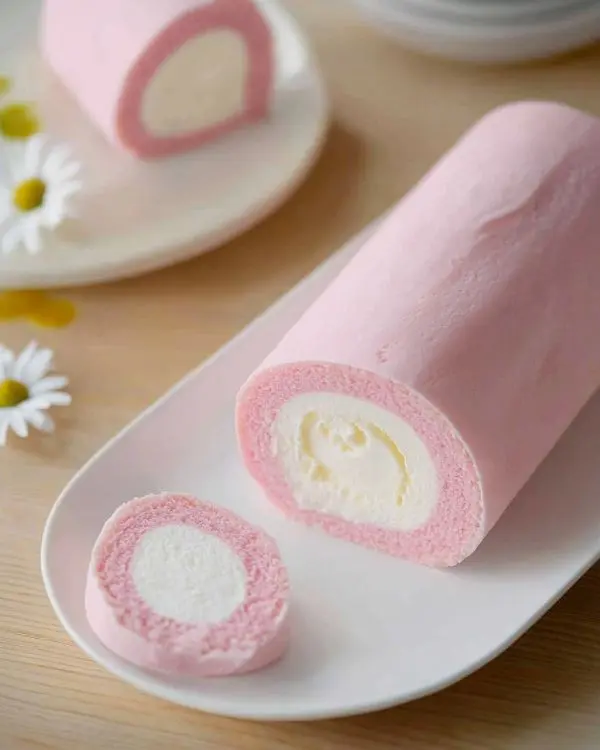
Japanese cotton candy Swiss cake roll represents the pinnacle of delicate pastry making. Unlike heavy American layer cakes, this ethereal dessert combines the lightness of Japanese sponge cake with the nostalgic sweetness of cotton candy flavor.
Key Ingredients and Shopping Guide
| Dry Mix Ingredients | US Measurement | Metric | Notes |
|---|---|---|---|
| Cake flour | 2/3 cup | 70g | Essential for tender texture |
| Sea salt | 1/4 teaspoon | – | Enhances flavor balance |
| Wet Mix Ingredients | US Measurement | Metric | Purpose |
|---|---|---|---|
| Whole milk | 6 tablespoons | 90ml | Creates moisture |
| Vegetable oil | 4 teaspoons | 20ml | Neutral flavor preferred |
| Granulated sugar | 2 tablespoons | 30g | Sweetness foundation |
| Cotton candy extract | 1/2 teaspoon | – | Signature flavor |
| Meringue Components | US Measurement | Metric | Quality Tips |
|---|---|---|---|
| Egg whites | 6 large | – | Room temperature essential |
| Granulated sugar | 1/4 cup | 55g | Superfine works best |
| Cream of tartar | 1/4 teaspoon | – | Stabilizes meringue |
| Gel food coloring | As needed | – | Vibrant colors preferred |
Shopping Tips for US Grocery Stores
First, look for cake flour in the baking aisle near specialty flours. However, if unavailable, substitute with all-purpose flour minus 2 tablespoons per cup, plus 2 tablespoons cornstarch.
Second, cotton candy extract might require a trip to specialty baking stores or online ordering. Nevertheless, vanilla extract works as a backup, though you’ll lose that distinctive cotton candy essence.
Third, heavy cream with 36% milk fat creates the most stable whipped cream. Therefore, check labels carefully, as some “heavy creams” contain lower fat percentages.
Pro Tip: Visit Asian grocery stores for authentic cake flour brands like Swans Down or Softasilk, which Japanese bakers prefer for their ultra-fine texture.
Essential Equipment and Preparation
Required Equipment
- 8×12 inch rectangular cake pan
- Stand mixer or hand mixer
- Large mixing bowls (non-plastic for meringue)
- Wire cooling rack
- Offset spatula
- Fine-mesh sifter
- Digital kitchen scale (recommended)
DIY Equipment Alternatives
Can’t find an 8×12 pan? Use a 9×13 inch pan but reduce baking time by 1-2 minutes. Similarly, lacking a stand mixer? Hand mixers work perfectly, though meringue requires more patience and arm strength.
Step-by-Step Preparation Guide
Preparing the Cake Base
Step 1: Set Up Your Workspace Preheat your oven to 325°F and line your rectangular pan with parchment paper. Oops, here’s where I made my first mistake—skipping the parchment overhang left me struggling to remove the delicate cake later.
Step 2: Combine Wet Ingredients Whisk together milk, vegetable oil, the first portion of sugar, and cotton candy extract until completely smooth. This mixture should smell like a carnival in spring.
Step 3: Prepare Dry Mixture Sift cake flour and salt into a large bowl. Create a well in the center, then pour in your wet mixture. Gently fold until just combined—overmixing develops gluten, creating a tough cake instead of our desired cloud-like texture.
Creating Perfect Meringue
Step 4: Whip Egg Whites Using a spotlessly clean bowl, whip egg whites on low speed until frothy. Add cream of tartar, then gradually increase speed to medium. Julia Child always emphasized the importance of clean equipment for successful meringue, and she was absolutely right.
Step 5: Add Sugar Gradually Once whites become opaque with tight bubbles, slowly stream in the second portion of sugar. Increase to medium-high speed, whipping until soft peaks form. Add gel coloring now, then continue until stiff peaks hold their shape.
Step 6: Fold with Confidence Fold one-third of the meringue into the flour mixture using a gentle cutting motion. Add remaining meringue in two additions, maintaining as much volume as possible.
Baking and Assembly Techniques
Step 7: Perfect the Pour Spread batter evenly in your prepared pan using an offset spatula. Tap the pan firmly on your counter to release trapped air bubbles—this prevents unsightly holes in your finished cake.
Step 8: Monitor Baking Carefully Bake for 10-12 minutes until the cake springs back when lightly touched and pulls away slightly from pan edges. The surface should appear set but still tender.
Step 9: Cool Strategically Cool in the pan for exactly 5 minutes, then flip onto a wire rack. Remove parchment immediately—waiting too long causes sticking.
Mastering Stabilized Cotton Candy Whipped Cream
Gelatin Preparation Technique
Sprinkle unflavored gelatin over cold water and let bloom for 5 minutes. Meanwhile, chill your mixing bowl and beaters in the freezer. Then, dissolve the bloomed gelatin in a hot water bath until completely liquid.
Whipping Method
Start whipping cream and sugar on medium speed. When tracks begin forming, slowly drizzle in cooled gelatin while continuing to whip. Add cotton candy extract, then increase to medium-high until stiff peaks form.
Critical Warning: Stop immediately at stiff peaks—overwhipping creates butter, not cream. Thomas Keller teaches that perfect whipped cream should hold its shape but still feel silky.
Assembly and Rolling Techniques
Spreading Strategy
Spread stabilized cream evenly across the cooled cake, adding extra cream along the edge that rolls first. This prevents gaps and ensures every bite contains adequate filling.
Rolling Method
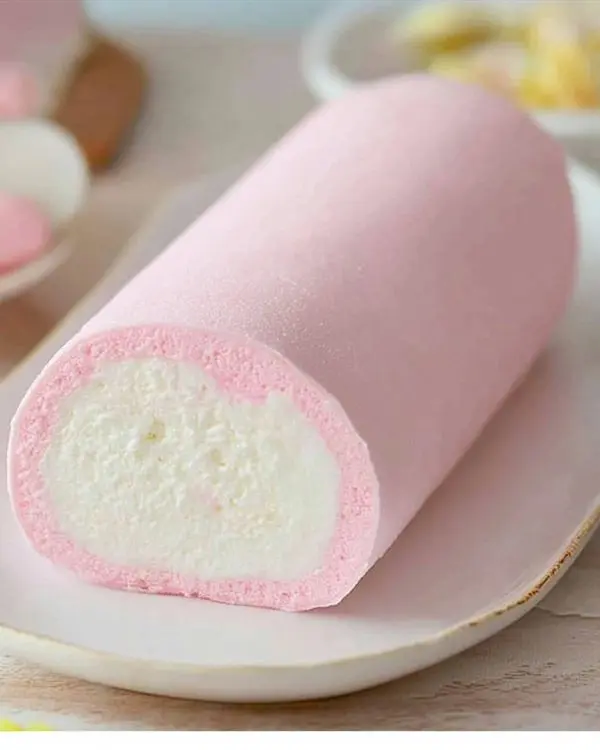
Using parchment paper as a guide, carefully roll from the short edge. Work slowly and confidently—rushing creates cracks. Wrap tightly in plastic wrap and refrigerate for at least 2 hours before serving.
Storage Guidelines
| Storage Method | Duration | Quality Notes |
|---|---|---|
| Refrigerated (wrapped) | 2-3 days | Best texture first 24 hours |
| Frozen (sliced) | 1 month | Thaw in refrigerator |
| Room temperature | 4 hours max | Cream stability decreases |
Creative Variations and Serving Ideas
Flavor Variations
Rainbow Cotton Candy Roll: Divide batter into portions and color each differently for a spectacular rainbow effect when sliced.
Birthday Cake Version: Replace cotton candy extract with vanilla and fold in rainbow sprinkles for a festive twist perfect for American birthday celebrations.
Holiday Adaptation: During Christmas season, try peppermint extract with red and white coloring for a candy cane inspired roll.
Regional American Twists
Transform this Japanese classic by incorporating American flavors like maple extract for a Vermont-inspired version, or add a touch of bourbon extract for a Southern belle interpretation.
Make-Ahead Strategies
Prepare the cake base up to one day ahead, wrapping tightly and refrigerating. However, assemble with fresh whipped cream on serving day for optimal texture and flavor.
Expert Tip: Freeze individual slices wrapped in plastic, then parchment. They thaw beautifully for unexpected guests or late-night cravings.
Troubleshooting Common Issues
Preventing Cake Cracks
Temperature control prevents most cracking issues. Additionally, avoid overbaking, which creates a dry cake prone to splitting during rolling. Furthermore, maintain moisture by not letting the cake cool too long before rolling.
Achieving Stable Meringue
Room temperature egg whites whip faster and achieve greater volume. Moreover, even trace amounts of fat or water prevent proper whipping, so clean equipment meticulously.
Fixing Deflated Results
Deflation usually stems from undermixed meringue or temperature shock. Therefore, ensure stiff peaks before folding, and maintain consistent oven temperature throughout baking.
Professional Presentation Tips
Slicing Techniques
Use a sharp, clean knife warmed under hot water. Wipe between cuts for pristine slices that showcase the beautiful spiral pattern.
Garnishing Ideas
Dust with powdered sugar, add fresh berries, or create cotton candy wisps for Instagram-worthy presentations. Similarly, edible flowers complement the delicate aesthetic perfectly.
Pairing Suggestions
Serve alongside Japanese clear soup for an authentic meal progression, or offer with traditional dango for a complete Japanese dessert experience.
Japanese Cotton Candy Swiss Cake Roll FAQs
What is Japanese roll cake called?
Japanese roll cake is called “rōru kēki” (ロールケーキ) in Japanese, derived from the English words “roll cake.”
What does cotton candy cake taste like?
Cotton candy cake delivers nostalgic sweetness reminiscent of carnival treats, with delicate vanilla undertones and an incredibly light, airy texture.
What do Japanese people call cotton candy?
Japanese people call cotton candy “wata-ame” (綿飴), literally meaning “cotton candy,” though some regions use “cotton candy” in English.
What is the difference between Japanese roll cake and Swiss roll cake?
Japanese roll cakes typically feature lighter sponge cake made with separated eggs and stabilized fillings, while Swiss rolls often use whole eggs and simpler cream fillings.
Seasonal Adaptations and Cultural Connections
This Japanese cotton candy Swiss cake roll bridges cultures beautifully, especially during American summer festivals when cotton candy nostalgia peaks. Moreover, it makes an elegant addition to Fourth of July celebrations when colored red, white, and blue.
Consider preparing this for Mother’s Day brunch or graduation parties, where its sophisticated appearance impresses guests while remaining approachably sweet. Additionally, the recipe scales easily for larger gatherings.
For autumn variations, incorporate sweet Japanese potato flavors, or create Halloween versions with orange and black coloring to complement your Halloween pasta salad.
Advanced Techniques for Perfect Results
Temperature Control Mastery
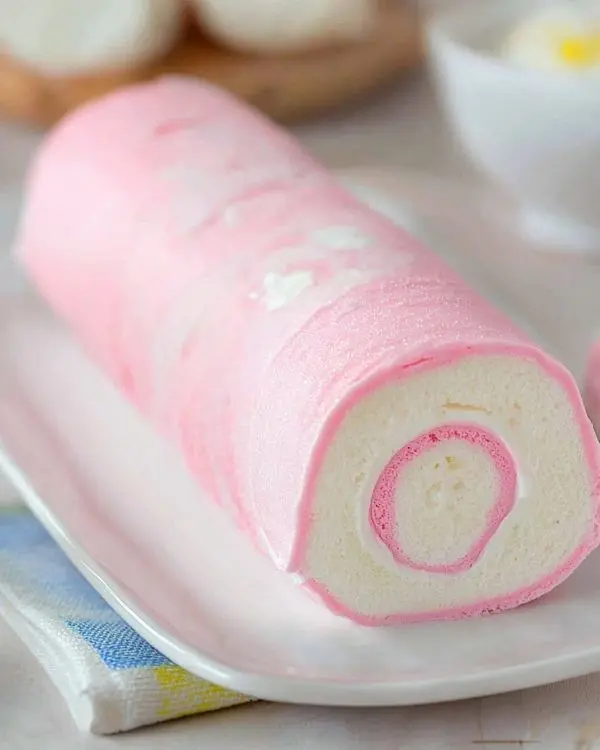
Maintain consistent temperatures throughout the process. Room temperature ingredients mix more uniformly, while properly chilled cream whips to greater volume and stability.
Understanding Gluten Development
Cake flour’s lower protein content creates tender results, but gentle mixing techniques remain crucial. Folding preserves the delicate structure created by your carefully whipped meringue.
Timing Coordination
Success requires careful timing coordination. Start whipped cream preparation while the cake cools, ensuring assembly happens at optimal temperatures for both components.
Man, oh man, the difference proper timing makes cannot be overstated. Rush the process, and you’ll sacrifice texture and stability.
The Science Behind Cotton Candy Flavor
Cotton candy extract captures the essence of spun sugar without requiring actual cotton candy production. This concentrated flavoring provides consistent results while maintaining the cake’s delicate moisture balance.
Furthermore, the stabilized whipped cream technique prevents weeping and maintains structure for days, unlike traditional whipped cream that deflates within hours.
Building Your Japanese Dessert Menu
Complement this cotton candy Swiss cake roll with other Japanese favorites like okonomiyaki for a complete cultural culinary experience. The contrast between savory pancakes and sweet roll cake creates memorable dining experiences.
Additionally, consider the visual presentation when planning your menu. Japanese aesthetics emphasize harmony and balance, so choose serving pieces and accompaniments that honor this tradition.
Conclusion: Your Journey to Cotton Candy Perfection
Creating this Japanese cotton candy Swiss cake roll transforms your kitchen into a stage for edible artistry. The combination of precise technique and whimsical flavor creates desserts that delight both children and sophisticated palates.
Remember that first magical bite I described from San Francisco’s Japantown? You’re now equipped to recreate that wonder in your own home, complete with the confidence that comes from understanding every technique and troubleshooting tip.
Whether you’re celebrating a birthday, hosting dinner guests, or simply indulging in a weekend baking adventure, this cotton candy Swiss cake roll delivers pure joy in every slice. The light-as-air texture paired with nostalgic cotton candy sweetness creates memories worth sharing.
Try pairing your finished cake roll with a delicate Japanese tea or sparkling water with fresh mint. Additionally, consider photographing your creation before serving—the beautiful spiral pattern deserves documentation.
I’d love to see your cotton candy Swiss cake roll creations! Tag us on social media and share which color combinations you chose. Did you try the rainbow version, or did you create your own unique twist?
Finally, remember that every expert baker started with their first roll cake attempt. Embrace the learning process, celebrate your successes, and don’t be discouraged by minor imperfections. Each cake roll you create builds skills for the next even more spectacular dessert
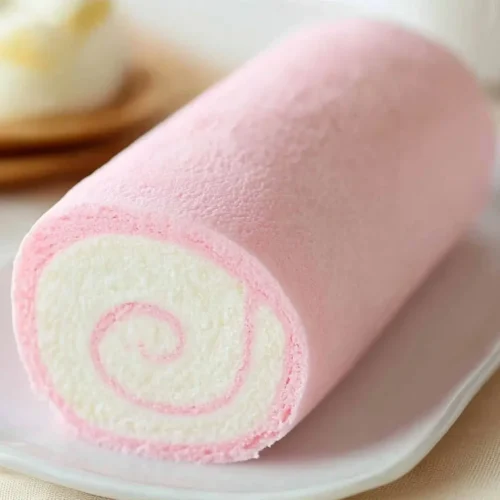
Japanese Cotton Candy Swiss Cake Roll
Equipment
- 8×12 inch rectangular cake pan
- stand mixer or hand mixer
- Large mixing bowls
- Wire cooling rack
- Offset spatula
- Fine-mesh sifter
- Digital kitchen scale
Ingredients
Dry Mix Ingredients
- ⅔ cup Cake flour 70g, essential for tender texture
- ¼ teaspoon Sea salt
Wet Mix Ingredients
- 6 tablespoons Whole milk 90ml
- 4 teaspoons Vegetable oil 20ml, neutral flavor preferred
- 2 tablespoons Granulated sugar 30g
- ½ teaspoon Cotton candy extract Signature flavor
Meringue Components
- 6 large Egg whites Room temperature essential
- ¼ cup Granulated sugar 55g, superfine works best
- ¼ teaspoon Cream of tartar Stabilizes meringue
- As needed Gel food coloring Vibrant colors preferred
Whipped Cream Filling
- 1 cup Heavy cream 36% fat for stability
- 2 tablespoons Granulated sugar
- ½ teaspoon Cotton candy extract
- 1 teaspoon Unflavored gelatin Stabilizer
- 2 tablespoons Cold water For blooming gelatin
Instructions
- Preheat oven to 325°F and line the cake pan with parchment paper.
- Whisk milk, oil, sugar, and cotton candy extract until smooth.
- Sift cake flour and salt, then fold in wet mixture gently.
- Whip egg whites with cream of tartar, gradually adding sugar until stiff peaks form. Add food coloring.
- Fold meringue into batter in three additions to keep volume.
- Spread batter evenly in the pan, tap to release air bubbles, and bake 10–12 minutes.
- Cool 5 minutes, then flip onto a rack and peel parchment.
- Bloom gelatin in cold water, melt, then add while whipping cream with sugar and cotton candy extract until stiff peaks form.
- Spread whipped cream evenly on cooled cake, roll tightly, wrap, and chill at least 2 hours.

