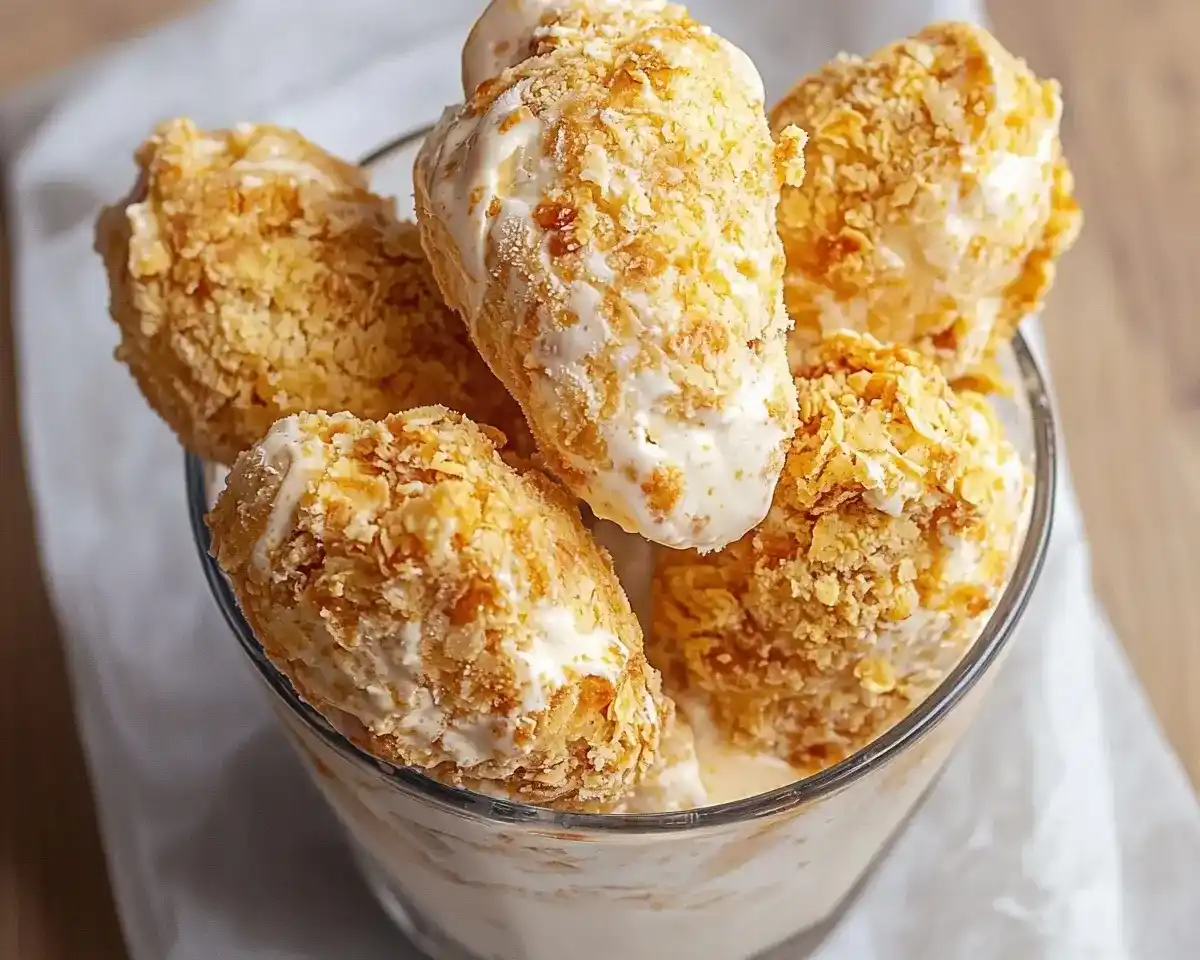
Homemade fried chicken ice cream combines creamy vanilla with crispy cornflake coating. Easy 5-step recipe with white chocolate coating for the ultimate dessert twist.
Hi, I’m Linda, and welcome to Tasty at Home—where bold flavors meet everyday kitchens. Last summer in Nashville, I stumbled into a quirky ice cream parlor that served something absolutely mind-blowing: fried chicken ice cream.
Well, let me tell you, one spoonful transported me to dessert heaven with its perfect balance of creamy sweetness and crunchy texture.
Initially, I thought the concept sounded bizarre. However, after three failed attempts in my own kitchen—including one disaster where my white chocolate seized completely—I finally cracked the code. Consequently, this homemade fried chicken ice cream recipe delivers that same nostalgic comfort with a playful twist that’ll surprise every guest.
Table of Contents
About This Innovative Ice Cream Recipe
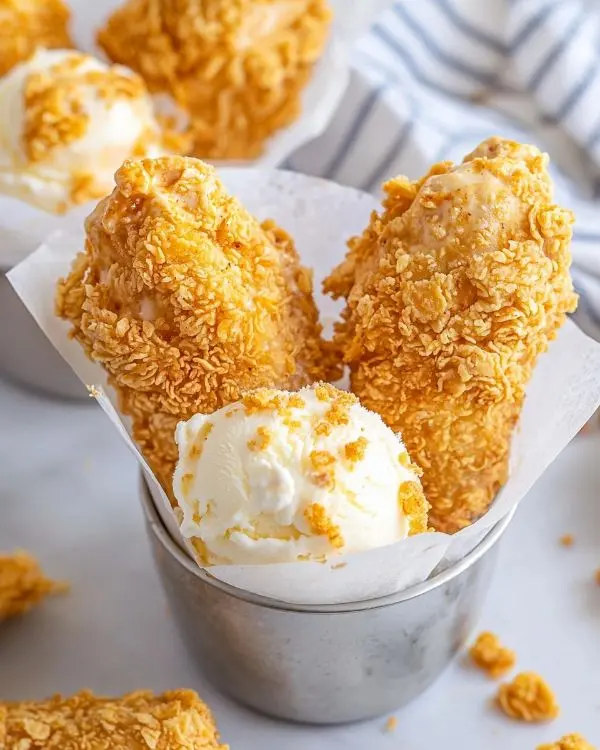
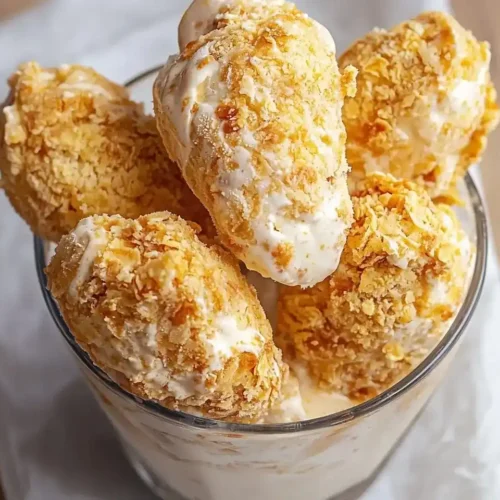
What makes this homemade fried chicken ice cream absolutely special? First, we skip the traditional churning process entirely. Instead, we create a no-churn vanilla base using just three ingredients. Then, we shape the frozen ice cream into realistic chicken pieces and coat them with melted white chocolate and crushed cornflakes.
The magic happens in the contrast. The rich, velvety ice cream provides comfort, while the crunchy cornflake coating delivers that satisfying texture we crave from actual fried chicken. Furthermore, the white chocolate acts as both adhesive and flavor enhancer, adding subtle sweetness that complements the vanilla perfectly.
Essential Ingredients Table
| For Vanilla Ice Cream Base | US Measure | Metric | Notes |
|---|---|---|---|
| Cold heavy cream | 2 cups | 480ml | Must be very cold |
| Sweetened condensed milk | 1 can (14 oz) | 400g | Chilled preferred |
| Vanilla extract | 1½ teaspoons | 7ml | Pure vanilla recommended |
| For “Fried Chicken” Coating | US Measure | Metric | Notes |
|---|---|---|---|
| White chocolate chips | 1½ cups | 255g | High-quality preferred |
| Refined coconut oil | 2 tablespoons | 30ml | Solid or liquid |
| Cornflakes | 3 cups | 90g | Crush before using |
Shopping Tips for US Grocery Stores
When shopping for this fried chicken ice cream, head to the baking aisle first. Look for high-quality white chocolate chips—avoid candy melts, as they don’t provide the same smooth texture. Additionally, choose heavy cream with at least 35% fat content for optimal whipping.
For cornflakes, any major brand works perfectly. However, avoid frosted varieties, as they’ll make your coating too sweet. Meanwhile, refined coconut oil helps the white chocolate coating set properly and prevents cracking.
Smart Substitutions
Bold Add-ins for Creative Variations:
- Replace vanilla with maple extract for autumn vibes
- Add honey powder to the cornflake coating
- Mix crushed pretzels with cornflakes for extra crunch
- Substitute white chocolate with milk chocolate for richer flavor
International Reader Substitutions:
- Heavy cream = Double cream (UK) or Whipping cream (35% fat)
- Sweetened condensed milk = Available globally in most supermarkets
- Cornflakes = Any plain corn cereal flakes
Equipment & Step-by-Step Preparation
Essential Equipment
You’ll need a stand mixer with whisk attachment for best results. Alternatively, use a hand mixer, though you’ll need extra arm strength for proper whipping. Additionally, gather a 9×13-inch baking dish, parchment paper, sharp knife, and microwave-safe bowl.
DIY Alternatives:
- No stand mixer? Use a large bowl and hand mixer
- Missing parchment paper? Use plastic wrap, though removal becomes trickier
- No microwave? Melt chocolate using double boiler method
Creating the Perfect Ice Cream Base
Step 1: Chill Everything Place your mixing bowl and whisk attachment in the refrigerator 15 minutes before starting. This crucial step ensures your cream whips properly. Cold equipment prevents the cream from becoming grainy or separating.
Step 2: Prepare Your Pan Line your baking dish with parchment paper, leaving overhang on two sides. These paper “handles” make removing the frozen ice cream much easier later.
Step 3: Whip the Cream Start whipping cold heavy cream on medium-low speed for 30-60 seconds. Then, increase to medium-high speed until soft peaks form. Finally, reduce to medium speed and continue until stiff peaks develop.
Pro tip: Watch carefully during this stage. Over-whipped cream turns into butter, and there’s no going back. Oops, I learned this the hard way during my second attempt!
Step 4: Fold in Sweetened Milk Remove the bowl from your mixer. Gently fold in chilled sweetened condensed milk and vanilla extract using a silicone spatula. The folding motion preserves the air you’ve incorporated, keeping your ice cream light and creamy.
Step 5: Freeze the Base Transfer the mixture to your prepared baking dish. Smooth it into an even layer, pushing mixture into corners. Freeze uncovered for at least 8 hours or overnight. Consequently, you’ll have a solid block ready for shaping.
Shaping Your “Chicken” Pieces
Step 6: Cut Creative Shapes Remove the frozen ice cream block using parchment handles. Run a sharp knife under hot water, then dry it completely. Cut the ice cream into chicken-inspired shapes: drumsticks, nuggets, or strips work perfectly.
The key here is working quickly. Warm your knife between cuts to ensure clean edges without cracking.
Step 7: Refreeze Shaped Pieces Transfer shaped pieces to a parchment-lined baking sheet. Freeze for 2 additional hours until completely solid. This second freezing prevents melting when you apply the coating.
Creating the Crispy “Breading”
Step 8: Prepare Coating Station Crush cornflakes in a shallow bowl or plate. Meanwhile, melt white chocolate with coconut oil in 15-second microwave bursts at 50% power. Stir between each burst until smooth and fully combined.
Step 9: Coat Each Piece Working one piece at a time, dip frozen ice cream in melted chocolate using a fork or skewer. Immediately roll in crushed cornflakes, pressing gently to ensure complete coverage.
Here’s where timing matters most. The chocolate hardens quickly, so work efficiently but carefully.
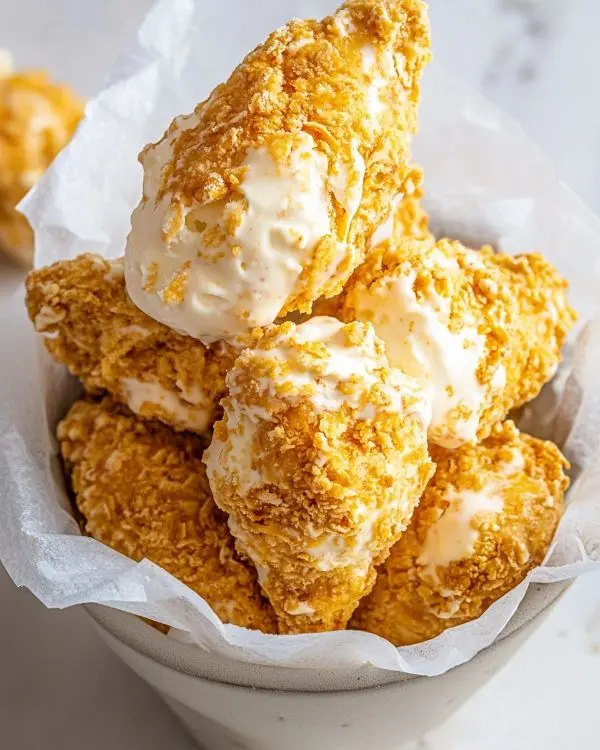
Step 10: Final Freeze Return coated pieces to the baking sheet. Freeze for at least 1 hour until the coating sets completely. Your homemade fried chicken ice cream is now ready to serve!
Expert Tips & Creative Variations
Professional Success Secrets
Temperature control determines success with this recipe. Keep your workspace cool, especially during summer months. Additionally, prepare all coating materials before removing ice cream from the freezer.
When melting chocolate, never exceed 50% microwave power. High heat causes chocolate to seize, creating an unusable grainy texture. Moreover, adding coconut oil provides flexibility and prevents cracking as temperatures fluctuate.
For perfectly shaped pieces, use cookie cutters when the ice cream reaches the right consistency. Too soft makes messy cuts, while too hard cracks under pressure.
Regional & Seasonal Variations
Southern Comfort Style: Add a pinch of cayenne pepper to your cornflake coating. This subtle heat mimics Nashville hot chicken while complementing the sweet vanilla base.
Holiday Magic: During Christmas season, tint white chocolate with red food coloring and roll pieces in crushed peppermint candies instead of cornflakes.
State Fair Special: Mix mini chocolate chips into your cornflake coating for extra crunch that mimics fair food excitement.
Healthy Twist: Substitute crushed nuts or granola for cornflakes. While different texturally, this variation adds protein and reduces processed ingredients.
Adult Version: Add 1 tablespoon bourbon to your ice cream base for grown-up sophistication that pairs beautifully with the “fried” concept.
Storage & Make-Ahead Advice
| Storage Method | Duration | Best Practices |
|---|---|---|
| Freezer (covered) | 2-3 weeks | Wrap individually in plastic wrap |
| Airtight container | 1 week | Layer with parchment paper |
| Individual portions | 1 month | Vacuum seal for best quality |
Make-ahead tip: Complete steps 1-7 up to one week before serving. Add coating on the day you plan to serve for optimal crispiness.
Perfect Pairings & Serving Suggestions
This fried chicken ice cream pairs surprisingly well with caramel sauce recipes or honey drizzle. For a complete comfort food experience, serve alongside warm potato soup for a sweet-savory meal combination.
Consider offering multiple “dipping sauces” like chocolate syrup, strawberry sauce, or even maple syrup. Additionally, crushed cookies make excellent garnish options that enhance the playful presentation.
Fried Chicken Ice Cream FAQs
What is fried chicken ice cream made of?
Fried chicken ice cream consists of vanilla ice cream shaped like chicken pieces, then coated in white chocolate and crushed cornflakes. The combination creates a dessert that looks like fried chicken but tastes like sweet, creamy ice cream with satisfying crunch.
How is fried ice cream made?
Fried ice cream typically involves coating ice cream scoops in crushed cereal or cookies, then briefly deep-frying. However, our homemade version skips the dangerous hot oil, instead using melted white chocolate as “batter” and cornflakes as “breading” for similar results.
How do they make fried ice cream without it melting?
The secret lies in temperature management and quick coating. First, freeze ice cream until rock-solid. Then, work rapidly with pre-chilled tools and melted chocolate at proper consistency. Finally, return coated pieces immediately to freezer before serving.
Does fried chicken ice cream taste like chicken?
Absolutely not! This fried chicken ice cream tastes exactly like vanilla ice cream with crunchy cornflake coating. The “chicken” refers only to the visual appearance and playful concept, not the flavor profile. Sweet vanilla and subtle white chocolate dominate the taste experience.
Final Thoughts on This Delightful Dessert Adventure
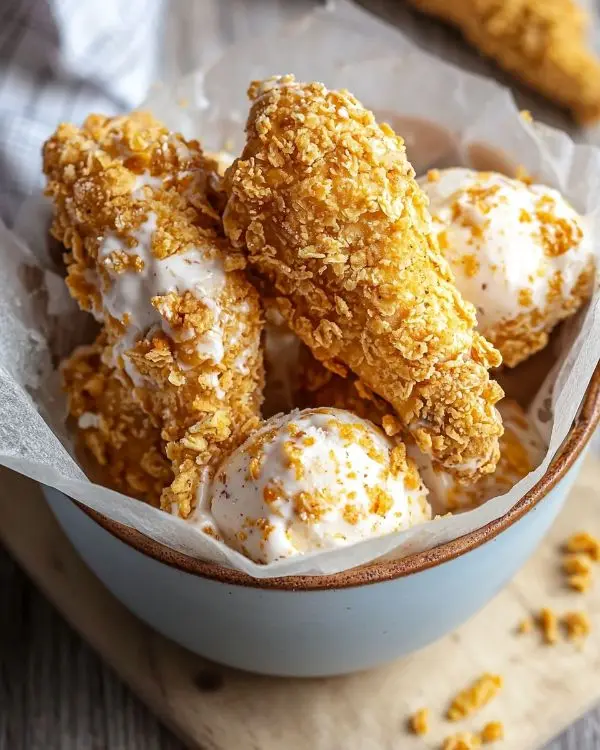
Creating homemade fried chicken ice cream transforms ordinary dessert time into pure entertainment. Moreover, this recipe proves that creativity in the kitchen leads to unforgettable memories and conversations.
The beauty of this dessert lies in its ability to surprise and delight simultaneously. Guests expect savory when they see “chicken,” but receive sweet satisfaction instead. Furthermore, the textural contrast between smooth ice cream and crunchy coating delivers sensory pleasure that keeps people coming back.
Next time you want to challenge conventional dessert expectations, try this recipe alongside creamy chicken and rice soup for a complete comfort food experience. Better yet, serve it at your next backyard barbecue and watch guests’ faces light up with surprise and joy.
Remember that summer in Nashville I mentioned? Well, now I can recreate that magic anytime right in my own kitchen. Most importantly, you can too.
Share your fried chicken ice cream creations on social media—I’d love to see how you customize this playful recipe. After all, the best recipes bring people together through shared amazement and delicious memories.
Homemade Fried Chicken Ice Cream
Equipment
- Stand mixer
- Whisk attachment
- Hand mixer (optional)
- 9×13 inch baking dish
- Parchment paper
- Sharp knife
- Microwave-safe bowl
Ingredients
For Vanilla Ice Cream Base
- 2 cups Cold heavy cream Must be very cold
- 14 oz can Sweetened condensed milk Chilled preferred
- 1½ teaspoons Vanilla extract Pure vanilla recommended
For Fried Chicken Coating
- 1½ cups White chocolate chips High-quality preferred
- 2 tablespoons Refined coconut oil Solid or liquid
- 3 cups Cornflakes Crush before using
Instructions
- Chill mixing bowl and whisk for 15 minutes before starting.
- Line a baking dish with parchment paper, leaving overhang handles.
- Whip cold heavy cream until stiff peaks form.
- Fold in sweetened condensed milk and vanilla extract gently.
- Freeze mixture in baking dish for at least 8 hours or overnight.
- Cut frozen ice cream into chicken-shaped pieces and refreeze for 2 hours.
- Melt white chocolate with coconut oil and prepare crushed cornflakes in a shallow bowl.
- Dip each ice cream piece in melted chocolate, then roll in crushed cornflakes.
- Freeze coated pieces for 1 hour until set, then serve.

