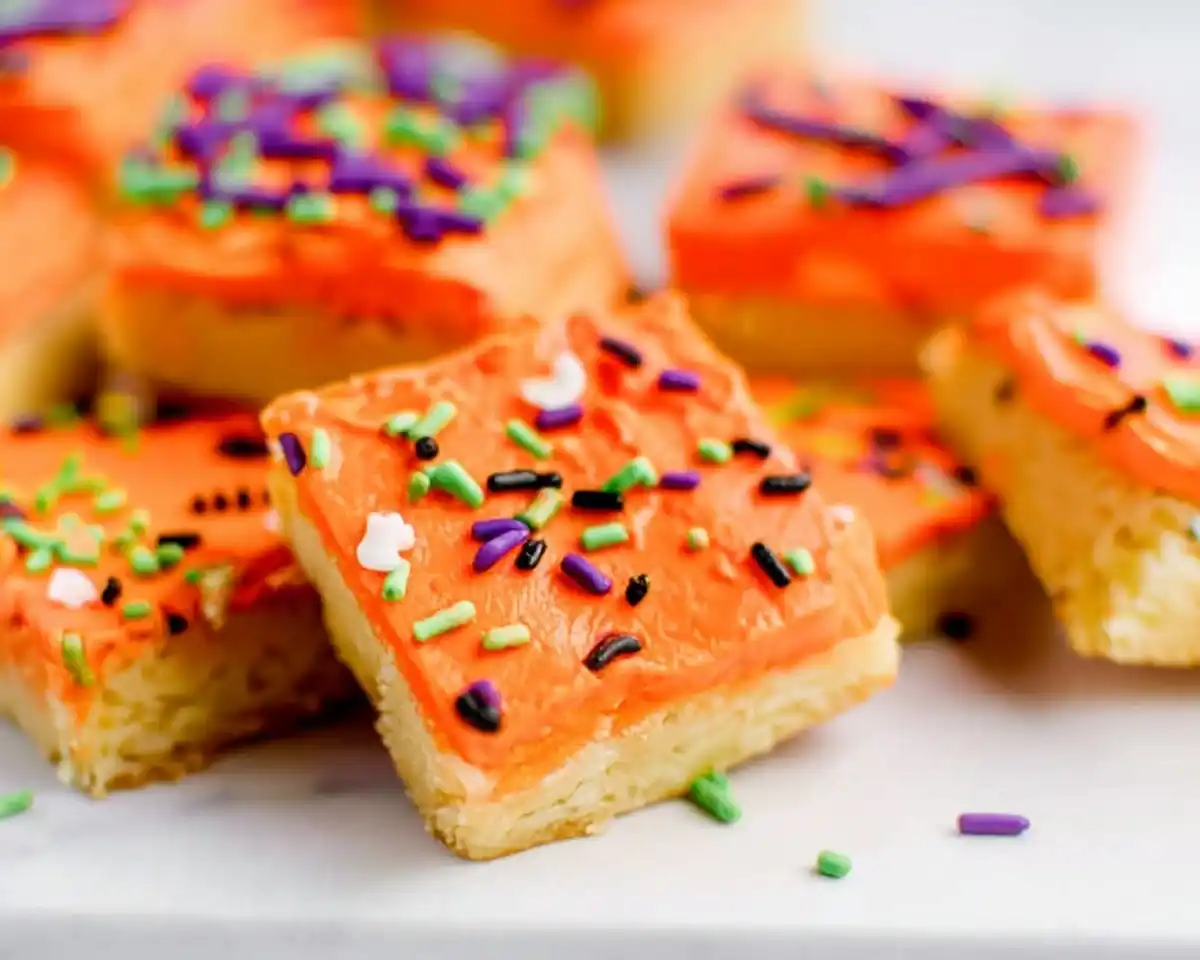
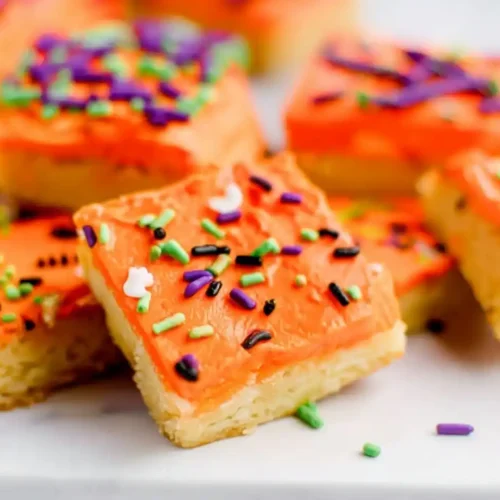
Halloween Sugar Cookie Bars are soft, frosted treats perfect for parties. This Sugar Cookie Bar Recipe takes 30 minutes with easy decorating tips.
Last October, I promised my nephew’s kindergarten class homemade Halloween treats. Well… let me tell you, that was ambitious.
I’d planned elaborate pumpkin-shaped cookies with intricate designs. Instead, I stood in my Phoenix kitchen at 10 PM, realizing I’d never finish 30 individual cookies by morning. Oops! That’s when I spotted my 9×13 pan and thought, “What if I just made one giant cookie?”
Those Halloween Sugar Cookie Bars saved me that night. Moreover, they became my most-requested recipe. The kids devoured them. Parents asked for the recipe. My sister now makes them for every fall gathering.
These bars deliver everything you love about Soft Frosted Sugar Cookies without the tedious rolling and cutting. You know what’s brilliant? They’re actually easier than traditional cookies while tasting just as buttery and delicious.
I’ve tested this Sugar Cookie Bar Recipe seventeen times (yes, seventeen). Each batch taught me something new about texture, sweetness, and that perfect cake-like crumb everyone craves.
Table of Contents
What Makes These Sugar Cookie Bars Special
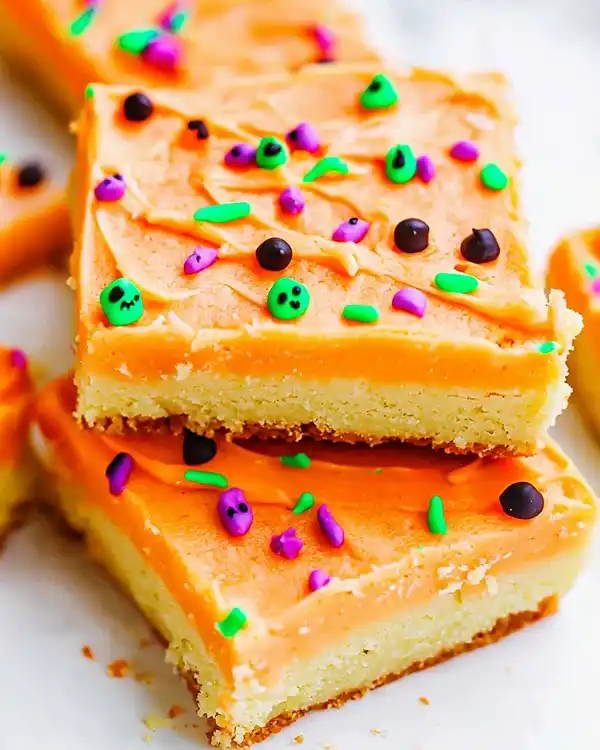
Traditional sugar cookies demand precision. These bars? They’re forgiving, fast, and feed a crowd.
The secret lies in the baking powder. It creates a tender, cake-like texture that’s softer than rolled cookies but sturdier than cake. Think of biting into a cloud that tastes like vanilla heaven.
I’ve adapted this recipe from classic American bakery-style cookies. The result combines the nostalgia of grocery store frosted cookies with homemade quality. Furthermore, the bars stay soft for days—no dry, crumbly edges here.
Ingredient Breakdown
| Ingredient | US Measure | Metric | Purpose |
|---|---|---|---|
| Salted butter (cookie) | 1 cup | 227g | Richness and flavor |
| Granulated sugar | 1 cup | 200g | Sweetness and structure |
| Vanilla extract (cookie) | 2 tsp | 10ml | Aromatic depth |
| Egg | 1 large | 50g | Binding agent |
| All-purpose flour | 2¼ cups | 281g | Structure |
| Baking powder | 2 tsp | 10g | Lift and tenderness |
| Salted butter (frosting) | ¾ cup | 170g | Creamy base |
| Powdered sugar | 3 cups | 360g | Smooth sweetness |
| Vanilla extract (frosting) | 3 tsp | 15ml | Flavor boost |
| Heavy cream | 3 tbsp | 45ml | Spreadable consistency |
Shopping Smart at US Grocery Stores
Look for Land O’Lakes or Kerrygold butter in the dairy section. Their higher fat content creates richer cookies. Grab King Arthur all-purpose flour for consistent results. Don’t skimp on vanilla—pure extract outperforms imitation every time.
For Halloween, I love McCormick orange food coloring. It’s concentrated, so you’ll need just 3-4 drops for vibrant color. Find it near the baking supplies at Target or Walmart.
Bold Add-Ins for Creative Variations
- Citrus Twist: Add 1 tablespoon orange zest to the dough
- Chocolate Lovers: Mix in ½ cup mini chocolate chips
- Spiced Version: Include ½ teaspoon cinnamon and ¼ teaspoon nutmeg
- Almond Flavor: Replace 1 teaspoon vanilla with almond extract
Substitutions for Different Diets
Can’t find salted butter? Use unsalted and add ¼ teaspoon salt to both the cookie and frosting. For dairy-free versions, Earth Balance works surprisingly well. The texture changes slightly—expect a crisper edge.
International readers using European butter (higher fat content) should reduce butter by 2 tablespoons. Your cookies will still turn out beautifully.
Equipment You’ll Need
Essential Tools:
- 9×13-inch metal baking pan (glass works but increases baking time)
- Parchment paper (prevents sticking better than cooking spray)
- Stand mixer or hand mixer
- Two large mixing bowls
- Measuring cups and spoons
- Rubber spatula
- Offset spatula for frosting
DIY Alternatives
No stand mixer? A hand mixer works perfectly. Even a sturdy wooden spoon and some elbow grease will do. I’ve made these bars while camping using just a bowl and fork.
Missing an offset spatula? Use a butter knife dipped in hot water. The warmth helps spread frosting smoothly.
Step-by-Step to the Perfect Halloween Sugar Cookie Bars
Preparing Your Workspace
Preheat your oven to 350°F. Position the rack in the center for even baking.
Line your 9×13-inch pan with parchment paper, leaving 2-inch overhangs on two sides. This creates handles for easy removal later. Trust me, this trick changed my baking life.
Making the Cookie Dough
Cream the Butter and Sugar
In your mixing bowl, beat the softened butter and granulated sugar for 3 minutes. The mixture should look pale and fluffy, almost like whipped cream. This step incorporates air, creating lighter cookies.
Julia Child always emphasized proper creaming. She’d say it’s the foundation of excellent baked goods. Man, oh man, was she right.
Add Wet Ingredients
Crack your egg into the bowl. Add the vanilla extract. Mix on medium speed for 1 minute until completely smooth. The mixture might look slightly curdled—that’s normal.
Incorporate Dry Ingredients
Add all-purpose flour and baking powder at once. Mix on low speed just until the dough comes together. Overmixing develops gluten, creating tough cookies. Stop mixing the moment you see no flour streaks.
The dough will be thick and slightly sticky. It should hold together when pressed but not be wet.
Baking the Base
Press and Shape
Dump the dough into your prepared pan. Here’s my trick: press it down with your hands first, then use the bottom of a measuring cup to smooth it evenly. This creates uniform thickness so everything bakes consistently.
Pay special attention to the corners. They tend to be thinner and can overbake.
Bake to Perfection
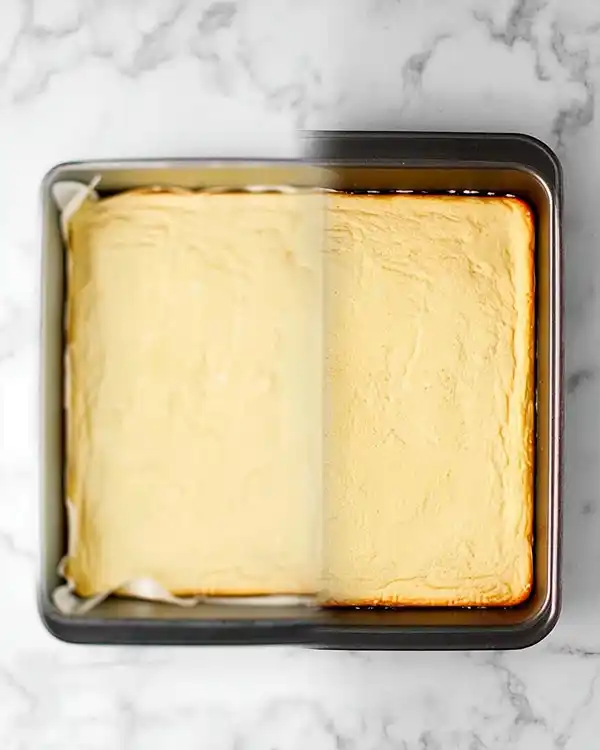
Slide the pan into your preheated oven. Set a timer for 14 minutes.
Watch for these signs of doneness: edges just turning golden, center looking set but still pale, and a toothpick inserted in the middle coming out clean. The surface shouldn’t brown much—you want soft bars, not crispy cookies.
My biggest mistake? Overbaking these the first three times. I thought they needed more color. Instead, I got dry, hard bars. Pull them out when they look barely done. They’ll firm up while cooling.
Cool Completely
This step tests your patience. Let the bars cool in the pan for at least 45 minutes. Seriously, don’t rush this. Warm cookies will absorb frosting and create a soggy mess.
I often bake these in the morning and frost them after lunch. The wait is worth it.
Creating the Frosting
Beat the Base
In a clean bowl, beat the softened butter for 2 minutes until light and creamy. Gradually add powdered sugar, one cup at a time. Beat thoroughly between additions.
Add vanilla extract and heavy cream. Increase speed to high and beat for 3-4 minutes. You’re looking for stiff peaks that hold their shape. Thomas Keller calls this “ribbon stage”—when you lift the beater, the frosting should fall in thick ribbons.
Add Color
Drop in orange food coloring one drop at a time. Mix between additions until you reach your desired shade. I typically use 4 drops for bright orange. For a softer peach tone, stick with 2 drops.
Want black frosting for a spooky version? You’ll need about 8-10 drops of black gel food coloring. Liquid won’t give you true black.
Assembly and Decoration
Spread the Frosting
Using your offset spatula, dollop half the frosting onto the cooled cookies. Spread it from the center outward, using long, smooth strokes. Add the remaining frosting and continue spreading.
The frosting should be about ¼-inch thick. Too thin and it’ll disappear. Too thick and it’s overwhelmingly sweet.
Add Sprinkles Immediately
Scatter Halloween sprinkles over the wet frosting right away. Once the frosting sets (about 20 minutes), sprinkles won’t stick properly.
I love using a mix of orange, black, and purple jimmies. Wilton makes great Halloween assortments available at Michaels or Hobby Lobby.
Cut into Bars
Use the parchment overhangs to lift the entire sheet onto a cutting board. A sharp chef’s knife works best. Wipe the blade between cuts for clean edges.
I typically cut 24 bars (6 rows by 4 rows). For parties, smaller 2-inch squares are perfect. For dessert, cut larger 3-inch portions.
Expert Tips for Perfect Sugar Cookies Results
Room Temperature Matters
Softened butter should leave a slight indent when pressed but not be greasy or melted. Leave it out for 45-60 minutes before baking.
Don’t Skip the Parchment
I once tried greasing the pan with butter. The bars stuck terribly. Parchment paper is non-negotiable for easy removal and perfect edges.
Test Your Baking Powder
Old baking powder loses potency. Test it by mixing ½ teaspoon with hot water. It should fizz vigorously. No bubbles? Buy fresh.
Frosting Consistency
If your frosting is too thick, add cream one teaspoon at a time. Too thin? Beat in more powdered sugar, ¼ cup at a time. The perfect consistency should spread easily but hold its shape.
Prevent Dry Edges
Cover the cooled bars with plastic wrap before frosting. This traps moisture and prevents the surface from drying out.
Creative Variations
Regional Halloween Twists
New England Maple Version: Replace 2 tablespoons of sugar with pure maple syrup. Add ½ teaspoon maple extract to the frosting.
Southern Pecan Praline: Mix ½ cup chopped pecans into the dough. Top frosted bars with toasted pecan pieces.
Southwest Cinnamon Sugar: Dust the baked cookies with cinnamon sugar before frosting. Use cream cheese frosting instead of buttercream.
Dietary Adaptations
Gluten-Free Option: Substitute Cup4Cup flour 1:1 for all-purpose. Add an extra tablespoon of butter to prevent dryness.
Reduced Sugar: Cut granulated sugar to ¾ cup. Use only 2 cups powdered sugar in frosting. They’ll be less sweet but still delicious.
Vegan Version: Use plant-based butter and aquafaba (3 tablespoons replaces one egg). The texture will be slightly denser but tasty.
Holiday Transformations
Christmas: Use red and green food coloring with peppermint extract Valentine’s Day: Create pink frosting with heart sprinkles Fourth of July: Layer red, white, and blue frosting stripes Easter: Pastel frosting with spring-themed decorations
For Thanksgiving, I make these with brown butter and top them with Cauldron Cookies crumbled on top. The combination is absolutely incredible.
Storage and Make-Ahead Guide
| Storage Method | Duration | Best Practices |
|---|---|---|
| Room temperature (unfrosted) | 3 days | Airtight container, single layer |
| Room temperature (frosted) | 5 days | Covered container, wax paper between layers |
| Refrigerated (frosted) | 10 days | Airtight container, bring to room temp before serving |
| Frozen (unfrosted) | 3 months | Wrapped tightly in plastic, then foil |
| Frozen (frosted) | 2 months | Flash freeze on tray, then store in container |
Make-Ahead Strategy
Bake the cookie base up to 2 days ahead. Wrap it tightly and store at room temperature. Frost the morning of your event.
You can also freeze unfrosted bars for emergency situations. I keep a batch in my freezer for last-minute school events. They thaw in 30 minutes on the counter.
Transporting Tips
These bars travel beautifully to potlucks. Place them in a covered container with parchment between layers. Avoid stacking more than two layers high—the bottom bars will compress.
For outdoor events, keep them in a cooler if it’s above 75°F. The frosting softens in heat.
Perfect Pairings
These Halloween Sugar Cookie Bars shine alongside:
Savory Balance: Serve them after Spooky Halloween Buffalo Dip for a sweet-spicy contrast that party guests love.
Beverage Matches: Cold milk is classic. For adults, try them with pumpkin spice lattes or hot apple cider. The vanilla complements autumn flavors perfectly.
Build a Dessert Table: Create a Halloween spread with these bars, Jack O’Lantern Quesadillas for the kids, and Halloween Chocolate Pretzel Spider Web for chocolate lovers.
According to King Arthur Baking Company, sugar cookies pair exceptionally well with citrus drinks. Try serving these with orange juice or lemonade for a refreshing combination.
Halloween Sugar Cookie Bars FAQs
Can I make Halloween Sugar Cookie Bars without a mixer?
Absolutely—mix the butter and sugar vigorously with a wooden spoon until fluffy, then add remaining ingredients and stir until combined.
Why are my Sugar Cookie Bars hard instead of soft?
Overbaking is the main culprit; pull them from the oven when edges are barely golden and the center looks slightly underdone since they continue cooking as they cool.
How do I get bright orange frosting without buying special colors?
Mix equal parts red and yellow liquid food coloring, starting with 2 drops of each, then adjusting until you achieve your desired Halloween orange shade.
Can I freeze frosted Sugar Cookie Bar Recipe portions?
Yes, freeze them in a single layer on a baking sheet until solid, then transfer to a freezer bag where they’ll keep for up to 2 months
Make These Your Halloween Signature
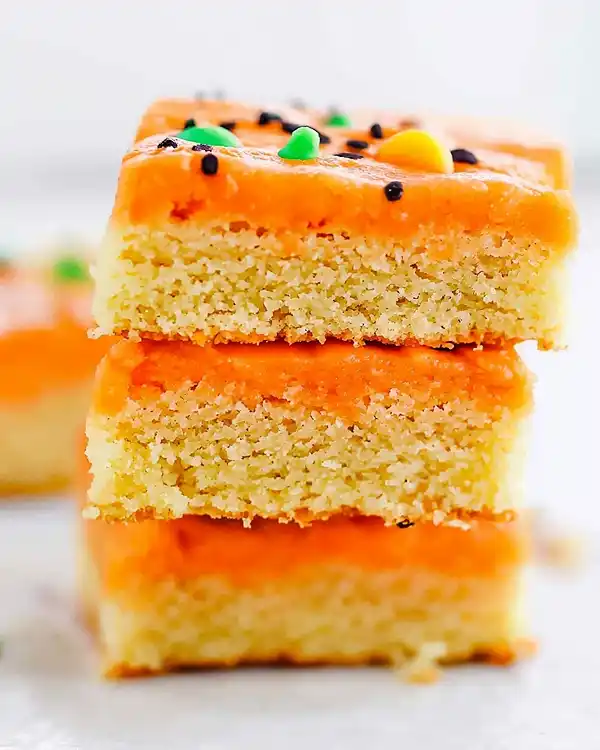
These Halloween Sugar Cookie Bars transformed my holiday baking. They’ve appeared at school parties, office celebrations, and family gatherings for three years running.
The best part? Everyone thinks you spent hours decorating individual cookies. Let them believe it.
Next time you make these, try the citrus variation. The orange zest adds a sophisticated twist that adults especially appreciate. Or go wild with the Halloween Bloody Baked Brie as your savory appetizer before serving these bars.
What sprinkles will you choose? Classic Halloween mix? Black and orange only? Maybe you’ll go rogue with purple and green. Share your decorated bars with me—I love seeing creative variations.
These soft, frosted treats prove that impressive desserts don’t require complicated techniques. Sometimes the simplest recipes become the most memorable.
Happy Halloween baking!
Halloween Sugar Cookie Bars
Equipment
- 9×13 inch baking pan
- Parchment paper
- stand mixer or hand mixer
- mixing bowls
- Measuring cups and spoons
- Rubber spatula
- Offset spatula
Ingredients
Cookie Base
- 1 cup Salted butter (227g, softened)
- 1 cup Granulated sugar (200g)
- 2 tsp Vanilla extract (10ml)
- 1 large Egg (50g)
- 2¼ cups All-purpose flour (281g)
- 2 tsp Baking powder (10g)
Frosting
- ¾ cup Salted butter (170g, softened)
- 3 cups Powdered sugar (360g)
- 3 tsp Vanilla extract (15ml)
- 3 tbsp Heavy cream (45ml)
- 3–4 drops Orange food coloring (optional, for Halloween color)
- Halloween sprinkles (for decoration)
Instructions
- Preheat your oven to 350°F (175°C) and line a 9×13-inch baking pan with parchment paper, leaving overhangs for easy removal.
- In a large bowl, cream together softened butter and granulated sugar for 3 minutes until light and fluffy.
- Add the egg and vanilla extract, mixing until fully incorporated.
- Stir in flour and baking powder until a soft, thick dough forms. Do not overmix.
- Press dough evenly into the prepared pan and smooth the surface with a measuring cup. Bake for about 14 minutes, until edges are just golden and center is set.
- Let bars cool completely in the pan for at least 45 minutes before frosting.
- To make frosting, beat softened butter until creamy. Gradually add powdered sugar, vanilla, and heavy cream, beating until fluffy and spreadable.
- Add orange food coloring one drop at a time until desired shade is reached.
- Spread frosting evenly over cooled bars using an offset spatula. Add Halloween sprinkles immediately before frosting sets.
- Lift bars out of the pan with parchment, cut into squares, and serve.

