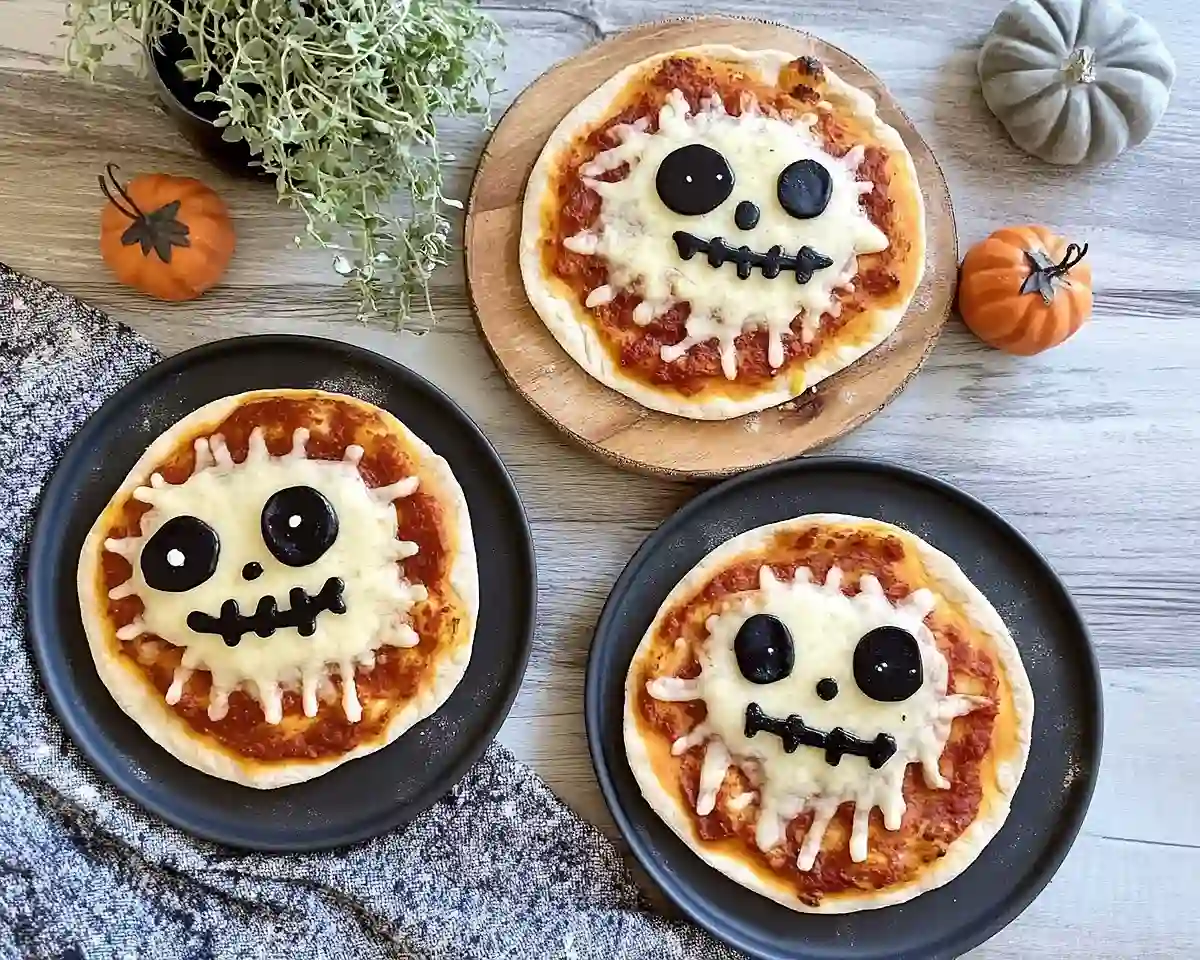
Learn how to make Halloween mini pizzas with simple designs. Discover 5 creative spooky decorating ideas perfect for movie night treats.
Let me tell you something—Halloween used to stress me out. Between my two kids demanding elaborate costumes and my husband insisting we host the neighborhood party, I felt completely overwhelmed. Then came the year I discovered Halloween mini pizzas, and honestly? Everything changed.
I remember standing in my kitchen at 6 PM on October 30th, panicking about appetizers nobody would touch. You know what I mean.
The usual veggie platters sit untouched while people gravitate toward actual food. That’s when it hit me: why not combine everyone’s favorite (pizza) with the holiday vibe everyone loves?
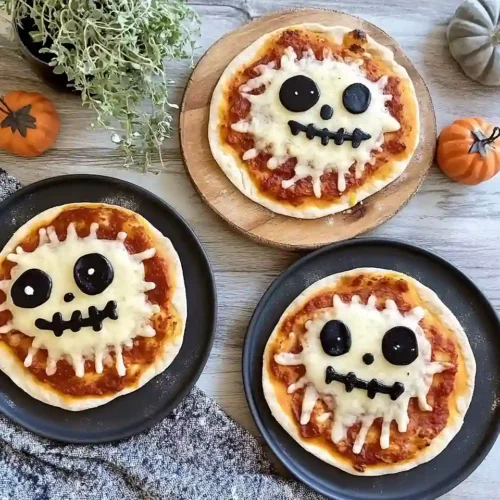
I threw together these mini pizzas on homemade crusts, added some olives for eyes, and created silly monster faces.
My kids went absolutely wild. Better yet, the adults couldn’t stop eating them either. Now this recipe shows up at every October gathering at our house. The magic? They look intimidating but honestly take 20 minutes from start to finish.
These Halloween mini pizzas become the centerpiece of any spooky food board, and they pair perfectly with everything from bat-shaped Oreo cookies to simple dips. Let’s make them together.
Table of Contents
What Makes These Halloween Mini Pizzas Special
These aren’t your typical pizza night leftovers. This recipe transforms basic ingredients into show-stopping Halloween treats through creative decorating and quality technique.
The secret lies in three places: first, using personal-size crusts means everyone gets their own pizza to customize. Second, the balance of toppings prevents soggy bases. Third—and this matters—strategic placement of olives and peppers creates instant character without looking forced.
I tested dozens of designs before settling on the ones here. Some failed spectacularly (those spaghetti “hair” pizzas? Total disaster). But these five designs work reliably, freeze beautifully, and excite kids and adults equally.
Ingredients You’ll Need for the Best Halloween Mini Pizzas
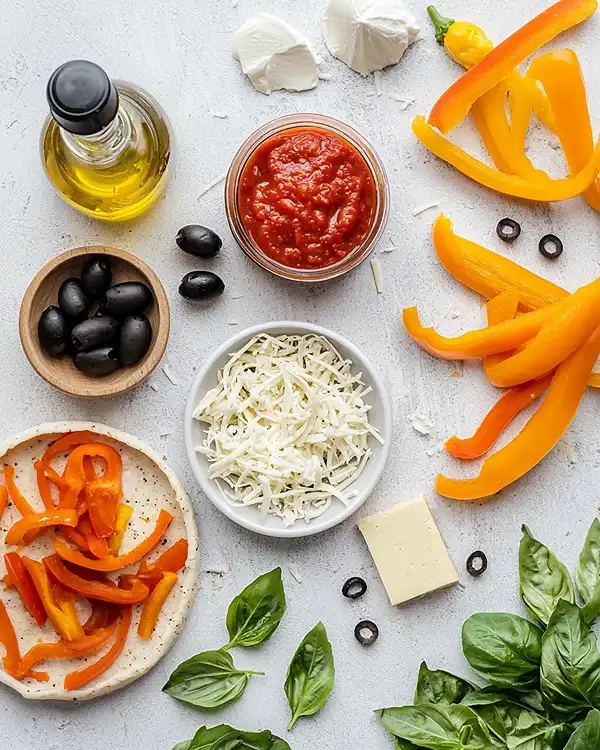
| Ingredient | Measurement | Notes |
|---|---|---|
| Mini Pizza Crusts | 8–10 personal-size bases | Look for whole wheat options at stores like Whole Foods or standard grocery chains |
| Pizza Sauce | 3/4 cup | Use quality marinara; San Marzano works great |
| Mozzarella Cheese | 1 cup shredded | Part-skim stretches further and browns beautifully |
| Black Olives | 1/4 cup sliced | Pre-sliced saves time; use the pitted kind |
| Mini Pepperoni | 1/4 cup | Optional but adds spooky credibility |
| Orange Bell Pepper | 1 whole | Thin strips create jack-o’-lantern smiles |
| Green Bell Pepper | 1 whole | Completes the classic Halloween duo |
| Part-Skim String Cheese | 4 sticks | Pulled apart becomes perfect mummy wraps |
| Fresh Basil | 2 tbsp chiffonade | Fine ribbons add sophisticated finish |
| Olive Oil Spray | For misting sheet | Prevents sticking without excess oil |
Shopping Tips for US Grocery Stores
Mini pizza crusts hide in three places: the freezer aisle, the bread section, and sometimes near the deli. Oops! I used to hunt everywhere before realizing stores stock them seasonally. October is peak availability, so grab extras for freezing.
For pizza sauce, skip the basic jarred versions. Spend the extra dollar on quality marinara—it genuinely transforms the final product. Check specialty grocery sections or Italian markets for imported San Marzano sauce. The difference proves worth it.
Bell peppers should feel firm with glossy skin. Avoid any soft spots. Buy them a day ahead; they’re easiest to slice when slightly chilled.
Equipment & Simple Preparation
You need surprisingly little gear for this recipe. A baking sheet, a knife, and your hands genuinely suffice. Well…consider these tools.
Essential Equipment:
- Baking sheet (rimmed prevents oil drips)
- Small spoon or offset spatula (spreads sauce evenly)
- Knife for slicing peppers and olives
- Cutting board
- Small bowl for gathered toppings
Helpful Additions:
- Parchment paper (cleanup dream)
- Pizza stone or preheated cast iron (crisps crusts)
- Kitchen shears (easiest for basil)
Step 1: Prep Your Workspace (3 Minutes)
Preheat your oven to 425°F. Line your baking sheet with parchment paper or lightly mist it with olive oil spray. Thomas Keller would remind us that proper mise en place—having everything ready before cooking—prevents chaos later.
Gather all toppings in small bowls within arm’s reach. This matters more than it sounds. Once pizzas hit the oven, you don’t get a second chance to add garnish.
Step 2: Sauce the Crusts (4 Minutes)
Place all mini crusts on your prepared baking sheet. Using a small spoon, spread one to two tablespoons of pizza sauce onto each crust, leaving a quarter-inch border. This prevents soggy edges.
Spread gently—aggressive spreading tears the crust. Think of it like spreading butter on warm bread, not icing a cake.
Step 3: Create Your Monster Characters (8 Minutes)
Here’s where personality emerges. You’ll create three designs rotating through your pizzas for visual variety.
Design 1: Mummy Face Pull apart string cheese into thin strands. Arrange them across the pizza crust like bandage wraps, leaving gaps for the face. Place two olive slices toward the top as eyes. This design absolutely stuns kids.
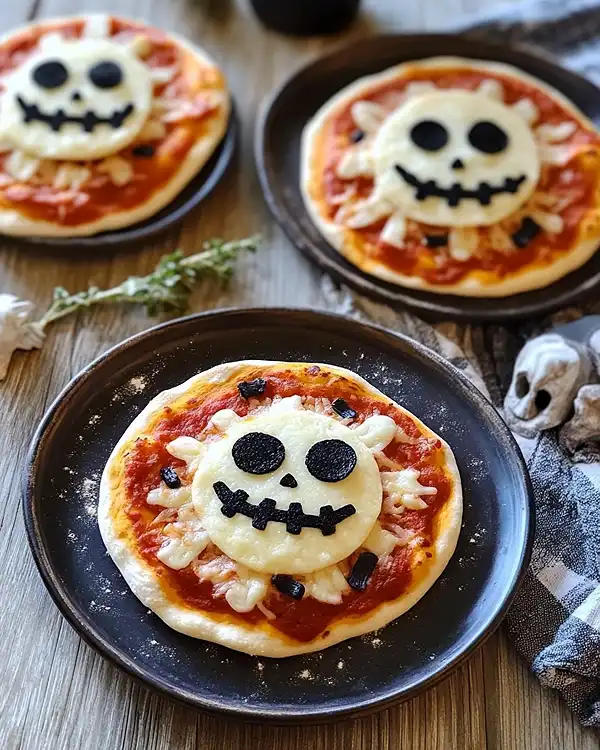
Design 2: Jack-O’-Lantern Sprinkle mozzarella over the pizza first. Using thin orange bell pepper strips, create a triangular nose and wavy smile. Two olive slices complete the jack-o’-lantern expression instantly.
Design 3: Monster Eyes Cover the pizza with shredded mozzarella. Place four olive slices in pairs at opposite ends—creating two silly monster faces looking different directions. Add a mini pepperoni in the center as a goofy nose.
Admit it: I burned an entire batch of these last year because I got distracted placing pepperoni. The lesson? Assemble all decorations before putting anything in the oven.
Step 4: Bake and Monitor (12 Minutes)
Slide the baking sheet into your preheated 425°F oven. Set a timer for six minutes. At that point, rotate the pan halfway. This creates even browning on all pizzas—a technique Julia Child emphasized religiously.
Continue baking for another six minutes until the crusts turn golden and cheese melts completely. The edges should look crispy but not burnt.
Step 5: Cool and Garnish (2 Minutes)
Remove from the oven carefully—that baking sheet is hot. Let pizzas cool for exactly two minutes. Then tear fresh basil chiffonade over the top.
The basil adds color, sophistication, and genuinely improves flavor without overpowering the pizza taste.
Pro Tips for Picture-Perfect Results
Keep pizza sauce consistent thickness across each crust. Thinner spots dry out; thicker spots stay wet. Aim for uniform spreading every time.
Cut bell peppers the night before. They’re easier to shape when cold and slightly firmer. This single step saves minutes during assembly.
Bake in the lower oven rack position. This crisps the crust faster while cheese stays melty, preventing undercooked bottoms.
Never skip the cooling period. Grab a hot pizza and cheese slides everywhere. Two minutes genuinely matters.
Five Creative Variations for Your Spooky Food Board
Variation 1: Pepperoni Spider Arrange pepperoni in a circle on mozzarella, then add two olive slices as menacing eyes. Thin black licorice strips become spider legs. Terrific for adding Halloween treats to your buffet spread.
Variation 2: Witch Hat Stack a mini pepperoni in the center. Arrange black olives in a circle around it. Build a triangle from green bell pepper at the top. Surprisingly recognizable and absolutely loved by kids.
Variation 3: Ghost Face Use white mozzarella as your base. Two olive slices become eyes; a mini pepperoni becomes the mouth. Simple but startlingly effective when lined up together.
Variation 4: Vegetarian Monster Skip the pepperoni entirely. Use mushroom slices, zucchini rounds, and artichoke pieces instead. This option works perfectly for picky eaters and adds diversity to your Halloween treats for movie night platter.
Variation 5: Fancier Margherita Version Fresh mozzarella instead of shredded. Whole basil leaves instead of chiffonade. Sun-dried tomatoes for extra flavor. This version impresses adult dinner parties while remaining festive.
Storage, Make-Ahead, and Serving Suggestions
| Method | Storage Time | Instructions |
|---|---|---|
| Room Temperature | 2 hours | Covered loosely; best served warm |
| Refrigerator | 3–4 days | Covered in airtight container; reheat at 350°F for 5 minutes |
| Freezer (Unbaked) | Up to 1 month | Freeze on baking sheet, then transfer to freezer bag; add 5 minutes to baking time |
| Freezer (Baked) | Up to 2 weeks | Cool completely; layer parchment between pizzas to prevent sticking |
Make-Ahead Strategy: Assemble everything except basil garnish the morning of your party. Cover with plastic wrap. Pop directly into the oven when guests arrive. This approach saves enormous last-minute stress.
Serving Suggestions: Serve these Halloween mini pizzas alongside Mississippi pot roast dip for a complete spooky food board. The warm, savory dip pairs beautifully with these individual pizzas. Add witch hat cookies and Halloween crinkle cookies for your ultimate dessert spread.
Pair with simple beverages: sparkling cider, apple cider, or hot chocolate. These complements round out your Halloween treats menu perfectly.
Common Questions About Halloween Mini Pizzas
Can I use regular-sized pizza dough instead of mini crusts?
Absolutely. Simply divide store-bought dough into eight portions, flatten into rounds, and add two to three minutes to baking time. The decorating becomes easier with larger canvases.
Do these freeze well after baking?
Yes. Cool them completely, layer parchment between each pizza, and freeze up to two weeks. Reheat at 350°F for six minutes until warmed through. They thaw perfectly.
What if my kids won’t eat vegetables like peppers?
Skip them entirely. Use only cheese, olives, and basil. Or involve your kids in decoration—they eat designs they created far more readily than designs you create.
Can I make these dairy-free?
Substitute dairy-free mozzarella and skip the string cheese. Use hummus as your sauce base. The pizzas won’t look identical, but they remain utterly delicious.
How far ahead can I prep these?
Assemble completely, cover, and refrigerate up to eight hours before baking. Add one to two minutes to cooking time if baking from cold. This strategy makes Halloween entertaining genuinely stress-free.
Why Halloween Mini Pizzas Win Every Time
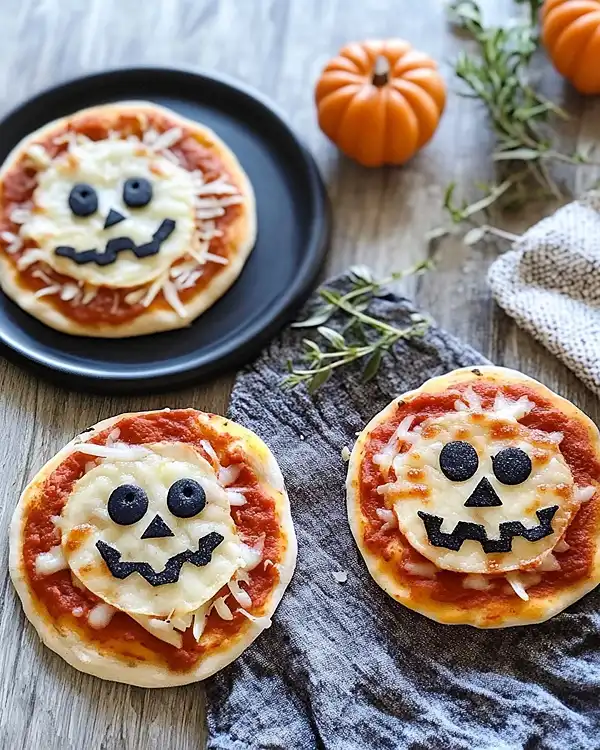
These aren’t just appetizers. They’re conversation starters. They’re vehicles for creativity. They’re proof that impressive-looking food doesn’t require complicated techniques.
The challenge with Halloween entertaining lies in creating something exciting without spending all day cooking. These mini pizzas solve that problem beautifully. You spend 30 minutes max from idea to oven.
More importantly, everyone eats them. Kids devour them because they look fun and taste like pizza—their favorite food group. Adults appreciate the creativity and excellent execution. Last Thanksgiving, my neighbor asked for this recipe after our Halloween party. Now she makes them for regular pizza night too.
Your Halloween treats for movie night deserve this level of attention. Whether you’re hosting a full party or creating a simple family gathering, these mini pizzas deliver.
Start with the basic designs here. Then experiment. Create your own monster characters. Involve your family in the decorating process. The memories matter more than perfect execution anyway.
Tasty at Home—Where bold flavors meet everyday kitchens.
Halloween Mini Pizzas
Equipment
- Baking sheet
- Parchment paper
- Small spoon or offset spatula
- Knife
- Cutting board
- Small bowls
Ingredients
Main Ingredients
- 8 count Mini pizza crusts personal-size bases
- ¾ cup Pizza sauce quality marinara or San Marzano
- 1 cup Mozzarella cheese shredded, part-skim
- ¼ cup Black olives sliced and pitted
- ¼ cup Mini pepperoni optional
- 1 whole Orange bell pepper thin strips for jack-o’-lantern designs
- 1 whole Green bell pepper thin strips
- 4 sticks Part-skim string cheese pulled apart for mummy wraps
- 2 tbsp Fresh basil chiffonade or finely ribboned
- 1 count Olive oil spray for misting baking sheet
Instructions
- Preheat your oven to 425°F. Line your baking sheet with parchment paper or lightly mist it with olive oil spray.
- Gather all toppings in small bowls within arm’s reach. Place all mini crusts on your prepared baking sheet.
- Using a small spoon, spread one to two tablespoons of pizza sauce onto each crust, leaving a quarter-inch border. Spread gently to avoid tearing the crust.
- Create your monster characters. For mummy faces: pull apart string cheese into thin strands and arrange across the pizza like bandages, leaving gaps for the face. Place two olive slices toward the top as eyes.
- For jack-o’-lantern designs: sprinkle mozzarella over the pizza first. Using thin orange bell pepper strips, create a triangular nose and wavy smile. Two olive slices complete the expression.
- For monster eyes: cover the pizza with shredded mozzarella. Place four olive slices in pairs at opposite ends creating two silly monster faces. Add a mini pepperoni in the center as a goofy nose.
- Slide the baking sheet into your preheated 425°F oven. Set a timer for six minutes. At that point, rotate the pan halfway for even browning.
- Continue baking for another six minutes until the crusts turn golden and cheese melts completely. The edges should look crispy but not burnt.
- Remove from the oven carefully and let pizzas cool for exactly two minutes. Then tear fresh basil chiffonade over the top.

