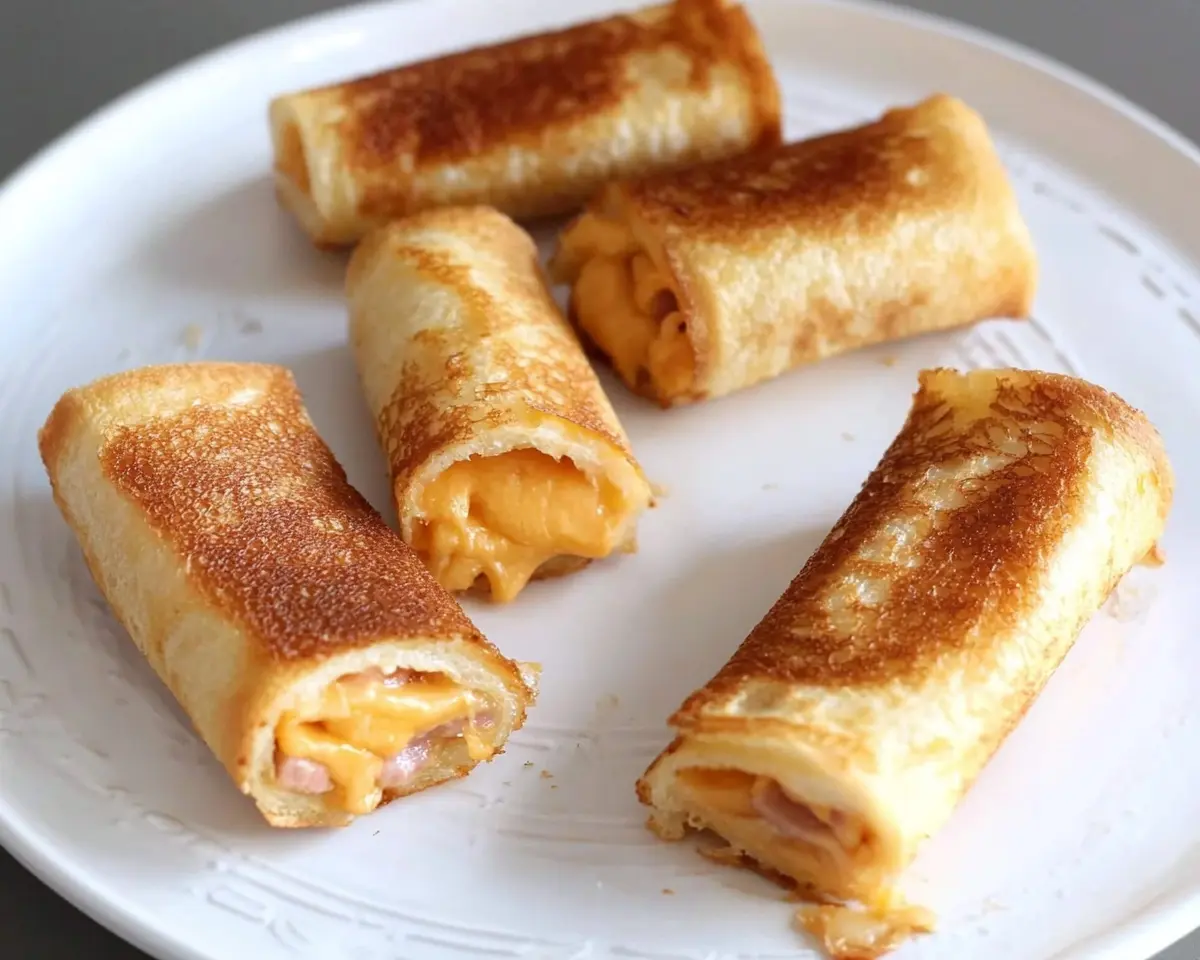
Grilled Cheese Roll-Ups transform ordinary sandwiches into fun, crispy delights. Perfect kids lunch box meals ready in minutes with simple ingredients.
Hi, I’m Linda, and welcome to Tasty at Home—where bold flavors meet everyday kitchens. Last Tuesday, my eight-year-old nephew visited for lunch. He took one look at my regular grilled cheese sandwich and wrinkled his nose. “Boring,” he declared with brutal honesty.
That’s when inspiration struck. I grabbed the rolling pin and transformed his “boring” sandwich into golden, crispy roll-ups that looked like tiny burritos. His eyes lit up instantly. Within minutes, he devoured three pieces and asked for the recipe to take home.
I’ve since perfected this grilled cheese roll-ups technique through countless kitchen experiments. Initially, I burned several batches because I used too much heat. However, I discovered the secret lies in medium-low temperature and patience. Now, these roll-ups have become our go-to solution for picky eaters and busy parents alike.
Whether you’re packing lunch boxes or need a quick afternoon snack, these roll-ups deliver comfort food in a fun, portable format. Moreover, they’re incredibly versatile—you can customize them with different cheeses, add proteins, or even sneak in vegetables.
Table of Contents
What Makes These Grilled Cheese Roll-Ups Special
These aren’t your typical grilled cheese sandwiches. Instead, they’re transformed into perfectly portable, crispy cylinders that kids can’t resist. The rolling technique creates more surface area for browning, resulting in extra crispiness that regular sandwiches simply can’t match.
Furthermore, the compact shape makes them ideal for small hands and lunch boxes. Unlike traditional sandwiches that can fall apart, these roll-ups maintain their structure beautifully. Plus, they cook faster than regular grilled cheese because of their smaller size.
Essential Ingredients for your Grilled Cheese Roll-Ups
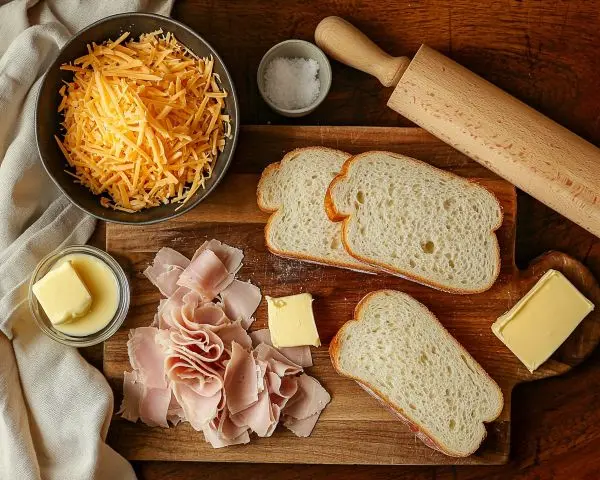
| Ingredient | Amount | Notes |
|---|---|---|
| White bread slices | 6 slices | Soft sandwich bread works best |
| Shredded cheese | 1 cup | Cheddar, American, or mozzarella |
| Butter | 2 tbsp | Room temperature for easy spreading |
| Ham slices (optional) | 6 thin slices | Adds protein and flavor |
Smart Shopping Tips
When shopping at your local grocery store, choose soft white bread over whole grain for this recipe. Whole grain bread tends to crack when rolled. Additionally, pre-shredded cheese melts more evenly than block cheese you grate yourself.
Look for thin-sliced deli ham if you’re adding protein. Thick slices make rolling difficult and can tear the bread. Moreover, room temperature ingredients work together more smoothly than cold ones straight from the refrigerator.
Bold Add-ins and Variations
Creative Cheese Combinations:
- Sharp cheddar with cream cheese
- Mozzarella with a sprinkle of Italian seasoning
- American cheese with mild salsa
Protein Additions:
- Turkey and Swiss combination
- Crispy bacon bits
- Chicken salad spread
Vegetable Sneaks:
- Finely chopped spinach mixed with cheese
- Thin cucumber slices
- Roasted red pepper strips
International Substitutions
For our international readers, you can substitute ingredients based on local availability. Use any soft white bread similar to American sandwich bread. Additionally, any mild melting cheese works perfectly—even processed cheese slices can be chopped and used.
Equipment and Preparation
Essential Tools
You’ll need basic kitchen equipment for this recipe. A rolling pin is crucial for flattening the bread properly. However, if you don’t have one, a clean wine bottle works as an excellent substitute—perfect for preparing Grilled Cheese Roll-Ups.
A non-stick skillet provides the best results for even browning. Cast iron works well too, but requires more careful temperature control. Additionally, kitchen tongs help turn the roll-ups safely without burning your fingers.
Step-by-Step Instructions
Step 1: Prepare Your Bread Foundation
Remove the crusts from all six bread slices using a sharp knife. This step is essential because crusts prevent proper rolling and can create tears. Next, place each slice between two sheets of parchment paper.
Roll each slice gently but firmly until it’s about half its original thickness. The bread should feel pliable and slightly compressed. Don’t press too hard—you want to flatten, not tear.
Step 2: Create the Filling Layer
Sprinkle approximately 2-3 tablespoons of shredded cheese evenly across each flattened bread slice. Leave a small border around the edges to prevent spillage during rolling. If you’re adding ham, place one thin slice over the cheese.
Pro tip: I learned this the hard way after my first batch oozed cheese everywhere. Less filling actually creates better roll-ups than overstuffing.
Step 3: Roll with Precision
Starting from one short end, roll each slice tightly but gently. Think of it like rolling a sleeping bag—firm pressure without crushing. If the bread starts to crack, you’re rolling too tightly.
Secure each roll-up with a toothpick if needed. However, properly rolled ones usually hold together without extra support, making them ideal for a Grilled Cheese Kids Meal.
Step 4: Master the Cooking Process

Heat your skillet over medium-low heat—this is crucial for success. Add butter and let it melt completely without browning. The temperature should be hot enough to sizzle gently when you add the roll-ups.
Place roll-ups seam-side down first. This helps seal them closed. Cook for 2-3 minutes per side, turning carefully with tongs. The goal is golden-brown color all around, which takes about 5-8 minutes total.
Step 5: Finish and Serve
Remove roll-ups from heat and let them cool for one minute. This brief cooling period allows the cheese to set slightly, preventing burns and messy spills.
Cut each roll-up in half diagonally for easier eating. The diagonal cut also creates an attractive presentation that kids love.
Expert Tips for Perfect Results
Temperature Control Secrets
Medium-low heat is your best friend here. High heat creates burned outsides with cold, unmelted centers. I learned this lesson after ruining my first batch with overly eager heat.
Additionally, preheating your skillet properly ensures even cooking. The butter should bubble gently, not aggressively sizzle.
Grilled Cheese Roll-Ups : Common Mistakes to Avoid
Don’t skip the crust removal step. Crusts create tough edges that resist rolling and can tear your bread. Moreover, overfilling leads to messy, difficult-to-handle roll-ups.
Another mistake involves rushing the cooking process. Patience creates perfectly melted cheese and golden-brown exteriors. Furthermore, turning too frequently can cause the roll-ups to fall apart.
Storage and Make-Ahead Solutions
| Storage Method | Duration | Instructions |
|---|---|---|
| Refrigerator | 2-3 days | Store in airtight container |
| Freezer | 1 month | Wrap individually in plastic wrap |
| Lunch box | 4-5 hours | Include ice pack for food safety |
These roll-ups reheat beautifully in a toaster oven or skillet. Avoid microwaving, which creates soggy textures instead of crispy exteriors—crucial for keeping Kids Lunch Box Meals tasty and appealing.
Creative Variations for the Grilled Cheese Roll-Ups

Holiday Themed Roll-Ups
Transform these basic roll-ups into festive treats with seasonal ingredients. For Thanksgiving, add thin slices of turkey and cranberry sauce. Christmas versions can include cream cheese with chopped green onions for color.
Moreover, Halloween calls for orange cheddar cheese with black pepper specks. These themed variations make ordinary lunches feel special and memorable.
Dietary Adaptations
Gluten-Free Option: Use gluten-free bread, though it may be more delicate during rolling. Add an extra minute to the cooking time for proper browning.
Dairy-Free Version: Substitute dairy-free cheese shreds and vegan butter. The technique remains identical, but flavors will differ slightly.
Protein-Packed Version: Add scrambled eggs, cooked bacon bits, or even leftover rotisserie chicken for heartier nutrition.
Regional American Twists
Southern Style: Include pimento cheese and a touch of hot sauce for adult versions.
California Fresh: Add avocado slices and sprouts for a healthier twist.
Midwest Comfort: Use Wisconsin cheese curds and add a small amount of ranch dressing.
Serving Suggestions and Pairings
These grilled cheese roll-ups pair wonderfully with classic American sides. Serve them alongside homemade tomato soup for the ultimate comfort food experience.
For lunch boxes, include apple slices and pretzels. The combination provides balanced nutrition and satisfying textures. Additionally, these roll-ups work perfectly with energy balls for an afternoon snack.
Consider serving them as appetizers at casual gatherings. Cut them into smaller pieces and arrange on a platter with various dipping sauces. Moreover, they’re excellent for movie nights when you want something more interesting than regular sandwiches.
Frequently Asked Questions
What is a grilled cheese roll up?
A grilled cheese roll up transforms traditional grilled cheese sandwiches into cylindrical, crispy treats by rolling flattened bread around cheese filling before pan-frying.
What is in a cheesy roll up?
A basic cheesy roll up contains flattened white bread, shredded cheese, and butter for cooking, though you can add proteins like ham or vegetables for variety.
Are cheese roll ups healthy?
Cheese roll ups provide protein and carbohydrates but are moderately high in calories and fat, making them suitable as occasional treats rather than daily meals.
How to make a grilled cheese wrap?
Make a grilled cheese wrap by flattening bread with a rolling pin, adding cheese and desired fillings, rolling tightly, then pan-frying in butter until golden brown.
How to roll a cheese wrap?
Roll a cheese wrap by starting from one short end of the flattened bread, applying gentle but firm pressure while rolling toward the opposite end, keeping fillings contained.
Final Thoughts: Creating Kitchen Magic
These grilled cheese roll-ups prove that simple ingredients can create extraordinary results. The transformation from flat bread to golden cylinders never fails to impress both kids and adults alike.
Remember, cooking is about experimentation and joy. Don’t worry if your first batch isn’t perfect—I certainly burned mine! Each attempt teaches valuable lessons about heat control and technique.
Try serving these roll-ups with creamy white chicken chili for a complete meal that satisfies the whole family. The combination of crispy, cheesy roll-ups with warm, comforting soup creates the perfect balance.
Share your creative variations in the comments below, or on social media with your roll-up adventures. We love seeing how our recipes inspire your own kitchen creativity.
After all, the best recipes are the ones that bring smiles to the table—and these grilled cheese roll-ups deliver exactly that kind of happiness.

Grilled Cheese Roll-Ups
Equipment
- Rolling Pin
- Non-stick skillet
- Kitchen tongs
- Sharp knife
Ingredients
- 6 slices white bread crusts removed
- 1 cup shredded cheese cheddar, American, or mozzarella
- 6 slices ham thin slices, optional
- 2 tbsp butter
Instructions
- Trim the crust off all bread slices using a sharp knife.
- Roll each bread slice flat using a rolling pin until pliable and about half the original thickness.
- Add 2-3 tablespoons of shredded cheese on top of each flattened slice. Add ham if using.
- Roll each slice up tightly from one short end. Use toothpicks if necessary to hold together.
- Heat skillet to medium-low heat. Add butter and let it melt completely.
- Place roll-ups seam-side down in the pan. Cook for 5 to 8 minutes, turning periodically with tongs until golden brown all around.
- Remove from heat and let cool for 1 minute. Cut in half diagonally if desired and serve immediately.

