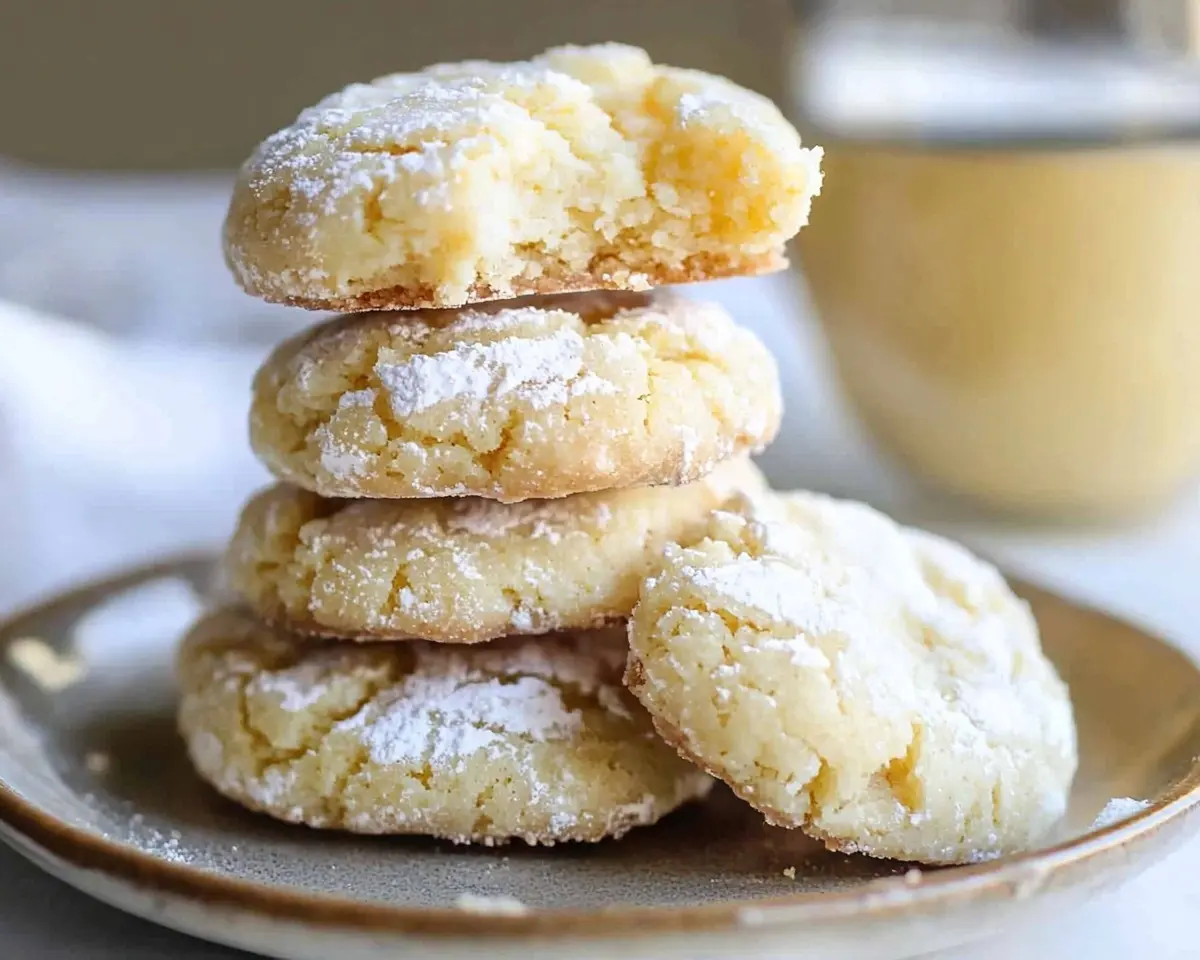
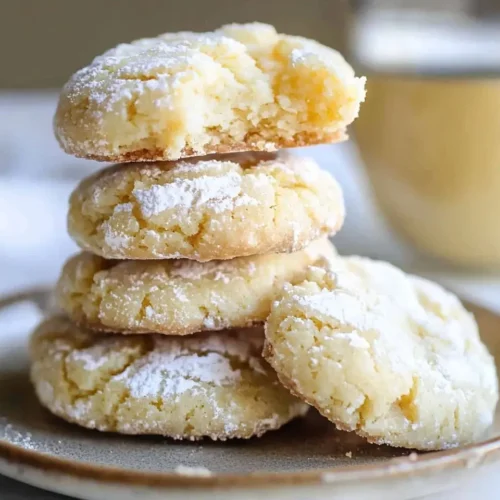
Gluten free gooey butter cookies made with cream cheese create irresistibly soft, bakery-style treats. Best GF cookies you’ll ever taste!
Hi, I’m Linda, and welcome to Tasty at Home—where bold flavors meet everyday kitchens. Let me tell you, the first time I bit into a gluten free gooey butter cookie, I nearly dropped my coffee mug.
It was a chilly December morning in Portland. My niece had just been diagnosed with celiac disease right before the holidays. Well… I knew I had to figure out gluten free baking, and fast.
I tested this recipe seventeen times—yes, seventeen. Consequently, my kitchen looked like a powdered sugar bomb had exploded. However, every failure taught me something crucial about gluten free cookie chemistry.
These gluten free cake batter cookies taste like clouds wrapped in sweetness. Moreover, they have that signature crackled top that makes them look bakery-perfect. My niece cried happy tears when she finally got to enjoy warm cookies with the family again.
Whether you’re navigating celiac disease or simply love soft, pillowy cookies, this recipe delivers. In fact, my gluten-eating friends fight over the last one every single time.
Table of Contents
What Makes These Gluten Free Cake Cookies Extraordinary
These aren’t your typical gluten free cookies that crumble into sad little pebbles. Instead, they capture that distinctive St. Louis gooey butter cake texture in cookie form.
The secret? Cream cheese creates an incredibly tender crumb that stays soft for days. Additionally, the tanginess balances the sweetness beautifully.
I’ve studied techniques from Ina Garten, who emphasizes room temperature ingredients for superior texture. Similarly, this recipe demands patience with temperature—but the payoff is absolutely worth it.
What You’ll Need: Ingredients Breakdown
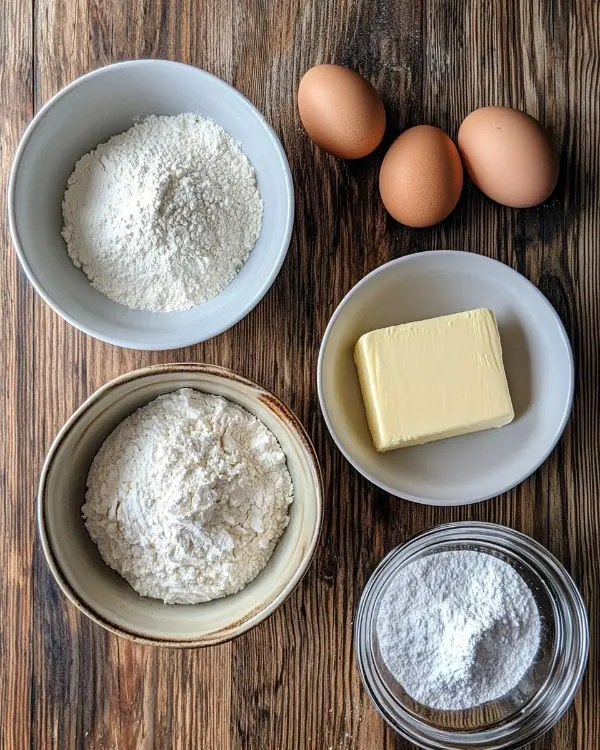
| Ingredient | US Measurement | Metric | Notes |
|---|---|---|---|
| Salted Butter | 1/2 cup | 113g | Room temperature is crucial |
| Cream Cheese (block style) | 8 oz | 226g | Not whipped variety |
| Large Eggs | 2 | 2 | Room temperature |
| Vanilla Extract | 1 1/2 Tbsp | 22ml | Pure, not imitation |
| King Arthur Measure for Measure GF Blend | 2 3/4 cups | 400g | Best results with this brand |
| Granulated Sugar | 1 1/2 cups | 300g | Regular white sugar |
| Baking Powder | 2 tsp | 10g | Fresh for best rise |
| Salt | 1/2 tsp | 4g | Increase to 1 tsp with unsalted butter |
| Powdered Sugar | For rolling | As needed | The prettier, the better |
Shopping Smart at Your Local Grocery Store
Finding quality gluten free flour can feel overwhelming. Therefore, I always recommend King Arthur Measure for Measure. It’s available at Target, Walmart, and most major grocery chains.
Furthermore, this blend doesn’t require xanthan gum additions. That means fewer ingredients and less confusion for beginner gluten free bakers.
Pro tip: Check the baking aisle first, but many stores now stock gluten free products in a dedicated section. Oops! I once spent twenty minutes searching before realizing my store had moved everything.
Ingredient Quality Indicators
Choose cream cheese in block form, never spreadable tubs. The moisture content differs dramatically. Additionally, look for packages that feel firm when squeezed gently.
For eggs, room temperature is non-negotiable. Cold eggs create lumpy batter that won’t incorporate smoothly. Simply place them in warm water for five minutes before starting.
Essential Substitutions for Different Needs
International readers: King Arthur can be replaced with Bob’s Red Mill 1-to-1 Gluten Free Baking Flour. However, results may vary slightly in texture.
Dairy-free option: Substitute vegan cream cheese and plant-based butter. Miyoko’s brand works exceptionally well. Nevertheless, the texture becomes slightly less gooey.
Sugar alternatives: Monk fruit sweetener can replace granulated sugar at a 1:1 ratio. Still, the cookies won’t spread quite as beautifully.
Equipment You’ll Need (Plus DIY Alternatives)
Essential Tools
Stand mixer or hand mixer: These cookies require thorough mixing. A stand mixer makes life easier, but a quality hand mixer absolutely works. I used my grandmother’s 30-year-old hand mixer for years.
Cookie scoop (1 1/2 tablespoon size): This ensures uniform cookies that bake evenly. Consequently, you’ll get professional-looking results every time. Don’t have one? Use two spoons to portion similar-sized amounts.
Parchment paper: Prevents sticking and makes cleanup effortless. Moreover, it helps cookies bake evenly without dark bottoms.
Shallow bowl for powdered sugar: A pie plate or shallow pasta bowl works perfectly for rolling cookies.
Wire cooling rack: Allows air circulation underneath cookies. This prevents soggy bottoms while maintaining that gooey center.
Nice-to-Have Items
A kitchen scale improves accuracy with gluten free baking. Additionally, weighing flour eliminates the compression issue that ruins many gluten free recipes.
Step-by-Step Instructions for Perfect Results
Step 1: Create the Cream Cheese Base
Place your room temperature butter and cream cheese in a large mixing bowl. Beat with a mixer on medium speed for 2-3 minutes.
You’re looking for a smooth, fluffy mixture with no lumps. This foundation determines your final cookie texture. Therefore, don’t rush this step.
Sensory indicator: The mixture should look like thick, pale yellow frosting and smell subtly tangy.
Step 2: Add Eggs and Vanilla
Crack eggs into the butter mixture one at a time. Mix after each addition until fully incorporated. Then, pour in vanilla extract.
Beat on medium speed for another minute. The batter should become slightly lighter in color and very smooth.
Common mistake I made: Adding cold eggs caused curdling. Room temperature prevents this issue entirely.
Step 3: Prepare the Dry Ingredients
In a medium bowl, whisk together gluten free flour, sugar, baking powder, and salt. Whisking distributes ingredients evenly, which prevents pockets of baking powder in your cookies.
Man, oh man, proper dry ingredient mixing makes a massive difference in gluten free baking. Thomas Keller always emphasizes this fundamental technique in his pastry work.
Step 4: Combine Wet and Dry Gradually
Add one-third of the dry mixture to your wet ingredients. Mix on low speed until just combined. Scrape down the sides of the bowl.
Repeat this process two more times. As the flour hydrates, the dough becomes quite dense. It may climb up your beaters—totally normal! Just scrape it down and continue mixing.
Pro tip: Patience here prevents overmixing, which can make cookies tough.
Step 5: The Critical Chill Time
Cover your dough bowl with plastic wrap. Refrigerate for exactly 30 minutes.
This chilling period is absolutely essential. It allows the gluten free flour to fully hydrate. Furthermore, cold dough spreads less during baking, creating those gorgeous thick cookies.
Skip this step, and you’ll get flat pancake cookies. Trust me—I learned this the hard way during test number four.
Step 6: Preheat and Prepare
About 20 minutes into chilling, preheat your oven to 350°F (175°C). Line baking sheets with parchment paper.
Fill your shallow bowl generously with powdered sugar. You’ll need more than you think—these cookies get double-dipped!
Step 7: Shape and Coat the Cookies
Using a 1 1/2 tablespoon scoop, portion out cookie dough. Roll each portion between your palms to form a smooth ball.
Drop the ball into powdered sugar. Roll it around generously until completely coated. The coating should be thick and opaque.
Gently press the ball to flatten slightly—about 3/4 inch thick. If the sugar seems to absorb into the dough, roll it through the powdered sugar again.
Visual cue: Each cookie should look like a small, fluffy snowball before baking.
Step 8: Arrange on Baking Sheets
Place coated cookies on parchment paper, spacing them 2 inches apart. You should fit about 12 cookies per standard baking sheet (3 rows of 4).
After filling one sheet, immediately return remaining dough to the refrigerator. Warm dough spreads excessively and creates thin, crispy cookies instead of gooey ones.
Step 9: Bake to Pillowy Perfection
Bake for 12-14 minutes at 350°F. Cookies are done when they look set on the edges but still appear slightly underdone in the center.
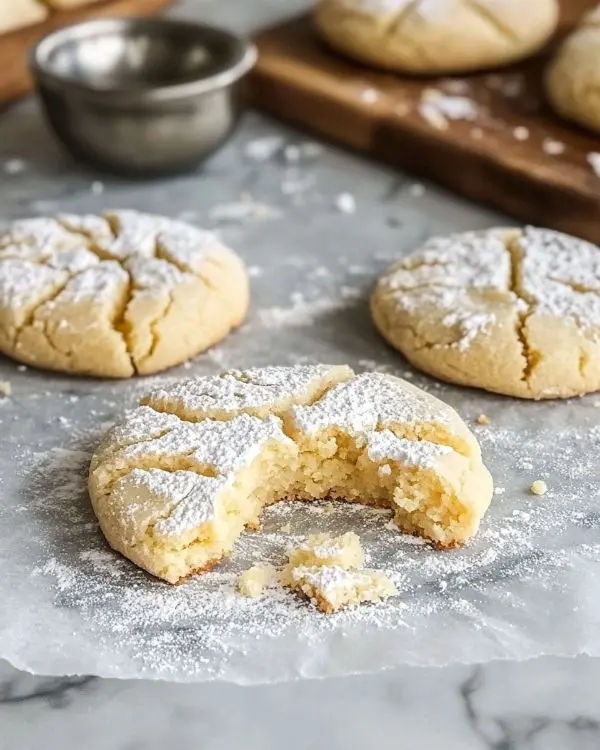
They should feel soft with a gentle give when touched lightly. The powdered sugar coating will have beautiful cracks running through it.
Timing is everything: Overbaking by even 2 minutes creates dry cookies. Set a timer and check at 11 minutes.
What you’ll notice: Your kitchen will smell like vanilla heaven mixed with sweet cream cheese. It’s intoxicating.
Step 10: Cool and Enjoy
Transfer cookies to a wire rack immediately. Let them cool for 5-10 minutes before eating.
The centers continue cooking slightly from residual heat. Consequently, they set up perfectly while maintaining that signature gooey texture.
You know what? These best GF cookies taste incredible both warm and at room temperature. However, warm cookies with cold milk might be the ultimate experience.
Expert Tips for Guaranteed Success
Temperature Control Is Everything
Room temperature ingredients blend seamlessly. Cold ingredients create lumpy, separated dough. Therefore, plan ahead and leave butter, cream cheese, and eggs on the counter for 1-2 hours.
Don’t Skip the Double Sugar Coating
That second dip in powdered sugar creates the iconic crackled appearance. Moreover, it ensures a sweet, tender exterior that contrasts beautifully with the gooey center.
Work Quickly Between Batches
Julia Child always stressed the importance of cold dough for tender pastries. Similarly, these cookies need cold dough to maintain their shape. Keep unbaked portions refrigerated until you’re ready to scoop and roll.
Use a Scale for Flour
Gluten free flour compresses easily in measuring cups. Consequently, you might accidentally add too much, creating dry cookies. Weighing ensures accuracy every single time.
Watch for Visual Cues, Not Just Time
Every oven runs differently. Therefore, look for set edges and slightly soft centers rather than relying solely on the timer.
Creative Variations to Try
Chocolate Lover’s Version
Fold 3/4 cup mini chocolate chips into the dough after mixing. Alternatively, use chocolate cream cheese for a deeper flavor. These gluten free cake batter cookies become even more indulgent.
Lemon Blueberry Twist
Add 2 tablespoons lemon zest and 1 teaspoon lemon extract to the wet ingredients. Fold in 1/2 cup dried blueberries. Perfect for spring brunch gatherings!
Holiday Peppermint Variation
Replace vanilla extract with peppermint extract. Mix crushed candy canes into the powdered sugar coating. These make spectacular holiday treats alongside traditional favorites.
Birthday Cake Style
Add 1/2 cup rainbow sprinkles to the dough. These become festive funfetti-inspired cookies that kids absolutely love.
Maple Pecan Autumn Cookies
Replace 1/4 cup sugar with maple syrup. Fold in 1/2 cup chopped toasted pecans. The combination tastes like fall in cookie form.
Storage and Make-Ahead Magic
Room Temperature Storage
| Storage Method | Duration | Notes |
|---|---|---|
| Airtight container at room temp | 5-7 days | Maintains gooey texture best |
| Refrigerated in sealed container | 10-14 days | Firms up slightly; bring to room temp before serving |
| Frozen baked cookies | 3 months | Thaw overnight; refresh in 300°F oven for 3 minutes |
| Frozen unbaked dough balls | 3 months | Bake directly from frozen, add 2-3 minutes |
Make-Ahead Tips
Prepare dough through step 5. Refrigerate up to 3 days before baking. The extended chilling actually improves flavor development.
Alternatively, scoop and coat cookies completely. Freeze on a baking sheet, then transfer to freezer bags. Bake directly from frozen when cravings strike.
Keeping Cookies Fresh
Store with a slice of bread in the container. The bread releases moisture that keeps cookies soft. Replace the bread every 2 days.
Furthermore, never store different cookie types together. These gluten free gooey butter cookies absorb flavors and aromas easily.
Perfect Pairings and Serving Suggestions
These cookies shine alongside hot coffee or cold milk. Additionally, they complement fresh berry desserts beautifully.
Serve them at holiday cookie exchanges with colorful Italian cookies and traditional snowballs for variety. The powdered sugar coating creates visual harmony on dessert platters.
For afternoon tea, pair with Earl Grey or chamomile. The subtle vanilla notes enhance tea’s delicate flavors.
Create an impressive dessert by sandwiching vanilla ice cream between two cookies. Freeze for 30 minutes before serving. Suddenly, you’ve got gourmet ice cream sandwiches!
Troubleshooting Common Issues
Cookies Spread Too Much
Your dough wasn’t cold enough. Always chill the full 30 minutes. Moreover, keep unbaked portions refrigerated between batches.
Cookies Are Too Dry
You may have overbaked them slightly. Remember, they should look slightly underdone when removed from the oven. Additionally, check your flour measurement—too much creates dry cookies.
Powdered Sugar Disappears
The sugar absorbs into warm dough. Make sure to double-dip cookies. Furthermore, if your dough feels too soft while rolling, chill it for 10 more minutes.
Cookies Don’t Have Cracks
The cracks come from cookies expanding during baking against the sugar coating. Ensure you’re coating generously and not pressing cookies too flat before baking.
Gluten Free Gooey Butter Cookies FAQs
Can I use regular all-purpose flour instead of gluten free flour?
Yes, substitute cup-for-cup with all-purpose flour. The texture will be slightly different—less tender and gooey—but still delicious. These become traditional gooey butter cookies rather than the gluten free version.
Why do my gluten free gooey butter cookies taste gritty?
Grittiness comes from undissolved sugar or flour that hasn’t fully hydrated. Mix the dough thoroughly and ensure you’re measuring flour by weight rather than volume. The 30-minute chill time also helps flour absorb moisture completely.
Can I make these cookies dairy free?
You can use vegan butter and dairy-free cream cheese alternatives. Brands like Kite Hill or Miyoko’s work well. However, the signature gooey texture will be slightly less pronounced. Add an extra tablespoon of vegan butter to improve richness.
How do I prevent gluten free cookies from falling apart?
These gluten free cake cookies stay together because of the cream cheese and proper flour hydration. Never skip the chilling step, and avoid overbaking. The cookies firm up as they cool, so patience is key.
Final Thoughts: Your New Favorite Cookie
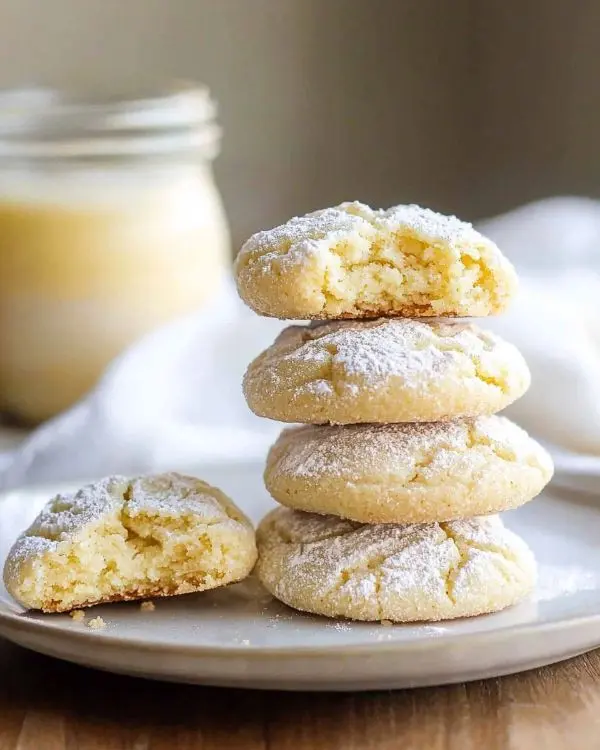
These gluten free gooey butter cookies prove that dietary restrictions don’t mean flavor sacrifices. In fact, many people prefer these to traditional recipes.
Remember that December morning when I first created these for my niece? Last Christmas, she requested them specifically. Moreover, she’s started making them herself—successfully!
The magic lies in understanding gluten free flour behavior. Consequently, these techniques work across many other gluten free baking projects.
Pair these beauties with afternoon coffee or serve them at your next gathering. I guarantee they’ll disappear faster than you can say “gluten free.”
Want to expand your cookie repertoire? Try my Italian Christmas cookies next. They’re equally crowd-pleasing and beautifully festive.
What variation will you try first? Chocolate chip? Lemon blueberry? Tag @TastyAtHome on Instagram with your creations. I absolutely love seeing your kitchen victories!
These cookies remind us that the best recipes come from love, patience, and seventeen rounds of testing. Here’s to creating memories—one gooey, powdered-sugar-covered bite at a time.
Tasty at Home – Where bold flavors meet everyday kitchens.
Gluten Free Gooey Butter Cookies
Equipment
- stand mixer or hand mixer
- Cookie scoop
- Parchment paper
- Shallow bowl
- Wire cooling rack
- Kitchen scale
Ingredients
Cookie Dough
- ½ cup Salted Butter Room temperature is crucial
- 8 oz Cream Cheese (block style) Not whipped variety
- 2 Large Eggs Room temperature
- 1 ½ Tbsp Vanilla Extract Pure, not imitation
- 2 ¾ cups King Arthur Measure for Measure GF Blend Best results with this brand
- 1 ½ cups Granulated Sugar Regular white sugar
- 2 tsp Baking Powder Fresh for best rise
- ½ tsp Salt Increase to 1 tsp with unsalted butter
For Coating
- Powdered Sugar For rolling, the prettier, the better
Instructions
- Beat butter and cream cheese together until fluffy and smooth.
- Add eggs one at a time, then mix in vanilla extract until incorporated.
- Whisk together gluten free flour, sugar, baking powder, and salt in a separate bowl.
- Gradually add dry ingredients to wet mixture, mixing until just combined.
- Cover dough and chill for 30 minutes.
- Preheat oven to 350°F (175°C) and line baking sheets with parchment paper.
- Scoop dough into balls, roll in powdered sugar, flatten slightly, then roll again.
- Arrange on baking sheets, spacing 2 inches apart.
- Bake for 12-14 minutes until edges are set but centers look slightly underdone.
- Cool on wire racks for 5-10 minutes before serving.

