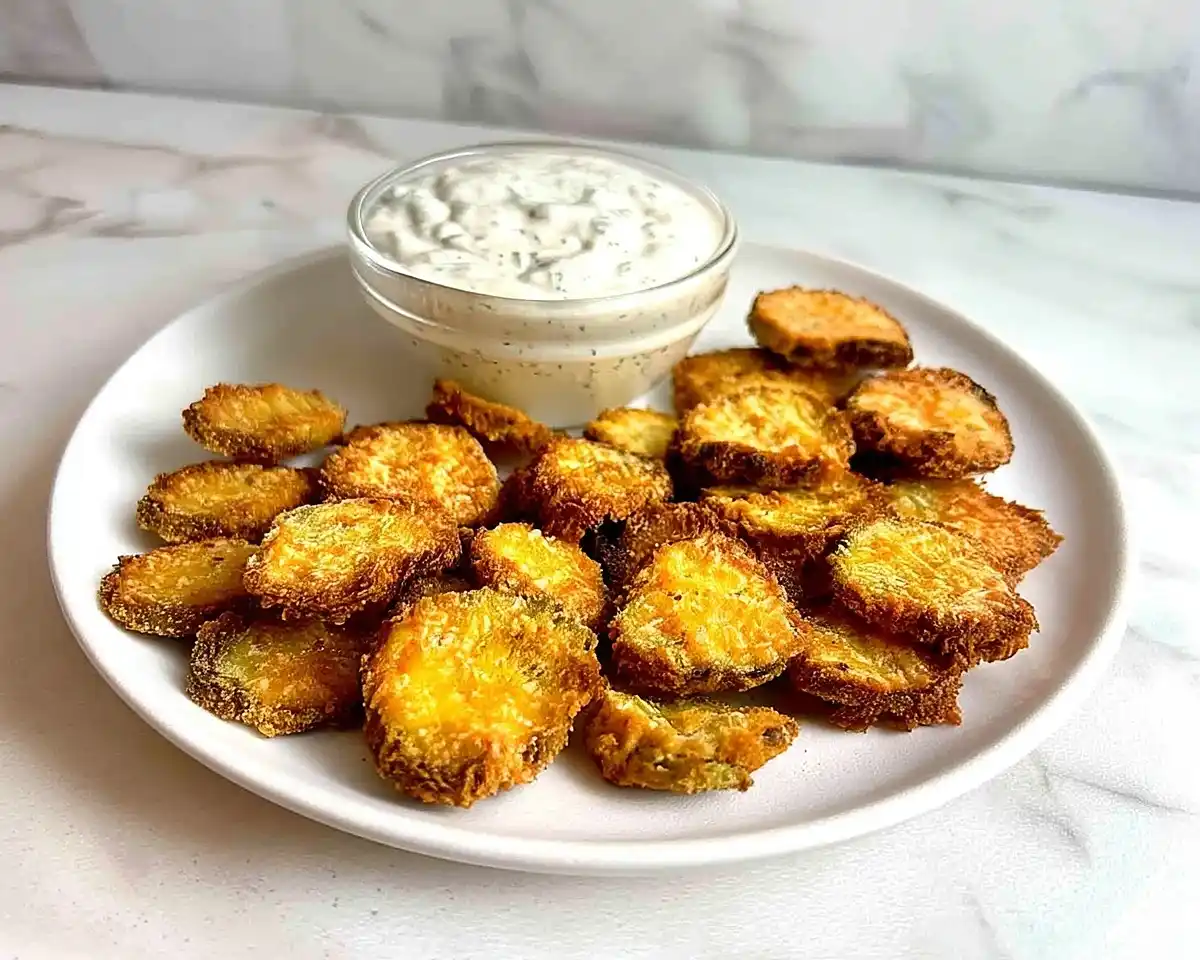
Easy Air Fryer Fried Pickles Recipe delivers crispy, tangy perfection. Quick air fryer fried pickles with creamy dip—your new favorite appetizer awaits!
Hey, I’m Linda! Welcome to Tasty at Home, where bold flavors meet everyday kitchens.
Last Super Bowl Sunday, I made a promise to myself. No more soggy, oil-soaked pickles from the deep fryer. My kitchen needed a makeover, and honestly, so did my game day spread.
That’s when I discovered the magic of air fryer fried pickles. Man, oh man, was I skeptical at first! Could hot air really deliver that satisfying crunch we all crave? After testing twelve batches (yes, twelve), I finally cracked the code.
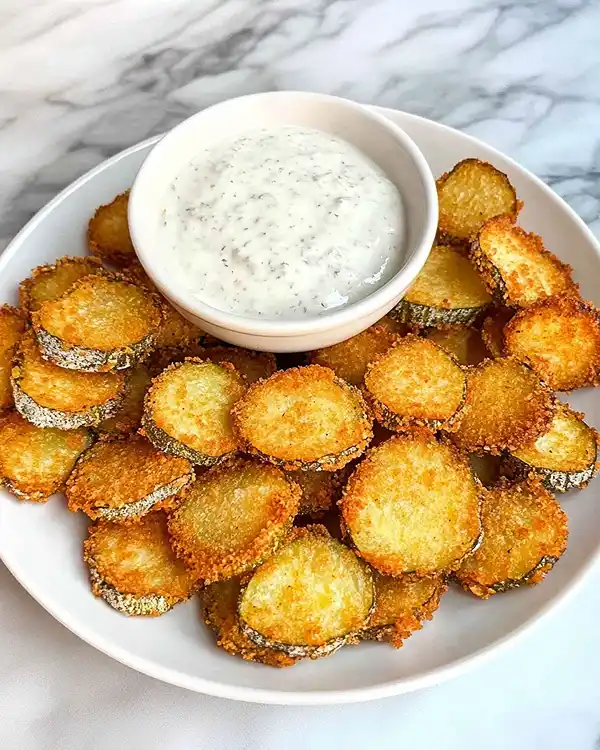
The result? Golden, crispy perfection without the guilt or the mess. These beauties come out of the air fryer with a texture that rivals any restaurant version. Meanwhile, the tangy dill flavor shines through every bite, complemented by a zesty panko coating that stays crispy for hours.
You know what’s wild? My neighbor actually knocked on my door asking what smelled so good. Now she makes these every weekend for her family movie nights.
This recipe solves three problems at once. First, it eliminates the oil splatter nightmare. Second, it cuts cooking time in half. Third, it delivers restaurant-quality results without leaving your house.
Whether you’re hosting friends or just craving a salty snack, these DIY fried pickles in air fryer style will become your new obsession. Trust me, once you nail this technique, you’ll never look at pickle jars the same way again.
Table of Contents
What Makes These Air Fryer Fried Pickles Special
This recipe represents months of testing and refinement. After trying countless variations, I’ve identified the exact combination that delivers maximum crunch with minimal effort.
The secret lies in three critical steps: proper pickle preparation, strategic seasoning, and precise air circulation. Many recipes skip the drying phase, which leads to soggy coatings. Not this one.
Furthermore, the hot sauce in the egg wash adds a subtle kick that elevates the entire experience. Tabasco works beautifully here, though any Louisiana-style hot sauce will deliver similar results. This technique mirrors the approach Julia Child used for achieving golden, crispy exteriors—proper moisture control makes all the difference.
Ingredients for Fried Pickles in the Air Fryer
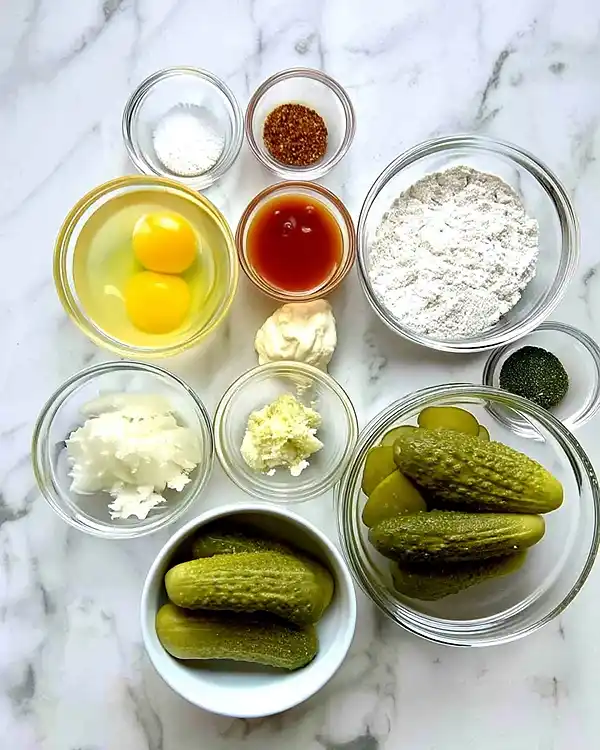
| Ingredient | US Measurement | Metric | Notes |
|---|---|---|---|
| For the Pickles | |||
| Sliced pickles | 1 cup | 240ml | Dill pickle chips work best |
| Large eggs | 2 | 2 | Room temperature preferred |
| All-purpose flour | 3 tablespoons | 24g | Creates binding base |
| Hot sauce | 1 tablespoon | 15ml | Tabasco recommended |
| Salt | ½ teaspoon | 3g | Kosher salt preferred |
| Black pepper | ½ teaspoon | 1.5g | Freshly ground |
| Panko breadcrumbs | 1 cup | 60g | Japanese-style for maximum crunch |
| For the Dip | |||
| Sour cream | ¼ cup | 60ml | Full-fat version |
| Mayonnaise | ¼ cup | 60ml | Duke’s or Hellmann’s |
| Salt | ½ teaspoon | 3g | |
| Black pepper | ½ teaspoon | 1.5g | |
| Minced onions | ¼ cup | 40g | White or yellow onions |
| Garlic clove | 1 | 1 | Fresh, finely minced |
| Dried dill | 1 teaspoon | 2g | Optional but recommended |
Shopping Tips for American Grocery Stores
Find pickle chips in the condiment aisle near the relish section. Avoid bread-and-butter pickles—they’re too sweet for this application. Instead, grab dill pickle chips from brands like Vlasic or Claussen.
Panko breadcrumbs live in the international aisle or near regular breadcrumbs. The Japanese-style texture creates superior crispiness compared to standard varieties. If your store doesn’t carry panko, check Asian markets or order online.
For the freshest results, select firm pickles without excessive brine cloudiness. Quality matters here because soggy pickles produce disappointing results.
Bold Add-ins and Creative Variations
Spicy Version: Add ½ teaspoon cayenne pepper to the breadcrumb mixture for heat lovers.
Ranch Twist: Mix 1 tablespoon ranch seasoning into the panko for classic flavor.
Extra Tangy: Include 1 teaspoon pickle brine in the egg wash for amplified dill notes.
Cheese Lover’s Dream: Toss 2 tablespoons grated Parmesan into the breadcrumbs before coating.
Ingredient Substitutions
Gluten-free option: Replace regular flour with rice flour and use gluten-free panko alternatives like crushed cornflakes.
Dairy-free dip: Swap sour cream for Greek yogurt or cashew cream. Additionally, use vegan mayo brands like Just Mayo.
Egg-free coating: Combine ¼ cup buttermilk with 2 tablespoons flour as your binding agent instead of eggs.
Equipment and Preparation Steps
Essential Equipment
Air fryer: Any 3.5-quart or larger model works perfectly. I use a Cosori 5.8-quart, though Ninja and Instant Pot versions deliver identical results.
Shallow dishes: Two wide bowls or pie plates for your dredging stations make assembly efficient.
Paper towels: Critical for removing excess moisture from pickles before coating.
Baking sheet: Holds your breaded pickles while you work in batches.
Cooking spray: Oil mister or aerosol spray ensures even browning.
DIY Alternatives
No air fryer? Well, a convection oven set to 425°F works beautifully. Simply arrange pickles on a wire rack over a baking sheet and bake for 12-15 minutes, flipping halfway through.
Missing shallow dishes? Use dinner plates instead—they provide enough surface area for easy coating.
How to Make Air Fryer Fried Pickles
Step 1: Dry Your Pickles Thoroughly
Lay down several sheets of paper towels on your counter. Arrange pickle slices in a single layer, then cover with more paper towels. Let them sit for 3-5 minutes.
This step removes excess brine that would otherwise prevent proper coating adhesion. Oops! I forgot this once, and my breading slid right off during cooking. Learn from my mistake—patience pays off here.
Pro tip: Press gently on the top paper towels to absorb maximum moisture without crushing the pickles.
Step 2: Create Your Dredging Stations
In your first shallow dish, whisk together eggs, flour, hot sauce, salt, and black pepper until completely smooth. The flour thickens the mixture, helping it cling to each pickle slice.
In your second dish, pour the panko breadcrumbs. Keep these separate until you’re ready to coat.
Temperature matters: Room temperature eggs mix more easily than cold ones straight from the fridge.
Step 3: Bread Each Pickle Slice
Working with one pickle at a time, dip it into the egg mixture. Let excess drip off for two seconds, then immediately press into the breadcrumbs.
Flip the pickle and press again, ensuring complete coverage on both sides. Transfer to your baking sheet and repeat with the remaining slices.
This assembly-line approach keeps your hands cleaner and speeds up the process. Thomas Keller’s mise en place philosophy applies perfectly here—having everything ready before you start creates smoother cooking experiences.
Common mistake: Overcrowding your coating stations leads to clumpy, uneven breading. Work in batches if necessary.
Step 4: Preheat and Arrange
Set your air fryer to 400°F and let it preheat for 3 minutes. This ensures immediate searing when pickles hit the basket.
Arrange breaded pickles in a single layer with space between each piece. Overcrowding prevents proper air circulation, resulting in soggy spots. Depending on your air fryer size, you’ll likely need to cook in 2-3 batches.
Spray the tops lightly with cooking oil. This promotes browning and crispiness.
Step 5: Air Fry to Golden Perfection
Cook for 5-7 minutes on the first side. You’ll know they’re ready when the edges turn golden brown and you hear a slight sizzle.
Carefully flip each pickle using tongs. Spray the second side with oil, then continue cooking for another 5-7 minutes.
Sensory indicator: The pickles should smell toasty and nutty. If you notice any burning smell before 10 minutes total, reduce temperature to 375°F.
Timing note: Thicker pickle slices need the full 14 minutes, while thinner chips finish closer to 10 minutes.
Step 6: Prepare the Creamy Dip
While pickles cook, combine all dip ingredients in a small bowl. Mix thoroughly until smooth and well-incorporated.
The minced onions add textural contrast, while garlic provides aromatic depth. If you’re not a dill fan, substitute with fresh parsley or chives instead.
Let the dip sit for 5 minutes before serving. This resting period allows flavors to meld beautifully.
Storage trick: This dip tastes even better after chilling for an hour, making it perfect for meal prep.
Expert Tips and Creative Variations
Tips for Maximum Crunch
Double coating: For extra-thick crust, repeat the egg-breadcrumb process twice per pickle.
Seasoning boost: Add garlic powder, onion powder, or smoked paprika directly to the panko for enhanced flavor complexity.
Crispier texture: Spray pickles generously with oil before cooking. Don’t be shy—the oil creates that restaurant-quality golden color.
Avoid sogginess: Serve immediately after cooking for optimal texture. If holding for guests, keep warm in a 200°F oven on a wire rack.
Regional and Dietary Variations
Southern Style: Mix 1 tablespoon Cajun seasoning into the breadcrumbs and serve with remoulade instead of ranch dip.
Buffalo Version: Toss cooked pickles in buffalo sauce and serve with blue cheese dressing.
Keto-Friendly: Replace panko with crushed pork rinds for a low-carb alternative that’s surprisingly delicious.
Thanksgiving Appetizer: Serve alongside honey bourbon cranberry sauce for a festive twist that’ll surprise your guests.
Holiday Party Platter: Arrange with smashburger quesadillas for a crowd-pleasing spread.
Storage and Make-Ahead Instructions
| Storage Method | Duration | Instructions |
|---|---|---|
| Room temperature | 2 hours | Keep on wire rack uncovered |
| Refrigerator | 3 days | Store in airtight container |
| Freezer (breaded, uncooked) | 2 months | Freeze on baking sheet, then transfer to freezer bag |
| Freezer (cooked) | 1 month | Cool completely before freezing |
| Reheating | 3-4 minutes | Air fry at 375°F until crispy |
Make-ahead strategy: Bread all pickles up to 24 hours in advance and refrigerate on a baking sheet. Cook fresh when guests arrive for optimal results.
The dip stores beautifully for up to 5 days in the refrigerator. Actually, the flavors improve overnight as ingredients marry together.
Perfect Pairings
These air fryer fried pickles shine alongside classic American comfort foods. Serve with juicy burgers, pulled pork sandwiches, or barbecue platters for backyard gatherings.
For game day spreads, pair with best stuffing recipe with sausage during Thanksgiving season. The tangy pickles cut through rich, savory dishes beautifully.
Add a cinnamon pecan pie cheesecake for dessert to complete your Southern-inspired menu.
Beverage pairing? Ice-cold beer, sweet tea, or lemonade complement the salty, tangy flavors perfectly.
Easy Air Fryer Fried Pickles FAQS
Can I use whole pickles instead of sliced?
Yes, but slice them yourself into ¼-inch rounds for even cooking and maximum surface area for breading.
Why are my air fryer fried pickles soggy?
Insufficient drying time or overcrowding the basket prevents proper air circulation, leading to steam rather than crispy results.
Do I need to flip them halfway through?
Absolutely—flipping ensures even browning on both sides and prevents one side from becoming too dark while the other stays pale.
Can I make fried pickles in air fryer without eggs?
Replace eggs with buttermilk mixed with flour to create a thick batter that adheres well to pickle surfaces.
The Final Crunch
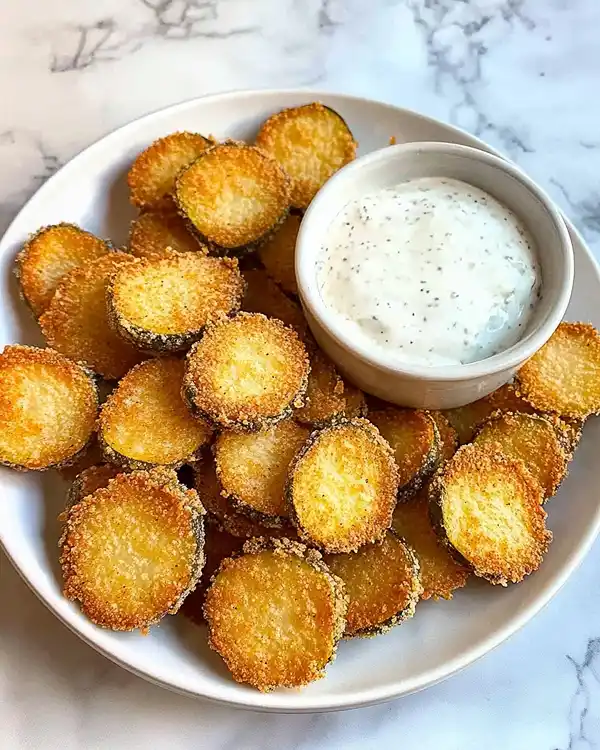
Let me tell you, these easy air fryer fried pickles have completely transformed my snack game. From that first experimental batch to today’s perfected version, the journey taught me valuable lessons about technique, patience, and the power of proper preparation.
Every time I pull a golden batch from the air fryer, I remember that Super Bowl Sunday when everything changed. Now, friends specifically request these at every gathering. Even my pickiest nephew (who claims to hate vegetables) demolishes an entire plate.
The beauty of this recipe lies in its simplicity and reliability. You don’t need fancy equipment or hard-to-find ingredients. Just solid technique, quality pickles, and about 15 minutes from start to finish.
Next time you’re craving something salty, tangy, and impossibly crispy, skip the drive-through. Instead, try this DIY fried pickles in air fryer method and experience the difference fresh, homemade snacks deliver.
Pair these with an old-fashioned southern pecan pie for dessert, and you’ve got yourself a proper Southern feast.
What’s your favorite dipping sauce for fried pickles? I’d love to hear your creative variations! Tag us on social media with your crispy creations—we feature the best ones every week.
Now go forth and conquer that air fryer. Your taste buds will thank you.
Tasty at Home – Where bold flavors meet everyday kitchens.
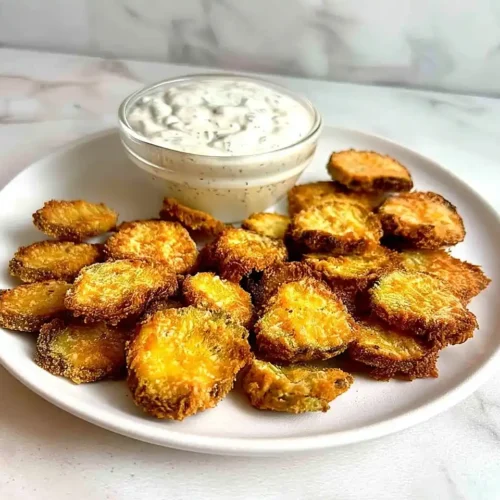
Easy Air Fryer Fried Pickles
Equipment
- Air Fryer
- Shallow dishes
- Paper towels
- Baking sheet
- cooking spray
Ingredients
For the Pickles
- 1 cup sliced pickles dill pickle chips work best
- 2 large eggs room temperature preferred
- 3 tbsp all-purpose flour creates binding base
- 1 tbsp hot sauce Tabasco recommended
- ½ tsp salt kosher salt preferred
- ½ tsp black pepper freshly ground
- 1 cup panko breadcrumbs Japanese-style for maximum crunch
For the Dip
- ¼ cup sour cream full-fat version
- ¼ cup mayonnaise Duke’s or Hellmann’s
- ½ tsp salt
- ½ tsp black pepper
- ¼ cup minced onions white or yellow onions
- 1 garlic clove fresh, finely minced
- 1 tsp dried dill optional but recommended
Instructions
- Lay pickle slices on paper towels and pat dry thoroughly for 3–5 minutes to remove excess moisture.
- In a shallow dish, whisk eggs, flour, hot sauce, salt, and pepper until smooth. In another dish, add panko breadcrumbs.
- Dip each pickle slice into the egg mixture, let excess drip off, then coat completely in panko. Place coated pickles on a baking sheet.
- Preheat air fryer to 400°F (200°C) for 3 minutes. Arrange pickles in a single layer in the basket and spray lightly with oil.
- Air fry for 5–7 minutes per side, flipping halfway, until golden and crispy. Adjust temperature if necessary.
- Mix all dip ingredients in a bowl until smooth and let rest 5 minutes before serving.

