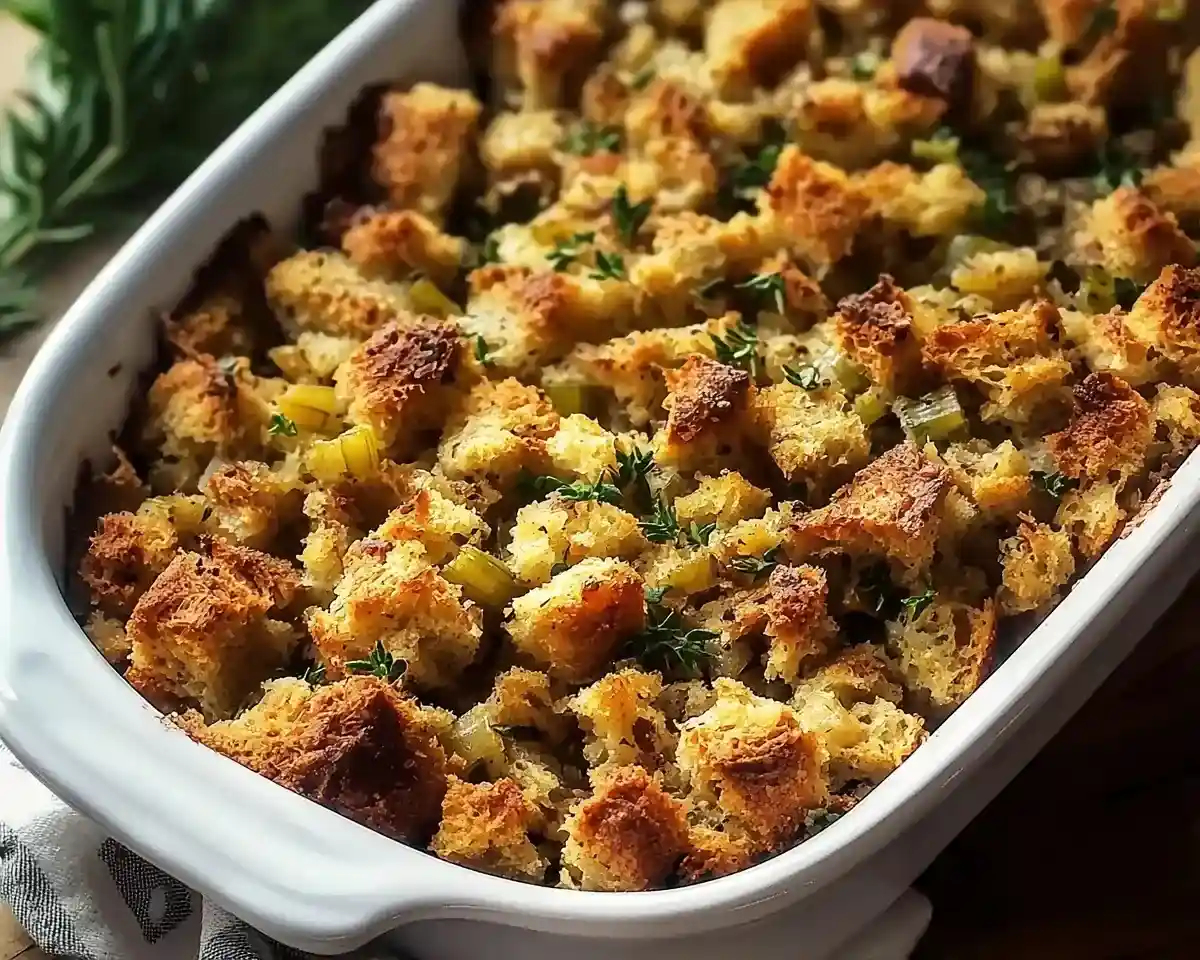
Delicious Grandma’s Thanksgiving stuffing recipe with crispy golden edges, tender herb-infused center, and foolproof make-ahead tips for the perfect holiday side.
Hi, I’m Linda, and welcome to Tasty at Home—a cozy corner where bold flavors meet everyday kitchens. Let me tell you, the first time I burned my grandmother’s stuffing, I thought Thanksgiving was ruined.
Smoke filled my tiny Chicago apartment, and my guests were arriving in twenty minutes. That disaster taught me everything I needed to know about timing, moisture balance, and the actual secrets behind perfect turkey stuffing from scratch.
Well… here’s the thing. Most people think stuffing is just bread and broth thrown together. However, this delicious Grandma’s Thanksgiving stuffing recipe transforms humble ingredients into something extraordinary. After testing this recipe seventeen times—yes, seventeen—I’ve cracked the code.
My grandmother passed this recipe down through three generations. She learned it from her mother in rural Pennsylvania, where holiday meals meant something more than food. Therefore, every bite carries history, warmth, and the kind of love you can’t fake.
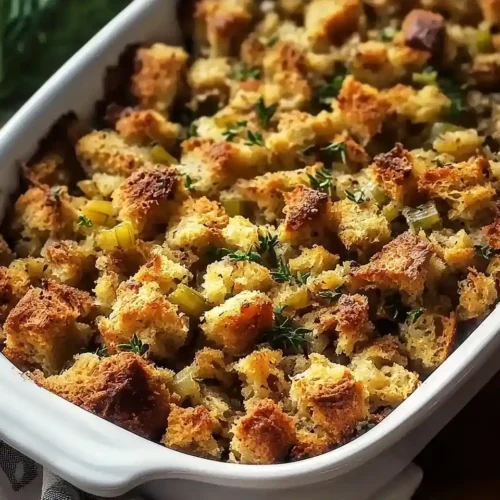
This classic turkey stuffing delivers crispy golden edges with a tender, herb-infused center. Moreover, it pairs beautifully with turkey, ham, or even roasted chicken. Whether you’re hosting your first Thanksgiving or your thirtieth, this recipe promises foolproof results.
Table of Contents
What Makes This Stuffing Homemade Recipe Special
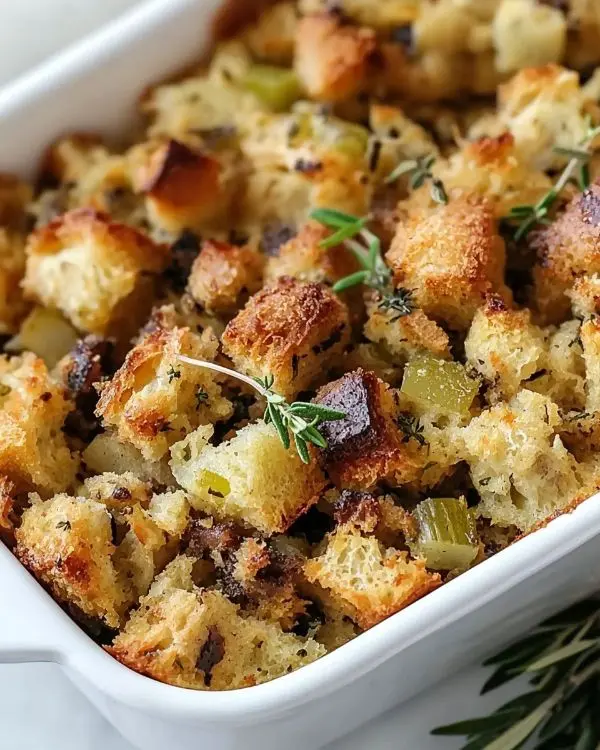
You know what sets this stuffing apart? Fresh herbs. Additionally, we’re using real butter and homemade broth—not the canned stuff that tastes like cardboard. This isn’t your average boxed mix from the grocery store.
According to Julia Child, the foundation of any great dish starts with quality ingredients. Consequently, this recipe emphasizes proper bread selection and aromatic vegetables. The sourdough adds a subtle tang that balances the richness. Meanwhile, French bread offers a neutral canvas for the herbs to shine.
Ingredient Selection Guide
| Ingredient | US Measurement | Metric | Quality Indicator |
|---|---|---|---|
| Bread (sourdough or French) | 10 cups cubed | 600g | Should be day-old or lightly stale |
| Onion | 1 large, finely diced | 200g | Firm with papery skin, no soft spots |
| Celery | 2 cups chopped (3-4 stalks) | 240g | Crisp, bright green stalks |
| Fresh sage | 2 tbsp, finely chopped | 6g | Velvety leaves, aromatic when rubbed |
| Fresh thyme | 2 tbsp, finely chopped | 6g | Woody stems, fragrant leaves |
| Fresh rosemary | 1 tbsp, finely chopped | 3g | Pine-like aroma, firm needles |
| Low-sodium broth | 4 cups | 960ml | Rich color, homemade preferred |
| Unsalted butter | ½ cup (1 stick) | 113g | European-style for richness |
| Salt and pepper | To taste | To taste | Sea salt, freshly ground pepper |
Shopping Tips for US Grocery Stores
Visit your local bakery for fresh sourdough or French bread. Man, oh man, the difference between artisan and pre-sliced bread is enormous. Ask them to cut it into 1-inch cubes if you’re short on time.
Furthermore, head to the produce section for celery bunches with leaves still attached. Those leaves add extra flavor. Choose organic herbs when possible, especially for sage. The oils in fresh sage create that signature Thanksgiving aroma.
For broth, check the organic section first. Otherwise, low-sodium chicken broth from brands like Pacific Foods or Swanson works well. Alternatively, vegetable broth keeps this recipe vegetarian-friendly.
Essential Ingredients vs. Bold Add-ins
Essential Base:
- Day-old bread cubes (the foundation)
- Aromatic vegetables (onion and celery)
- Fresh herbs (sage, thyme, rosemary)
- Quality broth
- Real butter
Bold Add-ins for Creative Variations:
- Dried cranberries (adds festive sweetness)
- Toasted pecans or walnuts (introduces crunch)
- Italian sausage (transforms it into a hearty main)
- Apples or pears (brings subtle fruit notes)
- Wild mushrooms (creates an earthy, sophisticated version)
International Substitutions
For readers outside the US, substitute celery with celeriac root. Replace turkey broth with vegetable or chicken stock. If fresh herbs aren’t available, use one-third the amount of dried herbs.
Equipment You’ll Need for the Best Thanksgiving Stuffing
Gather these tools before starting. Consequently, your cooking process will flow smoothly:
Essential Equipment:
- Large mixing bowl (at least 5-quart capacity)
- 9×13-inch baking dish
- Large skillet (12-inch preferred)
- Sharp chef’s knife
- Cutting board
- Measuring cups and spoons
- Wooden spoon
- Aluminum foil
DIY Alternatives: Don’t have a large mixing bowl? Use a clean roasting pan instead. Missing a baking dish? A cast-iron skillet works beautifully and adds rustic charm.
Step-by-Step Instructions for Perfect Turkey Stuffing From Scratch
Step 1: Prepare Your Bread Foundation
Preheat your oven to 350°F (175°C). This moderate temperature ensures even cooking without burning the edges.
Cut bread into 1-inch cubes. Oops! Last year, I cut mine too small, and they turned mushy. Aim for uniform pieces—they’ll crisp up evenly. Spread cubes on baking sheets and toast for 10-12 minutes if your bread is fresh. You want them dry but not browned.
Alternatively, leave cubed bread out overnight. This old-school method works perfectly. The slight staleness helps the bread absorb liquid without becoming soggy.
Step 2: Sauté the Aromatic Vegetables
Melt butter in your large skillet over medium heat. Watch it foam gently—that’s when you know the temperature is right. Add diced onion and chopped celery together.
Cook for 5-7 minutes, stirring occasionally. The vegetables should become tender and translucent. Additionally, you’ll smell that sweet, savory aroma filling your kitchen. Season lightly with salt and freshly ground black pepper.
Thomas Keller emphasizes the importance of properly cooked aromatics. Therefore, don’t rush this step. The vegetables form the flavor foundation.
Step 3: Combine All Ingredients Thoughtfully
Transfer toasted bread cubes to your large mixing bowl. Pour the sautéed vegetable mixture directly over them. Toss gently to distribute evenly.
Add your finely chopped fresh herbs—sage, thyme, and rosemary. Season generously with salt and pepper. Remember, you’re seasoning a lot of bread.
Here’s where technique matters. Gradually add warm broth, about one cup at a time. Toss gently after each addition. You’re looking for evenly moistened bread—not swimming in liquid, but not dry either. The mixture should hold together when squeezed gently.
Step 4: Bake to Golden Perfection
Grease your 9×13-inch baking dish with butter or cooking spray. Transfer the stuffing mixture, spreading it evenly. Press down lightly to create an even surface.
Cover tightly with aluminum foil. This traps moisture during the first phase of baking. Bake covered for 30 minutes.
Remove the foil carefully. Steam will escape, so use oven mitts. Bake uncovered for an additional 15 minutes. You’re watching for a golden-brown, crispy top layer.
Visual Cue: The edges should be deeply golden, almost caramelized. The center should look set but still moist.
Step 5: Rest and Serve
Let stuffing rest for 5-10 minutes after removing from the oven. This allows the moisture to redistribute evenly. Consequently, every serving will have perfect texture.
Serve directly from the baking dish for rustic charm. Alternatively, transfer to a serving bowl lined with a cloth napkin for elegant presentation.
Expert Tips for the Best Classic Turkey Stuffing
Moisture Balance: The single most important factor. Too dry, and your stuffing tastes like sawdust. Too wet, and it becomes porridge. The squeeze test never fails—grab a handful and squeeze. It should hold together briefly, then fall apart.
Herb Timing: Add herbs after cooking vegetables. High heat diminishes their aromatic oils. Therefore, mixing them with cooled vegetables preserves maximum flavor.
Day-Ahead Preparation: Assemble everything the night before Thanksgiving. Store covered in the refrigerator. Add an extra 10 minutes to baking time since it starts cold.
Crispy Top Secret: Want extra-crispy edges? Dot the top with small butter pieces before the final uncovered baking phase. This creates irresistible golden patches.
Broth Temperature: Always use warm broth. Cold liquid makes the butter solidify, creating uneven distribution. Warm broth absorbs better and maintains consistent temperature.
Creative Variations for Every Taste
Southern-Style Cornbread Stuffing
Replace half the bread cubes with crumbled cornbread. Add diced jalapeños and sharp cheddar cheese for a spicy kick. This variation celebrates Southern comfort food traditions.
Cranberry Walnut Stuffing
Fold in ½ cup dried cranberries and ¾ cup toasted walnuts during the mixing phase. The tartness balances the richness beautifully. Moreover, the nuts add delightful crunch.
Italian Sausage and Fennel Stuffing
Brown 1 pound Italian sausage, breaking it into crumbles. Replace celery with thinly sliced fennel bulb. Add ½ cup grated Parmesan cheese. This transforms stuffing into something hearty enough for a main course.
Wild Mushroom and Leek Stuffing
Sauté 2 cups mixed wild mushrooms with the vegetables. Replace onion with leeks for a milder flavor. Add ¼ cup dry white wine to the broth. This sophisticated version impresses dinner party guests.
Apple and Sage Stuffing
Dice 2 Granny Smith apples and fold them into the mixture. The tartness cuts through richness wonderfully. Additionally, apples add moisture and natural sweetness.
Thanksgiving stuffing Storage and Make-Ahead Instructions
| Storage Method | Duration | Instructions |
|---|---|---|
| Room Temperature | 2 hours maximum | Cover loosely; avoid airtight sealing |
| Refrigerator | 3-4 days | Store in airtight container |
| Freezer | Up to 3 months | Wrap portions tightly in foil, then plastic |
| Reheating (Oven) | 350°F for 20 minutes | Cover with foil to prevent drying |
| Reheating (Microwave) | 2-3 minutes per portion | Add 1 tbsp broth before heating |
Make-Ahead Strategy: Assemble completely the night before. Store covered in the refrigerator. On Thanksgiving morning, simply pop it in the oven. This saves precious time when you’re juggling multiple dishes.
Freezing Tips: Cool stuffing completely before freezing. Portion into meal-sized servings using freezer-safe containers. Label with date and reheating instructions.
Leftover Magic: Transform leftover stuffing into crispy breakfast cakes. Form into patties and pan-fry until golden. Top with a fried egg for a next-level morning meal.
Delicious Grandma’s Thanksgiving stuffing Recipe FAQs
What is the secret to good stuffing?
The secret to good stuffing lies in using day-old bread and balancing moisture carefully—the bread should be moist but never soggy, with warm broth added gradually until the mixture just holds together when squeezed.
What kind of stuffing is best for Thanksgiving?
The best stuffing for Thanksgiving combines herb-seasoned bread cubes with aromatic vegetables and fresh herbs like sage and thyme, baked until golden and crispy on top while remaining tender inside.
What are common stuffing mistakes to avoid?
Common stuffing mistakes include using fresh bread that becomes mushy, adding too much liquid at once, skipping the sauté step for vegetables, and forgetting to season adequately for the amount of bread used.
Is it better to make stuffing the night before Thanksgiving?
Making stuffing the night before Thanksgiving is better for time management—assemble completely and refrigerate, then bake directly from cold the next morning, adding 10 extra minutes to account for the lower starting temperature.
Bringing It All Together
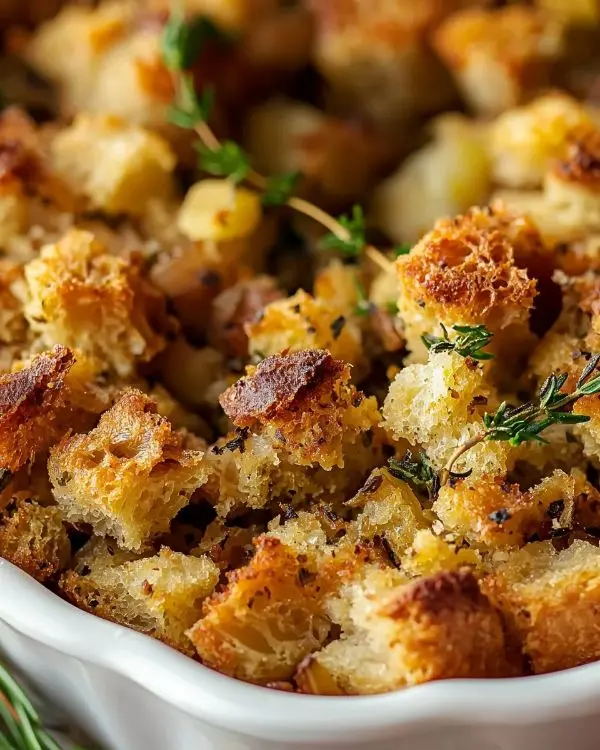
This delicious Grandma’s Thanksgiving stuffing recipe represents more than just a side dish. It carries memories, traditions, and the warmth of family gatherings. Therefore, when you serve this at your table, you’re sharing something meaningful.
Remember that burned stuffing in my Chicago apartment? That disaster taught me patience and precision. Now, I’ve passed this recipe to countless home cooks who’ve made it their own. Each variation tells a new story.
The beauty of turkey stuffing from scratch lies in its versatility. Change the herbs, swap the bread, add your favorite ingredients. Moreover, this stuffing homemade approach means you control every element.
Try serving this classic turkey stuffing with herb-roasted turkey and your favorite cranberry sauce. The combination never fails to impress. Pair it with a glass of sparkling cider or your preferred wine.
I’d love to hear how your stuffing turns out. Share your photos on social media and tag us. Additionally, tell me what creative variations you tried. Did you add sausage? Dried fruit? Wild mushrooms?
Make this recipe your own. Pass it down to your children. Burn it once or twice while you’re learning—that’s part of the journey. Most importantly, enjoy the process of creating something delicious for people you love.
Tasty at Home – Where bold flavors meet everyday kitchens.
Delicious Grandma’s Thanksgiving Stuffing Recipe
Equipment
- Large mixing bowl
- 9×13 inch baking dish
- Large skillet
- Chef’s knife
- Cutting board
- Measuring cups and spoons
- wooden spoon
- aluminum foil
Ingredients
Essential Base
- 10 cups Cubed bread (sourdough or French) Day-old or lightly stale
- 1 large Onion Finely diced
- 2 cups Celery Chopped (3-4 stalks)
- 2 tbsp Fresh sage Finely chopped
- 2 tbsp Fresh thyme Finely chopped
- 1 tbsp Fresh rosemary Finely chopped
- 4 cups Low-sodium broth Homemade preferred
- ½ cup Unsalted butter European-style
- to taste Salt and pepper Sea salt, freshly ground pepper
Instructions
- Preheat oven to 350°F (175°C). Cut bread into 1-inch cubes and toast for 10–12 minutes until dry but not browned, or leave cubed bread out overnight.
- Melt butter in a skillet over medium heat. Add onion and celery, cooking 5–7 minutes until tender and translucent. Season with salt and pepper.
- Transfer bread cubes to a mixing bowl. Add sautéed vegetables and fresh herbs. Gradually add warm broth, tossing gently until bread is evenly moistened but not soggy.
- Grease a 9×13-inch baking dish. Spread stuffing mixture evenly. Cover with foil and bake for 30 minutes. Uncover and bake for 15 more minutes until golden brown.
- Rest for 5–10 minutes before serving. Serve directly from the dish or transfer to a serving bowl.

