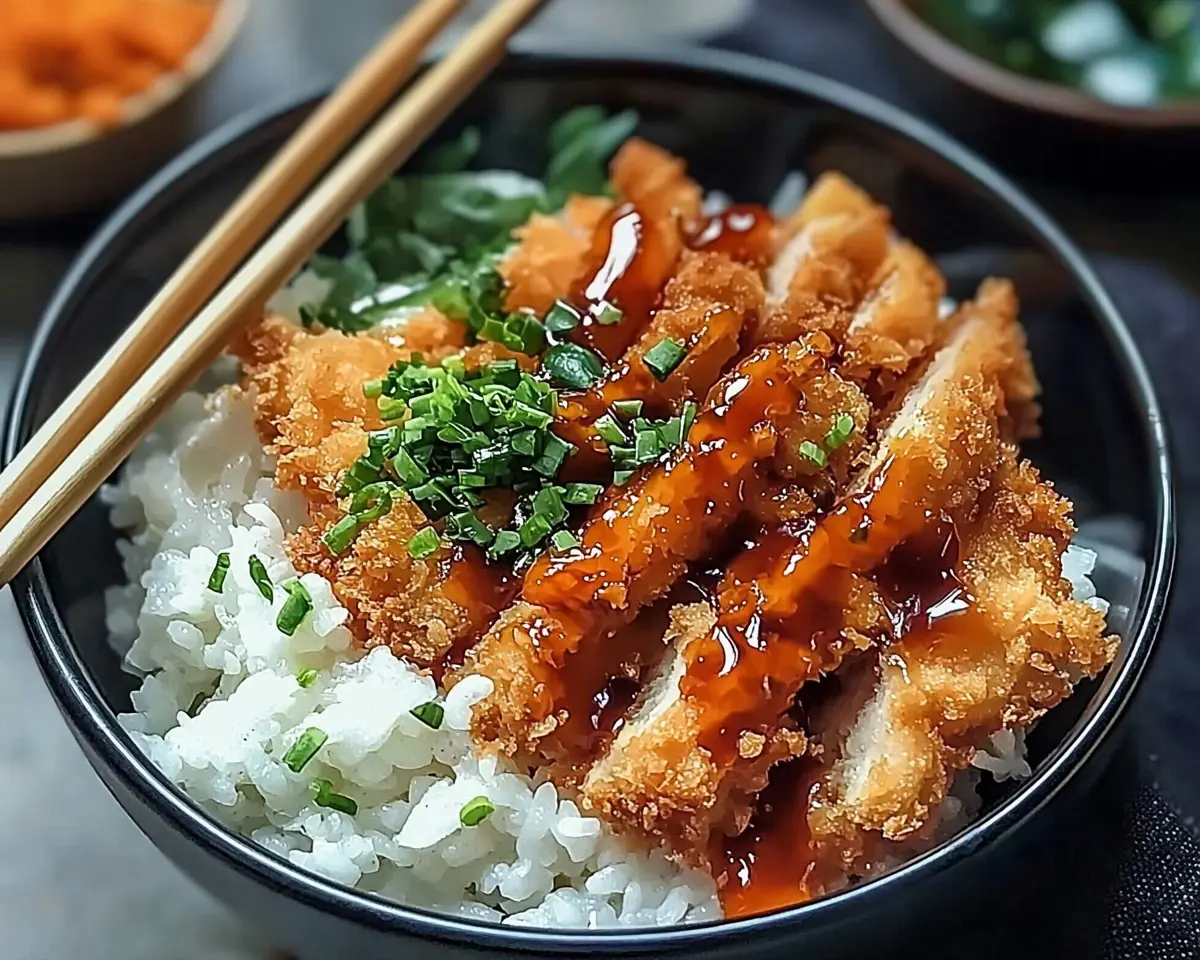
Crispy Japanese Katsu Bowls with golden panko chicken, sushi rice, and homemade tonkatsu sauce. Ready in 45 minutes!
Hi, I’m Linda, and welcome to Tasty at Home—a cozy corner where bold flavors meet everyday kitchens. Well, let me tell you about the day I discovered crispy Japanese katsu bowls. Picture this: a rainy Tuesday in Portland, ducking into a tiny ramen shop downtown. One bite of that golden, crunchy chicken over perfectly seasoned rice transported me straight to food heaven.
Man, oh man, I knew I had to master this at home. After fifteen attempts and more burned panko than I care to admit, I finally cracked the code. This recipe balances the satisfying crunch of restaurant-quality katsu with the comfort of homemade cooking. You know what makes this version special? The secret lies in double-coating the chicken and creating that perfect tonkatsu sauce from scratch.
Whether you’re a complete beginner to Japanese cooking or someone who’s struggled with soggy breading before, this foolproof method will deliver restaurant-worthy results. Let’s turn your kitchen into your favorite Japanese restaurant. Because here, every dish tells a story—and this crispy katsu bowl might just become your new comfort food obsession.
Table of Contents
What Makes These Katsu Bowls Extraordinary
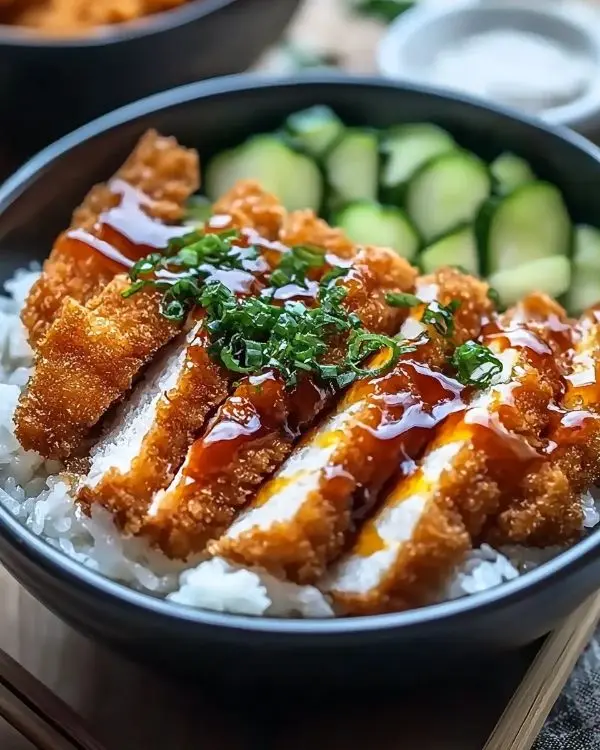
Japanese katsu bowls represent the perfect marriage of textures and flavors. Furthermore, this particular recipe elevates traditional katsu by incorporating American cooking techniques that ensure consistently crispy results. The key differentiator lies in our temperature-controlled frying method, which creates an impossibly crunchy exterior while maintaining juicy, tender meat inside.
Additionally, our homemade tonkatsu sauce combines umami-rich ingredients with a touch of sweetness that perfectly complements the savory elements. Unlike store-bought versions, this sauce achieves the ideal balance without overwhelming artificial flavors.
Essential Ingredients for Perfect Katsu Bowls
| Protein & Coating | Amount | Metric | Purpose |
|---|---|---|---|
| Boneless chicken breasts | 2 pieces | 450g | Main protein base |
| All-purpose flour | 1 cup | 125g | First coating layer |
| Large eggs | 2 | 2 | Binding agent |
| Panko breadcrumbs | 1 cup | 100g | Crispy exterior |
| Salt and pepper | To taste | To taste | Seasoning |
| Vegetable oil | For frying | 500ml | High-heat cooking |
| Rice Foundation | Amount | Metric | Purpose |
|---|---|---|---|
| Short-grain rice | 2 cups | 400g | Base carbohydrate |
| Water | 2½ cups | 625ml | Cooking liquid |
| Rice vinegar | 1 tablespoon | 15ml | Sushi rice flavor |
| Sugar | 1 tablespoon | 12g | Balancing sweetness |
| Salt | ½ teaspoon | 3g | Flavor enhancement |
| Sauce & Garnish | Amount | Metric | Purpose |
|---|---|---|---|
| Tonkatsu sauce | ¼ cup | 60ml | Primary flavoring |
| Soy sauce | 1 tablespoon | 15ml | Umami depth |
| Worcestershire sauce | 1 teaspoon | 5ml | Complex flavor |
| Ketchup | 1 teaspoon | 5ml | Subtle sweetness |
| Shredded cabbage | 1 cup | 100g | Fresh crunch |
| Green onions | 2 stalks | 2 stalks | Color and flavor |
| Sesame seeds | For garnish | For garnish | Nutty finish |
Shopping Tips for American Grocery Stores
Most ingredients are readily available at standard American supermarkets. However, panko breadcrumbs and short-grain rice require specific attention. Look for panko in the international aisle or near regular breadcrumbs. Japanese short-grain rice is often labeled as “sushi rice” in American stores.
Moreover, if tonkatsu sauce isn’t available locally, our homemade version using common condiments delivers superior results. Worcestershire sauce adds that distinctive tangy depth that makes authentic tonkatsu sauce so addictive.
Quality Indicators and Substitutions
Choose chicken breasts with even thickness and pale pink color. Avoid any pieces with dark spots or excessive liquid in the packaging. For vegetarian alternatives, thick-cut eggplant or firm tofu work beautifully with this coating technique.
Bold Add-ins for Creative Variations:
- Sriracha mayo for heat lovers
- Pickled daikon for traditional authenticity
- Avocado slices for California fusion
- Corn kernels for Korean-Japanese crossover
Equipment and Preparation Mastery
Essential Equipment List
A heavy-bottomed skillet or cast-iron pan ensures even heat distribution for perfect frying. Additionally, a meat mallet transforms thick chicken breasts into evenly pounded cutlets. Three shallow dishes create an efficient breading station, while a wire cooling rack prevents soggy bottoms after frying.
DIY Alternatives:
- Rolling pin instead of meat mallet
- Large plates instead of shallow dishes
- Paper towels instead of wire rack (though less ideal)
Step-by-Step Cooking Process
Preparing the Perfect Sushi Rice Foundation
Start by rinsing Japanese short-grain rice until water runs completely clear. This crucial step removes excess starch that creates gummy texture. Subsequently, combine rice with measured water in a heavy-bottomed saucepan.
Bring the mixture to a rolling boil, then immediately reduce heat to lowest setting. Cover tightly and simmer exactly fifteen minutes without lifting the lid. Patience here pays dividends in perfectly cooked rice.
Meanwhile, dissolve sugar and salt in rice vinegar using a small whisk. This seasoning mixture transforms plain rice into authentic sushi rice base.
Creating Restaurant-Quality Katsu
Pound chicken breasts to uniform half-inch thickness using gentle, overlapping strikes. This technique ensures even cooking and prevents dry edges. Season generously with salt and freshly ground black pepper.
Set up your breading station with flour in the first dish, beaten eggs in the second, and panko breadcrumbs in the third. This assembly line approach streamlines the coating process.
Pro Tip from Thomas Keller: Let breaded cutlets rest five minutes before frying. This allows the coating to adhere properly and prevents separation during cooking.
Dredge each chicken piece thoroughly in flour, shaking off excess. Next, dip completely in beaten eggs, ensuring full coverage. Finally, press firmly into panko breadcrumbs, creating an even, thick coating.
Achieving the Perfect Golden Crust
Heat vegetable oil to exactly 340°F in your heavy-bottomed skillet. This temperature creates maximum crispiness without burning the delicate panko coating. Test oil temperature with a small piece of bread—it should sizzle immediately and turn golden within thirty seconds.
Gently lower breaded chicken into hot oil using tongs. Avoid overcrowding, which drops oil temperature and creates soggy results. Fry four to five minutes per side until deep golden brown.
Mistake I Made: Initially, I rushed this process and fried at too high heat. The result? Burnt exterior with raw interior. Maintaining steady medium-high heat ensures even cooking throughout.
Transfer finished katsu to wire rack immediately after frying. This prevents steam from softening the crispy coating.
Crafting Authentic Tonkatsu Sauce
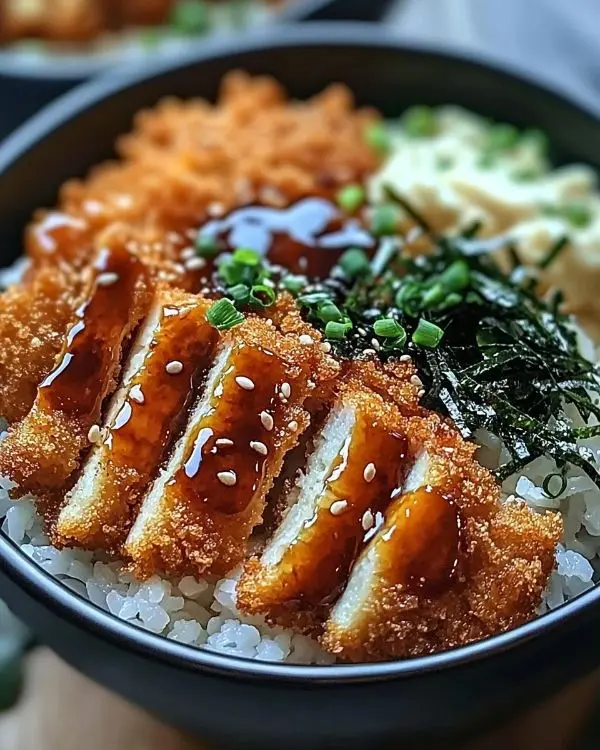
Combine tonkatsu sauce, soy sauce, Worcestershire sauce, and ketchup in small bowl. Whisk vigorously until completely smooth. This homemade version surpasses most store-bought alternatives in both flavor complexity and freshness.
Taste and adjust sweetness or tanginess according to preference. The sauce should balance sweet, salty, and umami flavors harmoniously
Expert Tips and Creative Variations
Professional Techniques for Success
Double-coating creates extra crunch. After initial panko coating, dip again in beaten egg and second layer of breadcrumbs. This restaurant technique produces incredibly thick, crispy crust.
Furthermore, letting oil return to proper temperature between batches prevents greasy, soggy results. Use a kitchen thermometer for consistent results every time.
Julia Child’s Wisdom: Never press down on frying cutlets with spatula. This compacts the coating and releases precious juices.
Regional and Dietary Variations
Southern Fusion Style: Add cayenne pepper to flour mixture and serve over dirty rice instead of sushi rice. This creates interesting American-Japanese fusion.
Healthy Lunch Meal Prep Version: Bake coated chicken at 425°F for twenty minutes, flipping once. Portion into meal prep containers with pre-cooked rice and fresh vegetables.
Holiday Entertaining Style: Create katsu sliders using Hawaiian rolls and Asian slaw. Perfect for Super Bowl parties or casual gatherings.
Vegetarian Adaptation: Substitute thick-sliced eggplant or extra-firm tofu. Salt eggplant slices thirty minutes before cooking to remove bitterness.
Korean-Japanese Crossover: Add kimchi and gochujang to traditional accompaniments for spicy, fermented complexity.
Storage and Make-Ahead Solutions
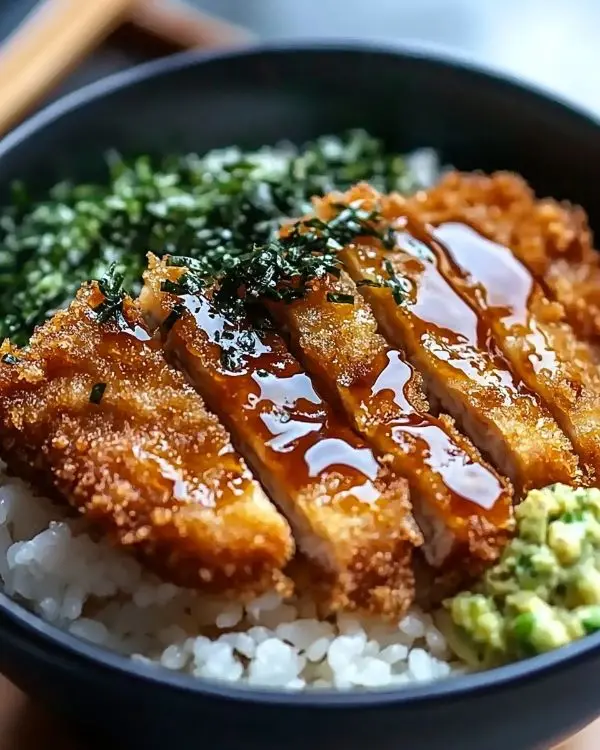
| Component | Refrigerator | Freezer | Reheating Method |
|---|---|---|---|
| Cooked katsu | 3-4 days | 2-3 months | 350°F oven, 10 minutes |
| Sushi rice | 4-5 days | 6 months | Microwave with damp towel |
| Tonkatsu sauce | 1 week | 6 months | Room temperature |
| Breaded (uncooked) | 1 day | 3 months | Fry from frozen, add 2 minutes |
Cooked katsu reheats beautifully in toaster oven or conventional oven. Avoid microwaving, which destroys the crispy coating texture.
Crispy Japanese Katsu Bowls Perfect Pairings and Serving Suggestions
Serve alongside our best yaki udon recipe for complete Japanese dinner experience. Additionally, consider pairing with gyoza soup as appetizer course.
For beverage pairings, cold Japanese beer or green tea complements the rich, fried elements perfectly. American craft lagers also work wonderfully with katsu’s hearty flavors.
Enjoy more delicious recipes:
- Start meal with whipped feta with honey for Mediterranean twist
- Follow with caramel apple bark for dessert
- Weekend brunch version pairs with Belgian waffle recipe
Crispy Japanese Katsu Bowls FAQs
What is a katsu bowl?
A katsu bowl features crispy breaded and fried protein (typically chicken or pork) served over seasoned rice with vegetables and savory sauce. This Japanese comfort food combines satisfying textures and umami-rich flavors in one complete meal.
What are those Japanese bowls called?
Japanese rice bowls are called “donburi” or simply “don.” Katsu don specifically refers to bowls topped with breaded, fried cutlets. These bowls represent popular Japanese fast food that’s both filling and flavorful.
What is Japanese katsu made of?
Japanese katsu consists of meat (chicken, pork, or fish) that’s been pounded thin, coated in flour, egg, and panko breadcrumbs, then deep-fried until golden. The panko coating creates the signature light, crispy texture that differentiates katsu from other fried foods.
What is a Japanese bowl dish called?
Japanese bowl dishes are collectively known as “donburi.” Popular variations include katsu don (fried cutlet), gyudon (beef), oyakodon (chicken and egg), and tendon (tempura). These one-bowl meals combine protein, rice, and vegetables for complete nutrition.
Bringing It All Together
Oops, I nearly forgot the most important part! This crispy Japanese katsu bowl recipe transforms everyday ingredients into restaurant-quality comfort food. The combination of perfectly seasoned sushi rice, golden panko-crusted chicken, and tangy tonkatsu sauce creates pure satisfaction in every bite.
Remember that rainy Tuesday I mentioned? Now I recreate that magical moment whenever I crave ultimate comfort food. Moreover, this recipe has become my go-to for impressive yet approachable entertaining.
For your next dinner party, consider serving these katsu bowls alongside our Japanese chicken yakitori for complete Japanese feast. The contrasting textures and complementary flavors create memorable dining experiences.
Finally, don’t hesitate to make this recipe your own. Add extra vegetables, adjust spice levels, or create fusion variations that reflect your taste preferences. After all, the best recipes evolve with each cook’s personal touch.
Share your katsu bowl creations on social media and tag us @TastyAtHome. We love seeing how our recipes inspire your kitchen adventures. Until next time, keep exploring bold flavors in your everyday kitchen!
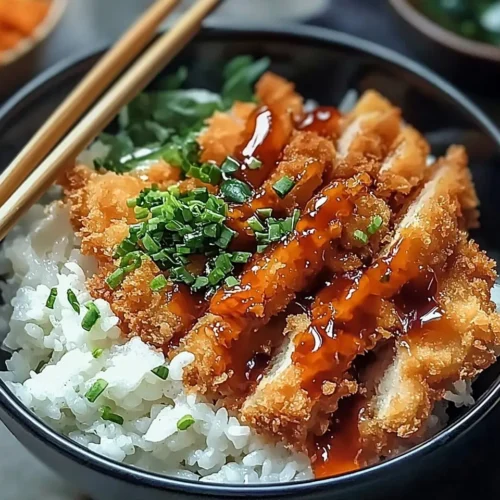
Crispy Japanese Katsu Bowls
Equipment
- Heavy-bottomed skillet or cast-iron pan
- Meat mallet
- Three shallow dishes
- Wire cooling rack
- Kitchen thermometer
Ingredients
Protein & Coating
- 2 pieces Boneless chicken breasts 450g
- 1 cup All-purpose flour 125g
- 2 Large eggs
- 1 cup Panko breadcrumbs 100g
- to taste Salt and pepper
- 500 ml Vegetable oil for frying
Rice Foundation
- 2 cups Short-grain rice 400g
- 2 ½ cups Water 625ml
- 1 tbsp Rice vinegar 15ml
- 1 tbsp Sugar 12g
- ½ tsp Salt 3g
Sauce & Garnish
- ¼ cup Tonkatsu sauce 60ml
- 1 tbsp Soy sauce 15ml
- 1 tsp Worcestershire sauce 5ml
- 1 tsp Ketchup 5ml
- 1 cup Shredded cabbage 100g
- 2 stalks Green onions
- Sesame seeds for garnish
Instructions
- Rinse rice until water runs clear, then cook with measured water. Season with vinegar, sugar, and salt to make sushi rice.
- Pound chicken breasts to 1/2 inch thickness and season with salt and pepper.
- Set up breading station with flour, beaten eggs, and panko. Coat chicken in flour, then egg, then panko. Rest 5 minutes.
- Heat oil to 340°F. Fry chicken 4–5 minutes per side until golden brown. Drain on wire rack.
- Mix tonkatsu sauce, soy sauce, Worcestershire sauce, and ketchup until smooth.
- Assemble bowls with sushi rice, sliced chicken katsu, cabbage, green onions, sesame seeds, and sauce.

