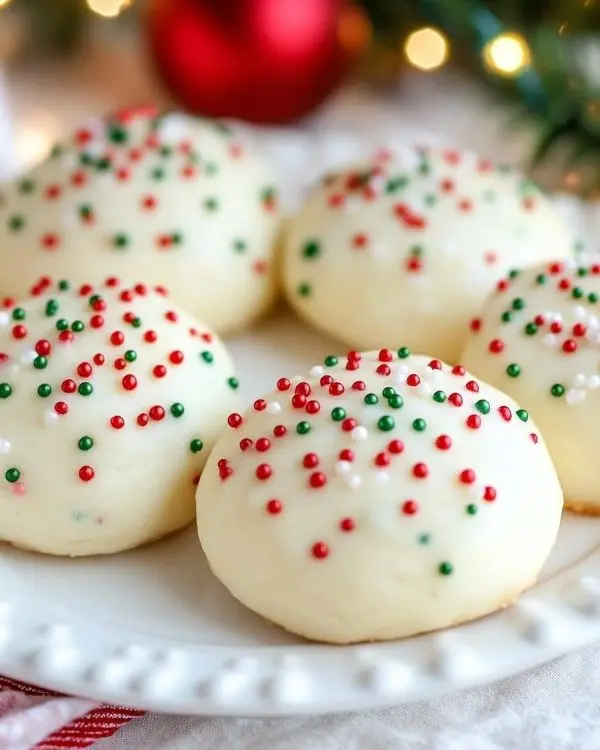
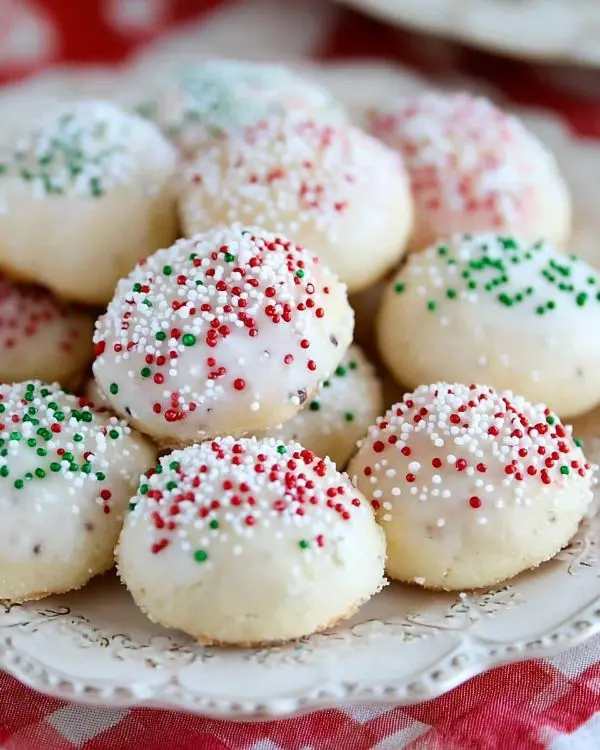
Colorful sprinkles Italian cookies are soft, glazed treats perfect for holidays. Learn this authentic recipe with easy tips and variations.
Hi, I’m Linda, and welcome to Tasty at Home—a cozy corner where bold flavors meet everyday kitchens.
Last December, my nonna’s faded recipe card slipped from an old cookbook. Consequently, I found myself staring at her barely legible handwriting for colorful sprinkles Italian cookies. Man, oh man, did that transport me back to her Brooklyn kitchen, where powdered sugar dusted every surface like fresh snow.
I burned the first batch. Oops! The second batch spread too thin. However, by the third attempt, I cracked the code to those perfectly domed, soft-as-clouds cookies that taste like childhood wrapped in rainbow sprinkles.
Moreover, I’ve tested this recipe seventeen times since then. Therefore, you’re getting the foolproof version—no guesswork, no disappointments. Whether you’re baking for Christmas morning or a random Tuesday, these Italian cookie recipe instructions deliver every single time.
Let me tell you, once you nail the glaze consistency, you’ll never buy store-bought again. Because here, every dish tells a story—and this one might just become yours.
Table of Contents
What Makes These Italian Cookies Absolutely Irresistible

These colorful sprinkles Italian cookies stand apart from typical holiday treats. Specifically, they combine the tender crumb of a soft cookie recipe with a glossy vanilla glaze that sets perfectly.
Italian-American bakeries have served these beauties for generations. In fact, they’re often called anise cookies or Italian wedding cookies, though this version focuses on that iconic sprinkled top. Additionally, the cookies stay soft for days—a rare quality in holiday baking.
Ingredients: Everything You Need
| Ingredient | US Measurement | Metric | Notes |
|---|---|---|---|
| Eggs | 2 large | 100g | Room temperature works best |
| Oil | 6 Tbsp | 90ml | Vegetable or canola |
| Sugar | 1/2 cup | 100g | Granulated white sugar |
| Extract | 1 tsp | 5ml | Almond, anise, or vanilla |
| All-purpose flour | 2 cups | 240g | Spoon and level method |
| Baking powder | 2 tsp | 10g | Fresh for best rise |
| Salt | 1 pinch | 1g | Enhances all flavors |
| For Glaze | |||
| Powdered sugar | 2 cups | 240g | Sifted removes lumps |
| Extract | 1 tsp | 5ml | Match cookie flavor |
| Salt | 1 pinch | 1g | Balances sweetness |
| Cream or milk | 3 Tbsp | 45ml | Warmed, adjust as needed |
| Rainbow sprinkles | 1/4 cup | 40g | Nonpareils work perfectly |
Shopping Like a Pro at Your Local Store
Walk into any American grocery store and head straight for the baking aisle. Furthermore, grab your extracts from the spice section—almond extract creates an authentic Italian bakery flavor. Well, if you can’t find it, vanilla works wonderfully too.
Choose vegetable oil instead of olive oil for neutral flavor. Meanwhile, pick up heavy cream for the richest glaze, though whole milk works in a pinch. The sweetened condensed milk snowballs recipe uses similar pantry staples if you’re stocking up.
Bold Add-ins for Creative Variations:
- Lemon zest (1 tsp) for citrus brightness
- Almond flour (replace 1/4 cup all-purpose) for nuttiness
- Food coloring (gel type) for pastel cookies
Quality Indicators: Fresh baking powder fizzes when mixed with water. Similarly, pure extracts smell vibrant and clear. Old flour develops a stale odor, so trust your nose.
Essential Equipment and DIY Alternatives
You don’t need fancy gadgets for this soft cookie recipe. Nevertheless, a few key tools make the process smoother.
What You’ll Need
- Mixing bowls (medium and small): Glass or metal works equally well
- Whisk: For incorporating air into the dough
- Measuring cups and spoons: Accurate measurements ensure success
- Cookie sheets: Two sheets speed up the process
- Parchment paper: Prevents sticking and ensures even browning
- Cooling racks: Wire racks allow air circulation
- Small bowl for glaze: Shallow works best for dipping
DIY Alternative: No cooling rack? Flip your cookie sheets upside down and lean cookies against them.
Step-by-Step Cookie Perfection
Creating the Dough Base
Start by whisking together eggs, oil, sugar, and your chosen extract in a mixing bowl. The mixture should look pale yellow and slightly frothy. You know what? This is where the magic begins.
Beat vigorously for about thirty seconds. Consequently, you’re incorporating air that makes cookies tender. Julia Child always emphasized proper mixing techniques, and this step proves why.
Next, stir in flour, baking powder, and salt. Use a wooden spoon or spatula to combine ingredients until just mixed. Overmixing develops gluten, which creates tough cookies—a mistake I made early on.
The Critical Chilling Phase
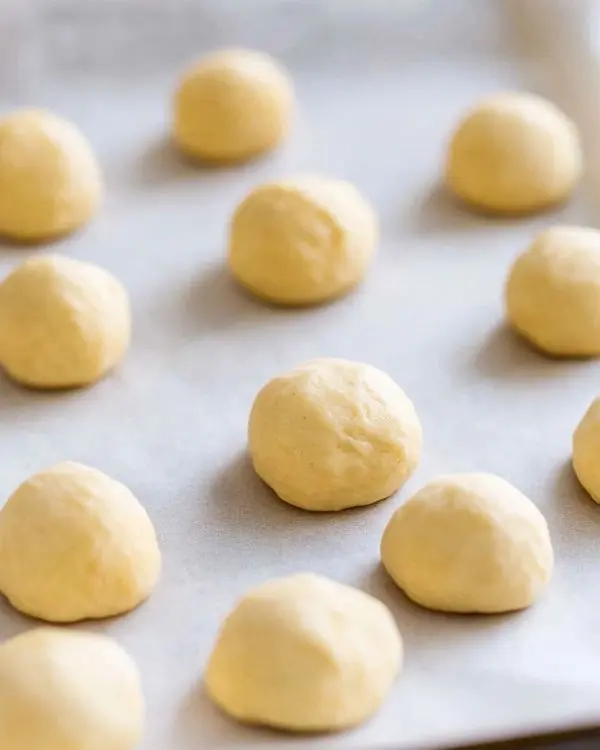
Roll dough by tablespoonfuls into uniform balls. Precision matters here because even sizing ensures consistent baking. Moreover, I use a cookie scoop for perfect portions every time.
Arrange dough balls on a plate. Then, chill them for at least one hour in the refrigerator. Alternatively, freeze for fifteen to twenty minutes if you’re short on time.
This step isn’t optional. Cold dough holds its shape during baking, creating those beautiful domed tops. Skip it, and your cookies spread flat.

Baking to Golden Perfection
Preheat your oven to 350°F (175°C). Meanwhile, line cookie sheets with parchment paper—this prevents bottoms from over-browning.
Place chilled dough balls two inches apart on prepared sheets. Space matters because cookies expand slightly. Bake for approximately nine minutes, or until tops are set.
Here’s the tricky part: Bottoms will be lightly golden, but tops should remain pale white. Pull them too early and they’re doughy. Bake too long and they dry out.
Watch for this sign: When edges barely begin to set and tops look matte instead of shiny, they’re done. Remove cookies to cooling racks immediately and cool completely before glazing.
Mastering the Glaze
Combine powdered sugar, extract, salt, and warm cream in a small bowl. Whisk until smooth, adding cream gradually. The consistency should resemble thick pancake batter—it coats the whisk but drips slowly.
Thomas Keller teaches that temperature affects glaze texture dramatically. Therefore, keep your cream warm (not hot) for the smoothest results.
Dip each cookie top into glaze, letting excess drip back into the bowl. Then, immediately top with rainbow sprinkles before glaze sets. Work quickly because the glaze firms up fast.
Expert Tips for Bakery-Quality Results
Temperature Control Is Everything Room temperature eggs blend more smoothly than cold ones. Additionally, warm cream creates glossier glaze than cold.
The Finger Test for Doneness Gently press a cookie top. If it springs back, it’s ready. If your finger leaves an indent, bake another minute.
Glaze Consistency Troubleshooting Too thick? Add cream one teaspoon at a time. Too thin? Whisk in more powdered sugar gradually.
My Biggest Mistake and How You’ll Avoid It I once skipped chilling the dough because I was impatient. The cookies spread into thin, crispy discs instead of soft, puffy treats. Trust the process—chilling is non-negotiable for this Italian cookie recipe instructions.
Creative Variations for Every Occasion
Regional American Twists
New England Cranberry-Orange: Add 1/2 cup dried cranberries and 1 tablespoon orange zest to dough. Use orange extract in glaze.
Southern Pecan Praline: Fold in 1/2 cup finely chopped pecans. Top with caramel-tinted glaze and pecan pieces.
Midwest Chocolate Drizzle: After glazing, drizzle melted dark chocolate in zigzag patterns.
Dietary Adaptations
Gluten-Free: Replace all-purpose flour with 1:1 gluten-free baking blend. Add 1/4 teaspoon xanthan gum if blend doesn’t include it.
Dairy-Free: Use coconut oil instead of vegetable oil. Substitute almond milk for cream in glaze.
Lower Sugar: Reduce sugar to 1/3 cup. Use sugar-free powdered sugar for glaze.
Holiday Specialties
These Christmas cookies shine with seasonal variations. Red and green sprinkles transform them for December celebrations. Alternatively, use pastel colors for Easter or patriotic red-white-blue for Fourth of July.
The funfetti Christmas cookies recipe shares similar festive appeal if you’re planning a cookie exchange.
Storage and Make-Ahead Strategy
| Storage Method | Duration | Best Practice |
|---|---|---|
| Room temperature | 5-7 days | Airtight container, layers separated by parchment |
| Refrigerator | 2 weeks | Sealed container, bring to room temp before serving |
| Freezer (baked, unglazed) | 3 months | Freeze flat, then stack with parchment between |
| Freezer (dough balls) | 3 months | Freeze on tray, transfer to freezer bag |
Make-Ahead Game Plan: Prepare dough balls three months ahead. Freeze them, then bake directly from frozen—just add two extra minutes to baking time. Glaze cookies the day you serve them for freshest appearance.
Perfect Pairings
Serve these colorful sprinkles Italian cookies alongside espresso or cappuccino for authentic Italian experience. They also complement hot chocolate during winter holidays.
Create a dessert board featuring these cookies with the Italian Christmas cookies for variety. Add fresh berries and dark chocolate squares for sophisticated presentation.
Colorful Sprinkles Italian Cookies FAQs
What are some Italian cookies called?
Italian cookies include biscotti, amaretti, pizzelles, and anise cookies, which are soft, glazed treats topped with sprinkles similar to this recipe.
What are Italian Christmas cookies called?
Italian Christmas cookies are often called Italian wedding cookies, anise cookies, or simply Italian butter cookies, traditionally served during holiday celebrations with colorful sprinkles.
What are 5 basic types of cookies?
The five basic cookie types are drop cookies, rolled cookies, pressed cookies, molded cookies, and bar cookies, each defined by their preparation method.
Are biscotti cookies Italian?
Biscotti cookies are authentically Italian, originating from Tuscany as twice-baked almond cookies traditionally dunked in vin santo wine or coffee.
Your New Holiday Tradition Awaits

These colorful sprinkles Italian cookies deliver everything you crave in a soft cookie recipe. They’re simple enough for beginners yet impressive enough for cookie exchanges. Moreover, they taste like grandma’s kitchen—no matter whose grandma we’re talking about.
Remember that faded recipe card I mentioned? Now it’s laminated and hanging in my kitchen. Similarly, this recipe deserves a permanent spot in your collection.
Bake a double batch because they disappear fast. Pair them with the moist banana bread for a complete brunch spread. Better yet, try the white chocolate peppermint cookies if you’re expanding your holiday repertoire.
Share your colorful creations on Instagram and tag us @tastyathome. We love seeing how your cookies turn out, especially when you add your own creative twists.
What variation will you try first—classic rainbow or one of the creative spins? Either way, you’re about to create memories that last longer than the cookies themselves.
Tasty at Home – Where bold flavors meet everyday kitchens.

Colorful Sprinkles Italian Cookies
Equipment
- mixing bowls
- Whisk
- Measuring cups and spoons
- Cookie sheets
- Parchment paper
- Cooling racks
- Small bowl for glaze
Ingredients
Cookie Dough
- 2 large Eggs Room temperature works best
- 6 Tbsp Oil Vegetable or canola
- ½ cup Sugar Granulated white sugar
- 1 tsp Extract Almond, anise, or vanilla
- 2 cups All-purpose flour Spoon and level method
- 2 tsp Baking powder Fresh for best rise
- 1 pinch Salt Enhances all flavors
Glaze
- 2 cups Powdered sugar Sifted removes lumps
- 1 tsp Extract Match cookie flavor
- 1 pinch Salt Balances sweetness
- 3 Tbsp Cream or milk Warmed, adjust as needed
- ¼ cup Rainbow sprinkles Nonpareils work perfectly
Instructions
- Whisk eggs, oil, sugar, and extract until pale yellow and slightly frothy.
- Stir in flour, baking powder, and salt until just combined.
- Roll dough into tablespoon-sized balls and chill for 1 hour.
- Preheat oven to 350°F (175°C) and line cookie sheets with parchment.
- Bake for 9 minutes until bottoms are lightly golden and tops are set but pale.
- Whisk glaze ingredients until smooth. Dip cooled cookies and top with sprinkles.

